ยกเว้นวัตถุ UI อยู่ภายใต้การควบคุมของโครงสร้างเลย์เอาต์ หรือขนาดปรับเปลี่ยน/ข้อจํากัด คุณมีการควบคุมเต็มรูปแบบเกี่ยวกับตําแหน่งของพวกเขา และขนาด คุณยังสามารถตั้งค่าลำดับ Z‑index ที่ซ้อนกันได้ในระหว่างวัตถุที่ซ้อนกัน
คุณสมบัติหลัก
ทั้งหมด GuiObjects แบ่งปันชุดคุณสมบัติหลักไปยัง ตำแหน่ง , ขนาด , พลังงาน และ ชั้น ภายในคอนเทนเนอร์บนหน้าจอหรือในประสบการณ์
ตำแหน่ง
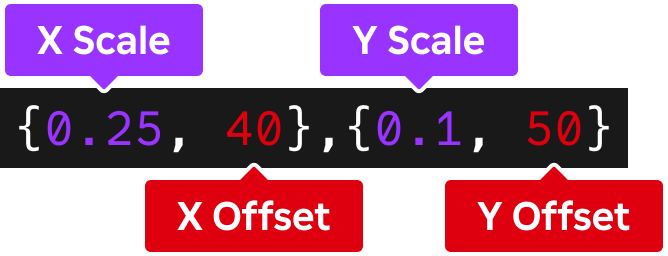
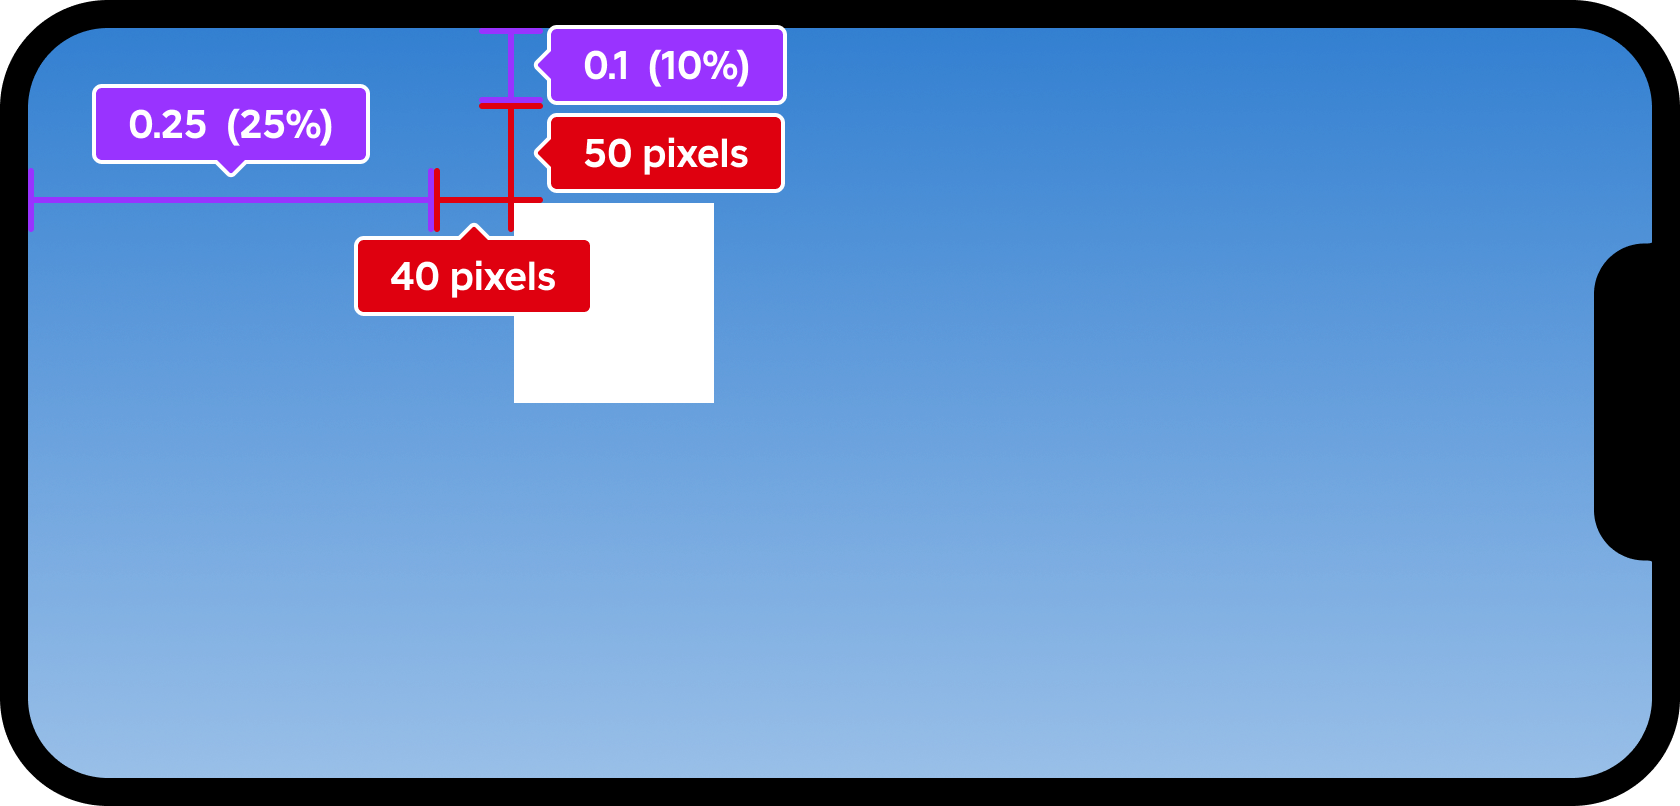
คุณสมบัติ Position เป็นชุดข้อมูล UDim2 ที่ตำแหน่งวัตถุตามแกน X และ Y A UDim2 ถูกแทนที่โดยทั้ง Scale และ Offset ค่าสําหรับแต่ละแกน:
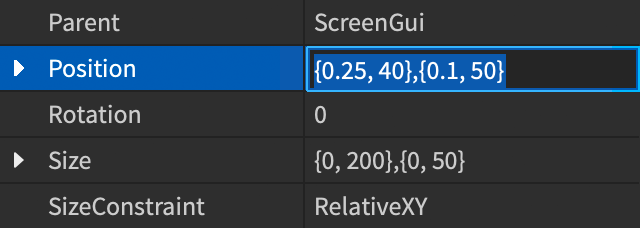
เพื่อแก้ไขตำแหน่งของตัวเลือก GuiObject ที่เลือกให้คลิกที่ฟิลด์ ตำแหน่ง ในหน้าต่าง คุณสมบัติ ตั้งค่าUDim2
ขนาด
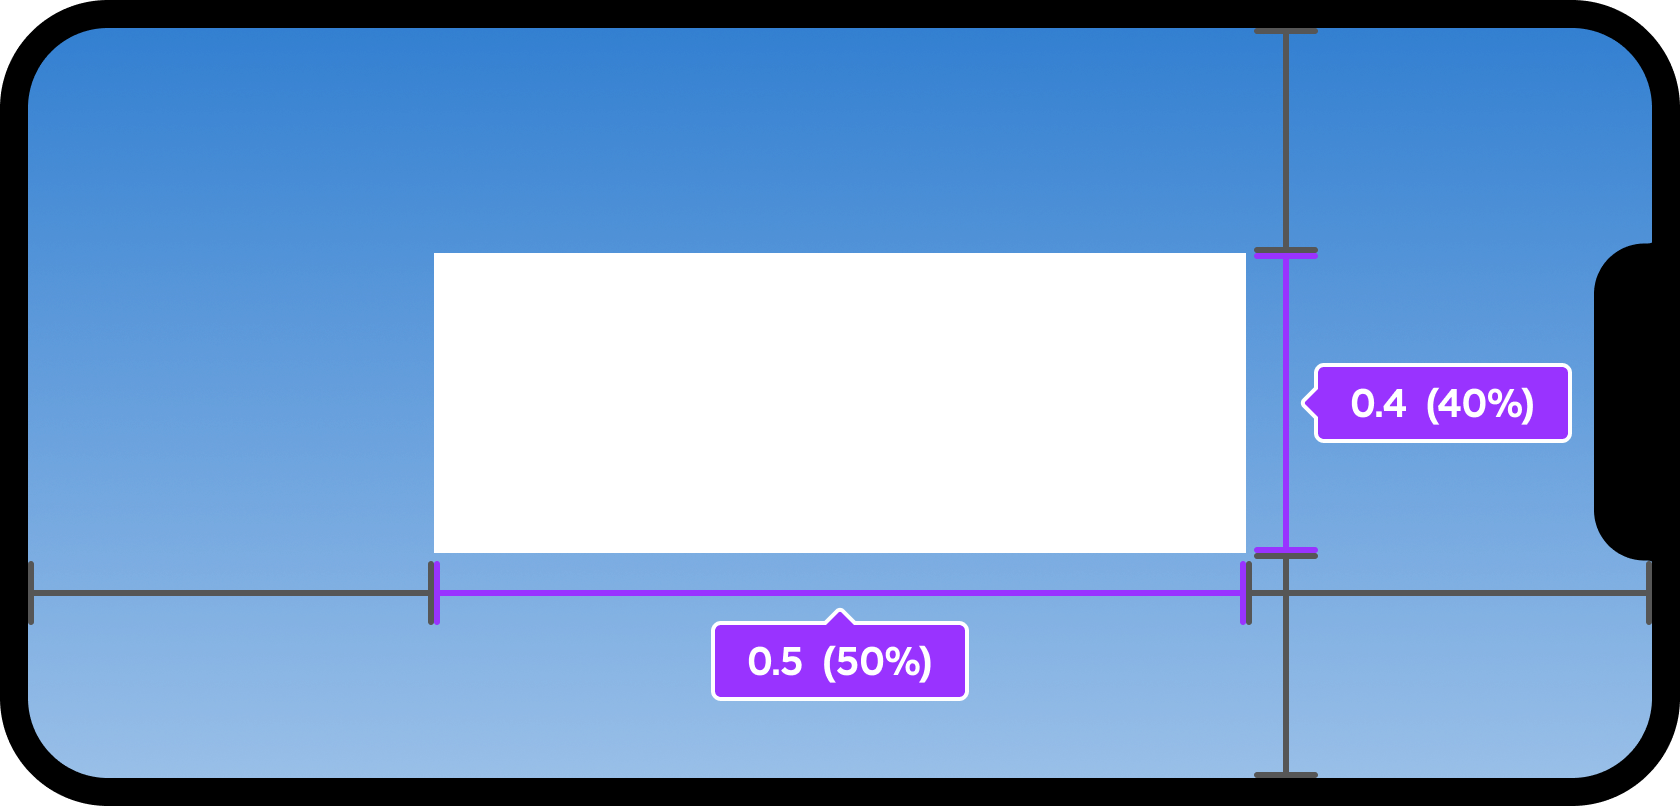
คุณสมบัติ Size เป็นชุดข้อมูล UDim2 ที่กำหนดขนาดวัตถุตามแกน X และ Y A UDim2 ถูกแทนที่โดยทั้ง Scale และ Offset ค่าสําหรับแต่ละแกน:
- เครื่องชั่ง — ค่าที่แทนที่เปอร์เซ็นต์ ของขนาดของคอนเทนเนอร์ ตามแกนที่ตรงกัน, เพิ่มเติมกับค่าออฟเซ็ตใดๆ ที่เกิดขึ้น * ค่าเอฟเฟกต์ — ค่าที่แทนที่ขนาด พิกเซล ของวัตถุตามแกนที่เหมาะสมเพิ่มเติมกับค่า เครื่องชั่ง ใดๆ
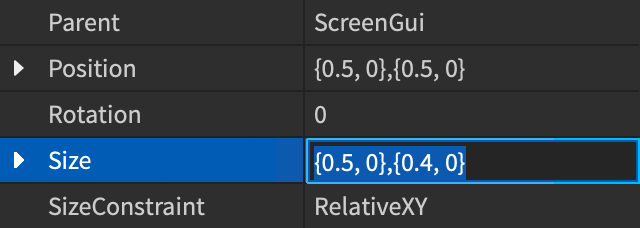
เพื่อแก้ไขขนาดของสิ่งที่เลือก GuiObject ให้คลิกที่ฟิลด์ ขนาด ในหน้าต่าง คุณสมบัติ ตั้งค่าUDim2
จุดยึดโยง
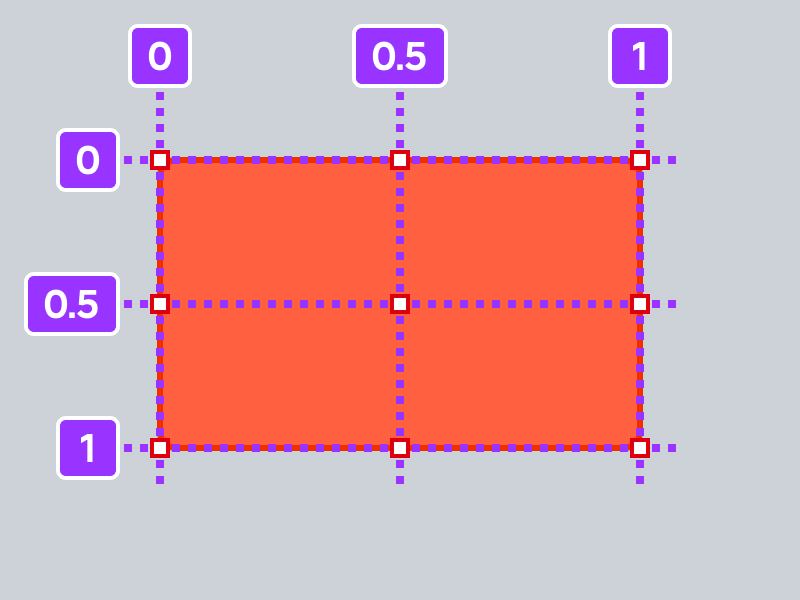
คุณสมบัติ AnchorPoint กำหนดจุดเริ่มต้น **** จากที่ตัววัตถุเปลี่ยนตำแหน่ง และขนาด ค่าเริ่มต้น ของมันคือ ซึ่งวางส่วนยึดไว้ในมุมบนซ้ายของวัตถุ
ค่าเป็นจำนวนเศษส่วน จาก ถึง เมื่อเทียบกับขนาด ของวัตถุ ซึ่งหมายถึงวัตถุที่มีค่า ของ สถานที่วางจุดเชื่อมต่อกลางทาง (50%) ผ่านวัตถุทั้งแนวนอนและแนวตั้ง และการเปลี่ยนแปลงใดๆ กับตำแหน่งหรือขนาดของวัตถุทั้งสองจะย้ายและขยายออกไปจากจุดนี้ ทั้งในแนวนอนและแนวตั้ง
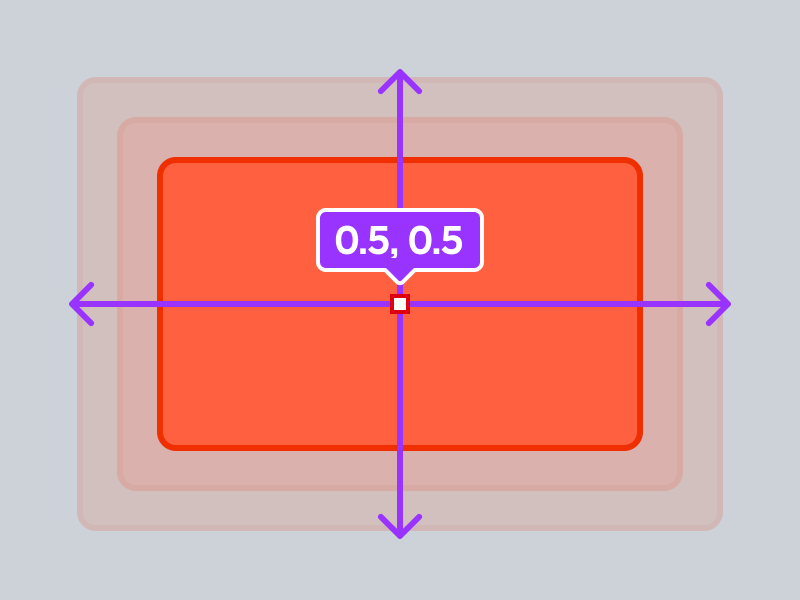
เพื่อดูและแก้ไขจุดยึดของสิ่งที่เลือก GuiObject :
ดัชนี Z
คุณสมบัติ ZIndex กำหนดลำดับชั้นที่ GuiObjects แสดงและซ้อนทับกันหากต้องการสร้างชั้นเรนเดอร์ใหม่ คุณต้องตั้งค่าคุณสมบัติ ZIndex ให้เป็นตัวเลขเชิงบวกหรือเชิงลบที่แตกต่างกันสำหรับแต่ละวัตถุ
สำหรับคอนเทนเนอร์ UI เช่น ScreenGui ค่าเริ่มต้นของ ZIndexBehavior จะเรนเดอร์เด็กบนพ่อแม่เสมอ และ ZIndex ของแต่ละเด็กจะถูกใช้เพื่อตัดสินลำดับที่เรนเดอร์บนคนอื่น
เพื่อแก้ไข ZIndex ของวัตถุโดยใช้ ZIndex ในหน้าต่าง คุณสมบัติ และใส่มูลค่าเตรียมใหม่

โครงสร้างเลย์เอาต์
โครงสร้างเลย์เอาต์ช่วยให้คุณจัดระเบียบและแสดง ได้อย่างรวดเร็ว ตัวอย่างเช่น ในรายการแนวนอนหรือแนวตั้ง รายการ กริด ของกระเบื้องขนาดเท่ากัน ลำดับหน้า และอื่นๆเลย์เอาต์มักจะยกเลิกหรือมีอิทธิพลต่อตําแหน่ง / ขนาดของวัตถุภายใต้การควบคุมของพวกเขา
| เลย์เอาต์ | คําอธิบาย |
|---|---|
| รายการ | UIListLayout ตําแหน่งพี่น้อง GuiObjects ในแนวนอนหรือแนวตั้งภายในคอนเทนเนอร์รากของพวกเขา |
| กริด | ตําแหน่งพี่น้องในกริดเซลเดียวกันขนาดเดียวภายในคอนเทนเนอร์พ่อแม่ของพวกเขา |
| ตาราง | UITableLayout ตําแหน่งพี่น้อง GuiObjects และบุตรหลานของพวกเขาในรูปแบบตาราง |
| หน้า | UIPageLayout จัดระเบียบพี่น้องของมัน GuiObjects scripting |
ปัจจัยข้ามแพลตฟอร์ม
Roblox มีพื้นฐานคือ ข้ามแพลตฟอร์ม เนื่องจากผู้เล่นสามารถค้นพบและเข้าร่วมประสบการณ์บนพีซีหรือคอนโซลได้ จากนั้นในภายหลังเก็บโทรศัพท์ของพวกเขาและดำเนินการต่อจากที่พวกเขาทิ้งไว้คุณควรออกแบบประสบการณ์ Roblox ปิด ทุกแพลตฟอร์มที่คุณเลือกที่จะสนับสนุน แทนที่จะเน้นการเพิ่มประสิทธิภาพสำหรับแพลตฟอร์มเดียวและละเลยคนอื่น
โซนสำรอง
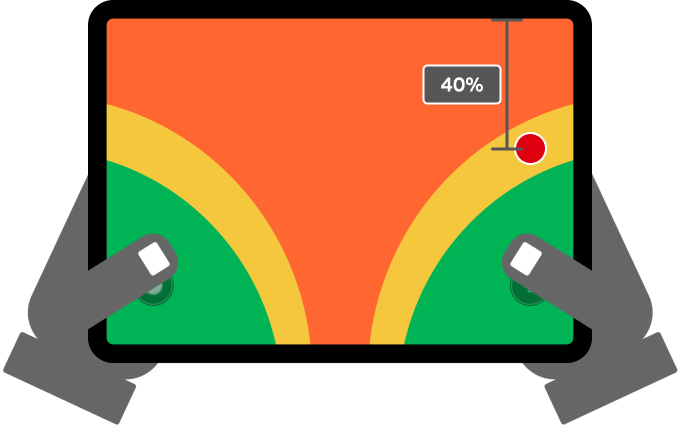
บนอุปกรณ์มือถือ การควบคุมเริ่มต้นจะใช้ส่วนหนึ่งของมุมด้านล่างซ้ายและด้านล่างขวาของหน้าจอเมื่อออกแบบ UI ของประสบการณ์ หลีกเลี่ยงการวางข้อมูลสำคัญหรือปุ่มเสมือนในพื้นที่เหล่านี้
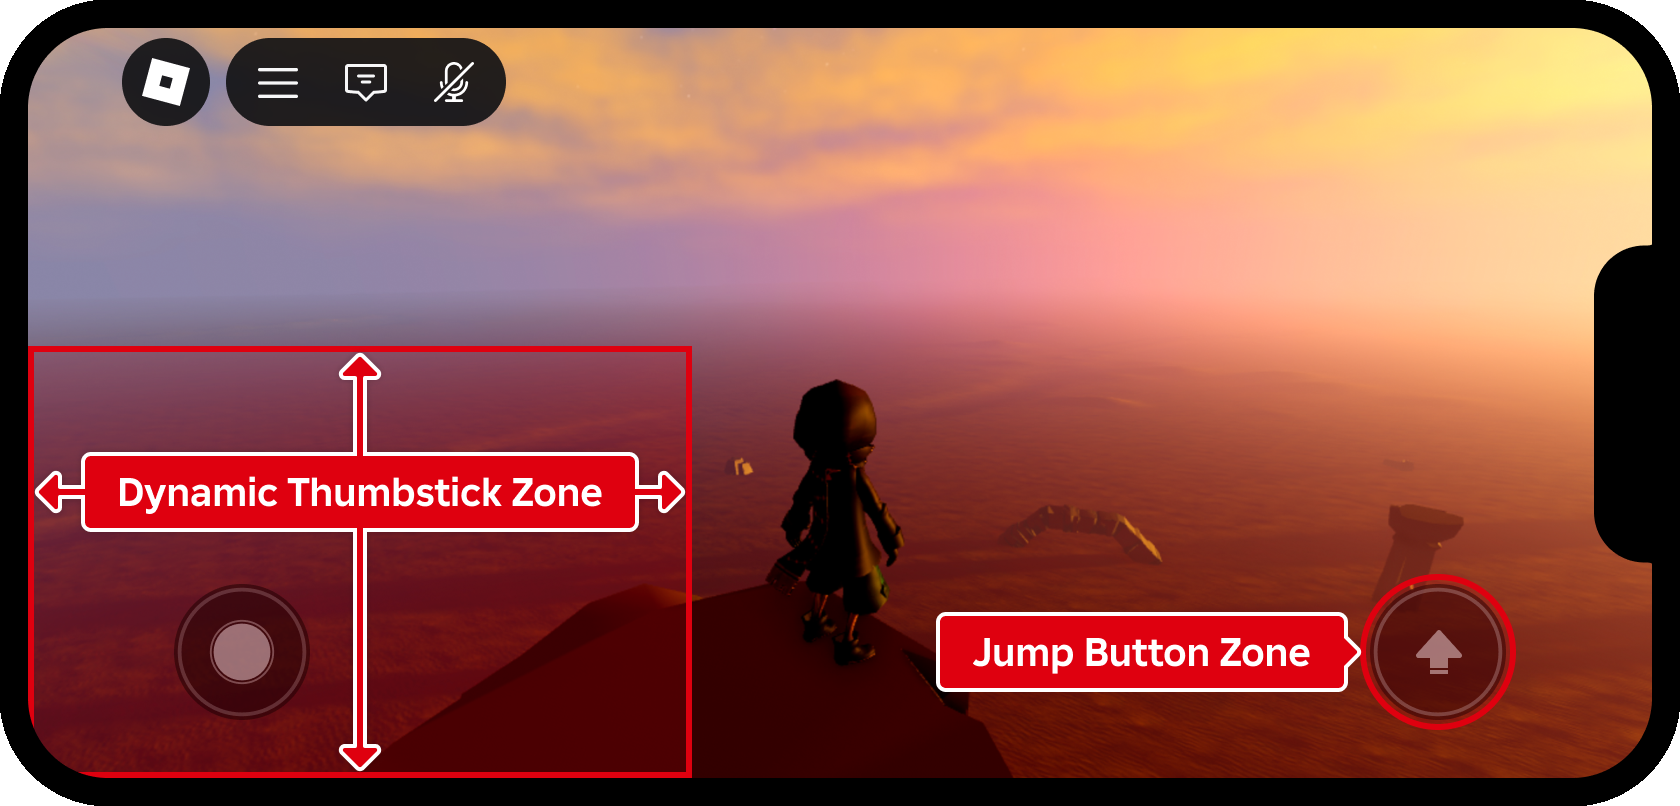
โซนนิ้วหัวแม่มือ
ผู้เล่นบนมือถือส่วนใหญ่ใช้นิ้วสองนิ้ว — หนึ่งบนสติกเท้าเสมือนและหนึ่งบนปุ่มกระโดดขึ้นอยู่กับขนาดทางกายภาพของอุปกรณ์และมือของผู้เล่น การเข้าถึงไกลเกินไปจากมุมด้านล่างจะกลายเป็นไม่สะดวกหรือเป็นไปไม่ได้ ดังนั้นคุณควรหลีกเลี่ยงการวางปุ่มที่ใช้บ่อยอยู่นอกพื้นที่ที่เข้าถึงได้ง่าย
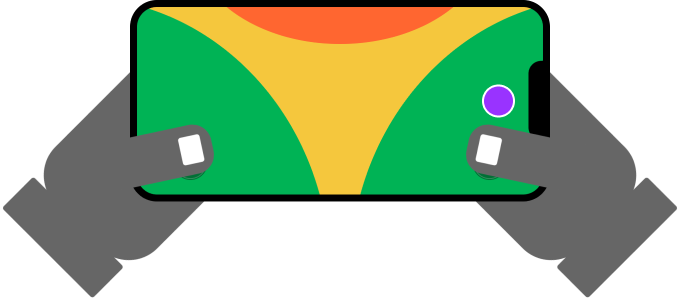
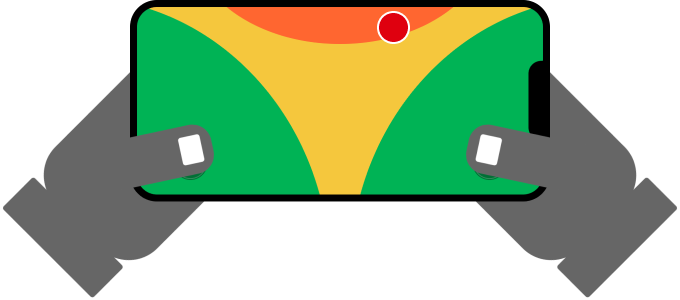
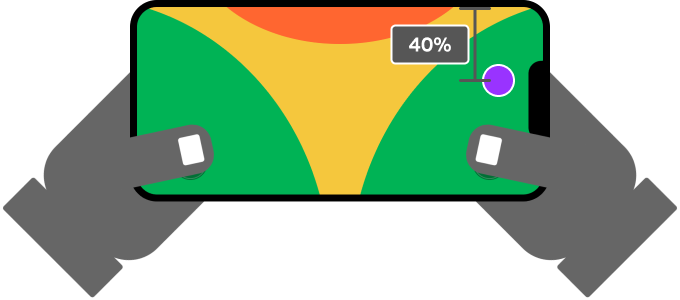
โปรดจำไว้ว่าโซนนิ้วที่สะดวกแตกต่างกันระหว่างโทรศัพท์และแท็บเล็ตเพราะแท็บเล็ตมีหน้าจอที่ใหญ่กว่าปุ่มที่วางอยู่ 40% ด้านล่างสุดขอบหน้าจอสามารถใช้งานได้บนโทรศัพท์ แต่เกือบจะไม่สามารถใช้งานได้บนแท็บเล็ต
วิธีที่เชื่อถือได้ทั้งในโทรศัพท์และแท็บเล็ตคือการจัดตำแหน่งปุ่มกําหนดเองที่ใกล้เคียงกับการควบคุมที่ใช้บ่อยเช่นปุ่มกระโดดเริ่มต้นวางไว้ในระยะที่เอื้อมถึงได้ง่าย
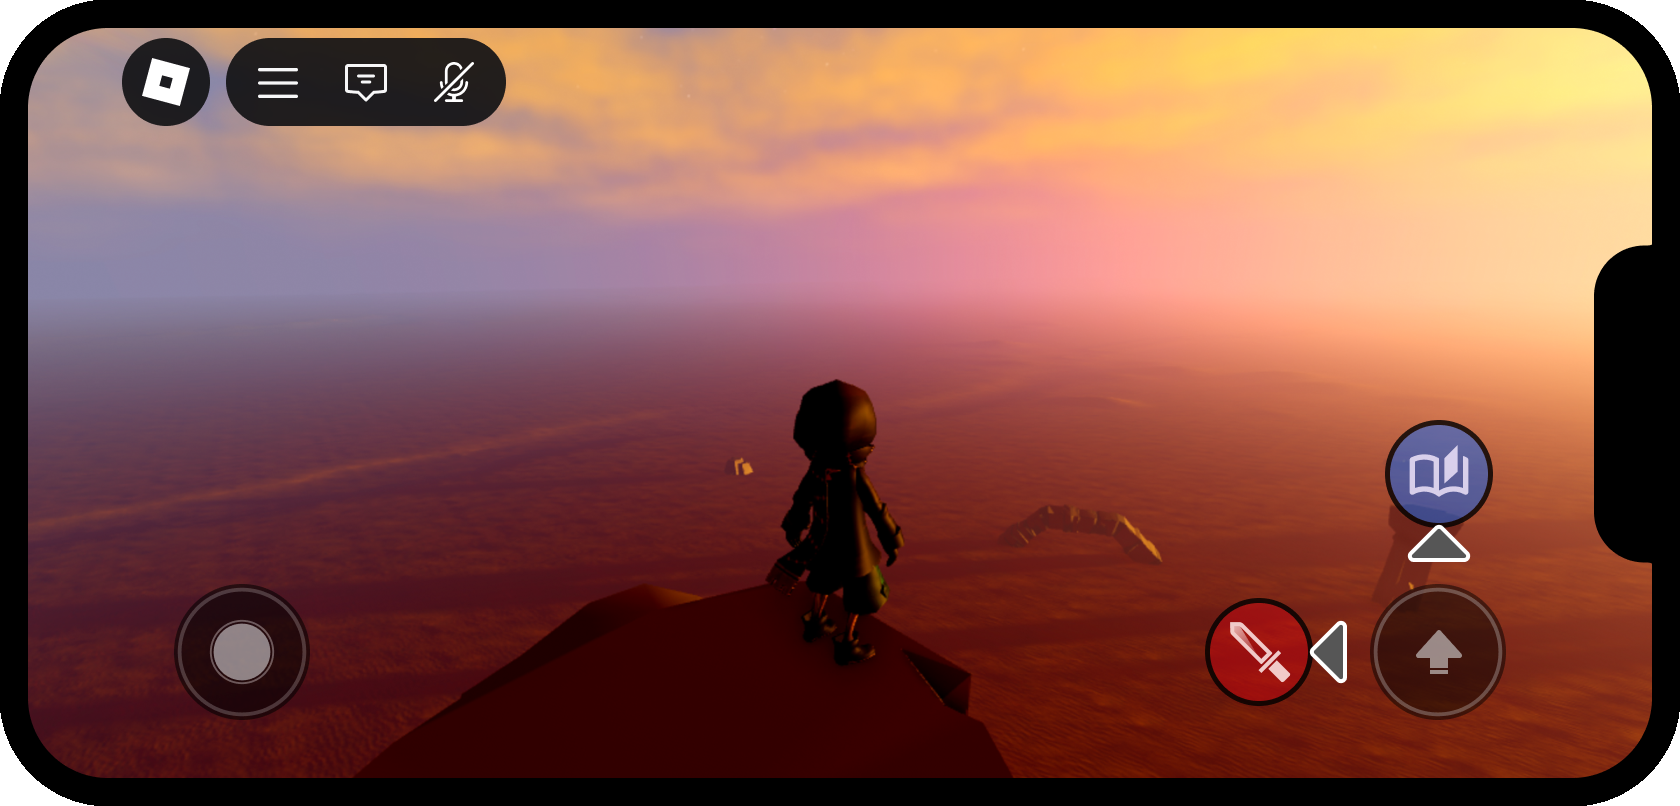
รหัสStarterPlayerScripts และรับตำแหน่งของปุ่มกระโดดและสร้างตัวชั่วคราว ปุ่ม 20 พิกเซลไปทางซ้าย
สคริปต์ไคลเอนต์ - ปุ่มที่กำหนดเองใกล้ปุ่มกระโดด
UI ขึ้นอยู่กับบริบท
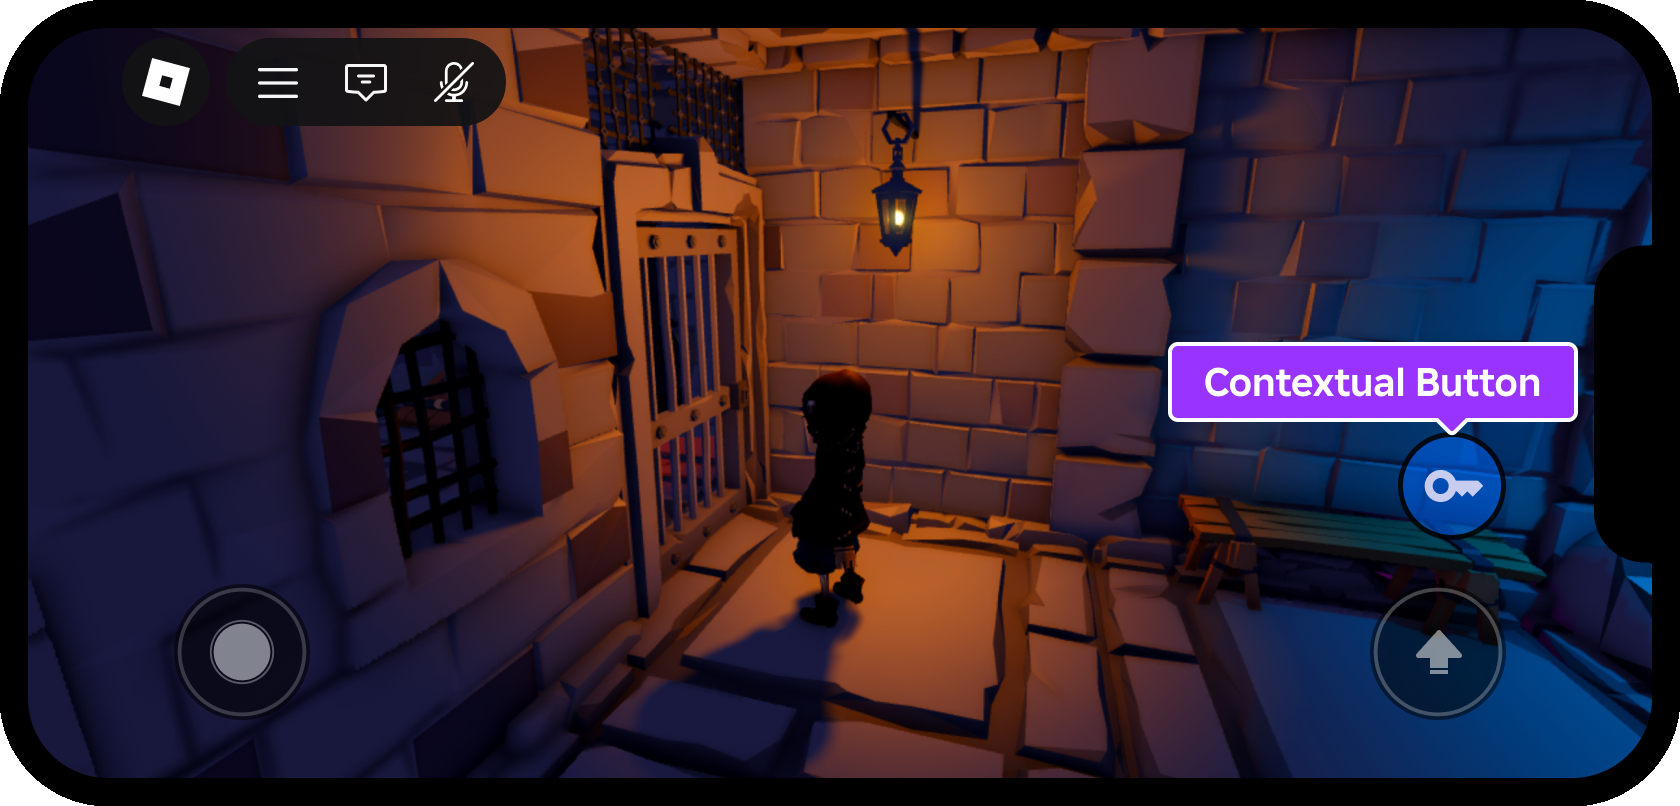
พื้นที่หน้าจอจํากัดบนอุปกรณ์มือถือดังนั้นคุณควรแสดงข้อมูลที่สําคัญที่สุดเท่านั้นในระหว่างการเล่นเกมที่ใช้งานอยู่ตัวอย่างเช่น หากประสบการณ์ของคุณรวมถึงการกดปุ่มพิเศษเพื่อเปิดประตูและหีบสมบัติแล้วไม่มีเหตุผลที่จะแสดงปุ่ม "เปิด" อยู่ตลอดเวลาบนหน้าจอแทนที่ใช้คําเตือนระยะไกล หรือวิธีการที่คล้ายกันเพื่อยอมรับการป้อนเฉพาะเมื่อตัวละครใกล้กับประตูหรือหีบเท่านั้น
