Path2D 實例及其 API 方法和屬性可讓您實現 2D 插值曲線和 2D 曲線,用於 UI 效果,例如基於路徑的動畫和圖形編輯器。
創建 2D 路徑
要將 Path2D 添加到屏幕或體驗中的物件:
在 Explorer 窗口中,將 Path2D 實例插入到一個可見的 ScreenGui 或 SurfaceGui 下(它不需要是直接子項)。

選擇新的 Path2D 以顯示視口內工具小部件。默認情況下,選擇了 Add Point 工具。

完成後,單擊小部件的 Done 按鈕或按 Enter 鍵。


修改控制點
在 Explorer 層級中選擇 Path2D 時,您可以修改其各個控制點以及它們的 切線。
移動點
要移動路徑上的單個控制點,啟用 Select 工具 (V),然後單擊並拖動到新位置。


對於非常特定的位置設定,選擇控制點,然後在 Properties 窗口中,為點的 SelectedControlPointData 屬性設定新位置(UDim2)。

請注意,點的位置不是絕對的,而是 相對於 路徑的父容器。例如,將控制點從左邊 30% 和從上邊 20% 的位置進行比較,對於放置在 ScreenGui 中的路徑,與定位在 ScreenGui 右上角的 Frame 中的相同路徑。

添加點
新控制點可以使用 Add Point 工具 (P) 添加到 Path2D,無論是兩個現有點之間還是從任一端點。


刪除點
要刪除控制點,將鼠標懸停並右鍵單擊它,然後從上下文彈出菜單中選擇 Delete Point。

控制點切線
控制點 切線 讓您在路徑上創建和調整曲線。

添加切線
要向任何尚未擁有切線的控制點添加切線:
在工具小部件中啟用 Add Tangent 工具。


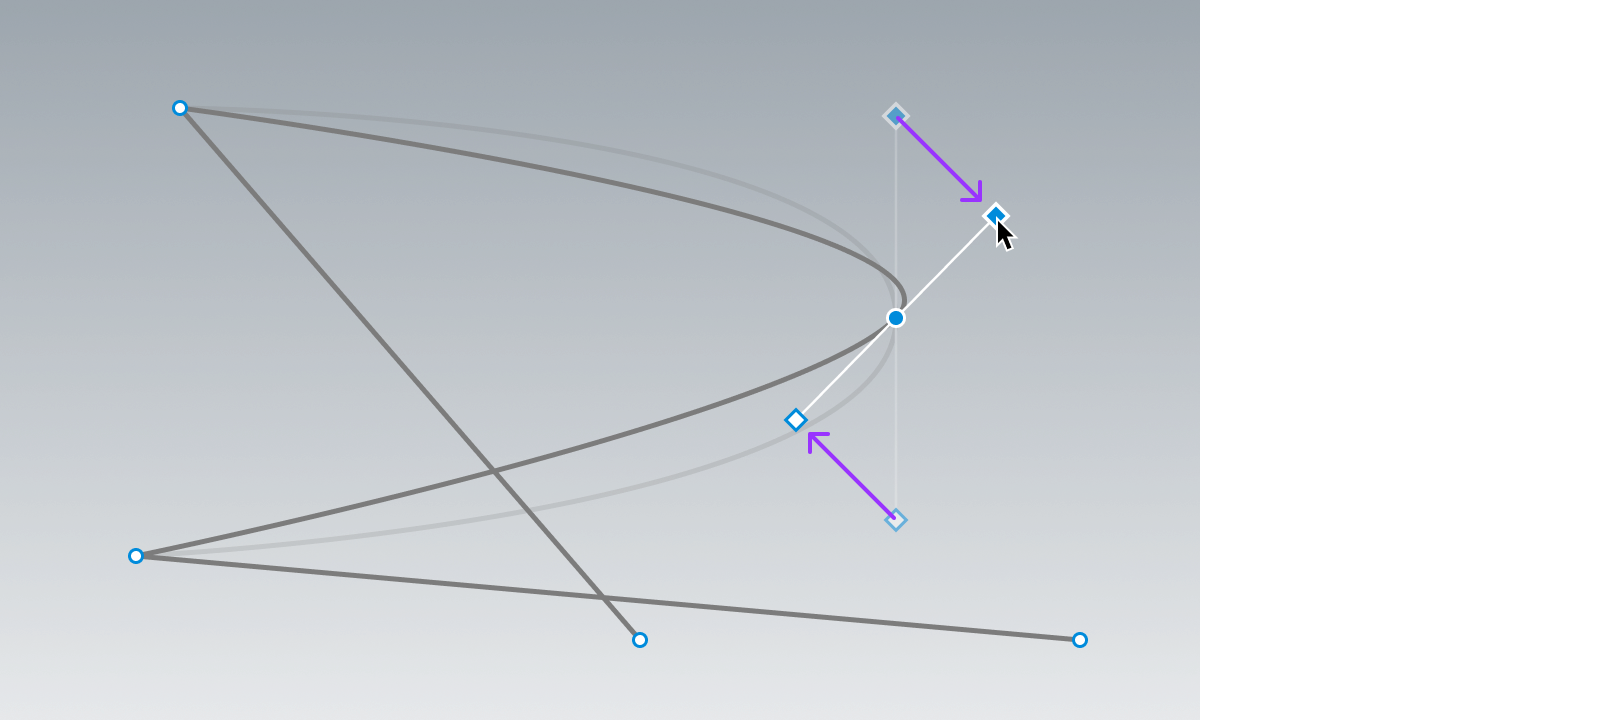
調整切線
要調整單個控制點的現有切線:
啟用 Select 工具 (V)。

將鼠標懸停在切線標記(而不是控制點)上,然後單擊並拖動到新位置。如果切線是鏡像的,配對的切線點將一起移動。
若要手動為切線設置特定的 UDim2 位置:
啟用 Select 工具 (V) 並選擇控制點。 在 Properties 窗口中,展開 SelectedControlPointData 欄位以顯示 LeftTangent 和 RightTangent 屬性。

設定 LeftTangent 和/或 RightTangent 的位置。請注意,這將會 打破鏡像行為 的切線。

刪除切線
要從控制點刪除兩個切線,將鼠標懸停並右鍵單擊該點,然後從上下文彈出菜單中選擇 Clear Tangents。

要僅刪除其中一個切線(左或右),將鼠標懸停並右鍵單擊該切線的標記,然後選擇 Delete Tangent。

斷開和鏡像
默認情況下,切線彼此鏡像。當您 拖動以調整 一個切線標記時,配對的切線點會一起移動。

要“打破”切線,使每個切線可以獨立於另一個移動,將鼠標懸停並右鍵單擊相關控制點,然後從上下文菜單中選擇 Break Tangents。打破後,您可以移動每個切線標記而不影響另一個。

路徑視覺屬性
您可以使用以下屬性自定義 Path2D 的視覺外觀:

Color3 = (125, 125, 125)

Color3 = (225, 0, 50)

路徑腳本
腳本對於多種路徑相關的工作流程非常有用。以下示例使用的方法如 GetControlPoints() 返回 Path2DControlPoints 的表格,及 GetPositionOnCurveArcLength() 返回在給定 t 值沿插值曲線的 UDim2 位置。
沿路徑排列 UI 物件
local parent = script.Parent
local path = parent:FindFirstChildWhichIsA("Path2D")
local function arrangeChildren()
local segmentCount = #path:GetControlPoints()
local objectsToArrange = {}
for _, child in parent:GetChildren() do
if child:IsA("GuiObject") then
table.insert(objectsToArrange, child)
end
end
for idx, child in objectsToArrange do
local t = idx / (#objectsToArrange + 1)
child.Position = path:GetPositionOnCurveArcLength(t)
end
end
-- 最初沿路徑排列子 UI 物件
arrangeChildren()
-- 監聽子項的添加/刪除以調整排列
parent.ChildAdded:Connect(arrangeChildren)
parent.ChildRemoved:Connect(arrangeChildren)
沿路徑動畫 UI 物件
local Tweenservice = game:GetService("TweenService")
local parent = script.Parent
local path = parent:FindFirstChildWhichIsA("Path2D")
local objectToAnimate = parent:FindFirstChildWhichIsA("GuiObject")
local TWEEN_DURATION = 4
local TWEEN_EASING_STYLE = Enum.EasingStyle.Cubic
local TWEEN_EASING_DIRECTION = Enum.EasingDirection.InOut
local pathSampleValue = Instance.new("NumberValue")
local tweenInfo = TweenInfo.new(TWEEN_DURATION, TWEEN_EASING_STYLE, TWEEN_EASING_DIRECTION, 0, true, 2)
local tween = Tweenservice:Create(pathSampleValue, tweenInfo, {Value = 1})
local function onSampleValueChanged()
objectToAnimate.Position = path:GetPositionOnCurveArcLength(pathSampleValue.Value)
end
pathSampleValue.Changed:Connect(onSampleValueChanged)
tween:Play()