インエクスペリエンス UI コンテナは、エクスペリエンスの 3D ワールド内に表示したい GuiObjects を保持します。
- A SurfaceGui は、3D ワールドでパーツの表面に UI オブジェクトのレンダリングを許可し、基本的なユーザーインタラクションが発生することも許可します。
- A BillboardGui は、3D 空間にUIオブジェクトが表示されるコンテナですが、常にカメラに向かっています。
表面 UI
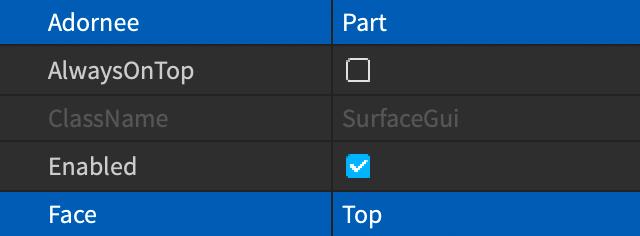
Decals と Textures に似て、TextLabels や ImageLabels のような UI オブジェクトは、SurfaceGui のプロパティを通じて同じ方向に向かっており、編集可能な面は SurfaceGui.Face プロパティです。
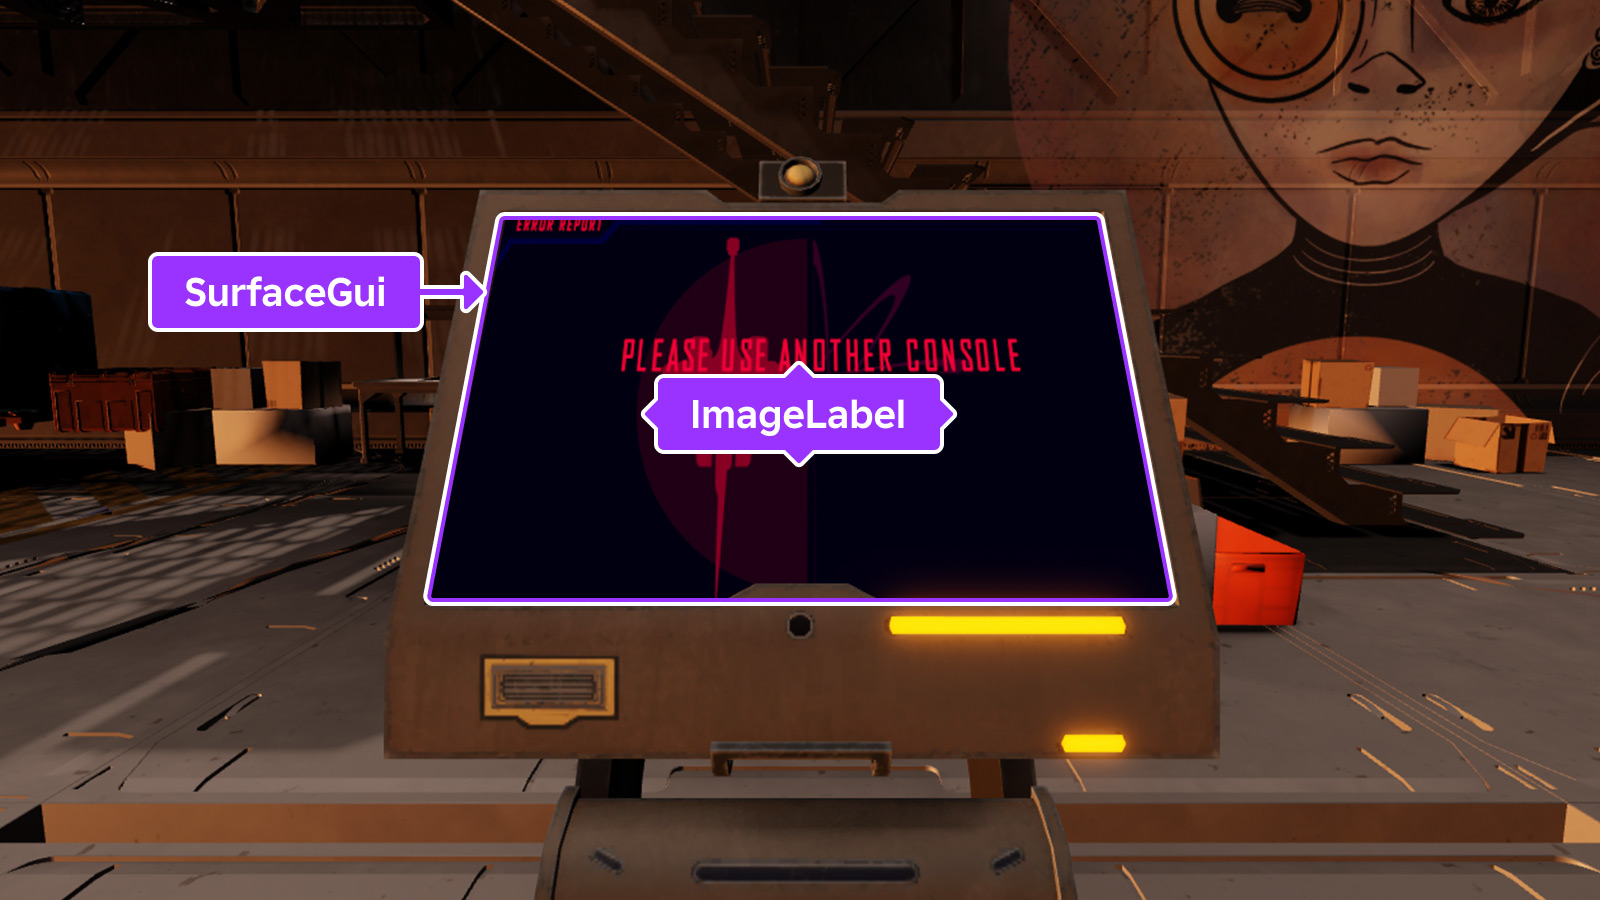
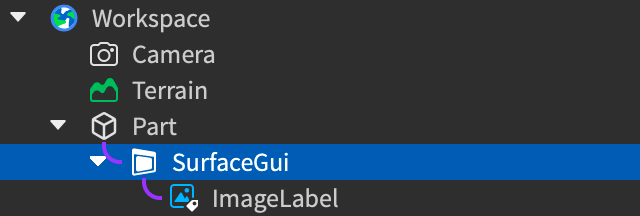
経験中の SurfaceGui に BasePart を適用するには、その部分に親を付けて SurfaceGui.Face プロパティを設定するだけです。子の UI オブジェクトは親のパーツのその面に表示されます。

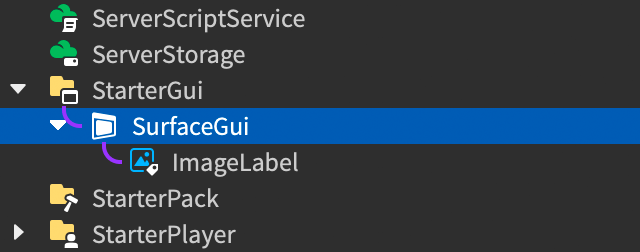
代わりに、SurfaceGui を StarterGui のようなコンテナ内に配置し、その Adornee プロパティを任意の BasePart 、およびターゲットの Face に設定できます。設定 Adornee は、実行時にスクリプトで設定できるため、配置の柔軟性が向上する直接の親関係をオーバーライドします。
サイズと位置
の「キャンバス」は、親または 部分の全体を占有します。ベストプラクティスとして、 スケール 値を使用して、子UIオブジェクトのサイズ と位置 のように、ImageLabels と同様の値を使用することをお勧めします。また、UIAspectRatioConstraint を顔のサイズに関係なく、SurfaceGui の子供に適用して、望ましいアスペクト比を維持することもできます。
閉塞モード
AlwaysOnTop プロパティは、SurfaceGui が 3D コンテンツの上にレンダリングされるか、それによって隠されるかを決定します。デフォルトの false に設定すると、SurfaceGui は他の 3D コンテンツと同じようにレンダリングされ、他の 3D オブジェクトによって隠されます。true に設定すると、常に 3D コンテンツの上にレンダリングされ、3D 環境の 明るさ/光 に影響を受けません。
明るさと光の影響
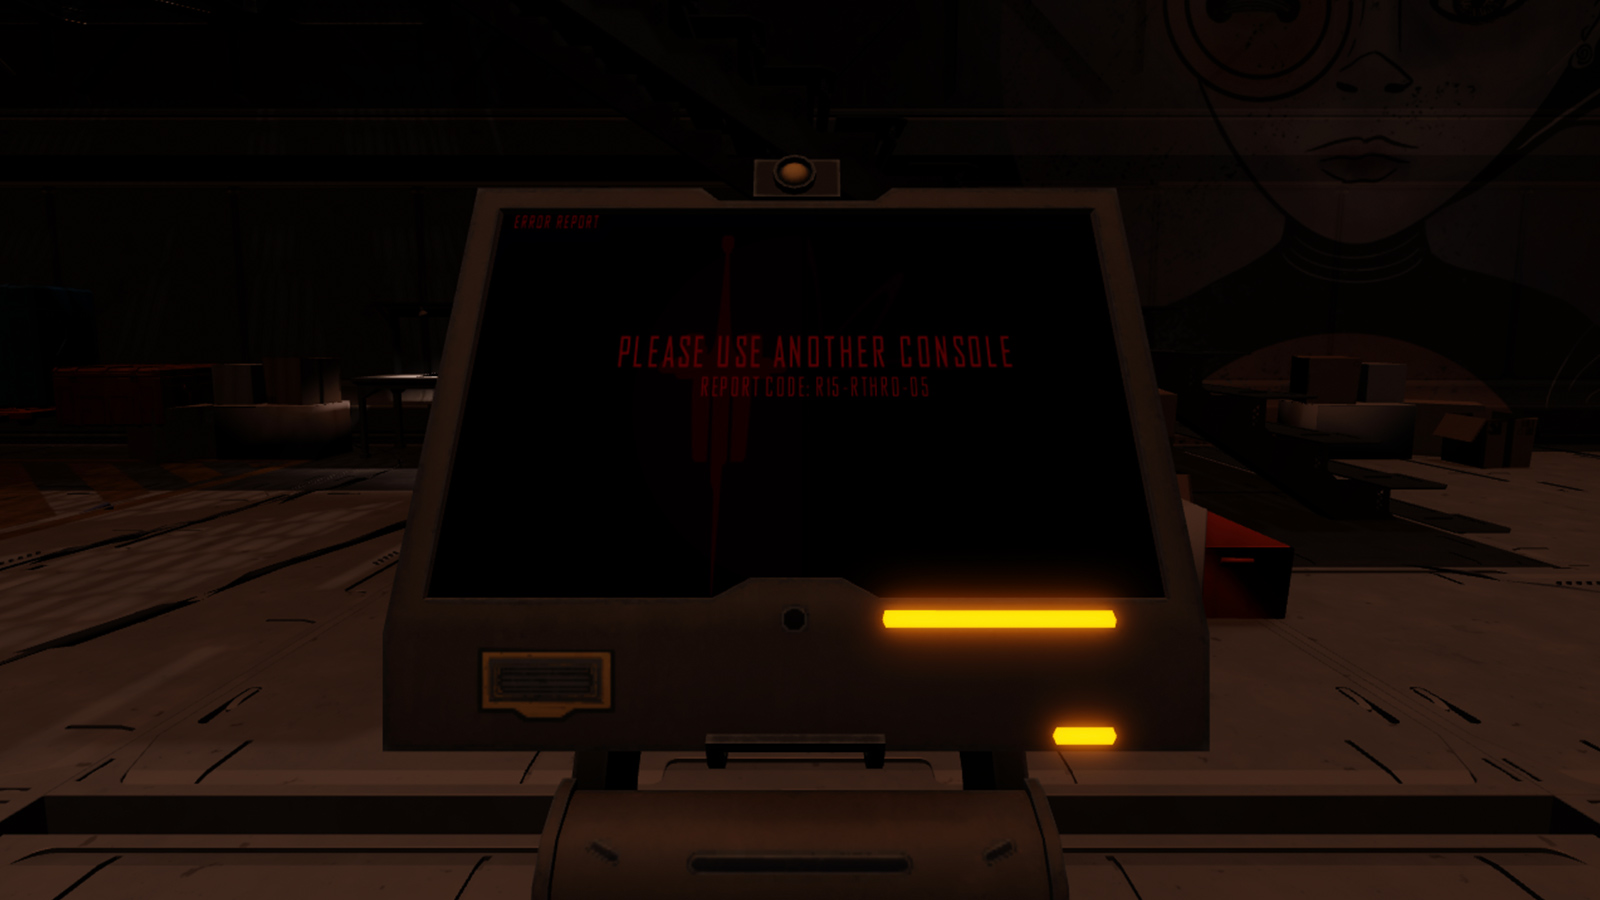
Brightness と LightInfluence は、環境光が SurfaceGui のUIコンテンツにどのように影響するかを決定するために協力して作業します。
は、発射された光が から までの範囲でスケーリングされる因子を決定し、環境との一致を可能にします。たとえば、ビデオビルボードは、Brightness を 10 に増加することで、暗い部屋内で明るくすることができます。
LightInfluence は、場プレースの照明の影響をどの程度受けるかを制御し、SurfaceGui から0までの範囲で、1に影響を与えます。これを 1 に設定すると、周囲の照明が外外見に完全に制御を持っていることになり、0 に設定すると、照明に効果がないことになります。
距離視認性
MaxDistance カメラからどれほど遠くに SurfaceGui が表示されるかを制御し、レンダリングを停止する前に。値 0 は制限がないことを意味し、無限遠にレンダリングされます。デフォルト値の 1000 は、ほとんどの場合にうまく機能します。
屋外に表示される場合は、SurfaceGuis が十分に高いことを確認するために、MaxDistance が画面に表示されるときにコンテナの UI が十分に小さくなるようにすることをお勧めします。これにより、突然のポップアウト効果が最小限に抑えられます。
順序を表示
同じ面に複数の SurfaceGui コンテナが存在する場合、ZOffset プロパティを通じて Z‑index でレイヤー化できます(これを変更すると、コンテナが表面から視覚的に「持ち上げ」または「沈め」ることはありません)。
ビルボード UI
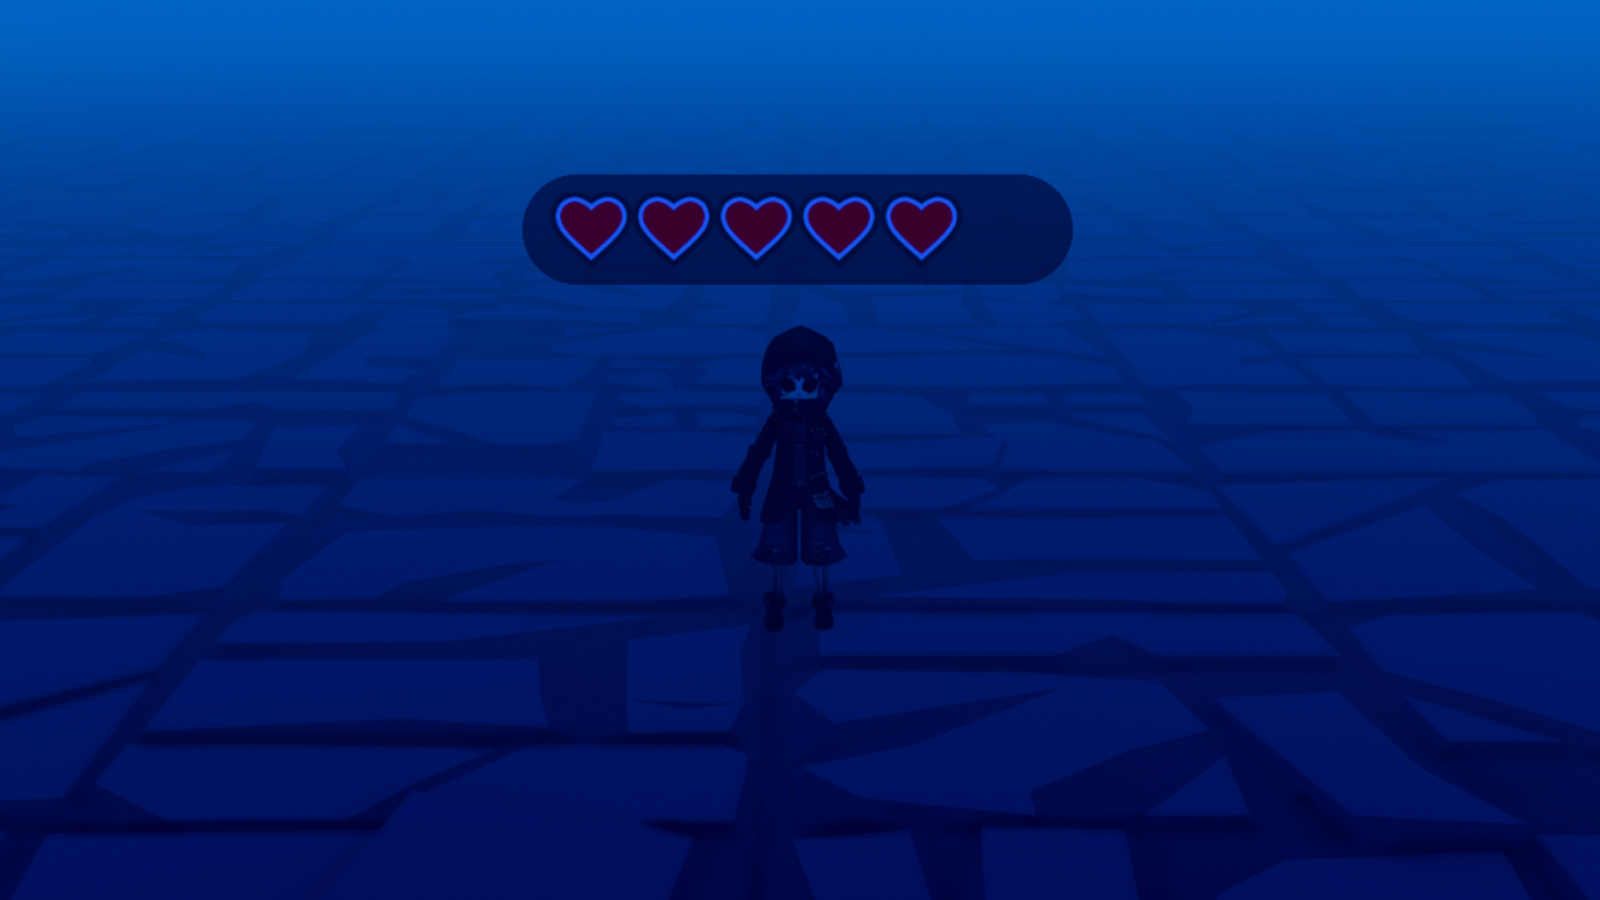
BillboardGui コンテナは、3D 空間に UI オブジェクトを表示しますが、SurfaceGui とは異なり、BillboardGui の子供は常にカメラに面します。このコンテナは、ヘルスメーターやプレイヤーキャラクターの上に表示される経験上のオブジェクト、3Dワールドのオブジェクトにプレイヤーを導くマーカーなど、上向き情報を表示するのに便利です。
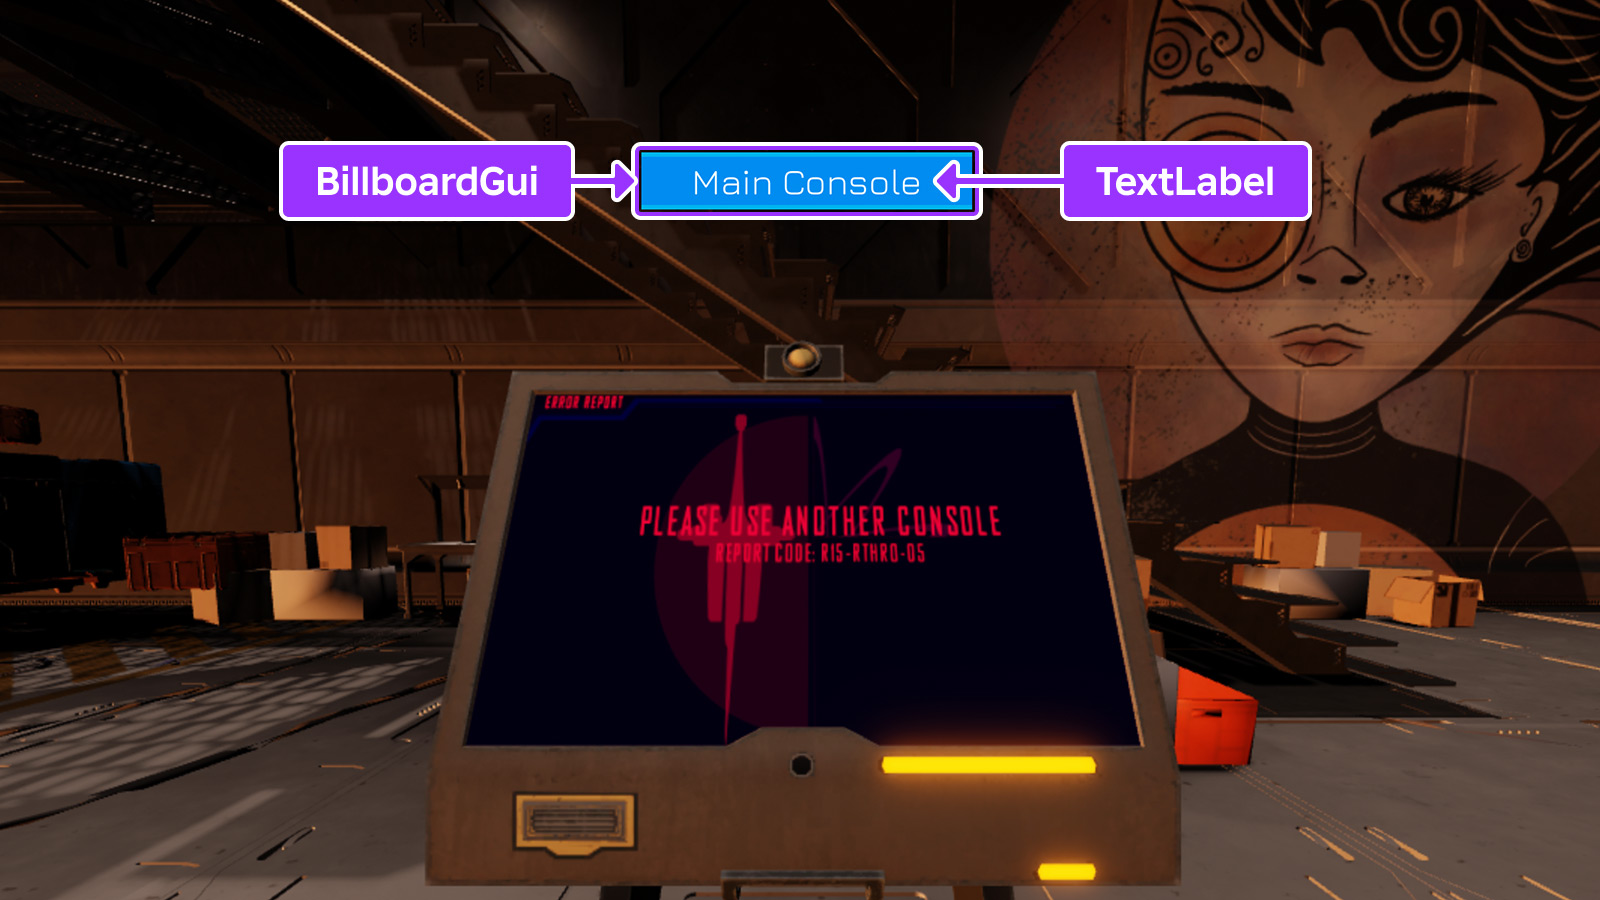
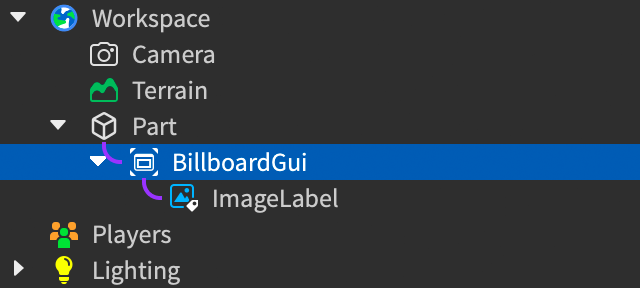
To link a BillboardGui to an in-experience BasePart または Attachment , simply parent it to that part or attachment, and, if desired, its サイズ/位置 を調整します。
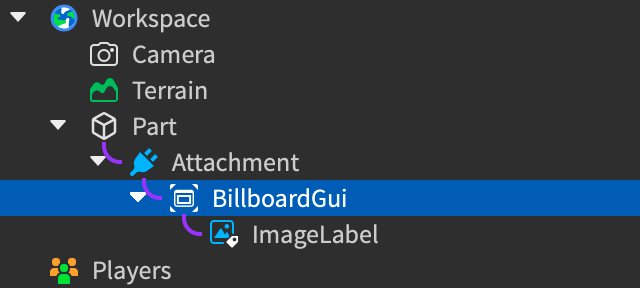
代わりに、BillboardGui を StarterGui のようなコンテナ内に配置し、その Adornee プロパティを任意の BasePart または Attachment に設定できます。このメソッドは、Adornee を実行中にスクリプトから設定できるため、例えばランタイム中にプレイヤーキャラクターの頭上に BillboardGui を配置することができます。
サイズと位置
ビルボードサイズについては、スケール コンポーネントの Size が、ビルボードのスタッドサイズを3D空間に設定します。たとえば、{10, 0},{2, 0} ( UDim2.fromScale(10, 2) ) の設定は、カメラからの距離に応じて大きく小さくスケールする 10:2 のアスペクト比のビルボードを形成します。
位置づけのために、StudsOffset プロパティは、 X 軸 (左/右)、 Y 軸 (上/下)、および Z 軸 (前/後) にカメラに対してビルボードキャンバスをシフトします。
閉塞モード
AlwaysOnTop プロパティは、BillboardGui が 3D コンテンツの上にレンダリングされるか、それによって隠されるかを決定します。デフォルトの false に設定すると、BillboardGui は他の 3D コンテンツと同じようにレンダリングされ、他の 3D オブジェクトによって隠されます。true に設定すると、常に 3D コンテンツの上にレンダリングされ、3D 環境の 明るさ/光 に影響を受けません。
明るさと光の影響
Brightness と LightInfluence は、環境光が BillboardGui のUIコンテンツにどのように影響するかを決定するために協力して作業します。
は、発射された光が から までの範囲でスケーリングされる因子を決定し、環境との一致を可能にします。たとえば、ビデオビルボードは、Brightness を 10 に増加することで、暗い部屋内で明るくすることができます。
LightInfluence は、場プレースの照明の影響をどの程度受けるかを制御し、BillboardGui から0までの範囲で、1に影響を与えます。これを 1 に設定すると、周囲の照明が外外見に完全に制御を持っていることになり、0 に設定すると、照明に効果がないことになります。
距離視認性
MaxDistance カメラからどれほど遠くに BillboardGui が表示されるかを制御し、レンダリングを停止する前に。値 0 または inf (デフォルト)は、制限がないことを意味し、無限遠にレンダリングされます。