Path2D 实例及其 API 方法和属性使您能够实现 2D 样条曲线和 2D 曲线线条,适用于基于路径的动画和图形编辑器等 UI 效果。
创建 2D 路径
要将 Path2D 添加到屏幕或体验中的对象:
在 Explorer 窗口中,在可见的 ScreenGui 或 SurfaceGui 下插入一个 Path2D 实例(不需要是直接子项)。

选择新的 Path2D 以显示视口内工具小部件。默认情况下,选择了 添加 点 工具。

完成后,单击小部件的 完成 按钮或按 Enter。


修改控制点
选中 Explorer 层次结构中的 Path2D 后,您可以修改其各个控制点及其 切线。
移动点
要移动路径上的单个控制点,请启用 选择 工具 (V),然后点击并拖动到新位置。


对于非常具体的定位,选择控制点,然后在 属性 窗口中为点的 SelectedControlPointData 属性(UDim2)设置新位置。

请注意,点的位置不是绝对的,而是 相对于 路径的父容器。例如,比较在 ScreenGui 内部距左侧 30% 和距顶部 20% 的控制点,与放置在 ScreenGui 右上角的 Frame 内的相同路径。

添加点
新的控制点可以通过 添加 点 工具 (P) 添加到 Path2D,既可以在两个现有点之间添加,也可以从任一端点添加。


删除点
要删除控制点,将鼠标悬停在其上并右击,然后从上下文弹出菜单中选择 删除 点。

控制点切线
控制点 切线 使您能够创建和调整路径上的曲线。

添加切线
要为未具有切线的任何控制点添加切线:
在工具小部件中启用 添加切线 工具。


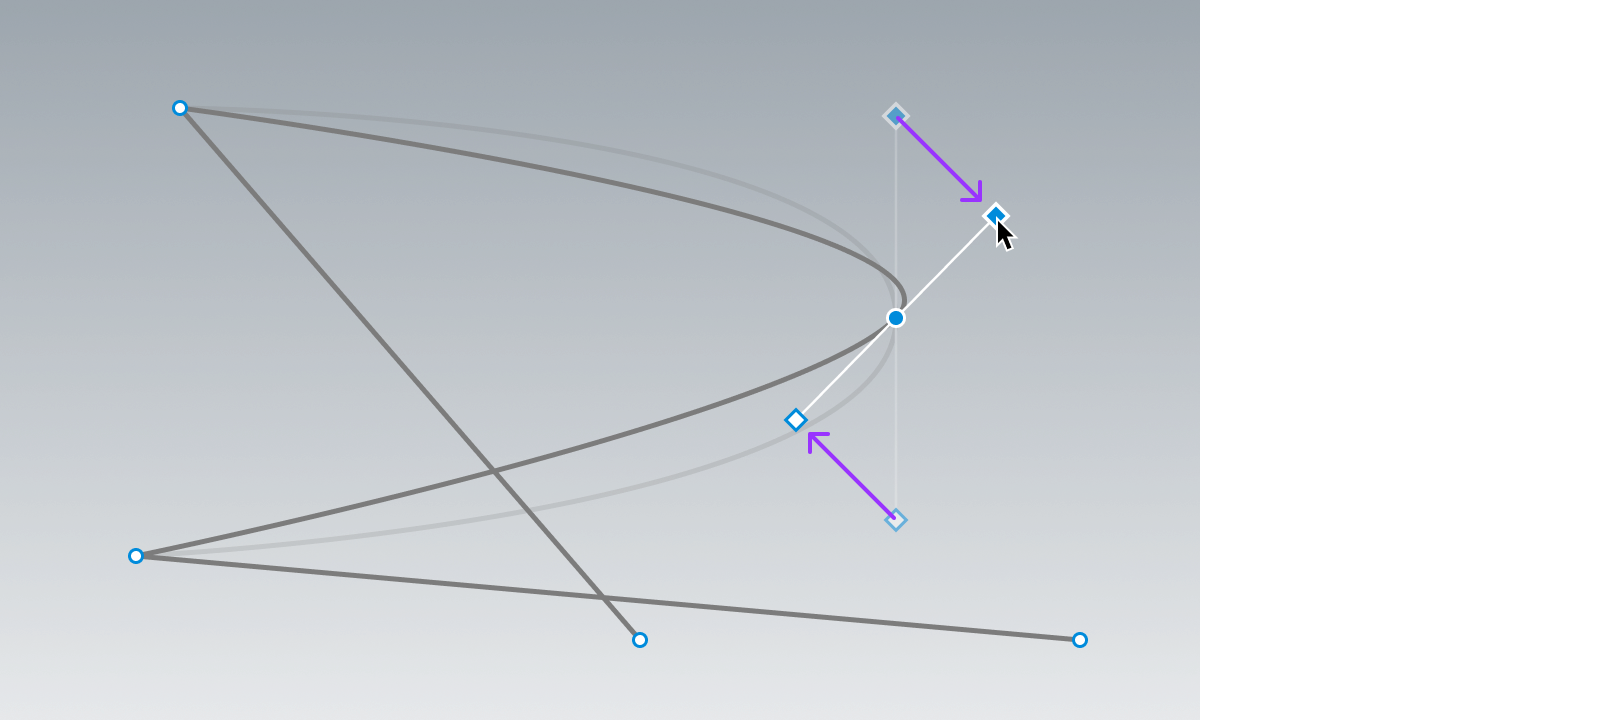
调整切线
要调整单个控制点的现有切线:
启用 选择 工具 (V)。

悬停在切线标记上(不是控制点),然后点击并拖动到新位置。如果切线是镜像的,则配对的切线点将同步移动。
要手动为切线设置特定的 UDim2 位置:
启用 选择 工具 (V) 并选择控制点。在 属性 窗口中,展开 SelectedControlPointData 字段以显示 LeftTangent 和 RightTangent 属性。

为 LeftTangent 和/或 RightTangent 设置位置。请注意,这将 中断切线的镜像行为。

删除切线
要从控制点删除两个切线,将鼠标悬停在该点上并右击,然后从上下文弹出菜单中选择 清除 切线。

要仅删除一个切线(左或右),将鼠标悬停在该切线的标记上,然后右击选择 删除 切线。

断开和镜像
默认情况下,切线是彼此镜像的。当您 拖动调整 一个切线标记时,配对的切线点将同步移动。

要“断开”切线以使其可以独立移动,请将鼠标悬停在相关控制点上,然后从上下文菜单中选择 断开 切线。断开后,您可以移动每个切线标记而不影响另一个。

路径视觉属性
您可以根据以下属性自定义 Path2D 的视觉外观:

颜色 = (125, 125, 125)

颜色 = (225, 0, 50)

路径脚本编写
脚本编写对多种与路径相关的工作流程非常有用。以下示例使用方法,如 GetControlPoints(),它返回一个 Path2DControlPoints 表,和 GetPositionOnCurveArcLength(),它返回给定 t 值沿样条曲线的 UDim2 位置。
沿路径排列 UI 对象
local parent = script.Parent
local path = parent:FindFirstChildWhichIsA("Path2D")
local function arrangeChildren()
local segmentCount = #path:GetControlPoints()
local objectsToArrange = {}
for _, child in parent:GetChildren() do
if child:IsA("GuiObject") then
table.insert(objectsToArrange, child)
end
end
for idx, child in objectsToArrange do
local t = idx / (#objectsToArrange + 1)
child.Position = path:GetPositionOnCurveArcLength(t)
end
end
-- 最初在路径上排列子 UI 对象
arrangeChildren()
-- 监听子对象的添加/删除以调整排列
parent.ChildAdded:Connect(arrangeChildren)
parent.ChildRemoved:Connect(arrangeChildren)
沿路径动画化 UI 对象
local Tweenservice = game:GetService("TweenService")
local parent = script.Parent
local path = parent:FindFirstChildWhichIsA("Path2D")
local objectToAnimate = parent:FindFirstChildWhichIsA("GuiObject")
local TWEEN_DURATION = 4
local TWEEN_EASING_STYLE = Enum.EasingStyle.Cubic
local TWEEN_EASING_DIRECTION = Enum.EasingDirection.InOut
local pathSampleValue = Instance.new("NumberValue")
local tweenInfo = TweenInfo.new(TWEEN_DURATION, TWEEN_EASING_STYLE, TWEEN_EASING_DIRECTION, 0, true, 2)
local tween = Tweenservice:Create(pathSampleValue, tweenInfo, {Value = 1})
local function onSampleValueChanged()
objectToAnimate.Position = path:GetPositionOnCurveArcLength(pathSampleValue.Value)
end
pathSampleValue.Changed:Connect(onSampleValueChanged)
tween:Play()