Future lighting is the most advanced and powerful Lighting.Technology system you can use for rendering the 3D environment within your experiences. Unlike the other available lighting systems, Future lighting offers pixel perfect light emission, detailed shadows, and specular highlights that mimic real-world lighting for both indoor and outdoor spaces.
Using the Lighting Indoors - Start .rbxl file as a starting place and Lighting Indoors - Complete as a reference, this tutorial shows you how to utilize Future lighting with strategic global and local light source configurations to produce realistic, immersive indoor lighting behavior that navigates players toward the exit of the cabin, including guidance on:
- Ensuring shiny surfaces have accurate reflections that update periodically as the environment dynamically changes.
- Moving the sun and earth to new positions to angle sunlight from windows onto specific surfaces.
- Customizing the atmosphere's ambient hue and density.
- Choosing light sources to solve unique environmental concerns with performance and optimization in mind.
- Balancing your light sources with how the camera perceives their lighting behavior.
If at any point you become stuck in the process, you can use Lighting Indoors - Complete as a reference to compare your progress.
Configure global lighting
Global lighting is the luminescence from either the sun or moon in an experience. While this tutorial focuses on enhancing the lighting inside of the cabin that's covered from the sun, it's important to configure global lighting because it impacts the air particles within the general atmosphere of the experience, regardless of whether they are indoors or outdoors.
By adjusting a couple of key default properties in the Lighting service and its child Atmosphere object, you can dramatically change how both the atmosphere and sunlight coming through the window appears to players, as well as how this lighting interacts with any other object you place in the experience.
Enable the Future lighting system
The Lighting.Technology property determines the behavior of both global and local lighting in your experience. Studio begins every experience with the Enum.Technology.ShadowMap lighting system, ensuring that the global lighting has precise shadows and illumination. However, to enhance the environment and enable your local light sources to also produce precise shadows, illumination, and specular highlights, you must enable the Enum.Technology.Future lighting system technology.
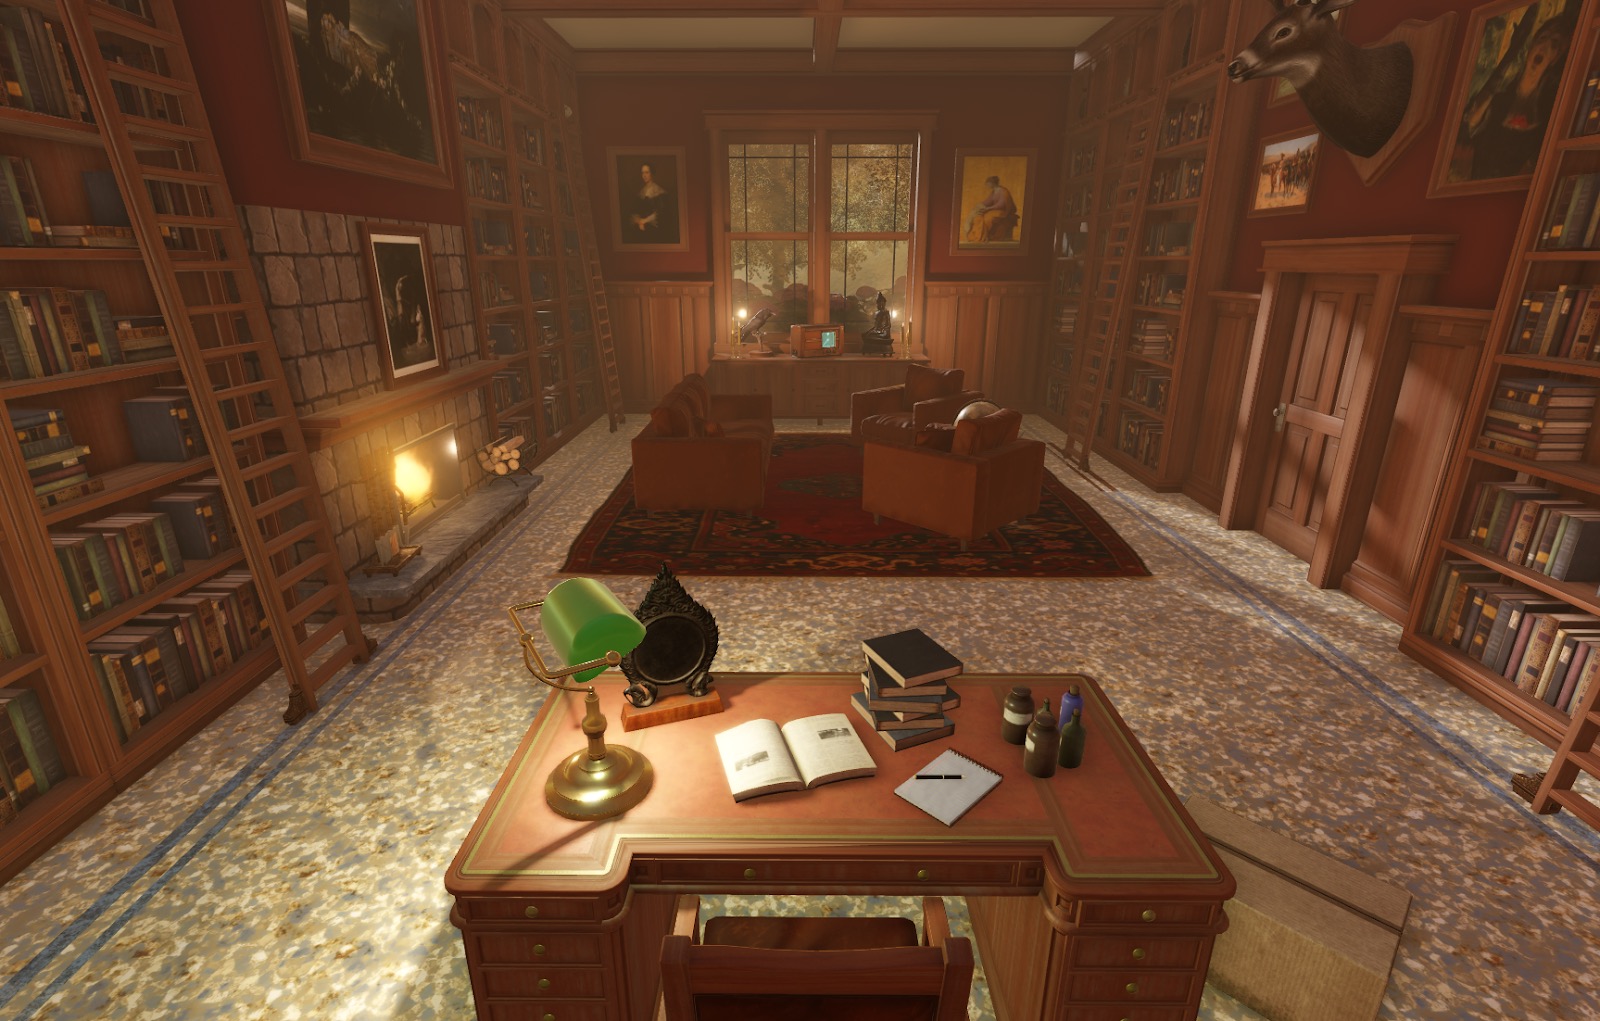
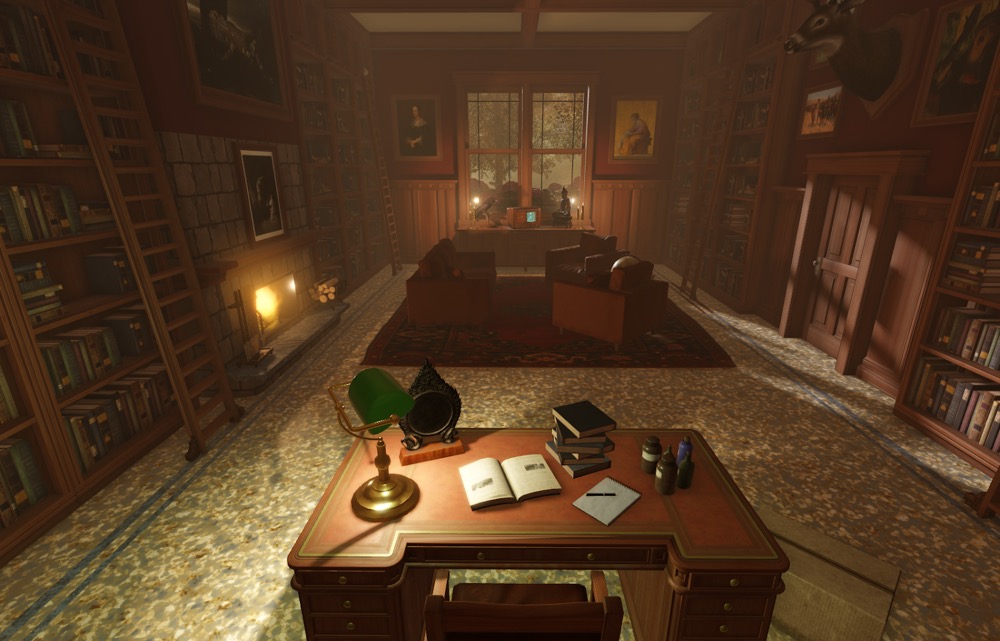
This lighting configuration allows both your global and local lighting to work together and provide more realistic and immersive visuals. To demonstrate, review how the lighting behavior for the radio changes when Lighting Indoors - Complete uses different lighting technology systems. The local lighting from the candlelight and radio with the ShadowMap lighting system doesn't produce shadows like the global lighting from the sun, and the details from the radio's leather and wood materials vanish.


It's important to note that because of the method in which the Future lighting system detects indoor spaces to calculate and render applicable shadows, it's best to surround indoor spaces with Part objects with a thickness of at least 1 stud to prevent undesirable outdoor light from leaking into the cabin. For example, to avert the indoor and outdoor lighting from blending, the sample Lighting Indoors - Start uses parts with a minimum thickness of 2.5 studs to surround all MeshPart walls and ceiling objects without obstructing the window so that the sunlight can still shine into the room.
To enable Future lighting technology:
In the Explorer window, select Lighting.
In the Properties window, click the Technology dropdown, then select Future.


Elevate metal reflections
A core advantage of using the Future lighting system is its ability to produce specular highlights on shiny, metallic surfaces. This increases the realism of indoor environments because it emulates real-world lighting behavior, and it provides a sense of depth to objects in the 3D space.
By default, all materials use physically-based rendering (PBR) textures that allow you to display realistic surfaces in various lighting scenarios by using multiple texture maps on a single object. This means that when you use Studio's built-in materials:
- The metalness and roughness of a particular surface is already defined for you without any additional steps.
- Objects with Studio's built-in materials naturally react more accurately to the lighting in your environment with realistic reflections.
You can enhance this effect with the Future lighting system by increasing the global lighting's Lighting.EnvironmentDiffuseScale and Lighting.EnvironmentSpecularScale properties, especially when you set each property to 1. This step is particularly important in this tutorial because it ensures that any PBR textures in the experience, including those from MaterialVariants or SurfaceAppearance objects, look their best and reflect their surroundings accurately.
To demonstrate this concept, examine the candle's metal bases with different Lighting.EnvironmentDiffuseScale and Lighting.EnvironmentSpecularScale property values. When you increase these values, the metal becomes more accurately reflects the lighting from both the global and local light sources, which allows the material to be more tangible to players as they explore the environment.
To recreate the metal reflections in the sample Lighting Indoors - Complete place file:
- In the Explorer window, select Lighting.
- In the Properties window, ensure that EnvironmentalDiffuseScale and EnvironmentSpecularScale are set to 1. If so, the metal in the experience is accurately reflective.
Change the time of day
In addition to customizing the general atmosphere of the 3D space, global lighting is a powerful tool in creating points of interest within the environment that you want players to explore. When you pair this technique with local light sources, you can indirectly guide players to each section of the gameplay area and prevent them from missing anything important.
To demonstrate this process, the Lighting Indoors - Complete sample strategically repositions the sun so that its light shines into the cabin at an angle, highlighting the cabin's only door. As players scan the room, each light source indirectly grabs player attention and pulls them clockwise: first toward the local light source of the fireplace, secondly toward the global and local light sources near the window, then finally toward the global light source that shines on the exit.
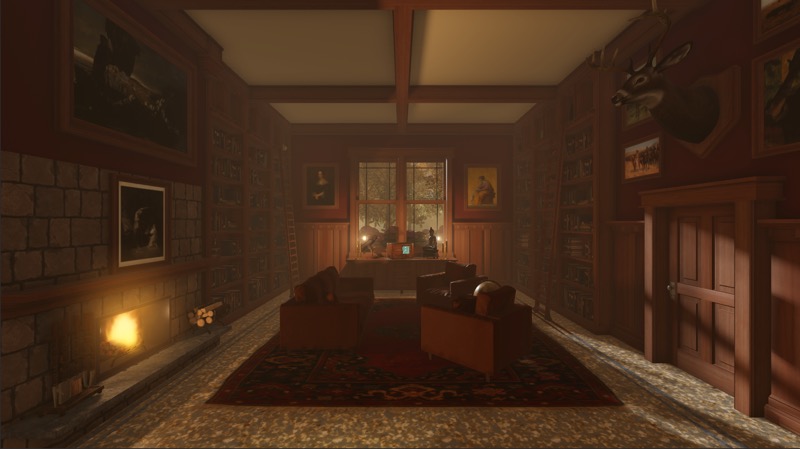
To recreate the time of day in the sample Lighting Indoors - Complete place file:
In the Explorer window, select Lighting.
In the Properties window,
- Set ClockTime to 15.6. The sun moves to the approximate position it would be in at 3:45 pm.
- (Optional) Set GeographicLatitude to 323.

Amplify the sun rays
Now that the sun is at an ideal position in the sky to shine its light in through the window and create a point of interest, you can use the Lighting service's child SunRays object to exaggerate the sun's illumination by amplifying its individual sun rays. Unlike other static atmospheric effects, sun rays dynamically change shape as objects come between the player's camera and the sun, creating realistic light and shadow visuals.
To demonstrate, review how the shape of the sun rays changes when you increase their intensity and spread. While the sun rays using the default configuration subtly approach the window, the sun rays using the custom configuration shine into the cabin. In addition to enhancing your visuals, this effect also improves the air particle density effect later in the tutorial because the sun rays highlight the dense air particles from nearly every angle as players traverse the space.
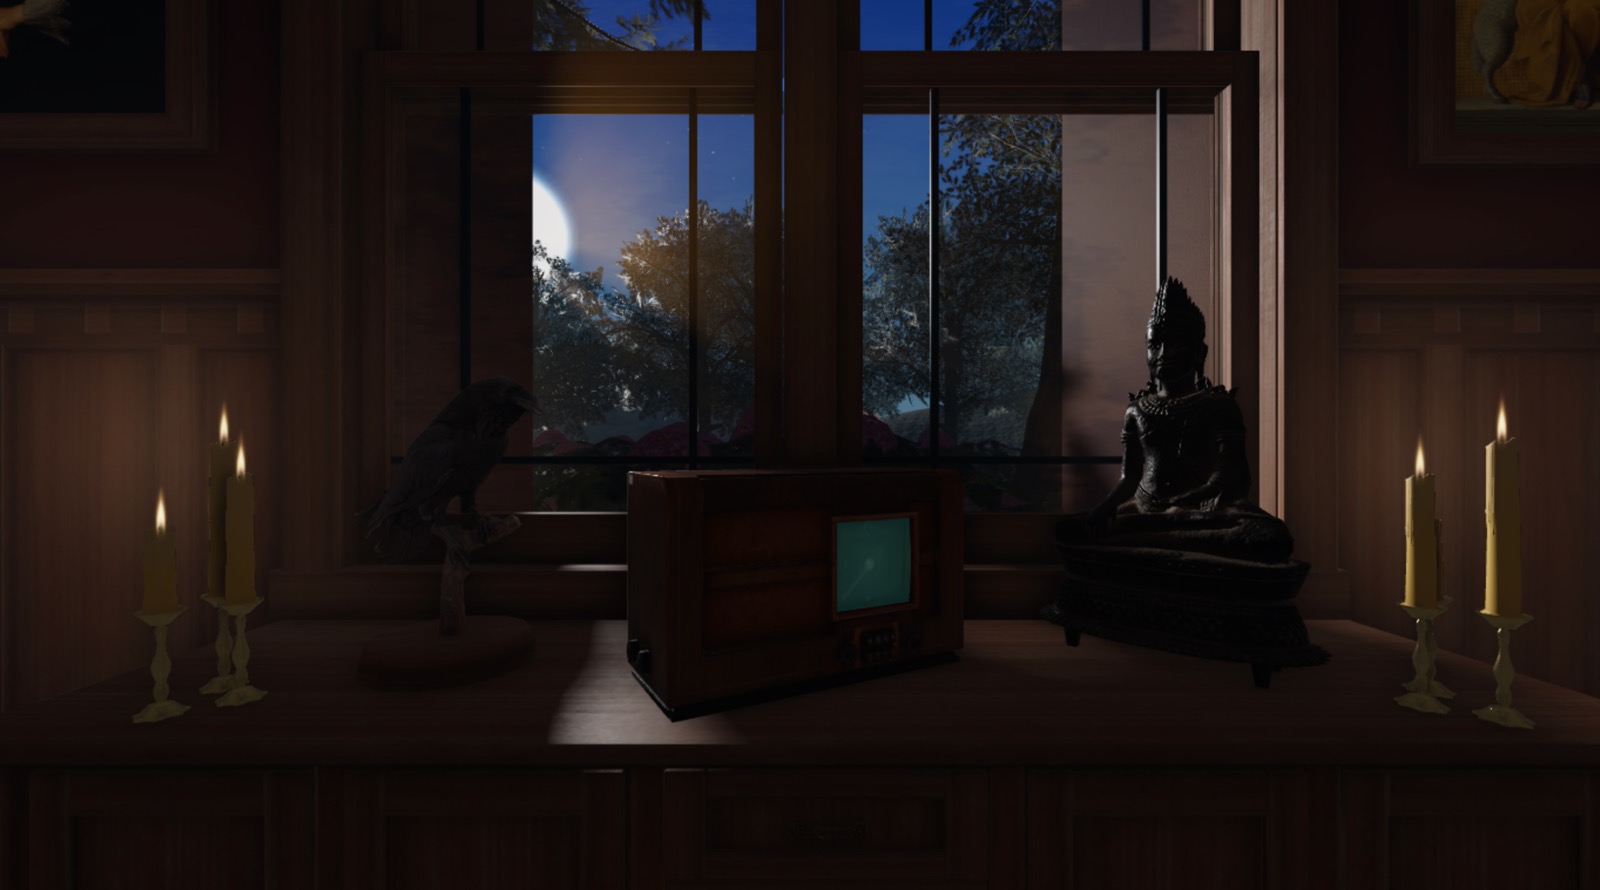
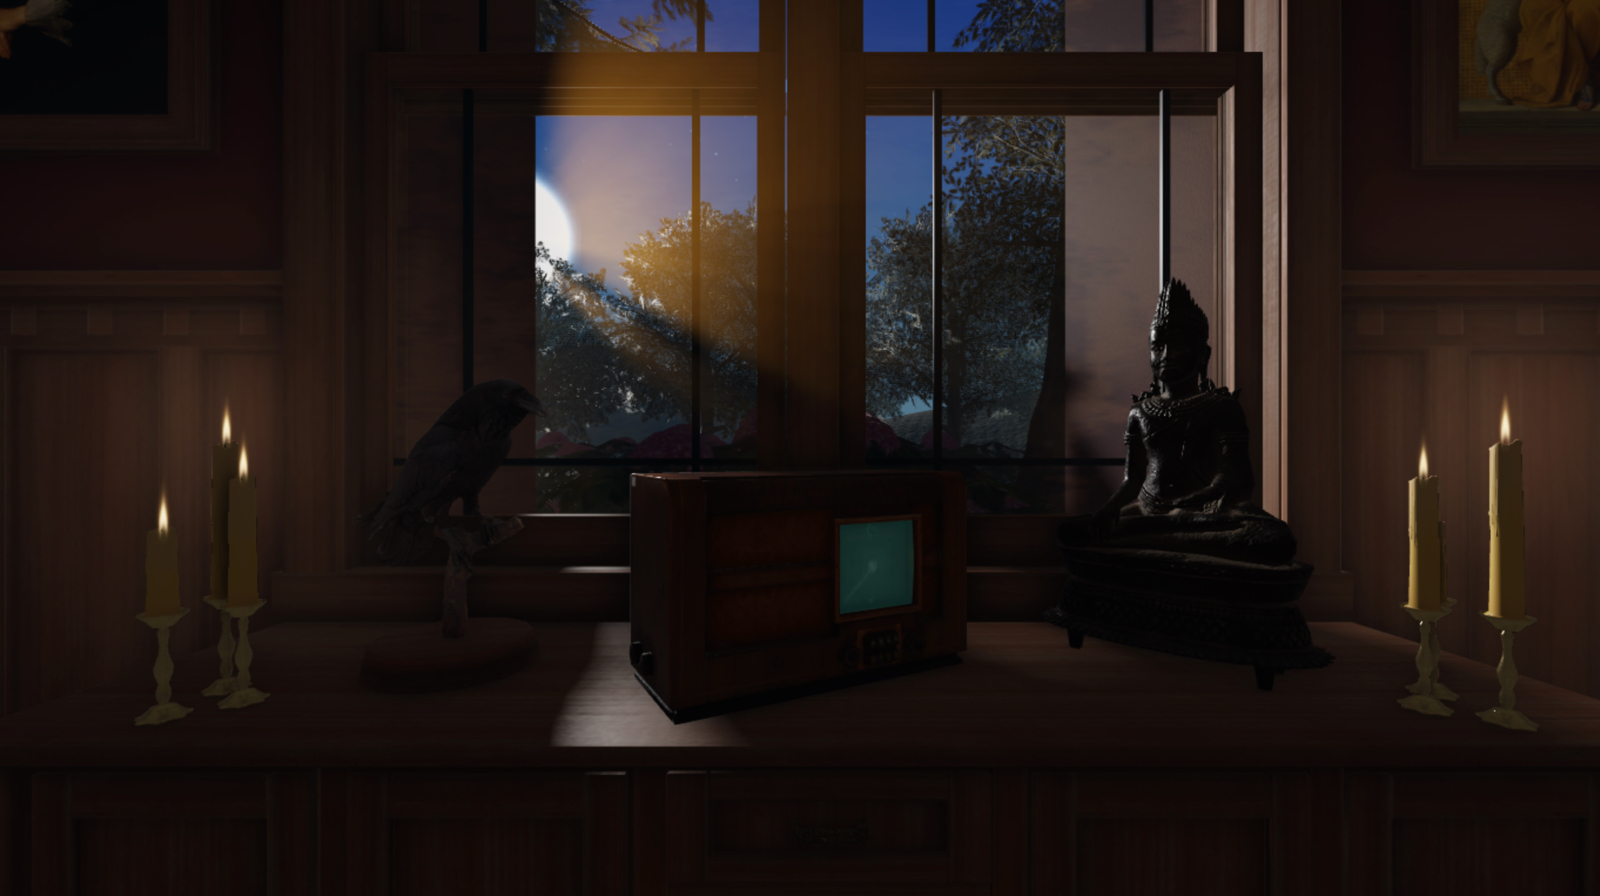
To recreate the sun rays in the atmosphere in the sample Lighting Indoors - Complete place file:
- In the Explorer window, select the Lighting service's child SunRays object.
- In the Properties window,
- Set Intensity to 0.023 to increase the opacity of the sun's halo.
- Set Spread to 0.266 to widen the sun rays spread across the sky.
Adjust the color of ambient light
Customizing the color of ambient light, or the general, indirect light in the 3D space, is a common method for both setting the mood of an environment and determining whether its lighting is warm or cool. There are two Lighting properties that control the color of ambient lighting:
- Lighting.OutdoorAmbient controls ambient lighting where the sky is visible.
- Lighting.Ambient controls ambient lighting within spaces where anything blocks the sky, such as indoor environments.
By default, both properties are set to produce a cool gray hue, but this doesn't match the light sources within the cabin. To solve this problem, the Lighting Indoors - Complete sample adjusts the Lighting.Ambient to produce a warm, orange hue that matches the warmth of the fire in the fireplace and candles, as well as the glow of the setting sun. While this change is subtle, you can significantly see the difference in indirectly lit areas, such as the shadows on the floor.
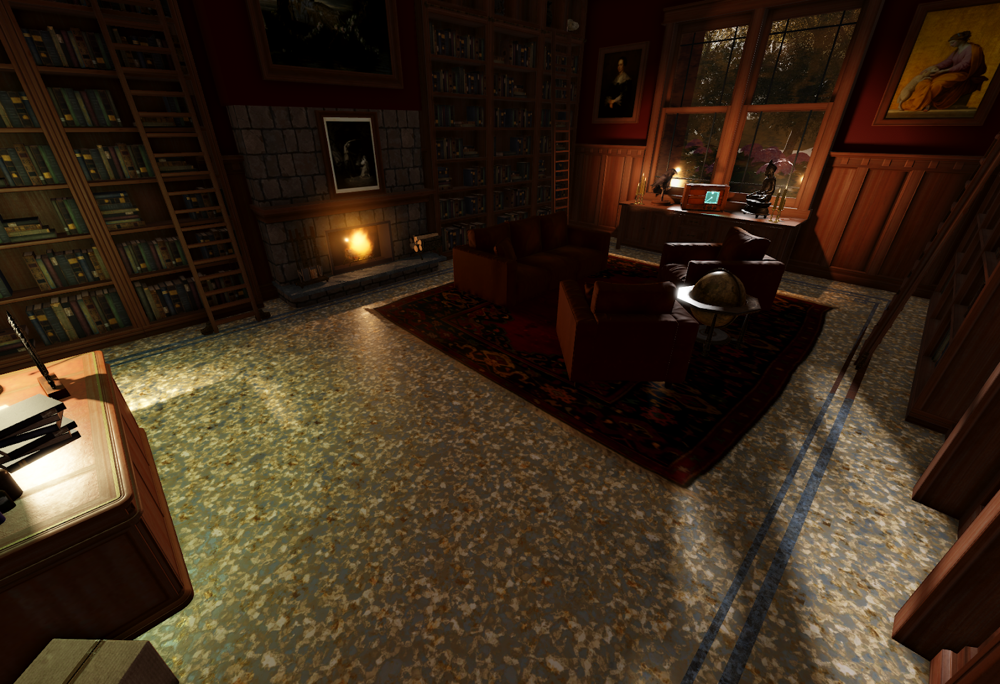
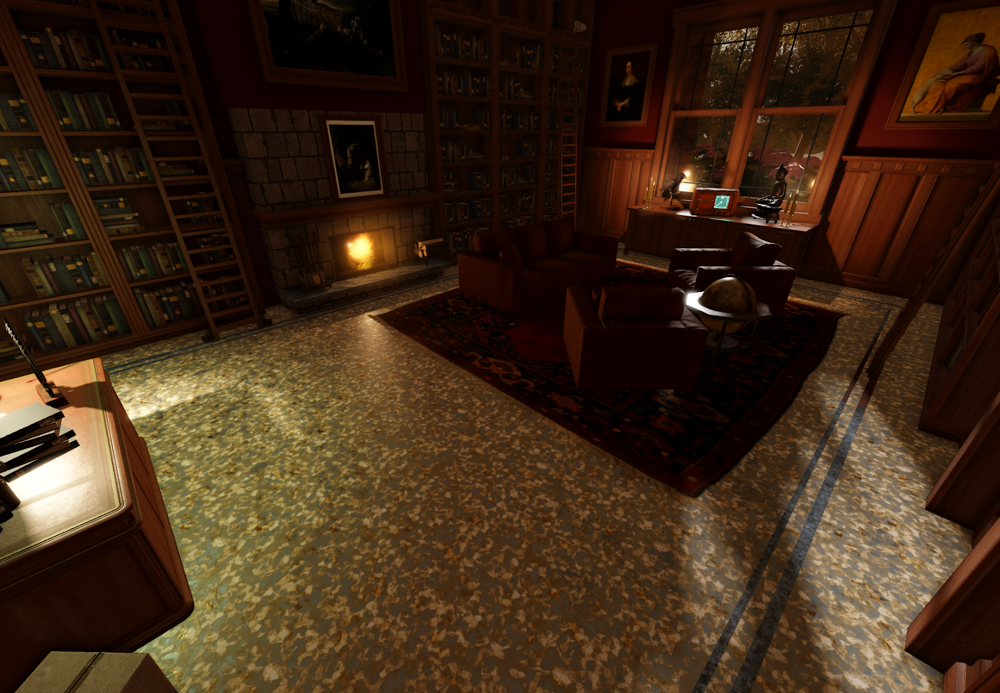
To recreate the color of ambient lighting in the sample Lighting Indoors - Complete place file:
In the Explorer window, select Lighting.
In the Properties window, set Ambient to 83, 70, 57. The ambient lighting changes to a more warm and dark orange hue.

Choose a complementary skybox
The Lighting service has a child Sky object with six individual properties that together create the skybox that makes up an experience's sky. Skyboxes can have a major impact on the look and feel of what's in your environment, so it's important to carefully consider how you can choose a skybox that enhances your experience's visual quality, especially as it influences the overall atmosphere that seeps into indoor spaces.
Because the Lighting Indoors - Complete sample requires a warm atmosphere, it uses a skybox that mostly prioritizes warm hues near the skyline, such as bright yellows, vibrant oranges, and some light greens. For information on how to create and customize skyboxes, see Skyboxes.
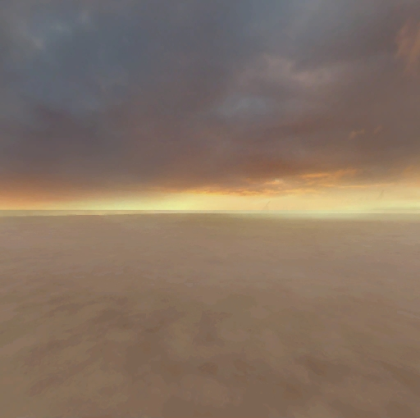

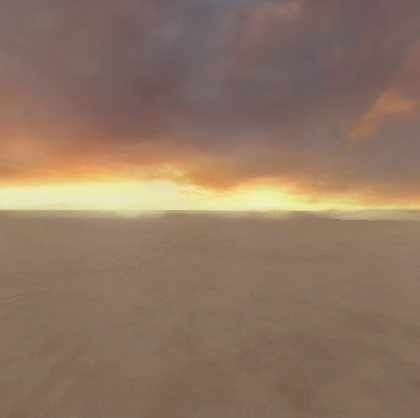
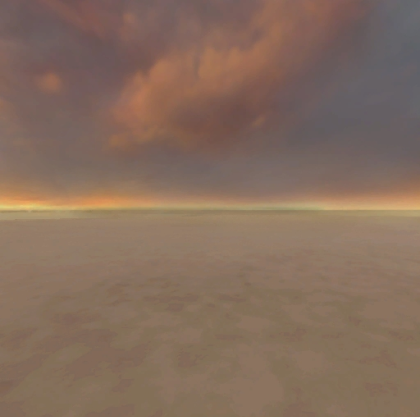
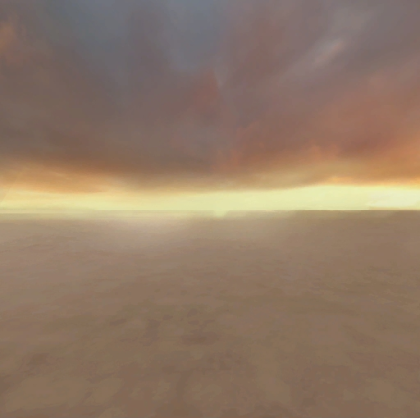
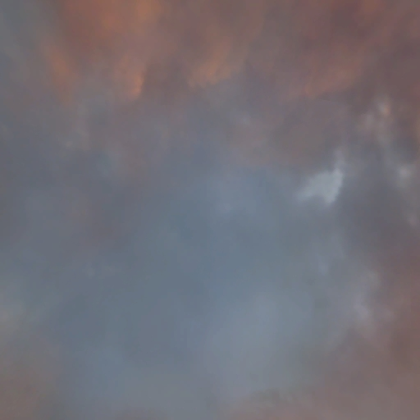
To recreate the skybox in the sample Lighting Indoors - Complete place file:
In the Explorer window, select the Lighting service's child Sky object.
In the Properties window,
- Set SkyboxBk to rbxassetid://162001887.
- Set SkyboxDn to rbxassetid://161998893.
- Set SkyboxFt to rbxassetid://162001897.
- Set SkyboxLf to rbxassetid://162001904.
- Set SkyboxRt to rbxassetid://162001919.
- Set SkyboxUp to rbxassetid://162001926.

Increase air particle density
The Lighting service has a child Atmosphere object with properties that allow you to simulate realistic environments by scattering sunlight in unique ways. While some of these properties are more evident in outdoor environments, such as those that impact the silhouette and blending of distant objects near the skyline, others influence the density and color of the air particles present throughout the 3D space, regardless of whether they are indoors or outdoors.
For example, the Atmosphere.Density property controls how many particles exist in the air of your experience. When you increase this property, the additional amount of particles create a sense of thickness and weight in the 3D space that's tangible to players exploring your world. This is helpful for adding texture and indirect lighting to an environment without distinct local lighting objects.
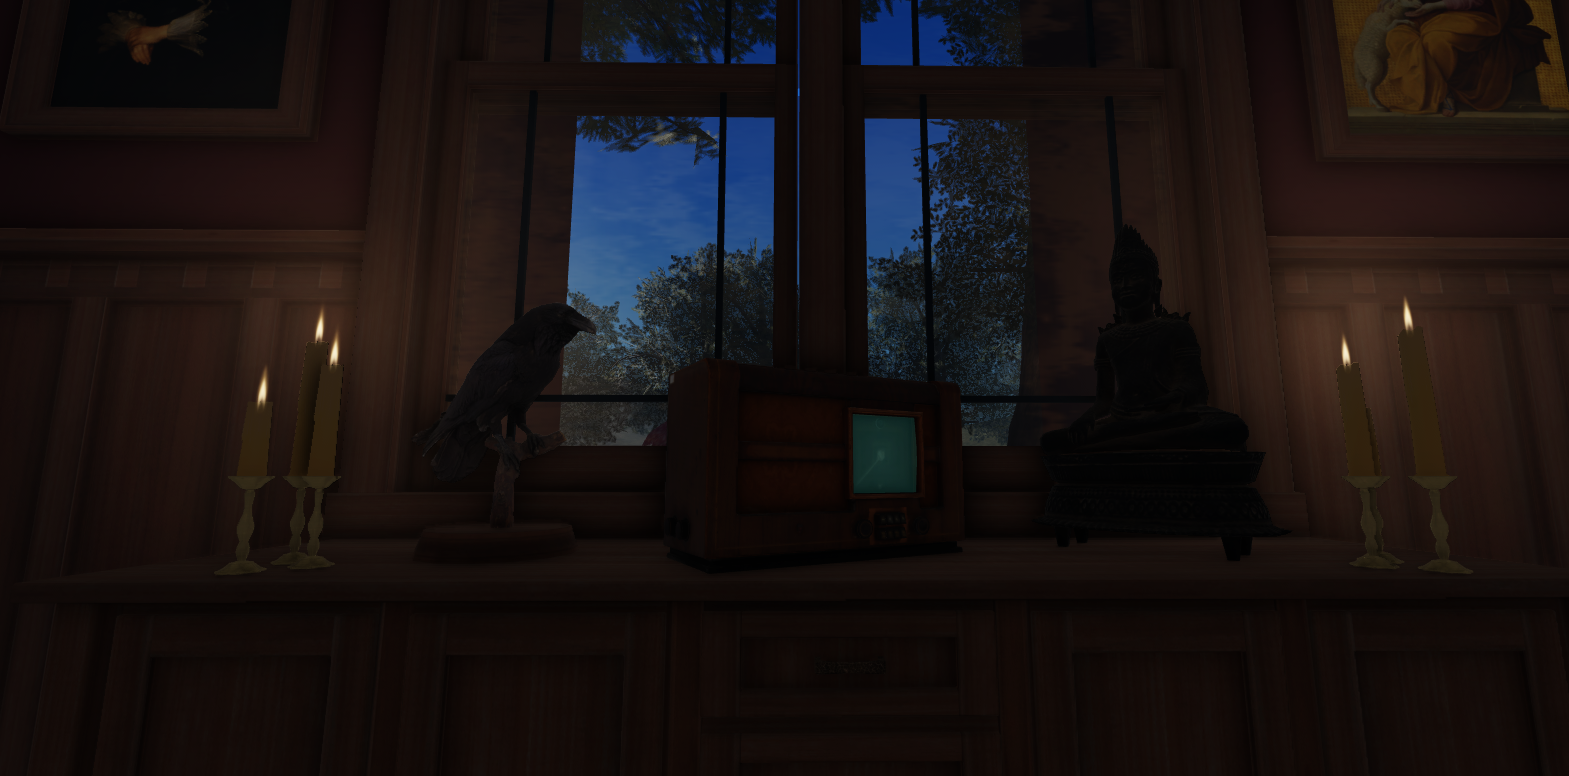
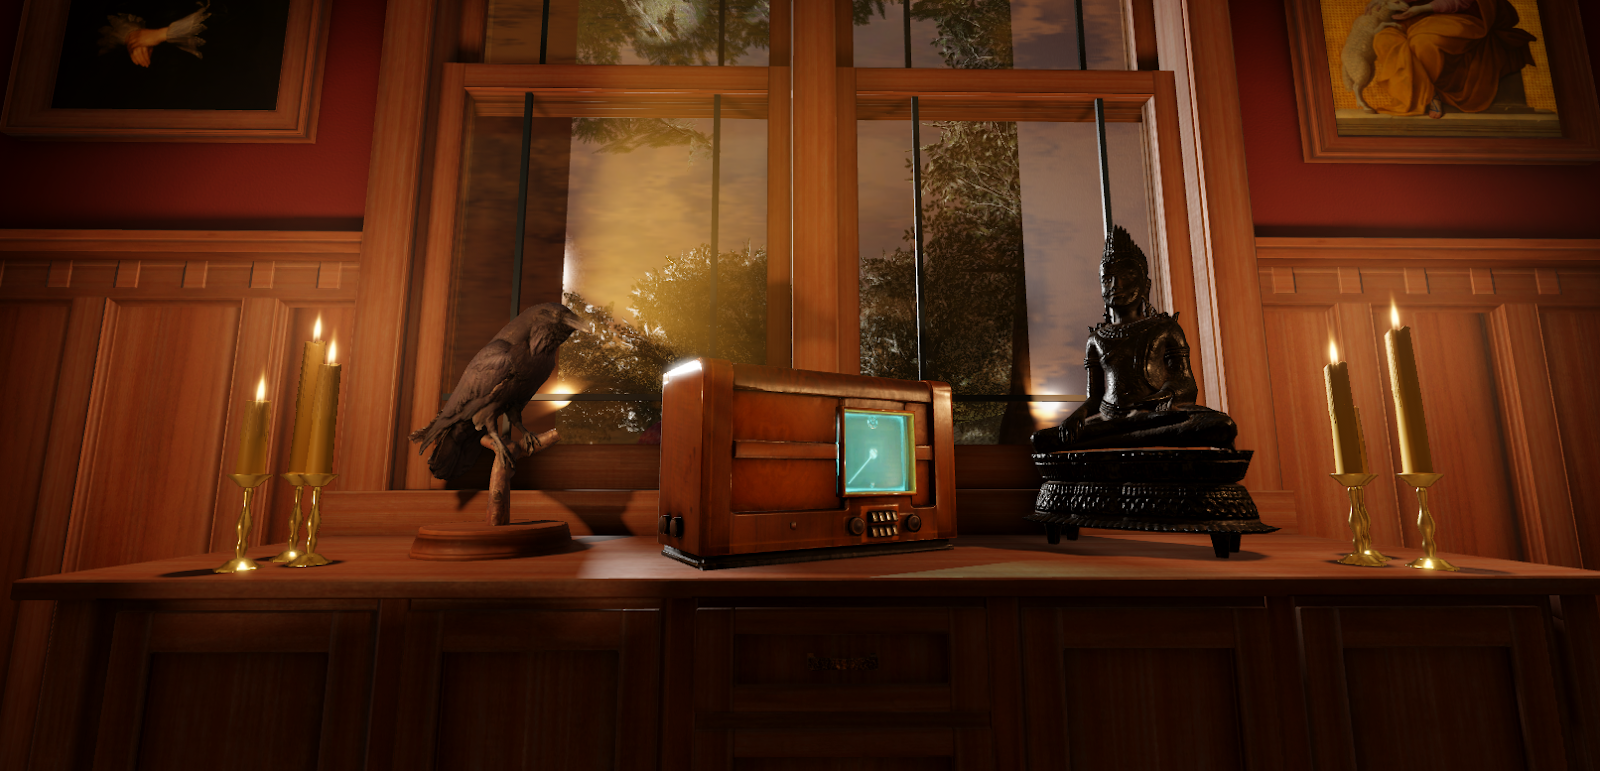
To illustrate this technique, review the following two images of the Lighting Indoors - Complete cabin with different air particle densities. When Atmosphere.Density is set to 0, the cabin is cold and dark despite having local light sources, but when Atmosphere.Density is set to 0.5, the cabin is warm and hazy. This effect is particularly impactful because the Atmosphere object adds a warm orange hue to air particles based on the colors of its skybox.
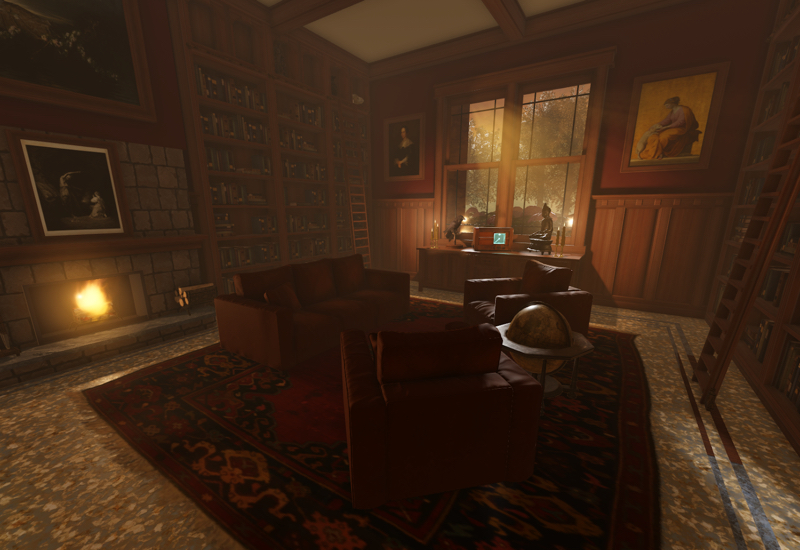
To recreate the density of the atmosphere's air particles in the sample Lighting Indoors - Complete place file:
In the Explorer window, select the Lighting service's child Atmosphere object.
In the Properties window, set Density to 0.5. The air becomes hazy.

Configure local lighting
Local lighting is the luminescence from local light sources in your experience, such as PointLight, SpotLight, and SurfaceLight objects. After you configure your global lighting to meet the general lighting and atmosphere requirements of the experience, it's important to utilize these local light sources to meet the specific lighting needs of anything in the scene that you want to illuminate within the 3D space.
The following sections demonstrate how to create each type of local light source and adjust a couple of its default properties to significantly alter how the local lighting compliments your global lighting and interacts with the overall environment.
Light the candles
The first objects in the scene that need to illuminate the space are the groupings of candles on the dresser near the window. Their default configuration in the Lighting Indoors - Start sample includes the following ParticleEmitter objects to add gentle movement to their flames:
- CandleFire - Produces light tapered particles to emulate the candle's flame.
- CandleSmoke - Produces dark tapered particles to emulate the cande's smoke.
- CandleFillLight - Produces circular particles to emulate the candle's soft glow.
While this is an excellent start, the candles still don't produce realistic lighting behavior that fully illuminates the nearby area or bounces off surrounding objects. To solve this lighting need, the Lighting Indoors - Complete sample introduces a PointLight object in the middle of the candle grouping.
PointLight objects emit light spherically from a single point in every direction, similar to a small sun. This lighting behavior makes them useful for objects that produce omnidirectional light, such as uncovered light bulbs, torches, and candlelight. To illustrate, review the following two images of how the scene changes with and without a point light. The scene without a point light produces a soft lighting that only illuminates the candle itself, but the scene with a point light produces stronger lighting that illuminates the candle, nearby walls, and the statue's subtle details.
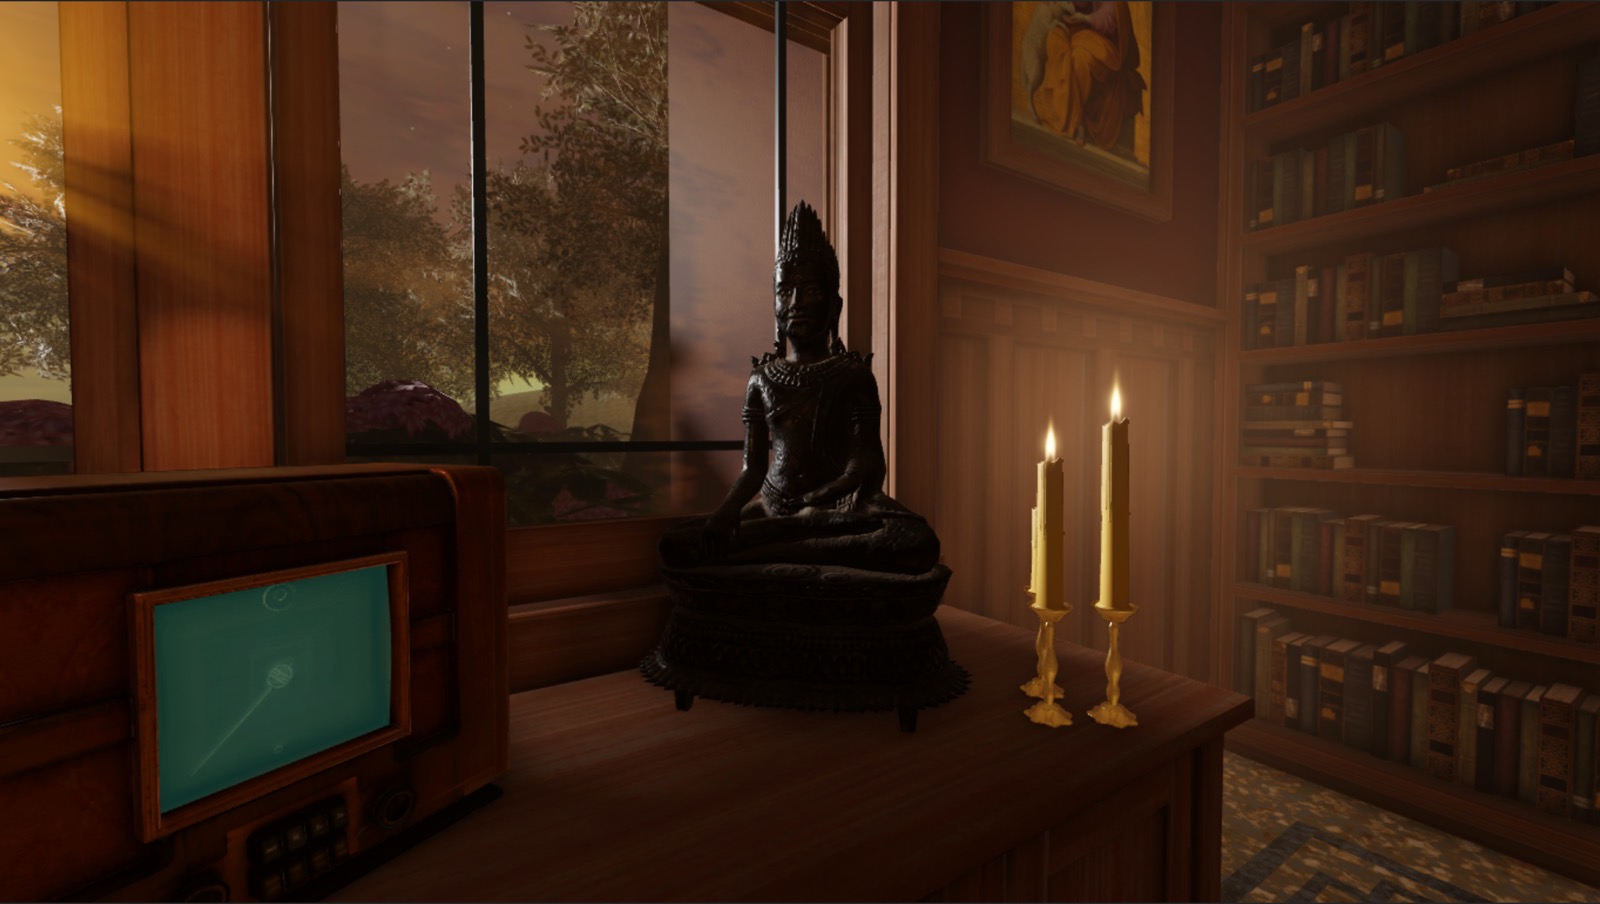
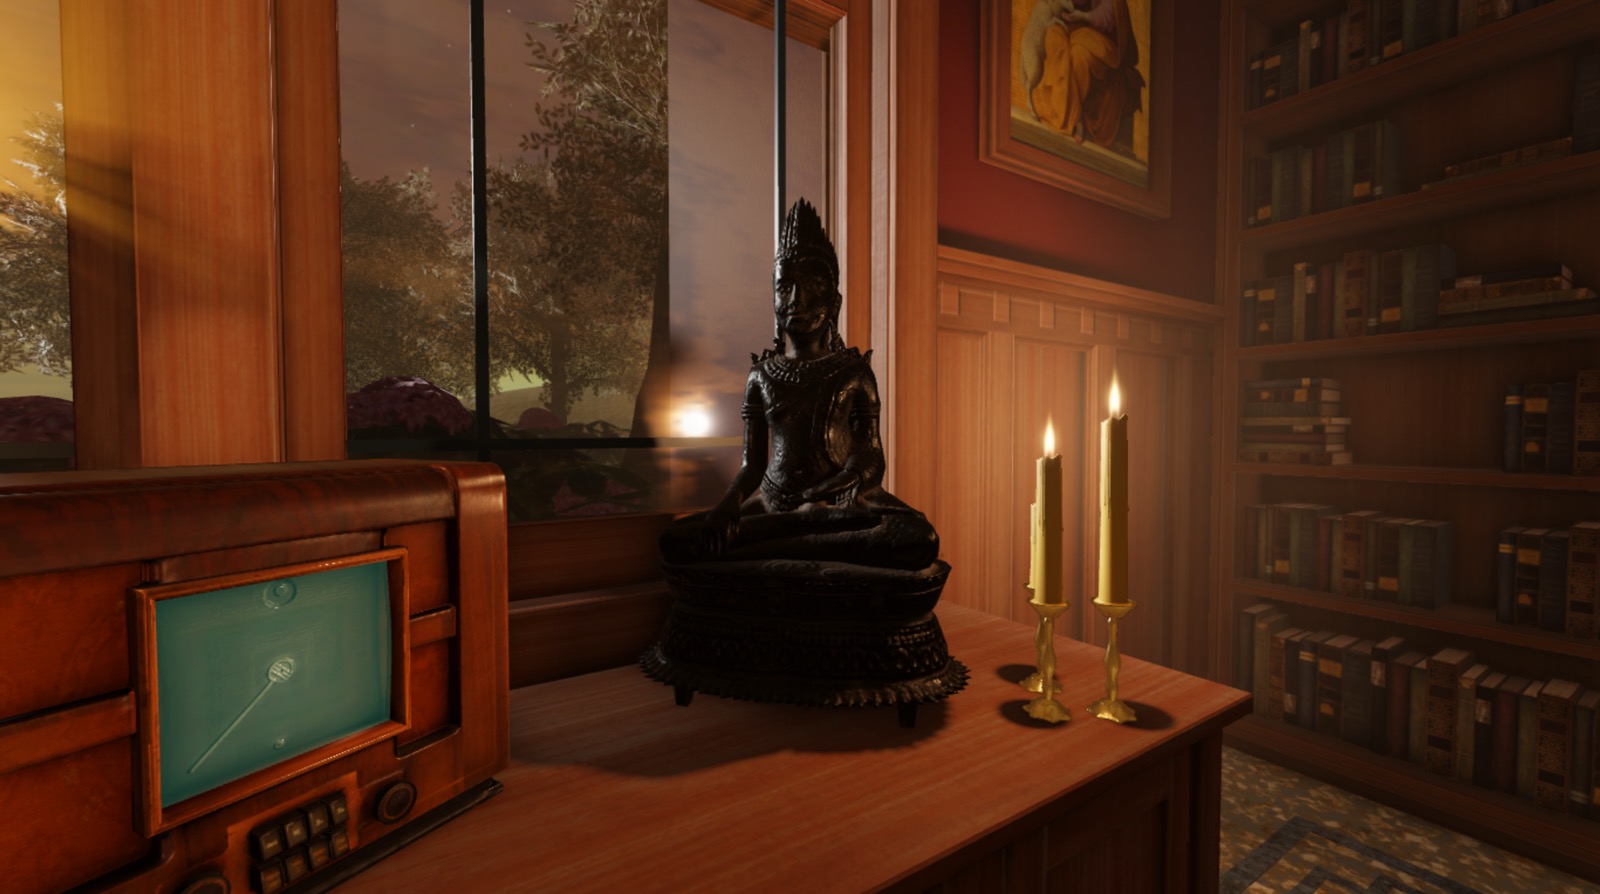
Point lights can be more performance intensive on low-end devices than other local light sources because point lights project in every direction. To optimize your experience, consider how many point lights are necessary without compromising your ideal lighting behavior. For example, the sample places only a single point light within the middle of the candle because each candle flame is small enough that individual point lights don't notably enhance the visuals within the gameplay area.
To recreate candle local lighting in the sample Lighting Indoors - Complete place file:
Insert a point light into one of the candle groupings.
- In the Explorer window, expand the Candle_Group_A model.
- Hover over the FillLight part, then click the ⊕ icon. A contextual menu displays.
- From the contextual menu, insert a PointLight.
Select the new point light, then in the Properties window,
- Set Brightness to 0.7 to reduce the intensity of the light to be more compatible for candlelight.
- Set Color to 255, 202, 156 to tint the light to a peach hue and replicate the warmth of the candle source.
- Enable Shadows to allow the candlelight to produce shadows.
Repeat this process for Candle_Group_B.
(Optional) Using the same technique from the previous steps, add a point light with your own configuration to illuminate the fire burning in the fireplace.
Turn on the desk lamp
The second object in the scene that needs to illuminate the space is the desk lamp near the back corner of the cabin. When you're deciding which local light object you want to use, it's important to review how the type and shape of the light source affects how it shines light in the real world. For example, because the Lighting Indoors - Start sample's desk lamp includes a white light bulb under a curved, dark green hood, the lamp must produce two different types of light:
- Bright white light that illuminates only in the direction of the desk.
- Subtle green light that leaks through the dark green hood in all other directions aside from the bright white light.
To solve the first lighting need, the Lighting Indoors - Complete sample introduces a SpotLight into the desk lamp to shine outward from where it's uncovered from the lamp's hood. SpotLight objects emit light in a single direction in the shape of a cone with a spherical base, and they include a Face property that determines which face/axis light emits from. This makes their lighting behavior useful for objects that produce directional light, such as street lamps, flashlights, and headlights.
To solve the second lighting need, the sample uses a PointLight that produces a soft green light that illuminates the entire corner of the cabin without being significantly noticeable within the bright white light. To illustrate, review the following two images of how the scene changes with and without an additional point light. Both scenes include comparable bright white light, but the scene with the point light creates realistic lighting behavior that bounces off the nearby statue and bookcases to make the cabin's corner visible and a point of interest.
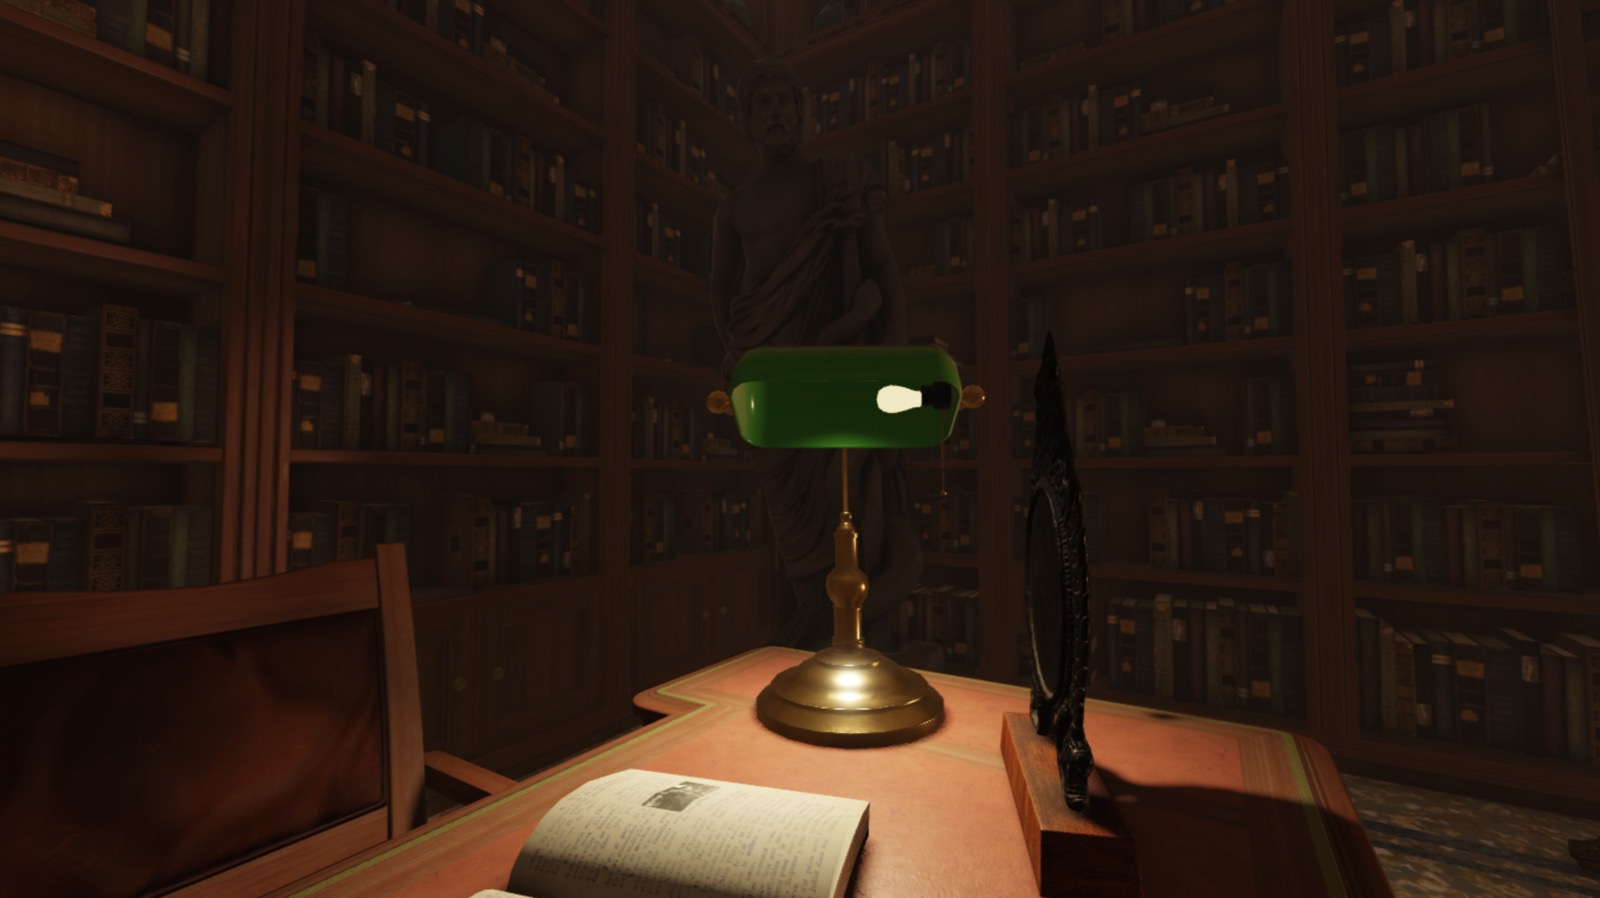
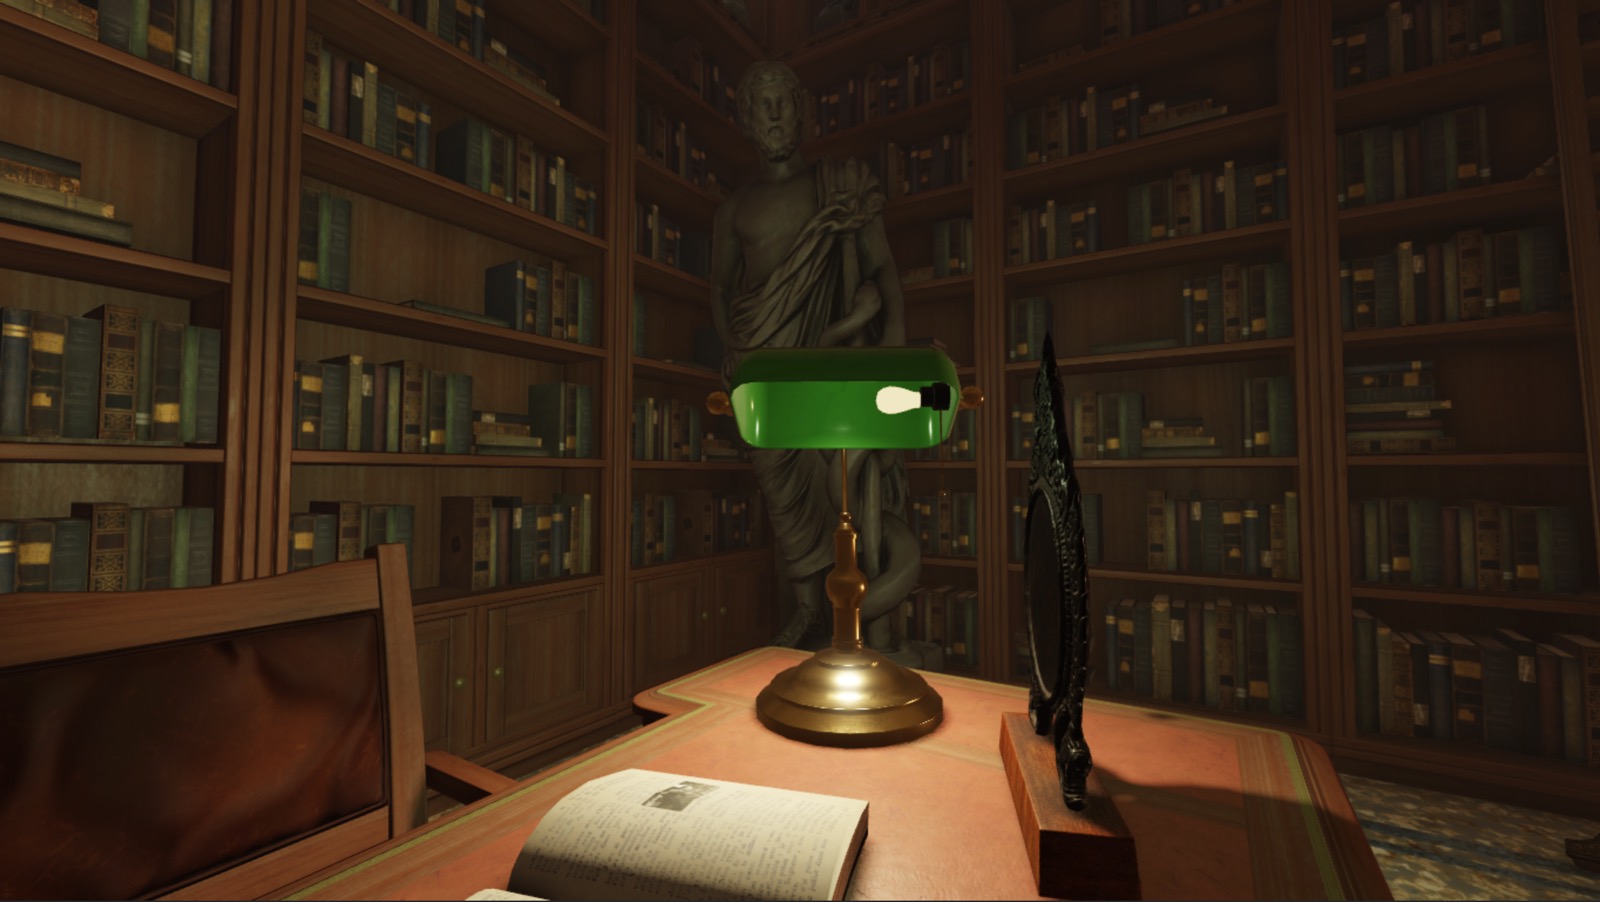
To recreate the lamp local lighting in the sample Lighting Indoors - Complete place file:
Insert a spotlight into one of the candle groupings.
- In the Explorer window, expand the Bankers_Lamp model, then the Lamp_Hood mesh.
- Hover over the Lightbulb mesh, then click the ⊕ icon. A contextual menu displays.
- From the contextual menu, insert a SpotLight.

Select the new spotlight, then in the Properties window,
- Set Face to Bottom to shine the spotlight toward the desk.
- Set Angle to 140 to project the light in a hemisphere shape rather than a cone shape.
- Set Brightness to 4 to increase the intensity of the light.
- Set Color to 255, 238, 202 to tint the light to a light tan hue and replicate the subtle warmth of the lamp source.
- Set Range to 12 to decrease the size of the area that the spotlight illuminates so that it touches the floor.
- Enable Shadows to let the lamp light to produce shadows and a dramatic effect.

Insert a point light that mimics the indirect green lighting from the lamp's hood.
- In the Explorer window, hover over the FillLight part, then click the ⊕ icon. A contextual menu displays.
- From the contextual menu, insert a PointLight.

Select the new point light, then in the Properties window,
- Set Range to 12 to increase the size of the area that the point light illuminates so that it can illuminate the walls behind the desk.
- Set Color to 142, 157, 125 to tint the light to a light moss green hue and indirectly reduce its brightness.

Illuminate the radio screen
The final object in the scene that needs to illuminate the space is the classic radio in the middle of the statues on the dresser. Similar to the previous section, when deciding which local light object you want to use, it's important to review how the type and shape of the light source doesn't emit light in the real world. For example, neither of the previous local light objects work for this radio because its screen wouldn't emit light in every direction like a PointLight object, nor from a single point in one direction like a SpotLight.
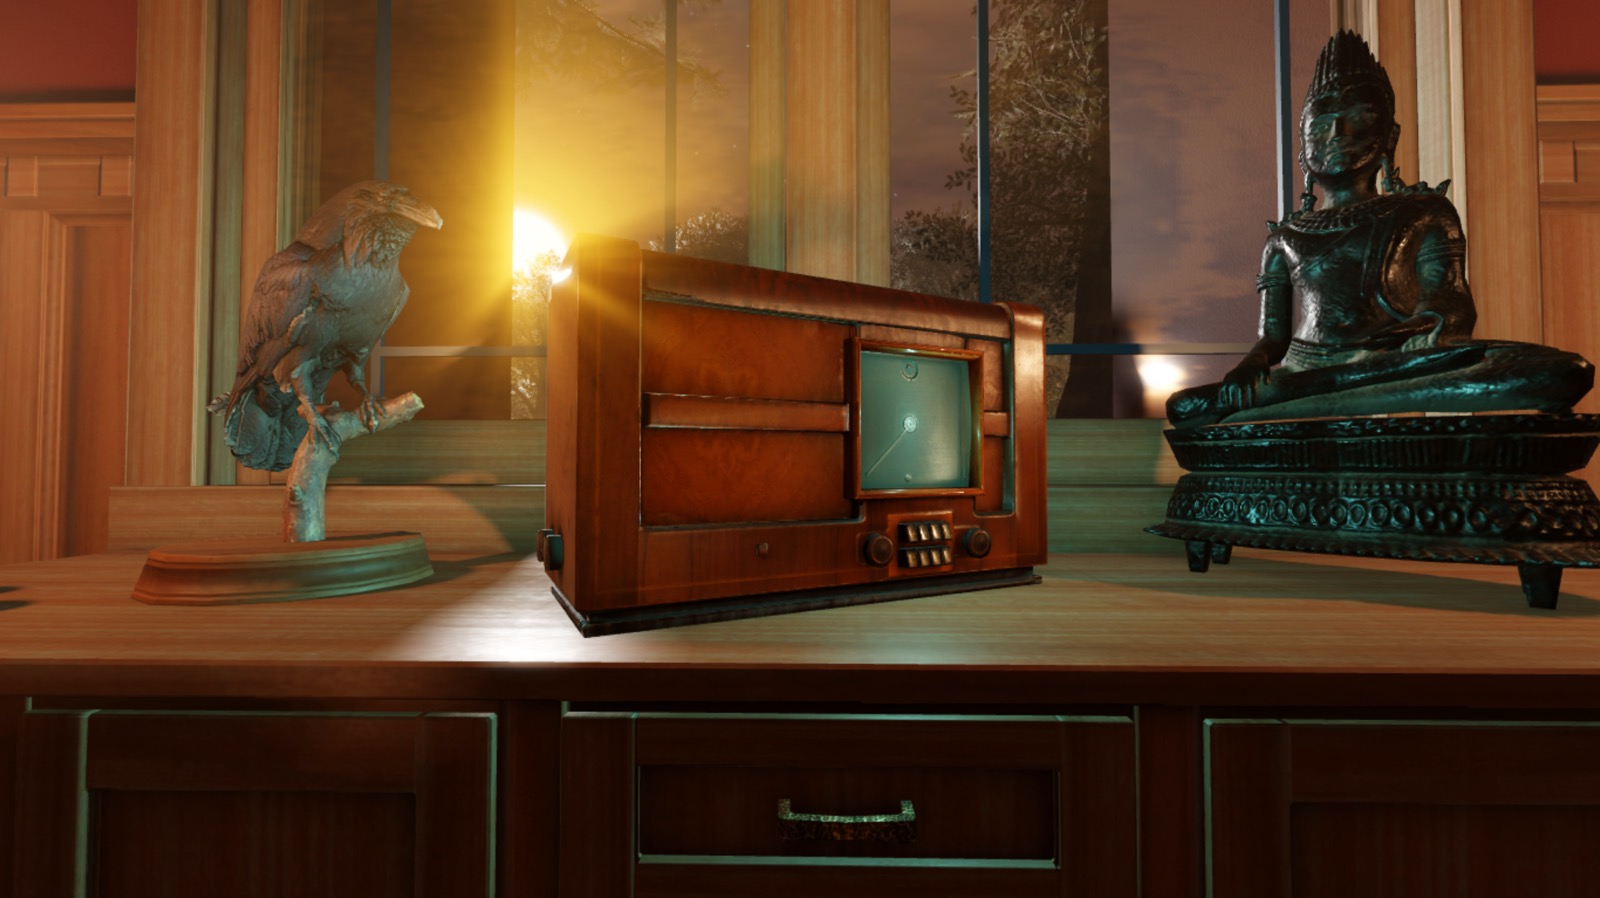
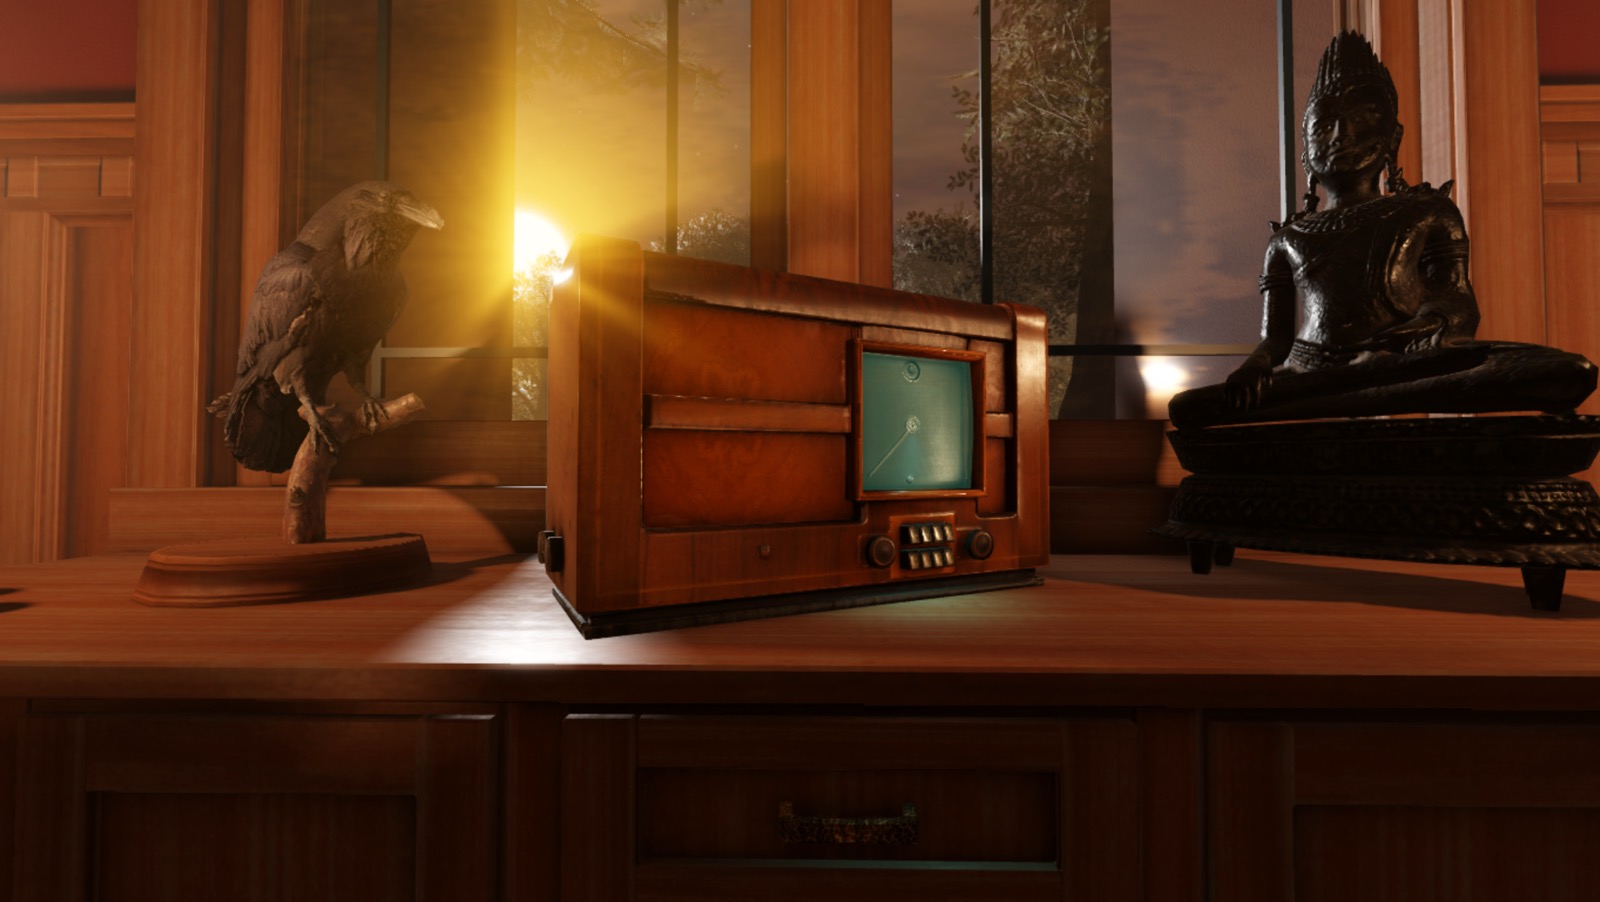
Instead, to solve this lighting, the Lighting Indoors - Complete sample introduces a SurfaceLight object into the radio to shine outward from the entire surface of its screen. SurfaceLight objects emit light from a Attachment or a face of a BasePart, and they include a Face property that determines which face/axis light emits from. This makes their lighting behavior useful for objects that produce directional light from a near flat surface, such as TV or computer screens, billboards, and fluorescent panels.
It's important to note that despite both surface lights and spotlights using a Face property to determine which cubical surface to emit light, surface lights are distinct from spotlights because their light emission changes according to the surface size of their parent object. To demonstrate, review the following images to see how the surface light changes how it emits light relative to the size of its parent block part.
To recreate the radio surface light in the sample Lighting Indoors - Complete place file:
Insert a surface light into the screen of the radio.
- In the Explorer window, expand the Radio_Noise model, then its child Radio model.
- Hover over the Radio_Backglow mesh, then click the ⊕ icon. A contextual menu displays.
- From the contextual menu, insert a SurfaceLight.

Select the new surface light, then in the Properties window,
- Set Face to Left to shine the light away from the clock;s surface
- Set Brightness to 2 to slightly increase the intensity of the light.
- Set Color to 146, 255, 251 to tint the light to a teal blue hue.
- Set Range to 4 to decrease the size of the area that the surface light illuminates so that it only touches the desk.

Balance light sources
Lighting an environment is a balance between your light sources and the camera's perception of their lighting. Even if your light sources have appropriate settings for how they'd illuminate the space in the real world, you may have to adjust and rebalance how the camera perceives that lighting in order to achieve your ideal lighting behavior.
For example, the scene in its current state has an intentionally warm glow throughout the cabin, but its colors and shadows appear both dull and desaturated. To solve this problem, the Lighting Indoors - Complete sample adjusts its global lighting to increase its richness in the player's camera without losing details or contrast between light and dark hues throughout the 3D space.
Adjust light exposure
Similar to customizing how long a real-life camera's lens stays open for a picture, the Lighting service's ExposureCompensation property allows you to adjust how much light reaches the camera. Using this property is unique from adjusting the Brightness property because ExposureCompensation applies a bias toward increasing the effect of brighter parts of the environment.
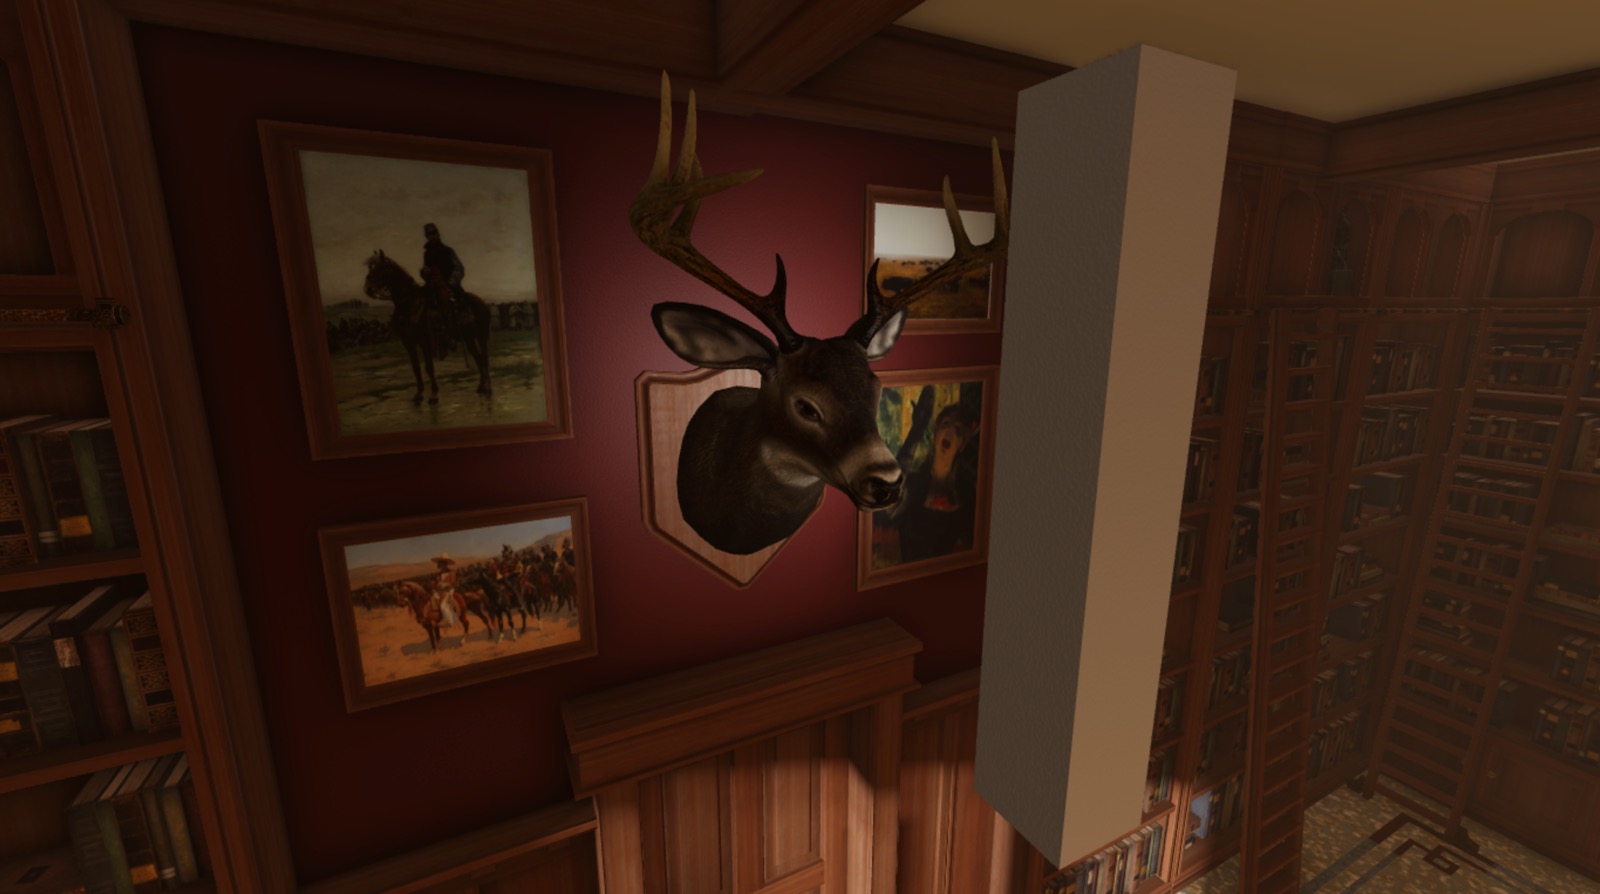
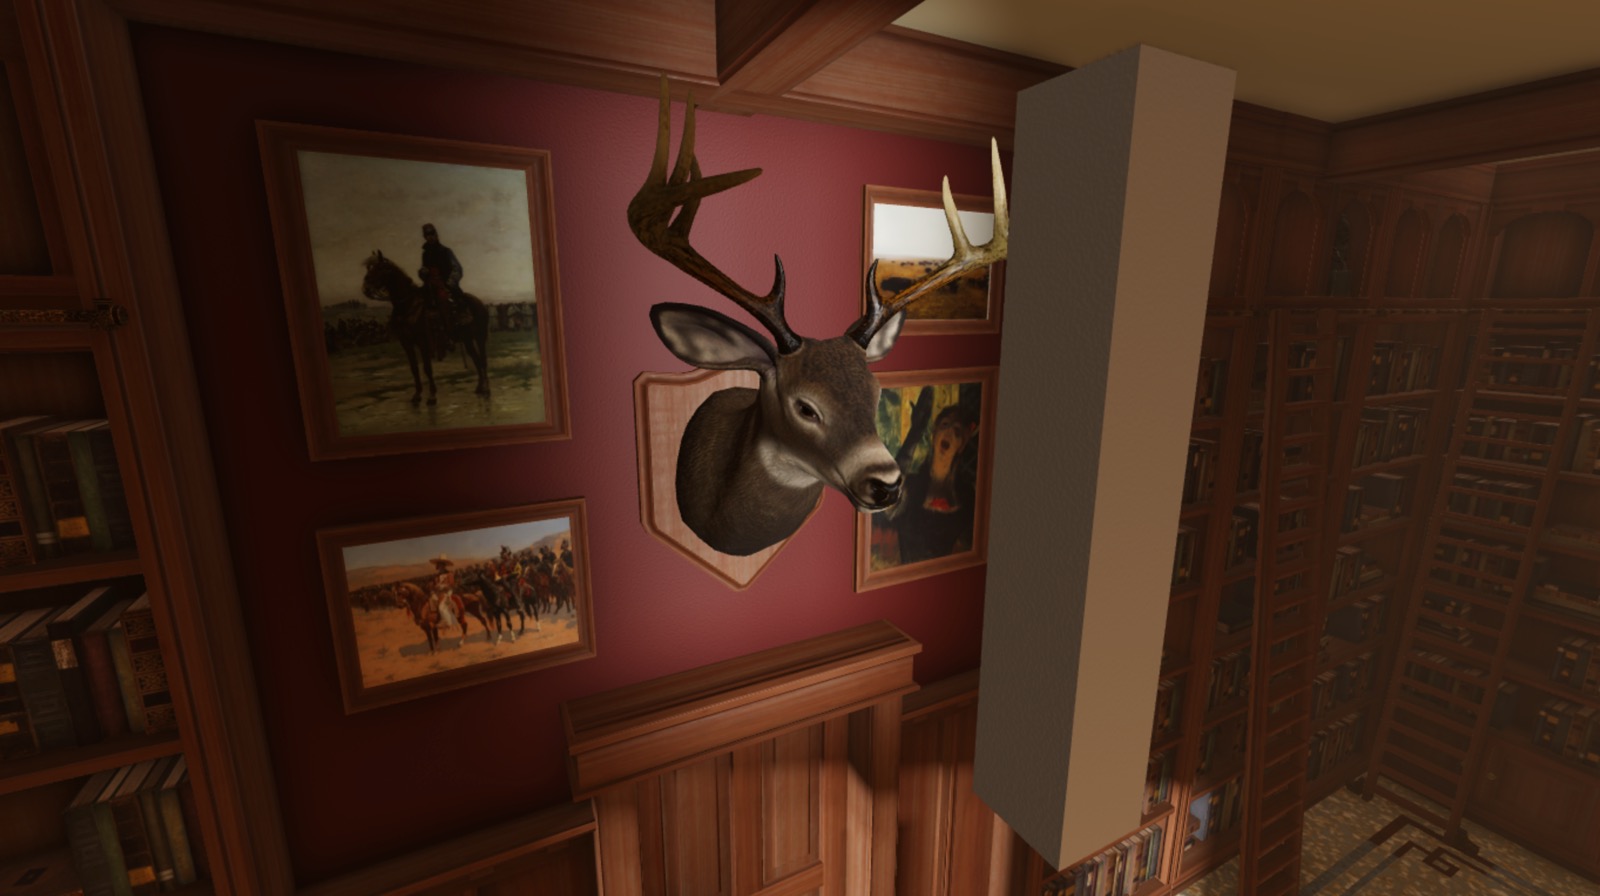
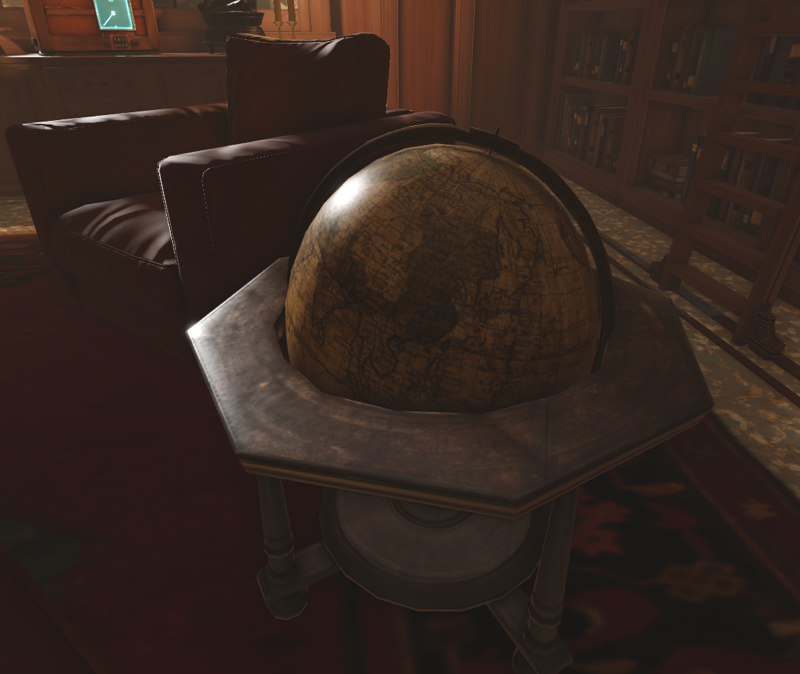
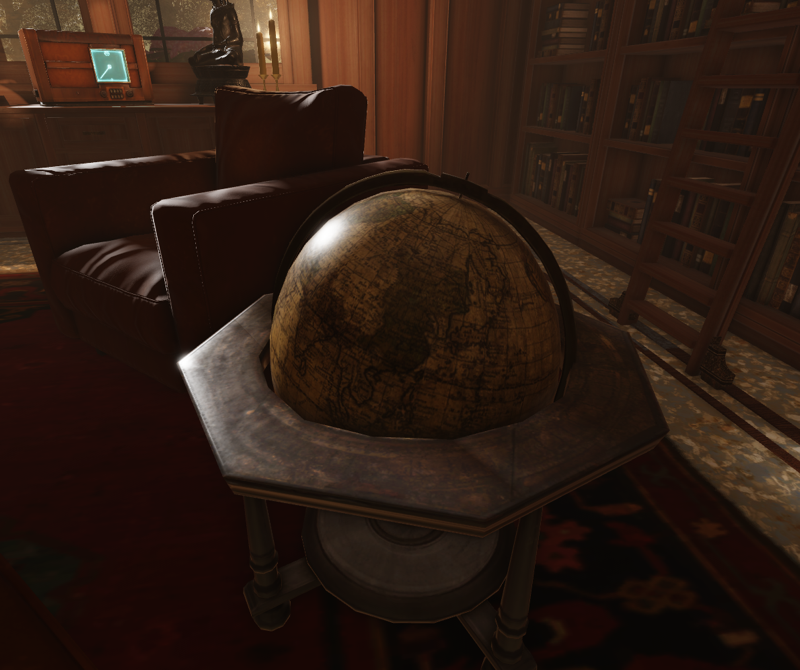
For example, examine the following images to see how the lighting changes depending on if you brighten the cabin by either increasing your global lighting's Brightness or ExposureCompensation property. The cabin with a higher Brightness property increases all brightness of the space, including brightness within the shadows, which leads to an unintentional murkiness in the cabin. Conversely, the cabin with a higher ExposureCompensation property doesn't increase the brightness of light and shadows equally, allowing the space to appear brighter without completely washing out its darker colors.
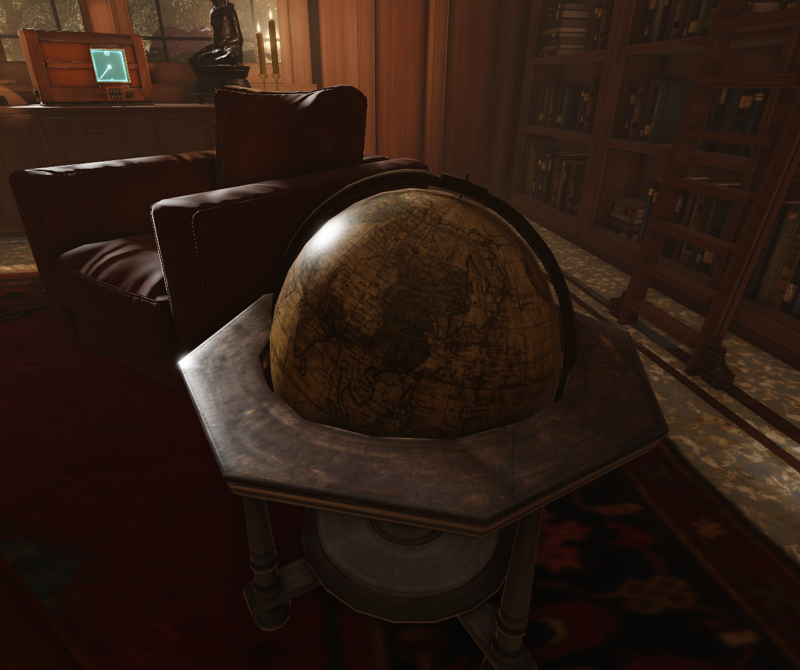
To recreate the exposure levels in the sample Lighting Indoors - Complete place file:
In the Explorer window, select Lighting.
In the Properties window, set ExposureCompensation to 0.5 to apply extra exposure to the scene.

Adjust color contrast
Similar to applying a filter over a camera, you can add a ColorCorrectionEffect post-processing object to the Lighting service to adjust how the camera perceives color. This is useful when you want to make color adjustments that impact the entire environment instead of just a single object or gameplay area.
The Lighting Indoors - Complete sample uses ColorCorrectionEffect to increase the vibrancy and contrast between all dark and light colors. This is useful for creating a warm, saturated space that's inviting to players.
To recreate how the camera perceives color in the sample Lighting Indoors - Complete place file:
In the Explorer window, hover over the Lighting service, then click the ⊕ icon. A contextual menu displays.
From the contextual menu, insert a ColorCorrectionEffect.
Select the new post-processing effect, then in the Properties window,
- Set Contrast to 0.05 to increase the contrast between dark and light colors.
- Set Saturation to 0.1 to make all colors more vivid.


