แดชบอร์ด ประสิทธิภาพ ให้ข้อมูลเมตริกของไคลเอนต์และเซิร์ฟเวอร์ล่าสุดสำหรับประสบการณ์ของคุณตรวจสอบหน้านี้ก่อนและหลังการอัปเดตประสบการณ์ของคุณเพื่อระบุปัญหาประสิทธิภาพเบื้องต้น
เข้าถึงแดชบอร์ด
เพื่อเข้าถึงหน้าประสิทธิภาพ คุณต้องเป็นเจ้าของประสบการณ์หรือมีสิทธิ์กลุ่มวิเคราะห์
- นําทางไปที่หน้า สิ่งประดิษฐ์ บน Creator Hub 2. ภายใต้การโต้ตอบแบบเลื่อนลงของ ส่วนสร้างสรรค์ เลือกบัญชีหรือกลุ่มที่เป็นเจ้าของประสบการณ์
- เลือกประสบการณ์
- ในการดรอปดาวน์ การตรวจสอบ เลือก ประสิทธิภาพ
ใช้แดชบอร์ด
แดชบอร์ดเริ่มต้นด้วยจํานวนผู้ใช้ปัจจุบันจํานวนเซิร์ฟเวอร์ที่พวกเขากระจายไปทั่ว และการแบ่งอุปกรณ์เพื่อให้แดชบอร์ดแสดงเชิงมุมของไคลเอนต์และเซิร์ฟเวอร์ แผนภาพ เช่นในภาพด้านล่าง ประสบการณ์ของคุณจะต้องมีผู้ใช้ที่ใช้งานประจำวันอย่างน้อย 100 คน (DAU)
แดชบอร์ดมีสองแท็บ ไคลเอนต์ และ เซิร์ฟเวอร์ รวมถึงเมนูเพื่อปรับช่วงเวลาและช่วงเวลาคุณยังสามารถใช้เมนู สถานที่ เพื่อตรวจสอบสถานที่แต่ละแห่งแทนที่จะเป็นประสบการณ์ทั้งหมด
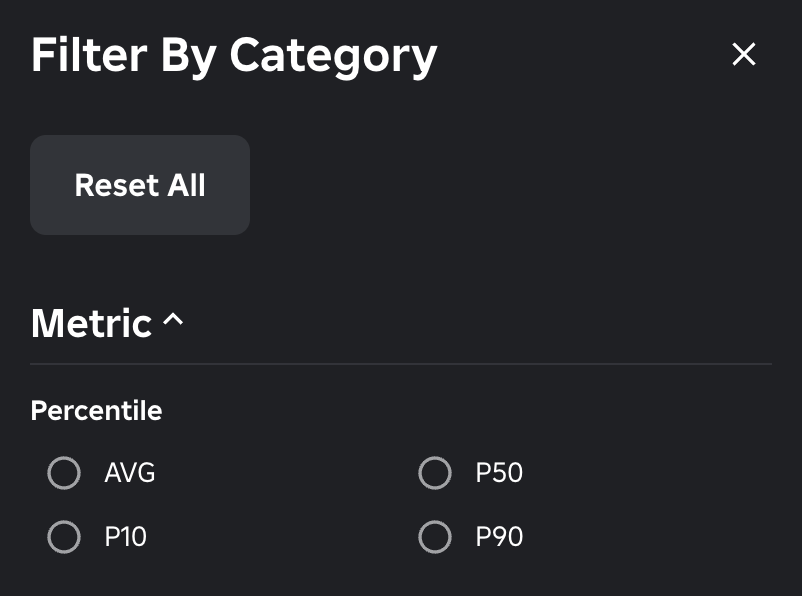
เมนู กรองโดย ช่วยให้คุณสลับระหว่างค่าเฉลี่ยหรือค่าเปอร์เซ็นต์

เมื่อตรวจสอบแผนภูมิหรือการกรอง:
- P90 หมายถึงจํานวนค่าที่ตกอยู่ภายในร้อยละ 90หากการเต้นของหัวใจของเซิร์ฟเวอร์ P90 คือ 59 เซิร์ฟเวอร์ 90% จะทำงานที่หรือต่ำกว่า 59 ยิงมุมมองบุคคลที่หนึ่ง
- เช่นเดียวกับ P10 หมายถึง 10th percentile หากหัวใจเซิร์ฟเวอร์ของ P10 คือ 40 แล้ว 10% ของเซิร์ฟเวอร์กำลังทำงานที่หรือต่ำกว่า 40 ยิงมุมมองบุคคลที่หนึ่ง
- P50 คือค่าเฉลี่ย ครึ่งหนึ่งของค่าทั้งหมดตกอยู่เหนือมัน ครึ่งหนึ่งตกอยู่ด้านล่าง
แผนภูมิลูกค้า
แท็บ ลูกค้า รวมถึงแผนภูมิต่อไปนี้ซึ่งทั้งหมดถูกแยกตามแพลตฟอร์มหรือระบบปฏิบัติการ:
| แผนภาพ | คําอธิบาย |
|---|---|
| ผู้ใช้พร้อมกัน | แผนภาพเส้นแสดงจำนวนผู้ใช้ในประสบการณ์ของคุณ |
| เวลาของเซสชัน | ระยะเวลาที่ผู้ใช้ใช้ในประสบการณ์ของคุณ |
| ให้คะแนน | เส้นแผ่นภาพแสดงกรอบลูกค้าต่อวินาทีอัตราเฟรมต่ำอย่างถาวรหรือการดรอปขนาดใหญ่อาจส่งสัญญาณปัญหาสำหรับข้อมูลเกี่ยวกับการตรวจสอบอัตราเฟรมของไคลเอนต์ดูที่ การคำนวณของไคลเอนต์ |
| ให้คะแนน | เส้นแผ่นภาพแสดงอัตราการชนการของไคลเอนต์โดยประเภทอุปกรณ์หนามในอัตราการชนกันโดยเฉพาะอย่างยิ่งหลังจากอัปเดตประสบการณ์มักจะบ่งบอกถึงปัญหา |
| การใช้หน่วยความจําของไคลเอนต์ | แผ่นภาพเส้นแสดงการใช้หน่วยความจําของไคลเอนต์โดยประเภทอุปกรณ์ การเพิ่มขึ้นอย่างต่อเนื่องอาจบ่งบอกถึงการรั่วไหลของหน่วยความจํา ดู หน่วยความจํา |
| ร้อยละการใช้หน่วยความจําของไคลเอนต์ | แผ่นภาพเส้นแสดงเปอร์เซ็นต์ของหน่วยความจำอุปกรณ์ที่ใช้งานได้ที่ไคลเอนต์กำลังใช้ตัวอย่างเช่น หากสาย Android ใกล้ถึง 100% ส่วนใหญ่ของอุปกรณ์ Android ที่ใช้งานประสบการณ์ของคุณมีความเสี่ยงที่จะหมดหน่วยความจำและพัง |
แผนภูมิเซิร์ฟเวอร์
แท็บ เซิร์ฟเวอร์ รวมถึงแผนภูมิต่อไปนี้:
| แผนภาพ | คําอธิบาย |
|---|---|
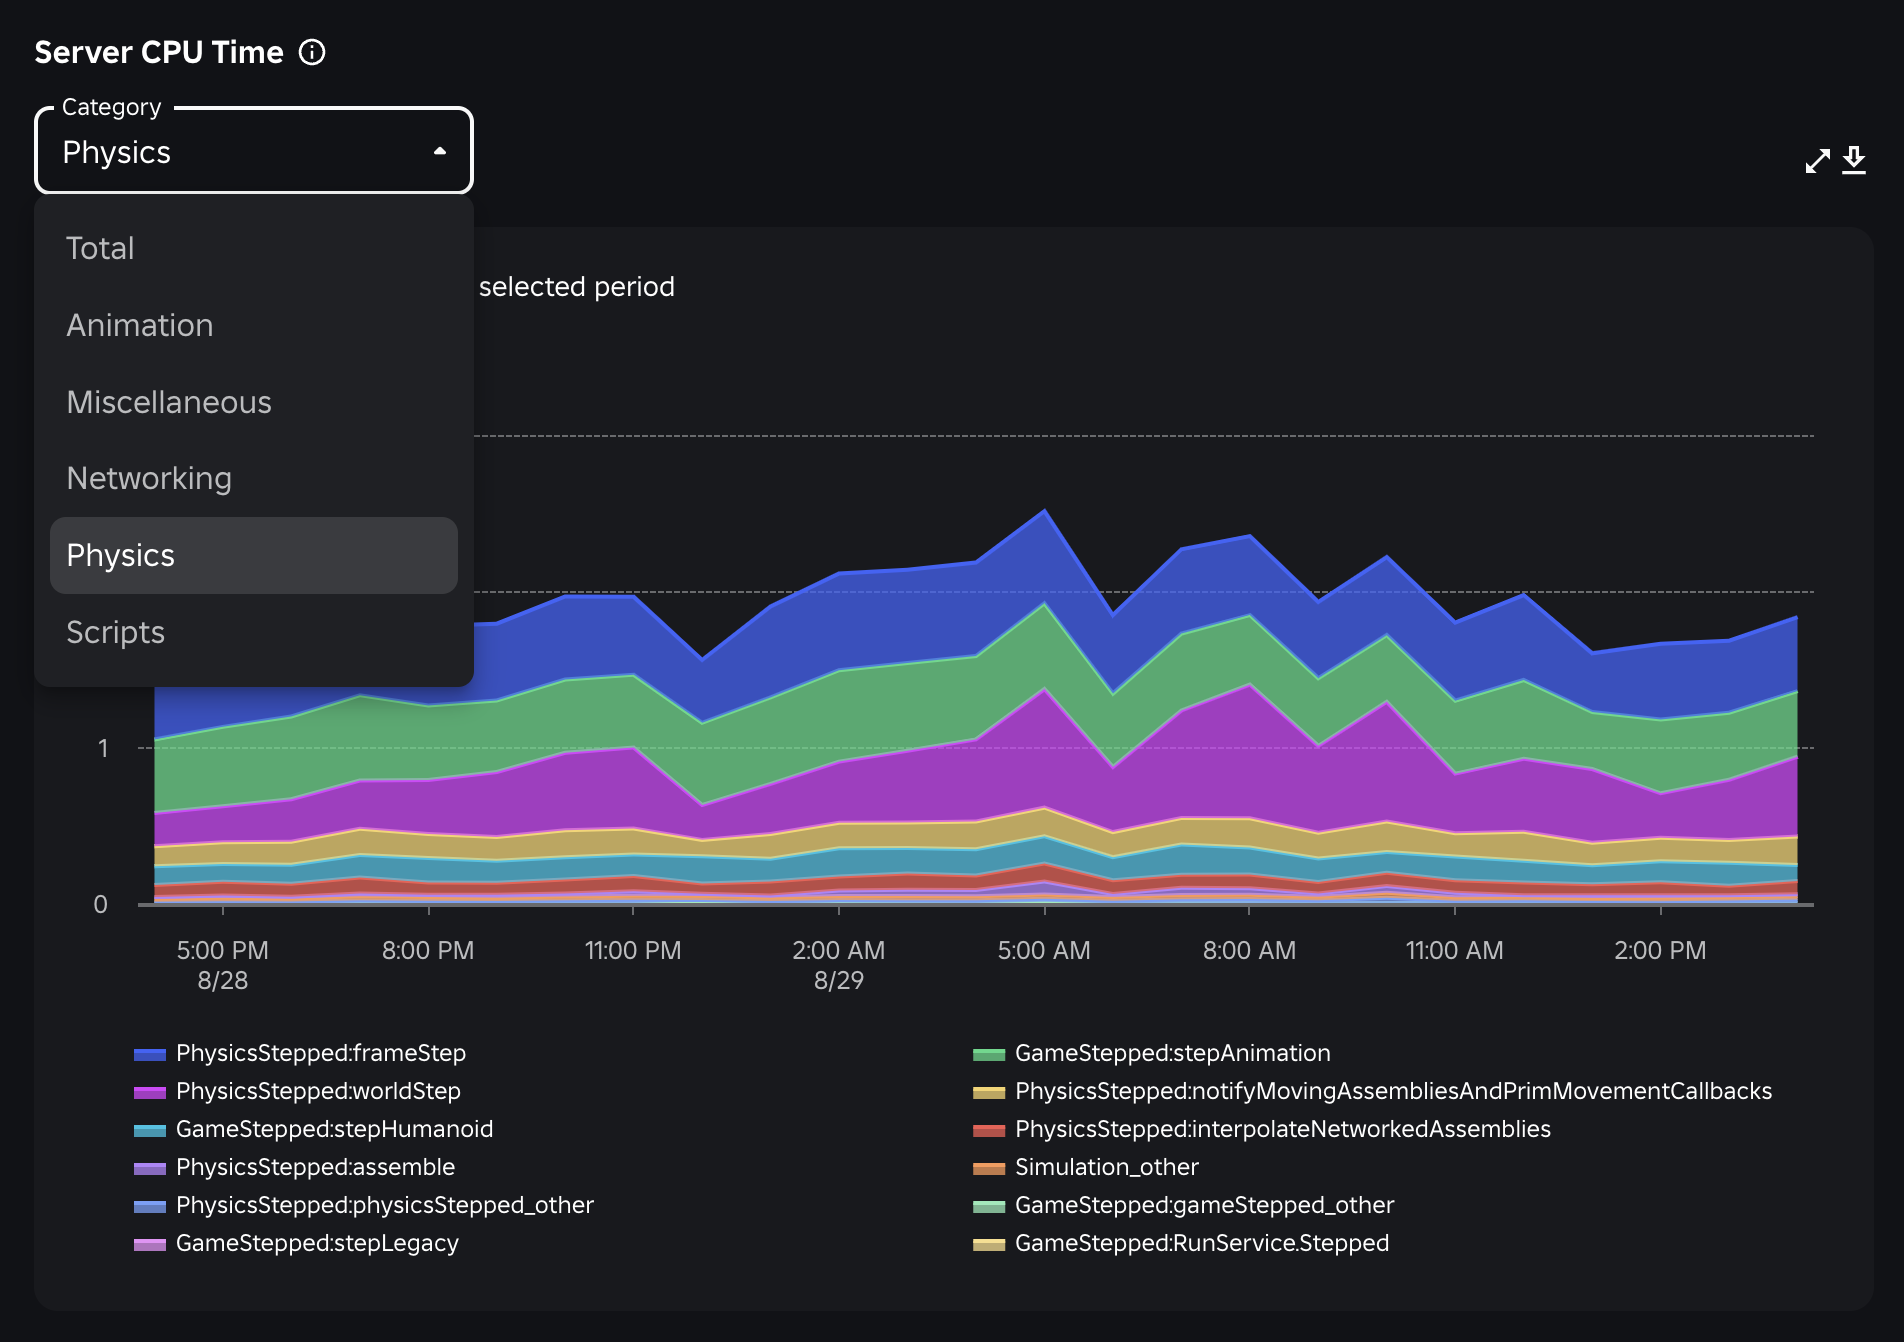
| เวลา CPU ของเซิร์ฟเวอร์ | แผนภูมิพื้นที่ซ้อนกันที่แสดงเวลาการประมวลผลเป็นนาที (ms) ต่อเฟรมค่าที่มากกว่า 16.67 มิลลิวินาเป็นที่น่ารังเกียจมาก; พวกเขาสามารถทำให้อัตราเฟรมเซิร์ฟเวอร์ลดลงต่ำกว่า 60ดู การคำนวณเซิร์ฟเวอร์ |
| ให้คะแนน | เส้นแผ่นภาพแสดงอัตราเฟรมเซิร์ฟเวอร์ใน ยิงมุมมองบุคคลที่หนึ่งค่านี้จะเป็น 60 เสมออัตราเฟรมเซิร์ฟเวอร์ถูกจำกัดที่ 60 และการดรอปสามารถลดอัตราเฟรมของไคลเอนต์และเพิ่มความล่าช้าได้ดู การคำนวณสคริปต์ |
| การใช้หน่วยความจําเซิร์ฟเวอร์ | แผนภูมิพื้นที่ซ้อนกันที่แสดงการใช้หน่วยความจำเซิร์ฟเวอร์ใน MBพยายามให้ค่านี้ต่ำกว่า 50% ของ หน่วยความจำเซิร์ฟเวอร์ทั้งหมดอย่างไรก็ตาม เครื่องมือวาดภาพไม่แสดงหน่วยความจําเซิร์ฟเวอร์ทั้งหมด ดังนั้นแนวทางที่ดีอีกอย่างหนึ่งคือการอยู่ภายใต้ 3 GBหากตัวเลขนี้ยังคงสูงหรือเพิ่มขึ้นอย่างต่อเนื่องเมื่อเวลาผ่านไป ให้ตรวจสอบวิธีการปรับปรุงการใช้หน่วยความจํา ปรับปรุงการใช้หน่วยความจํา |
| หน่วยความจําเซิร์ฟเวอร์ตามอายุ | แผนภูมิพื้นที่ซ้อนกันที่แสดงการใช้หน่วยความจำของเซิร์ฟเวอร์โดยอายุของเซิร์ฟเวอร์หากการใช้หน่วยความจําเพิ่มขึ้นอย่างมากในระหว่างอายุการใช้งานของเซิร์ฟเวอร์ ให้ตรวจสอบการรั่วไหลหน่วยความจําในหมวดหมู่ที่มีการเติบโตมากที่สุด เช่น สคริปต์ และ ฟิสิกส์ และ การแสดงผล |
| แกนใช้ต่อเซิร์ฟเวอร์ | แผนภาพเส้นแสดงการใช้หน่วยประมวลผลเซิร์ฟเวอร์จํานวนหลักการใช้การนับแกนกลางต่ำรวมกับเวลาการประมวลผลเซิร์ฟเวอร์สูงเป็นตัวบ่งชี้ที่คุณควรตรวจสอบ การทำงานหลายกระบวนท่า |
| ความสามารถในการคำนวณ | แผนภาพเส้นแสดงประสิทธิภาพของประสบการณ์ของคุณเมื่อเทียบกับค่าเฉลี่ยของ Robloxค่าที่สูงกว่า 100% บ่งบอกถึงประสิทธิภาพสูงกว่าเบสไลน์ปัจจัยที่มีส่วนร่วมรวมถึงจํานวนผู้เล่นสูงสุดต่อเซิร์ฟเวอร์ (สูงกว่าจะมีประสิทธิภาพมากขึ้น) และเวลาของซีพียูเซิร์ฟเวอร์ต่อเฟรม (ต่ํากว่าจะมีประสิทธิภาพมากขึ้น)ประสิทธิภาพการคำนวณที่สูงขึ้นหมายถึงผลกระทบต่อสิ่งแวดล้อมที่ต่ำกว่า แต่ตัวชี้วัดนี้ไม่ได้บ่งบอกถึงประสบการณ์ผู้เล่นที่ดีหรือไม่ดี |
เซิร์ฟเวอร์ CPU และแผนภูมิหน่วยความจํามีค่าเริ่มต้นเป็นมุมมองทั่วไป ทั้งหมด แต่มีเมนูลูกเลื่อนสําหรับกลุ่มกระบวนการแยกต่างหาก เช่น ฟิสิกส์ การเรนเดอร์ และสคริปต์ผลบวกของหมวดหมู่เหล่านี้คือ ไม่ ครอบคลุม; เซิร์ฟเวอร์ดำเนินการจำนวนงานเพิ่มเติมเล็กน้อย—โดยปกติไม่สำคัญ—ต่อเฟรมที่ไม่รวมอยู่ในหมวดหมู่ใดๆดังนั้นค่านาทีและ MB โดยรวมจะต่ำกว่าความเป็นจริงเล็กน้อย การดำเนินการ
หากหมวดหมู่สูงกว่าปกติหรือดูเหมือนจะใช้เวลามากเกินไป ให้ใช้เมนูเลื่อนลงเพื่อดูกลุ่มและระบุกระบวนการที่อาจทําให้เกิดปัญหา

หมวดหมู่และงานของ CPU จับคู่กับผู้ที่อยู่ใน MicroProfiler ดังนั้นคุณสามารถรับ การดัมพ์เซิร์ฟเวอร์ เลือกโหมด ตัวจับเวลา แล้วใช้เมนู กลุ่ม เพื่อกรองโดยกลุ่มกระบวนการที่มีปัญหา
ตัวอย่างเช่น หากคุณพบปัญหาที่อาจเกิดขึ้นกับกระบวนการประกอบ ภายใต้กลุ่ม ฟิสิกส์ คุณสามารถค้นหาได้ภายใต้ชื่อเดียวกันใน MicroProfiler:

แท็กหน่วยความจําแผนที่ไปยังหนึ่งใน Enum.DeveloperMemoryTag โดยมีข้อยกเว้นที่โดดเด่นของ CoreMemory:Total ซึ่งเทียบเท่ากับ Enum.DeveloperMemoryTag.Internalคุณสามารถใช้คอนโซลนักพัฒนา เพื่อตรวจสอบแท็กสําหรับการใช้งานที่มากเกินไปภาพนี้แสดงวิธีที่คุณอาจใช้คอนโซลนักพัฒนาเพื่อตรวจสอบปัญหาด้วย PlaceMemory:GraphicsTexture ที่คุณเห็นในแดชบอร์ด:

การแก้ปัญหา
หากคุณพบปัญหาที่อาจเกิดขึ้นให้ใช้ขั้นตอนต่อไปนี้เพื่อแก้ไขและแก้ไข:
ตรวจสอบการอัปเดตล่าสุดและพิจารณาการย้อนกลับหากผลกระทบต่อตัวชี้วัดรุนแรง
ดู ระบุปัญหาประสิทธิภาพ และ ปรับปรุงประสิทธิภาพ สำหรับข้อมูลเกี่ยวกับการแก้ปัญหาด้วยการคำนวณเซิร์ฟเวอร์การคำนวณของไคลเอนต์และการใช้หน่วยความจำ
ใช้เครื่องมือทดสอบที่มีอยู่เพื่อตรวจสอบปัญหาต่อไป:
- คอนโซลนักพัฒนา สำหรับดูข้อผิดพลาดและข้อความบันทึกและข้อมูลรายละเอียดเกี่ยวกับหน่วยความจำและเครือข่าย
- โปรไฟล์สคริปต์ สำหรับระบุสคริปต์ที่ใช้ทรัพยากรมากที่สุด
- ไมโครโปรไฟล์เพื่อดูส่วนที่ไม่ได้รับการปรับแต่งของประสบการณ์ของคุณทางภาพ MicroProfiler
รวบรวมความคิดเห็นของผู้ใช้จากชุมชนของคุณ