Whether you are exporting your character for testing, or are performing a final export out of Blender, you must apply the appropriate export settings to ensure that Blender exports the proper character data.
Export textures
Including the default PBR textures, your template character includes four separate image maps that make up its surface appearance. Depending on your workflow, you can choose to embed the image maps to your export file or export the textures separately as image files. Both methods have advantages:
- Embedding textures simplifies your export by packing all of your textures within the single .fbx file.
- Exporting texture images directly allows you direct access to the image textures, so you can test and swap them more quickly.
Embed textures
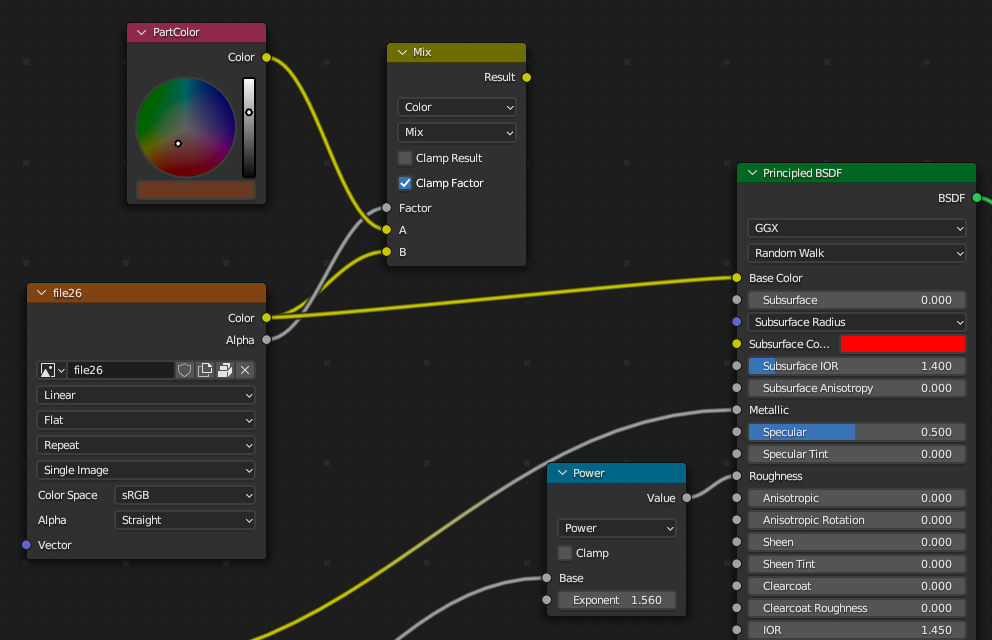
Embedding the texture maps to your .fbx export can simplify the Blender export and Studio import process. When embedding your textures with Roblox's template files, you need to make a quick adjustment to custom skin tone shader nodes in the Blender file.


To prepare your textures to embed with export:
In Object mode, select any part of the character.
Navigate to the Shading tab.
Ensure the Type of Data dropdown is set to Object.

Find the node that connects to the Principled BSDF's Base Color.

Click and drag the line from Base Color to disconnect the node.

Find the file26 node with the color texture map and click and drag the Color to Principled BSDF's color node.

Unpack image files
As an alternative to embedding textures, you can export your texture files as separate .png image files, which allows you to quickly access and swap image texture maps.
To export your texture image files:
- Navigate to File > External Data > Unpack Resources.
- Select Use files in current directory to save in the same directory as your project. Blender exports your image files to a textures directory in your project's parent directory.
