Creating a high-quality game demands many skills such as modeling, scripting, user interface design, and audio production. It's unlikely that one person has all of these skills, which makes collaboration between different roles an essential part of the development workflow.
With Studio's built-in collaboration tools, creators can contribute to games independently on their own time, or work together with their team all at the same time.

Age-based collaboration requirements
To use Studio's collaboration tools with other creators, you must first complete an age check by either verifying your ID or completing a facial age estimation. Group or game owners must complete an age check to enable the rest of their collaborators to join their games.
After completing an age check, you can only collaborate with creators in compatible age groups by default. For example, a 16-year-old creator can collaborate with a creator who is 17 and another who is 21. A creator who is under 13, however, must be a trusted friend of older collaborators or have parental permission to collaborate with creators who are older than 18.
| Your age group | Can collaborate with | Cannot collaborate with |
|---|---|---|
| Under 9 | Users under 13 | Users 13 and older |
| 9–12 | Users under 16 | Users 16 and older |
| 13–15 | Users aged 9–17 | Users under 9 and 18+ |
| 16–17 | Users 13 and older | Users under 13 |
| 18+ | Users 16 and older | Users under 16 |
To work with creators outside of your age group, you must meet at least one of the following requirements the first time you join a Team Create session:
Become a trusted friend with every collaborator who has already accessed your game.
- You can send trusted friend requests to multiple people at once directly from Studio. Trusted friend requests from users under 13 require parental approval. In some regions, this requirement also applies to older teenagers.
- To see which collaborators you need to become trusted friends with to unblock yourself and which creators are currently blocked by you, go to your game in Creator Hub and then go to Safety > Collaborators.
Receive permission from a linked parent account to collaborate with creators of all age groups through the collaboration parental controls. Parents can use these controls to choose which age groups they are comfortable allowing their child to collaborate with.
- Creators under 16 can request that a parent update this setting. Linked parents can update this setting directly from their parental controls.
- This setting remains in effect until a parent changes it. Creators do not need to request permission every time they use Team Create.
- Permission to collaborate with all age groups does not guarantee access to every collaboration session. For example, if another collaborator under 16 who accessed the game before you has their own parental permissions restricted to similar age groups or trusted friends, you won't be able to collaborate with them unless they add you as a trusted friend.
After a creator meets one of these requirements and successfully joins a Team Create session, they retain access unless they lose trusted friend status with a required collaborator or a parent revokes their Studio collaboration permission.
Collaborators who can't join Team Create because of age-based collaboration requirements still have Edit permissions. They can:
- Use Save As to publish a copy of the game to Roblox.
- Use Open Cloud APIs.
- Manage the game's metadata in Creator Hub.
For more information, see the Team Create age requirements FAQ.
Manage collaborators
Collaborators you add to a game have permission settings that correspond to their level of access to the game. As follows are the different user permission settings:
| Permission | Description |
|---|---|
| Owner | User is the owner of the game and has permission to configure other users' permissions. |
| Edit | User has permission to edit the game. This also grants the user Play permission. |
| Play | User has permission to play the game privately. |
| No Access | User does not have either Edit or Play permissions. |
There are some small differences when managing collaborators in group‑owned games vs. user‑owned games.
Group-owned games
For group games, only the group owner or members with sufficient permissions can manage the group's roles, either across all group games or on a per‑game basis. Such users can also add individual collaborators to group‑owned games in the same workflow as user‑owned games, but only for Play access.
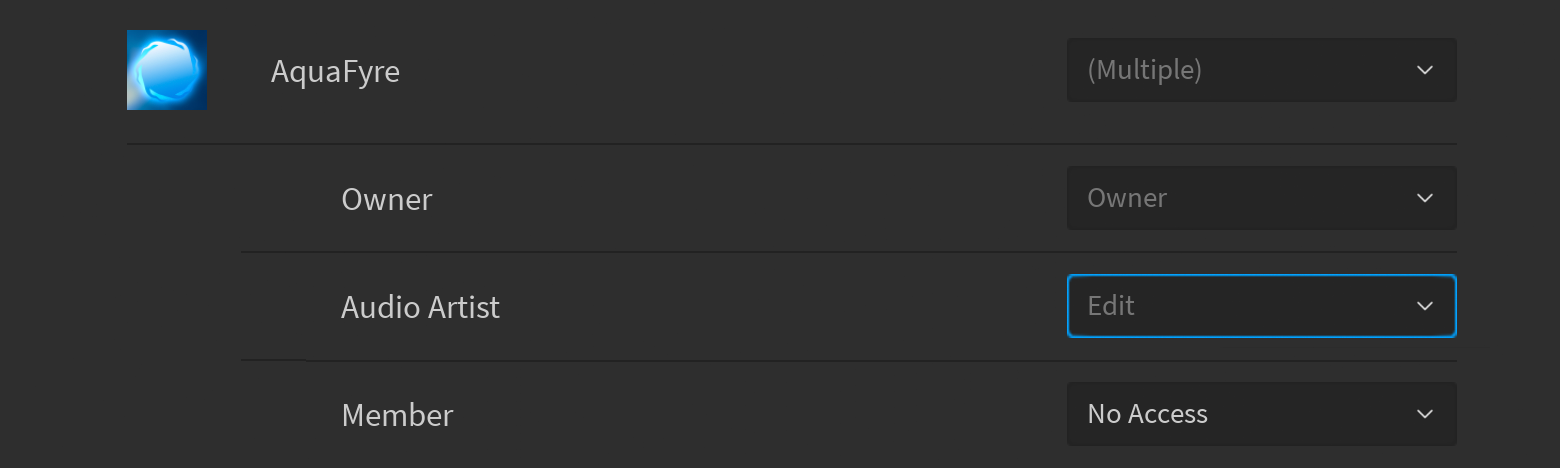
If you're the group owner or a member with sufficient permissions, you can configure collaboration across all group games, for example grant Edit permission to an "Audio Artist" group role so they can fine-tune audio playback across multiple group games.
From the Creator Dashboard, expand the account switcher in the upper‑left and select the group.
Expand the account switcher again and select Roles.
Enable the Edit experiences permission for roles that should have editing permission. Remember to click Save Changes for each role that you change.
In Studio's Manage Collaborators window for any group-owned game, eligible roles display Edit permission but are muted to indicate that you can't change the permission level from Studio.



User-owned games
For user-owned games, you can grant Play access to any user or group, but you can only grant Edit permission to Roblox friends.
To give Edit permission to a friend for a game that you own:
With the game open in Studio, click the Collaborate button on the right side of the mezzanine bar.

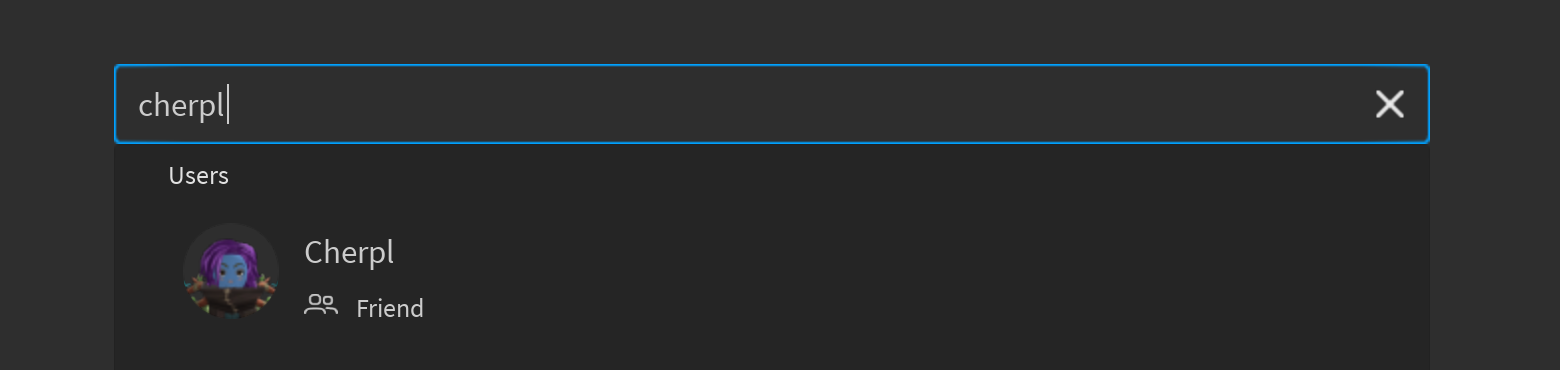
Type into the search bar at the top to search for a collaborator to add. A dropdown appears listing matching collaborators, with friends indicated by the Friend label. Select the collaborator to add.
Select Edit from the permissions dropdown for the friend, then click Save for your collaboration settings to take effect.


Access a session
Those who have permission to edit a game can join a collaborative session as follows:
Navigate to the Creator Dashboard.
Locate the game depending on whether it's group-owned or user-owned.
Select the group from the upper‑left selector menu.
Make sure Creations is selected on the left and My Experiences in the main panel.
My ExperiencesShared With Me
Hover over the game's tile and click the Edit in Studio button to collaborate.


View collaborators
While working in a collaborative session, you can see the current collaborators in the upper-right corner of Studio, each with a unique assigned color that's consistent across all collaborators' devices.

To view more details on the current collaborators, click on any of the icons to open the Live Collaborators window. In this window, you can see whether a user is active or inactive inside Studio, as well as an indication of where the user is working. Users become inactive if they do not use Studio for more than 5 minutes.

Selection visualization
By default, selected code in the Script Editor and selected objects in the 3D viewport are highlighted with the unique color assigned to each collaborator. Additionally, the Explorer window marks selected objects with dots in these assigned colors to indicate selection by other collaborators.


To make all collaborators' selections invisible to only you while still seeing their work, uncheck Show collaborator selections at the bottom of the Live Collaborators window.

Join collaborators
To quickly jump to a location in the workspace or to the exact line in a script that a collaborator is editing, hover over their name in the Live Collaborators window and click Join.

Comments
Roblox Studio has a comments feature that lets you pinpoint an object in the 3D viewport and start a conversation with your collaborators, leave to-do notes, and more. Comments update in real time which lets you and your team receive and respond to feedback without disrupting your workflow in Studio. You can also receive personalized notifications to help you stay on top of feedback, even when you're not using Studio.
Workflow
To create a comment, click the Comment button on the right side of Studio's mezzanine (keyboard shortcut C).

In the viewport, your cursor turns blue. Click on any object that inherits from BasePart (most do, including Terrain), type your comment, and click Submit.

Comments appear in the Comments window, accessible from Studio's Window ⟩ Collaboration menu, with the most recent comments at the top. From within the Comments window, you can:
- Single-click on a comment to show the full conversation in the 3D viewport.
- Double-click on a comment to zoom in on it in the viewport.
- Use the ⋯ menu in the upper-right corner to show resolved comments, filter for only the comments that you've been tagged in, or hide comments in the viewport.
- Resolve comments as you and your team address them. After you resolve a comment, it disappears from both the viewport and the main list, but it isn't completely gone; you can always un‑resolve it later.

Notifications
To help you stay on top of feedback even when you're not using Studio, you'll receive an email digest that recaps all recent activity. Each email digest provides a simple overview of comment activity per place, including:
- When someone mentions (tags) you in a comment, for example @username.
- When someone comments in a thread that you previously replied to or were mentioned in.
- When someone resolves a thread that you previously replied to or were mentioned in.
From within the email overview, simply click View in Studio to go directly to the conversation in Roblox Studio.
Collaborative scripting
In a collaborative session, you can code together in real time through live scripting, or you can draft scripts in a more focused environment before committing them to a collaborator-shared repository.
Live scripting
Live Scripting lets collaborators code together in real time. In the Script Editor, each collaborator's cursor color matches their assigned color in the Live Collaborators window.

While live scripting, edits are auto‑saved every 5 minutes just like place edits, and a collaborator can manually save a script at any time with CtrlS (⌘S). Saved or auto‑saved versions are logged in the Script History window.
Drafts mode
Through Drafts mode, you can independently edit and test scripts without affecting the game for others. After you finish drafting a script, you can commit it to the shared repository and use collaborative testing to test the committed version with others.
Commit drafts
Once you've edited a script, it appears in the Drafts window, a non‑default window which you must add to a custom tab in Studio's toolbar.

Drafts are saved to your local file system and persist between Studio sessions on the same machine. To commit your local edits to the repository, left-click a script, or hold Shift and left-click to select multiple scripts. Then click Commit to commit all selected scripts.

Compare and merge changes
If another collaborator commits changes to the same script that you're editing, an icon with a green ⊕ symbol appears in the Drafts window. To view their changes, right‑click the script and select Compare With Server.

In the (Diff) tab that opens in the Script Editor, code that other collaborators changed or deleted appears in red, while code that you updated appears in green.

To merge their changes into your script:
In the Drafts window, right‑click the script and select Merge From Server.

In the merge window, you can pick which code to keep, or make manual edits.
- Check Draft to keep your changes, or leave it unchecked to discard them.
- Check Server to merge the committed changes into your draft, or leave it unchecked to ignore them.
- Check Other to manually edit the script and save the changes to your draft.
Once you've previewed the merge resolution, click Merge All to update your local script.

Restore deleted scripts
If a collaborator deletes a script that you're editing, an icon with a red ⊘ symbol appears in the Drafts window. To restore the script, right‑click it and select Restore Script. Scripts are restored to the place's Workspace tree, so you may need to manually re‑parent them back to their original location.

View script history
All script changes, whether saved by a collaborator, auto-saved, or committed by a collaborator through Drafts mode, are logged in the Version History window. To access it:
Right-click the script in the Explorer window and select View Script History.
In the Version History window that opens, you'll see all committed versions of the script, the commit date, which collaborator committed, and more. From this window, the following actions are possible:
To compare any version (except the oldest) with its previous version, select it and click Compare With Previous Version. In the (Diff) tab that opens in the Script Editor, code from the newer version appears in green while code from the older version appears in red.
Save and publish
During a collaborative session, Studio automatically saves the project to the cloud every four minutes.
Revert to previous versions
The owner of a game can revert changes made by other editors. See access version history for instructions.
You might also want to check Activity History. This view provides a chronological event log that improves team visibility into key game settings.
Disable collaboration
Team Create is the core Studio feature that enables collaboration. Workflows that involve the Manage Collaborators dialog will automatically enable the feature, but you can manually disable it if necessary.
If the Live Collaborators window isn't already open, click on any of the collaborator icons to open it.

In the bottom-right corner of the window, click the ⋯ button and select Disable Team Create.

When prompted, confirm ending the session to reload the place in a non‑collaborative state.
