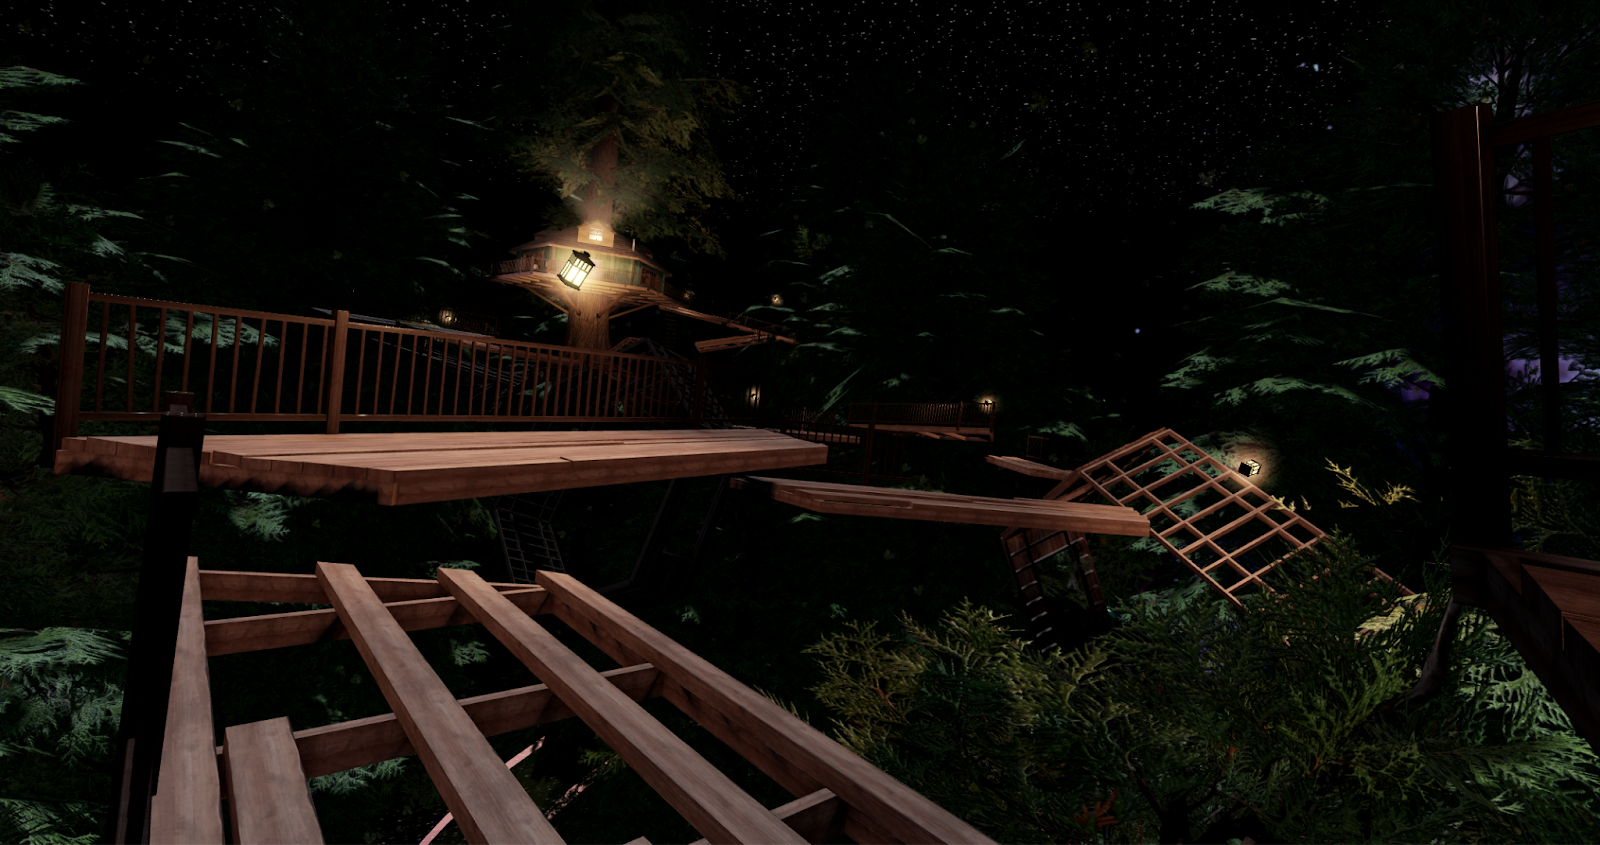
Creating movement in any environment within an experience helps it to instantly feel more immersive and realistic to our world, whether that's from ambient tree movement, reactive doors from player interaction, or even boxes that move when they bump into them. Studio has many unique methods to create motion in order to help worlds feel more alive, including a physics system, TweenService, and animations, and analyzing your experience's specific needs can help you determine which one to use. In this section, we'll demonstrate how we determined what type of movement we wanted to create in Studio, and what tools we used to accomplish these distinct goals.
Create the storm
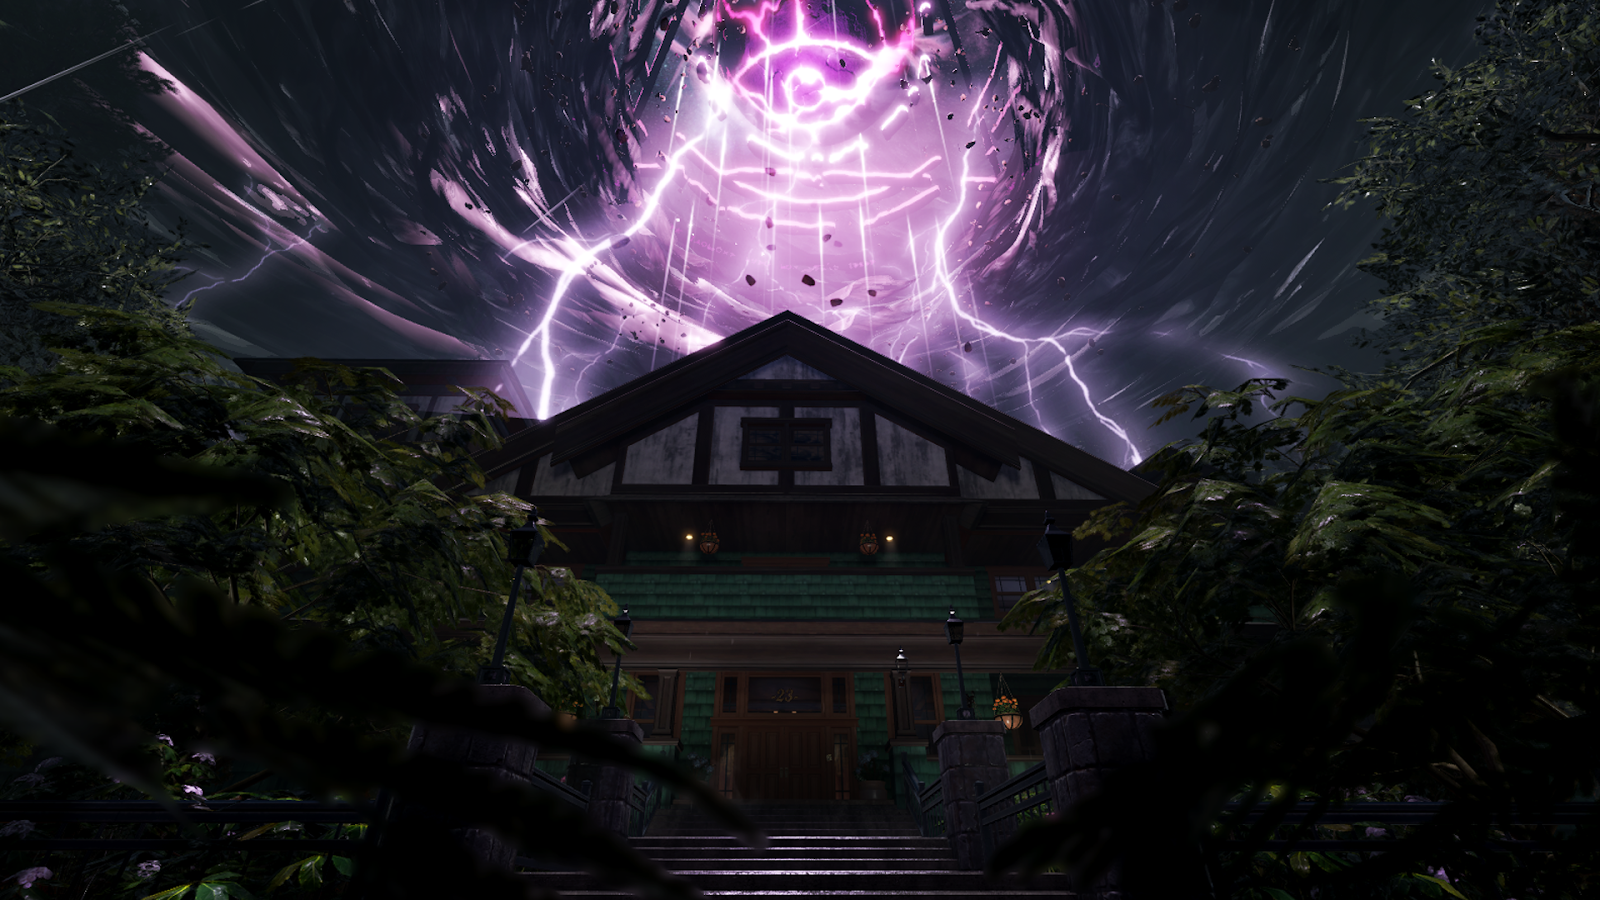
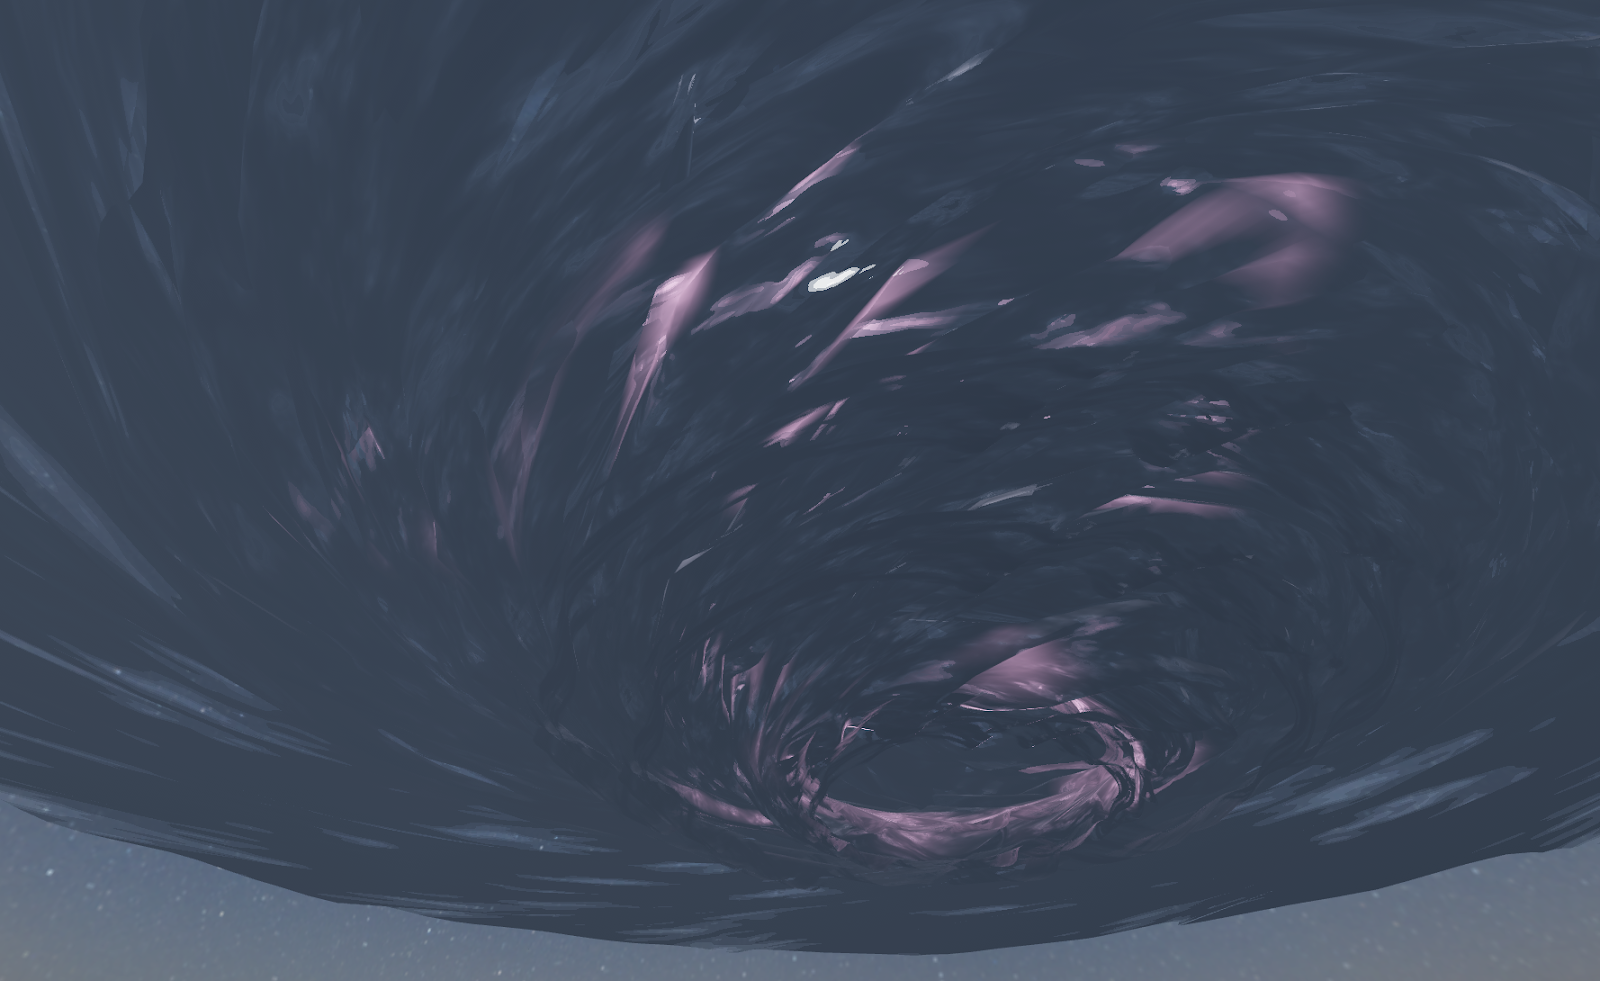
The storm went through many iterations before we settled on what is live in The Mystery of Duvall Drive. Early on, we thought about the storm as a giant obsidian pillar, and in later iterations we considered it to be a giant portal to the corrupt space. After experimenting with many different storms with unique looks and feels to them, we settled on a storm with a smaller central "eye" because:
- The storm should give players a sense of the impact of this event on the world, including trees blowing and debris flying around.
- The spinning vortex of the cloud themselves should give players a peek at the central portal without revealing everything. This would encourage players to investigate closer to see what's going on.
- The tighter point of light would allow us to focus on the composition of the house, which is both the main character and where most of the gameplay is located.
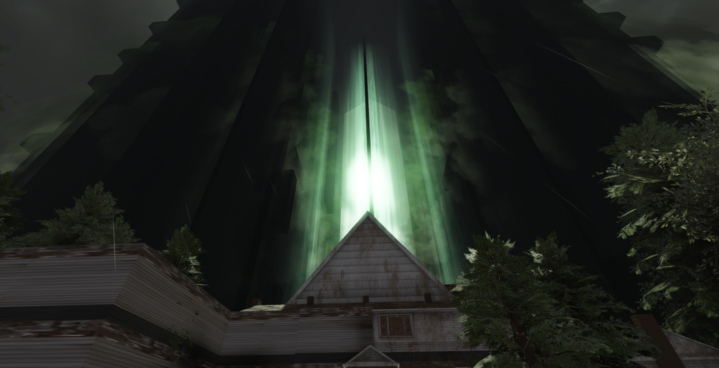
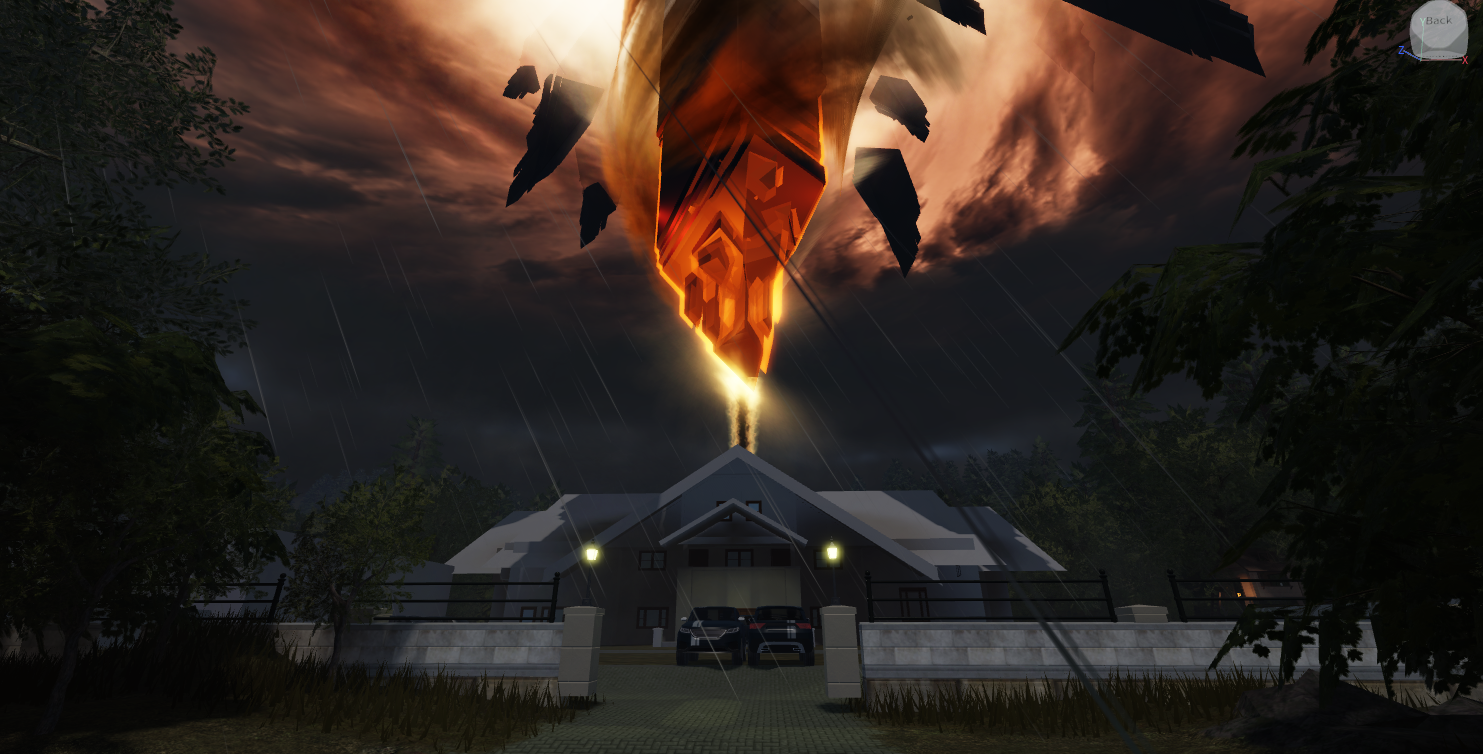
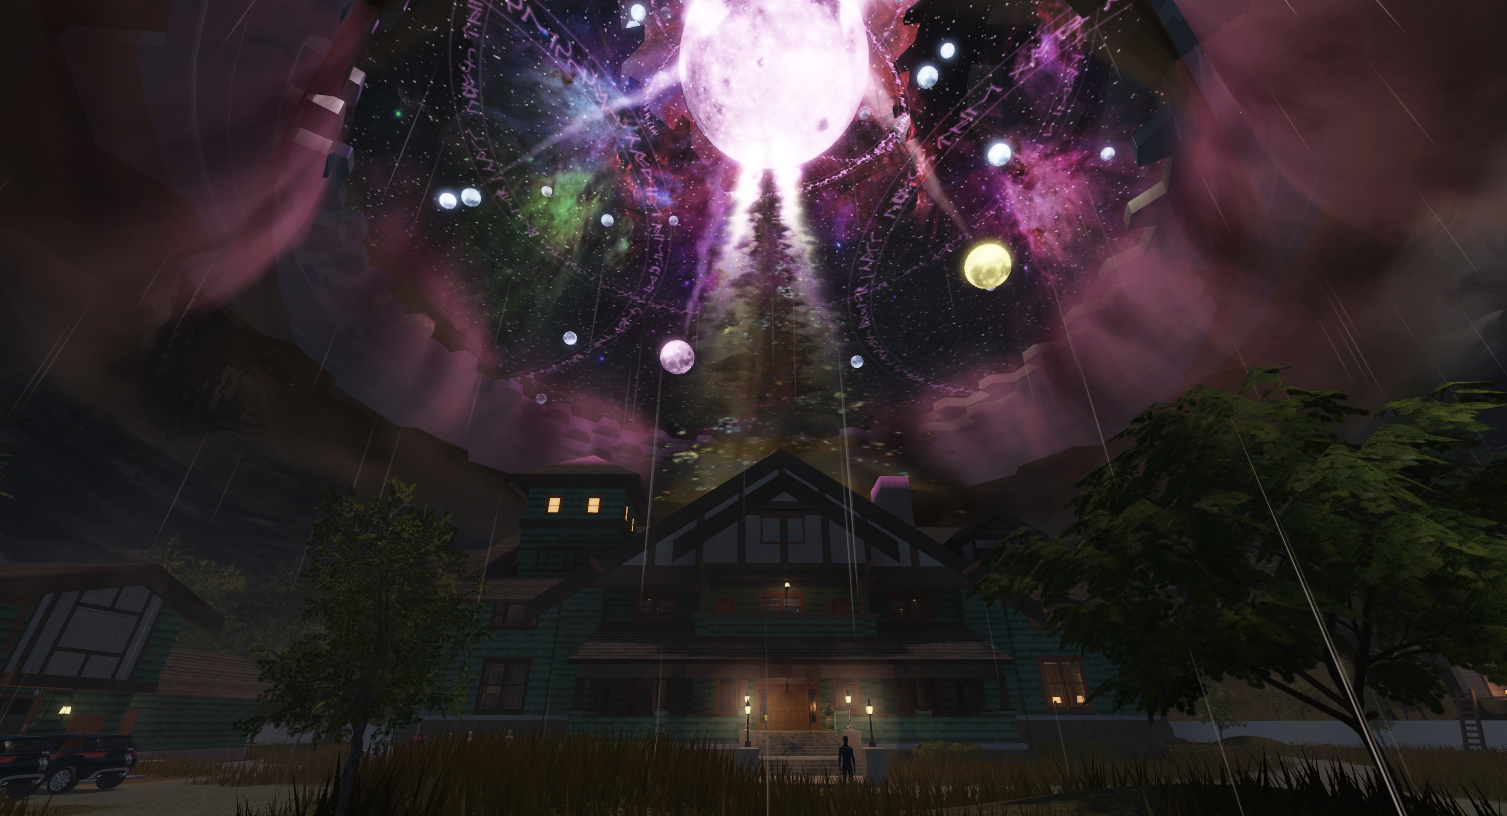
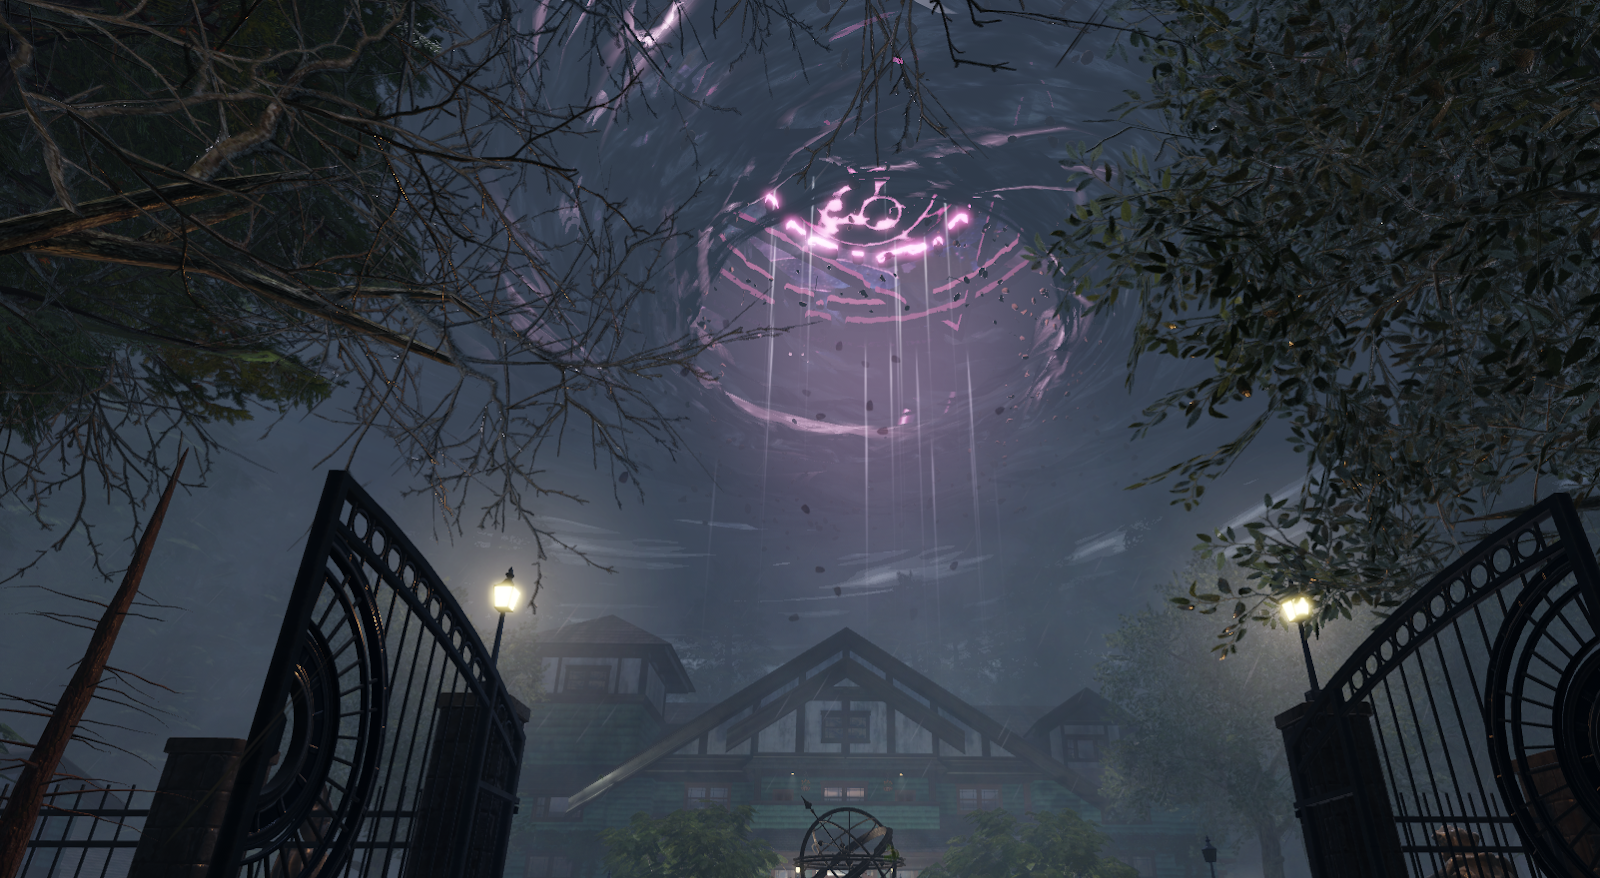
To make the storm feel dynamic, aggressive, and ever-changing within its environment, we used the following systems and features:
- TweenService - For cloud movement.
- Lighting changes - For creating the cloud to cloud lightning.
- Beams - For the "volumetric lighting" and the lightning bolts.
- Particle Emitters - For debris flying up to the portal and flying around due to the wind blowing.
- Animations - For the trees that were blowing in the wind.
Add clouds with textures
While dynamic clouds are great for normal, high altitude realistic clouds, we needed something that felt dramatic and that we could more heavily direct and customize. To do this, we applied surface appearance objects with semi-transparency to a series of heavily stacked and layered cloud meshes in order to fake cloud cover. Why did we stack them and layer them so heavily? Because when each cloud mesh moves at different speeds, they intersect and create cloud forms that go inside and out of each other. This process made the clouds feel a bit more dynamic and natural, despite just being spinning discs. It was also important that the clouds were semi-transparent, because we wanted players to be able to peek through them to see something bright in the center prior to arriving at the house!
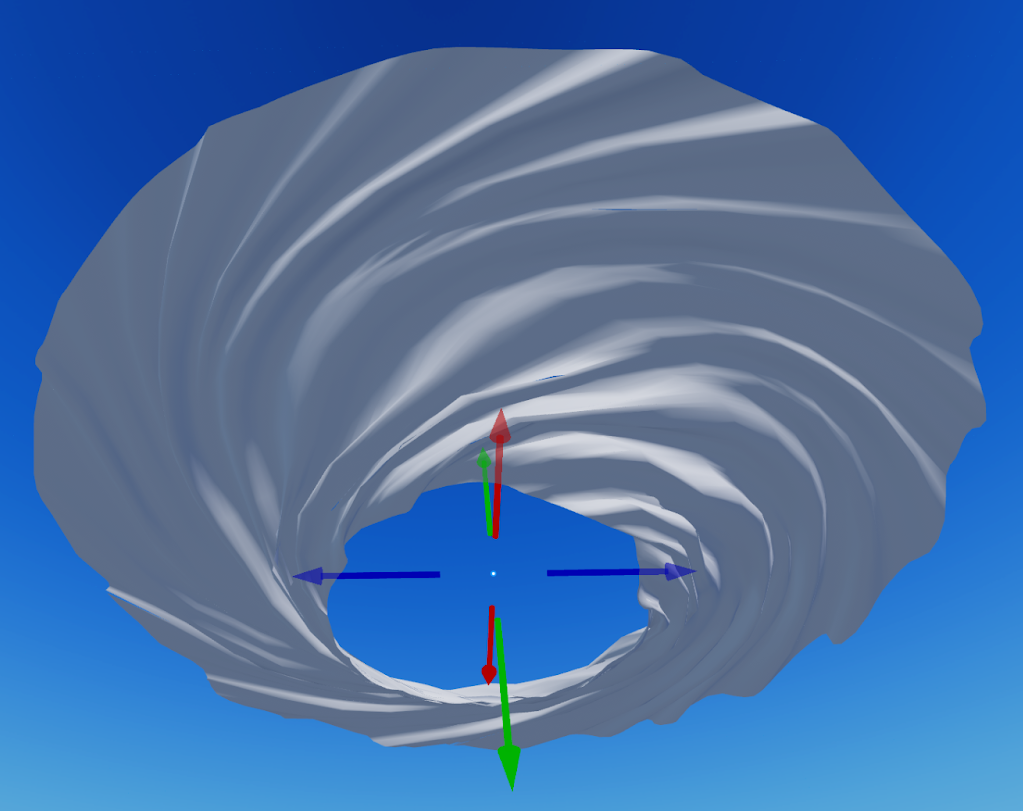
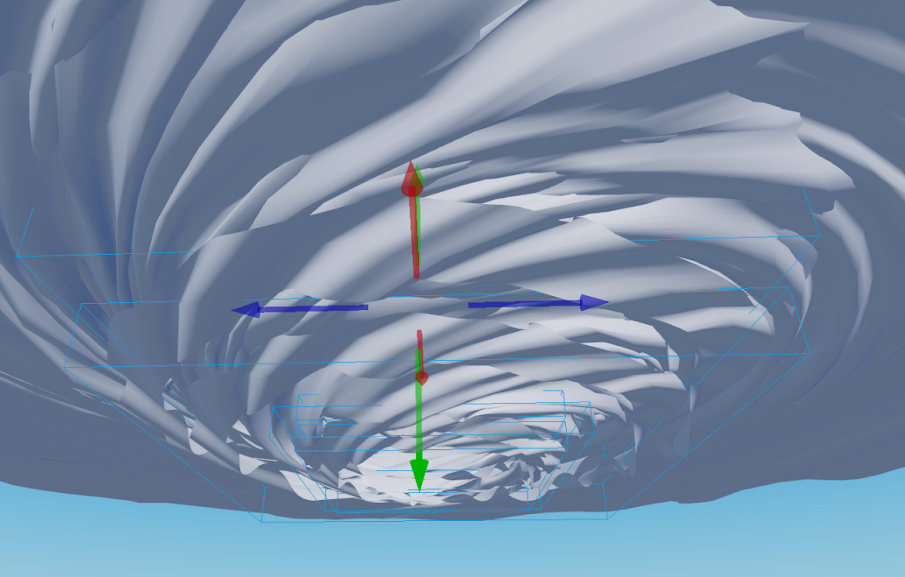
Since each cloud mesh needed to be massive to fully surround the house and convey how enormous the storm was, we knew we needed to tile the texture we wanted to use on the individual cloud meshes so that it would heavily repeat throughout the surface of the mesh. We tested the materials we made for the cloud on these simple parts, then applied them to the vortex!
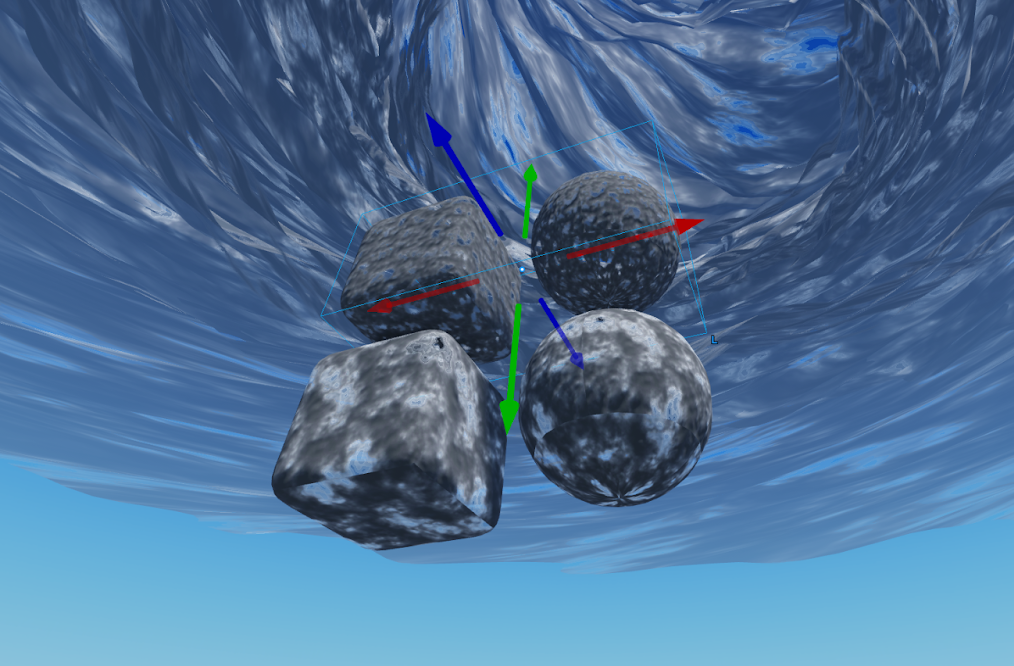
Unlike particle emitters or beams, meshes allowed us to be able to bounce light off of each mesh, which was important when we wanted to implement cloud-to-cloud lightning. We also modeled in the twisting so that lighting bouncing off of it would look like it had depth! This was important especially in situations where the performance demands of the experience dropped the quality levels of our surface appearance objects.
Rotate cloud meshes
After we were satisfied with the overall visual appearance of the clouds, we needed to get it moving! We had the general shapes of each cloud layer in place, but it took some trial and error to make sure the spinning effect looked good in practice. We initially tried using constraints to introduce velocity that would physically drive the clouds to move. This was more difficult than we wanted it to be to iterate later, and the player would never interact with it, so we didn't need it to be as accurate in its movement.
We wanted an easy-to-use method to rotate instances that were either too far to be interactable, such as clouds, or too small or decorative to be important for gameplay/physics, such as indoor furniture like small lamps. We decided to use a LocalScript to reduce client-server bandwidth, allow for a smoother movement, and have each cloud mesh be able to have a different rate of rotation and delay. To make it more generic, we also made it possible to specify the axis of rotation. It is possible to use 3 attributes, but for our case we used 3 values: Axis, Delay, and Speed.

As in many cases in the demo, we used a LocalSpaceRotation tag so that we were able to manage affected instances in Studio using an instance tagging plugin. We utilized only a single LocalScript that handled all tagged instances using the CollectionService so that we didn't have a ton of scripts to maintain throughout the development process.
In our demo, portions of the world are cloned from the ServerStorage into the workspace as needed, so we needed to handle cases where tagged objects were created and destroyed. With LocalScripts, we also have to be aware of the streaming, where meshes and their child values might be streamed in and out. We processed initially placed objects in the Init() function, and connected to CollectionService.GetInstanceAddedSignal and CollectionService.GetInstanceRemovedSignal for tagged objects to handle newly created/destroyed objects. The same SetupObj function was used to initialize new objects in Init() and in CollectionService.GetInstanceAddedSignal.
local function Init()
	for _, obj in CollectionService:GetTagged("LocalSpaceRotation") do
		if obj:IsDescendantOf(workspace) then
			SetupObj(obj)
		end
	end
end

CollectionService:GetInstanceAddedSignal("LocalSpaceRotation"):Connect(function(obj)
	objInfoQueue[obj] = true
end)

CollectionService:GetInstanceRemovedSignal("LocalSpaceRotation"):Connect(function(obj)
	if objInfo[obj] then
		objInfo[obj] = nil
		if objInfoQueue[obj] then
			objInfoQueue[obj] = nil
		end
	end
end)

Init()
objInfo is a map that has information for all relevant objects, such as their rotation speed and axis. Note that we do not call SetupObj from CollectionService.GetInstanceAddedSignal immediately, but we added an object into objInfoQueue. With streaming and cloning objects on the server, when CollectionService.GetInstanceAddedSignal is called, we might not yet have had our Axis, Delay, and Speed values, so we add the object into a queue, and called SetupObj on subsequent frames from the Update function until the values were there and we could read them into per object "info" structure.
We rotated the instances in the Update function connected to heartbeat. We got the parent transform (parentTransform), accumulated a new rotation angle (curObjInfo.curAngle) based on rotational speed of this object, calculated the local transform (rotatedLocalCFrame), and finally set it to the CFrame. Note that both parent and the object can be a Model or MeshPart, so we had to check IsA("Model") and use either a PrimaryPart.CFrame or CFrame.
We checked for a valid Model.PrimaryPart to be set to handle streaming. If an Update was called on our object while a Model.PrimaryPart (that can point to a child mesh) wasn't streamed yet, we would just skip the update. The current system is a second iteration of object rotation, and the previous system worked differently: the values were 12 times different! To keep the same data, we converted it in our script, like "12 * obj.Speed.Value".
Design lightning strikes
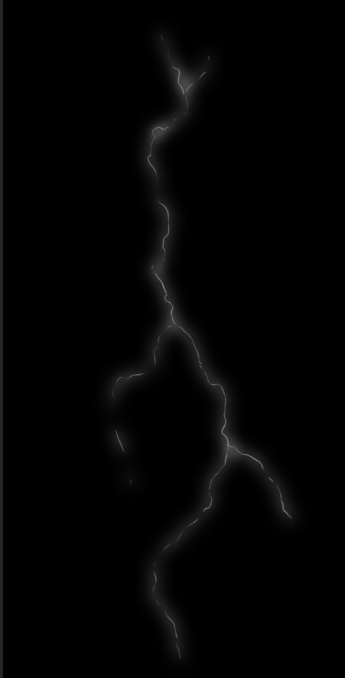
Because Studio doesn't offer an out of the box lightning generator, and the particle system had some limitations that wouldn't work for the hero lightning strikes, we had to get creative with a solution for the hero lightning strikes. We decided on two main systems to make up the lightning: textured beams for the hero lightning strikes coming from the eye of the storm are scripted textured beams that reveal and sync with audio and post process effects, and a simple particle effect for the distant cloud-to-cloud lightning.
Texture beams
We'd typically either use a sequencer or timeline tool to drive the timing of a lighting bolt strike effect like this, but since Studio doesn't offer this functionality yet, we decided to write scripts that would control lighting bolt timing. The scripting of this effect is fairly simple, but it accomplishes the following important goals:
- Elements of the lightning bolt strikes, such as their textures, brightness, and delays, are randomized with every strike.
- Audio and post FX changes are in sync with strike FX.
- Players that are either indoors or in the corrupt area would not be able to see or hear them.
We have a server-side Script that calculates various parameters and timings, sends them to all clients, and waits for a random amount of time:
local function LightningUpdate()
	while true do
		task.wait(rand:NextNumber(3.0, 10.0))
		local info = CreateFXData()
		lightningEvent:FireAllClients(info)
	end
end
Inside CreateFXData, we fill in the info structure, so that all clients get the same parameters.
On the client side (LightningVFXClient), we check if this client should run the FX:
local function LightningFunc(info)
	…
	-- no FX when indoors
	if inVolumesCheckerFunc:Invoke() then
		return
	end

	-- no FX when not in the "normal" world
	if not gameStateInfoFunc:Invoke("IsInNormal") then
		return
	end
	…
In addition, we run the sequence to set textures, positions, and brightness, run tweens, and use task.wait(number). Randomized parameters are from the info structure that we received from the server, and some numbers are fixed.
To check if a player is indoors we use a helper inVolumesCheckerFunc function, which goes over pre-placed volumes approximating indoor areas, and checks if player position is inside any of them (PointInABox). We could have used touch-based detection, but we found out that when a player takes a seat inside the volume, they are no longer "touching" the volume. Testing a point in a few boxes is simpler, and we do it only when a player moves far enough from the previously tested position.
To check if a player is in corrupt areas, we invoke a helper gameStateInfoFunc function, which checks the current game state. To play a random sound from a folder, we also used a helper PlayOneShot function. For the lightning bolts themselves, these were super easy to create in Photoshop; we drew a squiggly line, then added an "Outer Glow" layer effect.

Utilize particle emitter systems
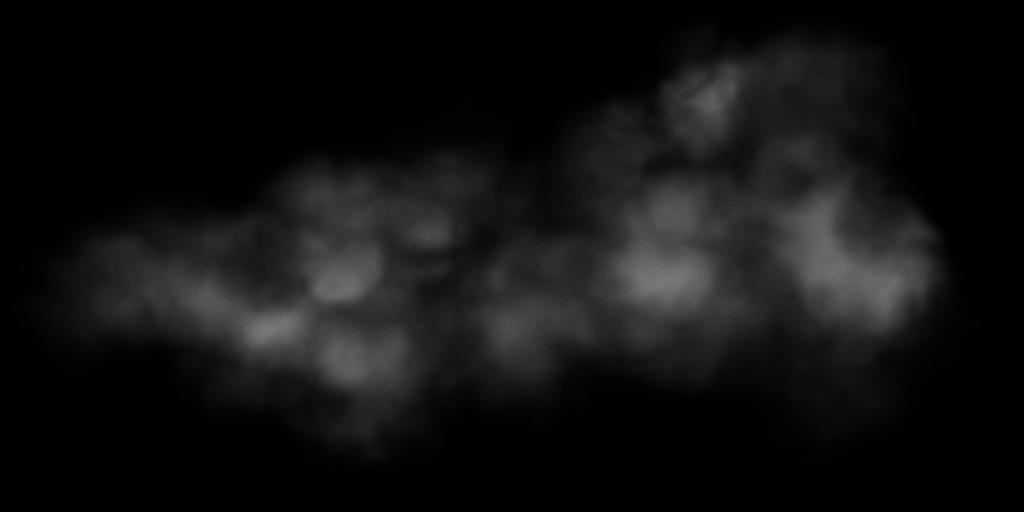
The hero lightning strikes are supported by a particle system that suggests distant lightning by creating the impression of a layer of clouds in the background catching light from distant strikes, or cloud-to-cloud lighting. We achieved this effect through a very simple particle system which flashes a cloud billboard on the periphery of the main storm cloud. The system emits a cloud particle periodically with a randomized transparency curve:

Make trees blow in the wind
After we had the clouds and the lightning working the way we wanted it to, we then needed to add two other major components of a storm: the wind and the rain! These elements presented a few challenges, including needing to work within Studio's current limitations of our physics and special effects systems. For example, making trees move with actual wind isn't possible in today's engine, so we utilized particle emitter effects and custom character animations for the trees.
We knew to really sell the effect of the wind and rain, we needed the trees themselves to move. There are a few ways you can do this within the engine, including moving parts using plugins that are publicly available, using TweenService, or animating models directly. For our purposes, animations gave us the ability to control the motion we wanted out of our trees, and it allowed us to use a single animation we could share among all trees within the experience.
We started by skinning several trees from the Endorse Model Pack - Forest Assets. Since these trees already existed, and our experience took place in the Pacific Northwest, it saved us some time early on from having to create each tree model.
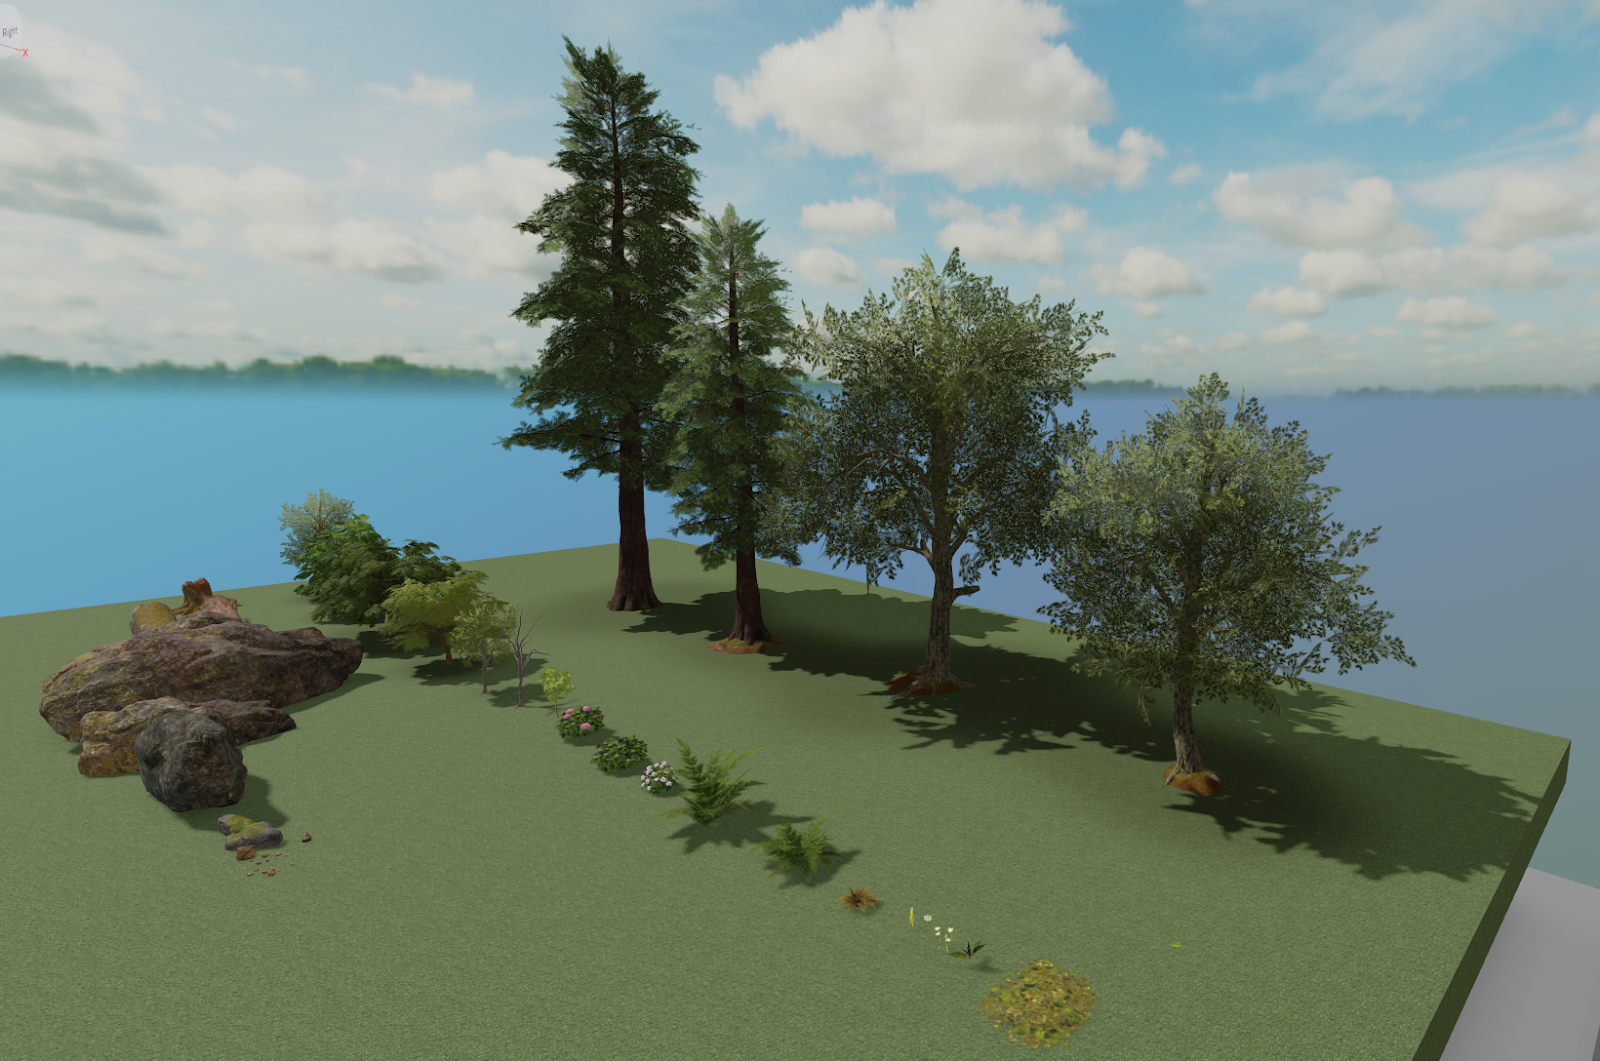
After we picked our trees, we knew we needed to skin them. Skinning a mesh is the act of adding joints (or bones) to a mesh in another 3D modeling application, such as Blender or Maya, then applying influence to those joints/bones to move the mesh. This is most commonly used in humanoid characters, but with custom characters, you can skin pretty much anything.
We knew we wanted to save time and reuse the same animation, so we built our first tree rig and made sure the joint names were generic because we wanted to use these same names in the rigs for the other trees. We also knew we needed to include primary, secondary, and tertiary joints/bones for the trunks to bend with the wind, the branches to swing, and the leaves to seem like they were shaking in response. For this process, we needed to create a secondary motion, which is an animation concept where any action causes other parts of the object to react to that action and appear to catch up with the initial movement.
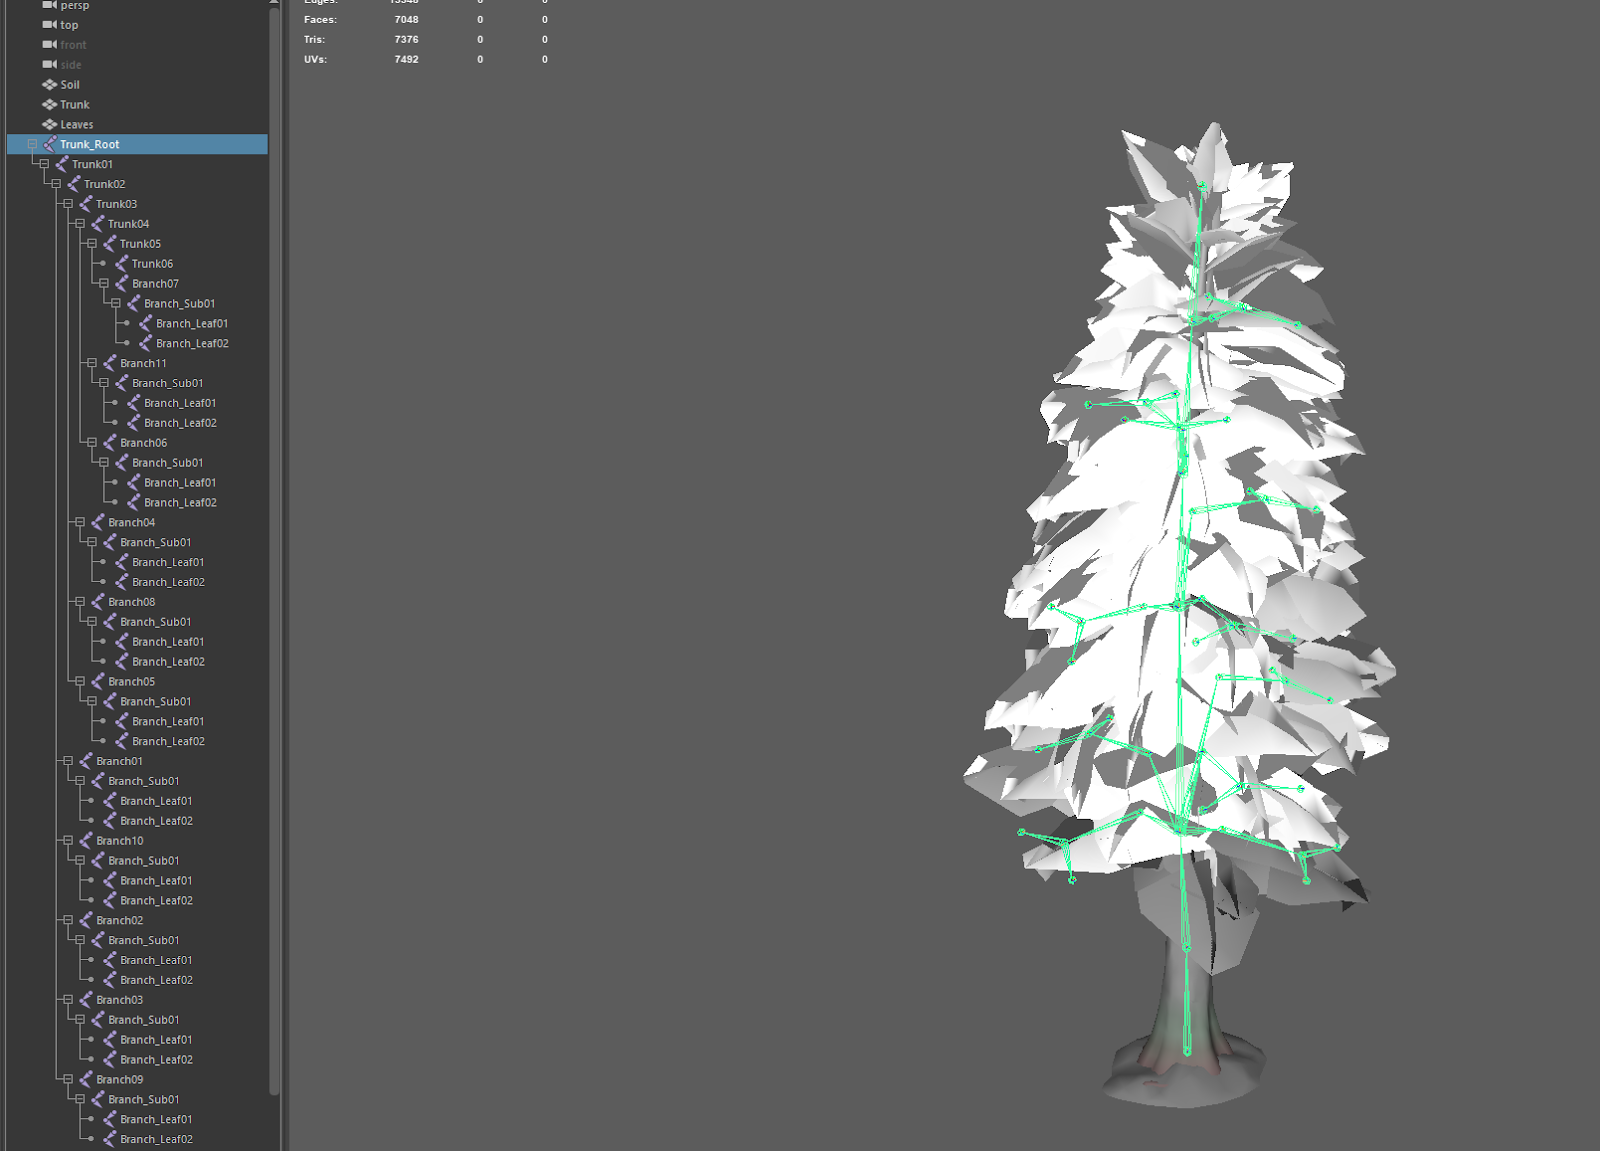
Once we had created our joints/bones, it was time to create a test animation to move around all the joints and bones in Studio to see if it moved the way we wanted it to. To do this, we had to import the tree into Studio through the Custom Rig setting in the 3D Importer, then move/animate the mesh using the Animation Editor. We set up the materials and textures after these tests, but you can see the result below.
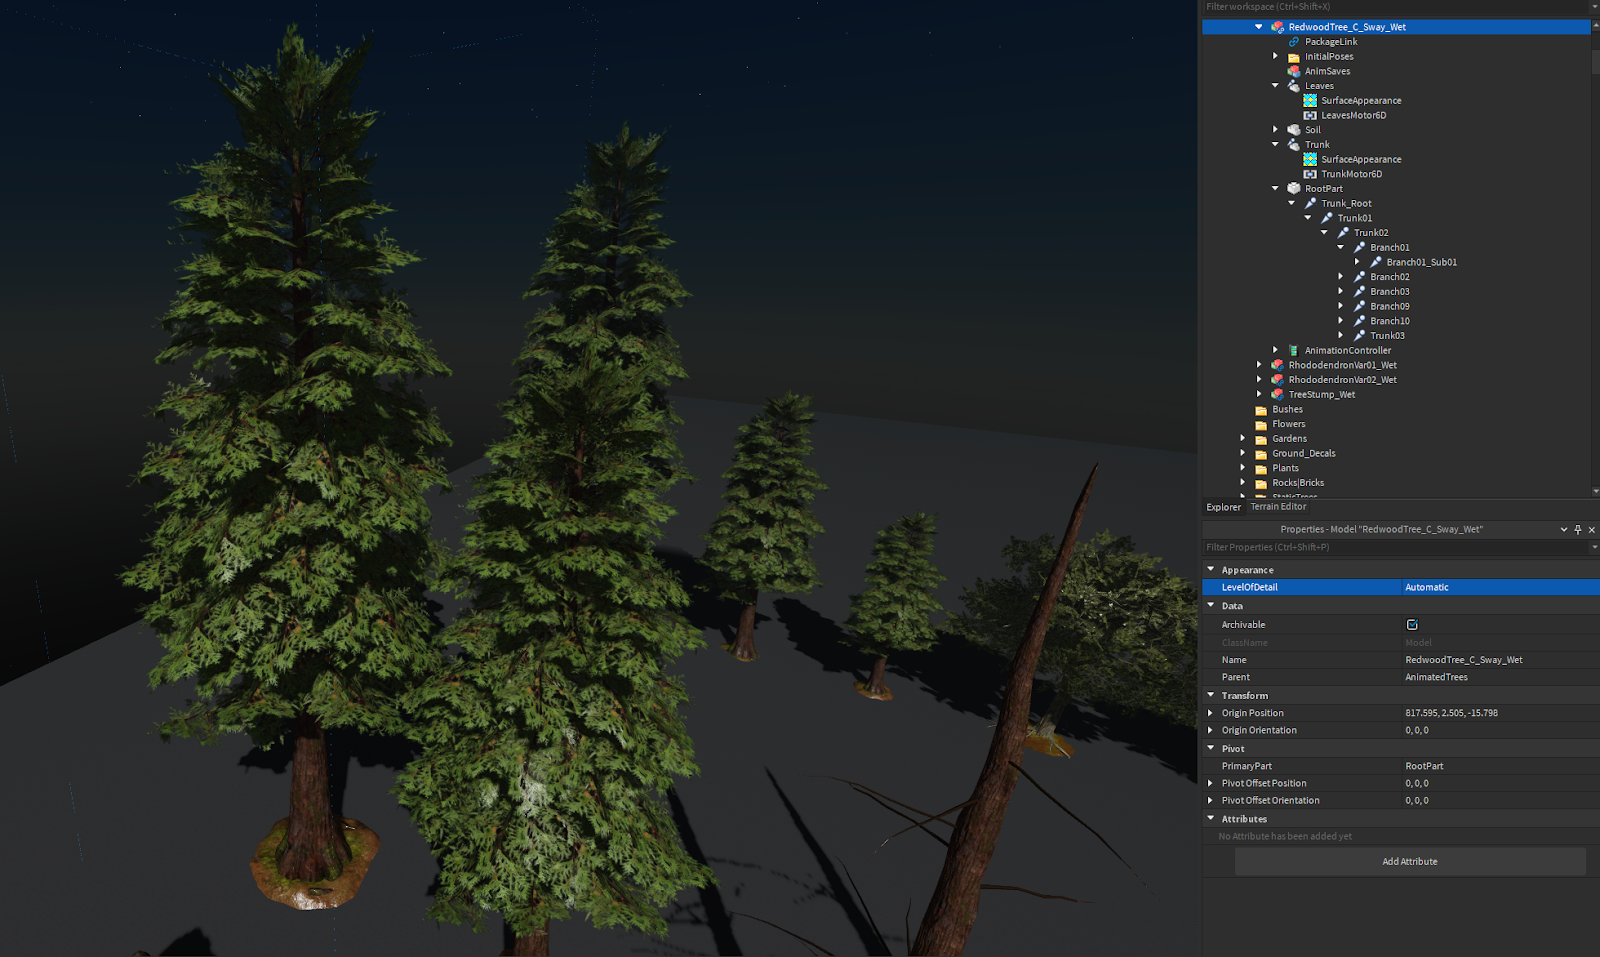
After we were happy with the results on that tree, it was time to test the same animation on a different tree! We already knew it was going to be the same animation between the different rigs for each tree type, so we just made sure our animation looked like it was general enough to work between a tall Redwood and stout Beechwood tree!
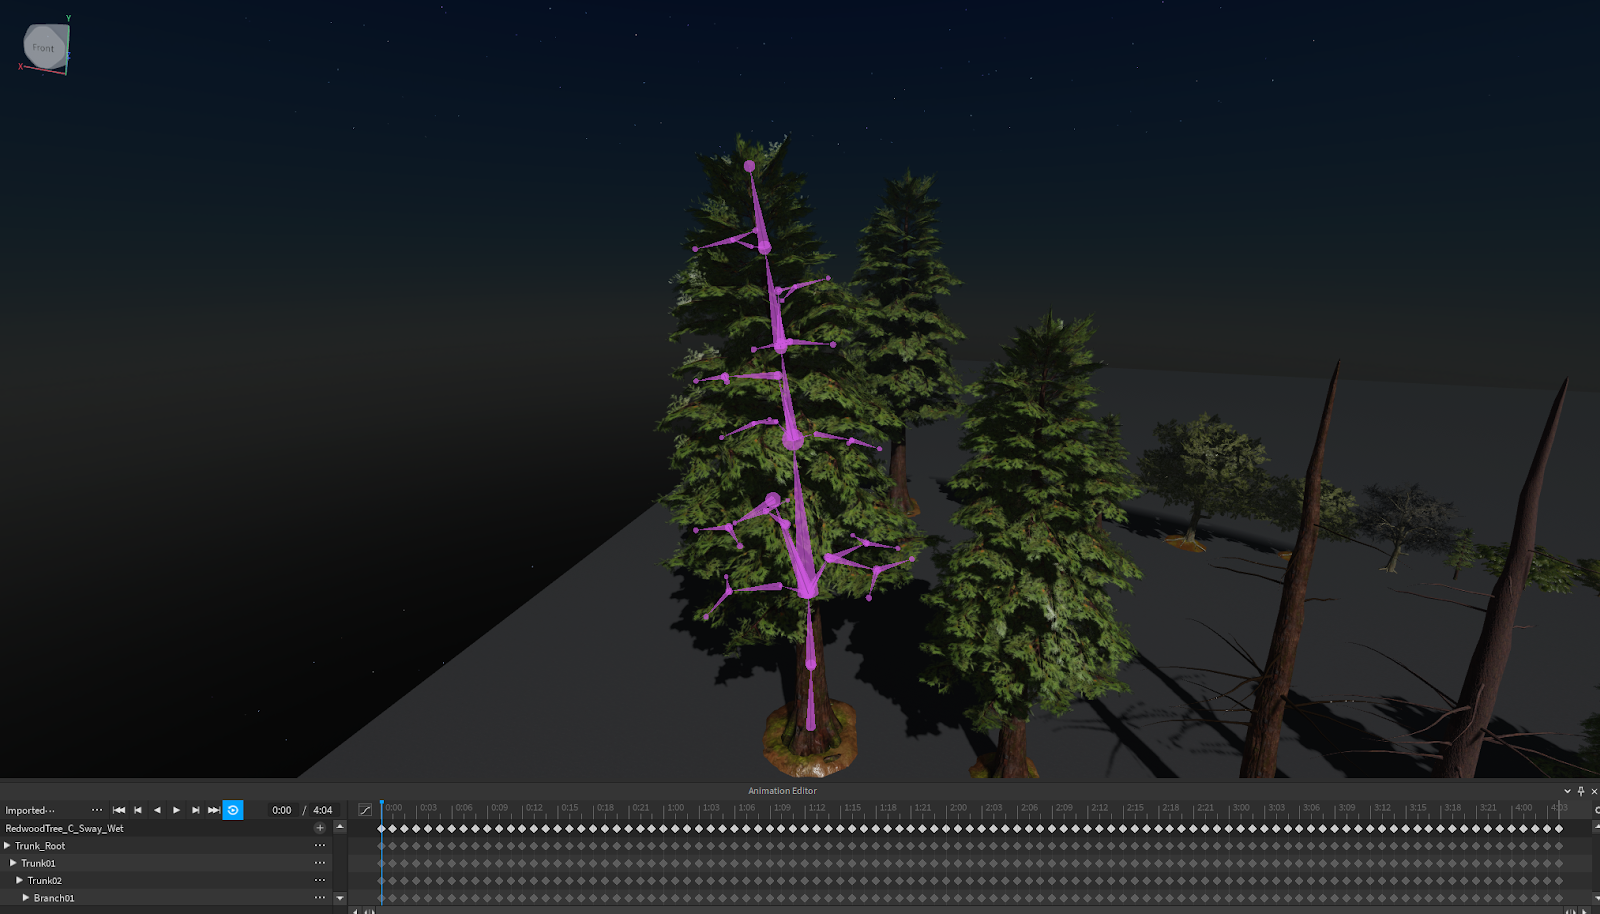
To do this, we took the Beechwood tree from that Forest Pack and built a similar rig, using the same exact naming for the joints. This was so the animation we had previously imported could be applied to this tree too. Since the animations were all based on rotating joints, it didn't matter how big, small, tall or wide the tree was!
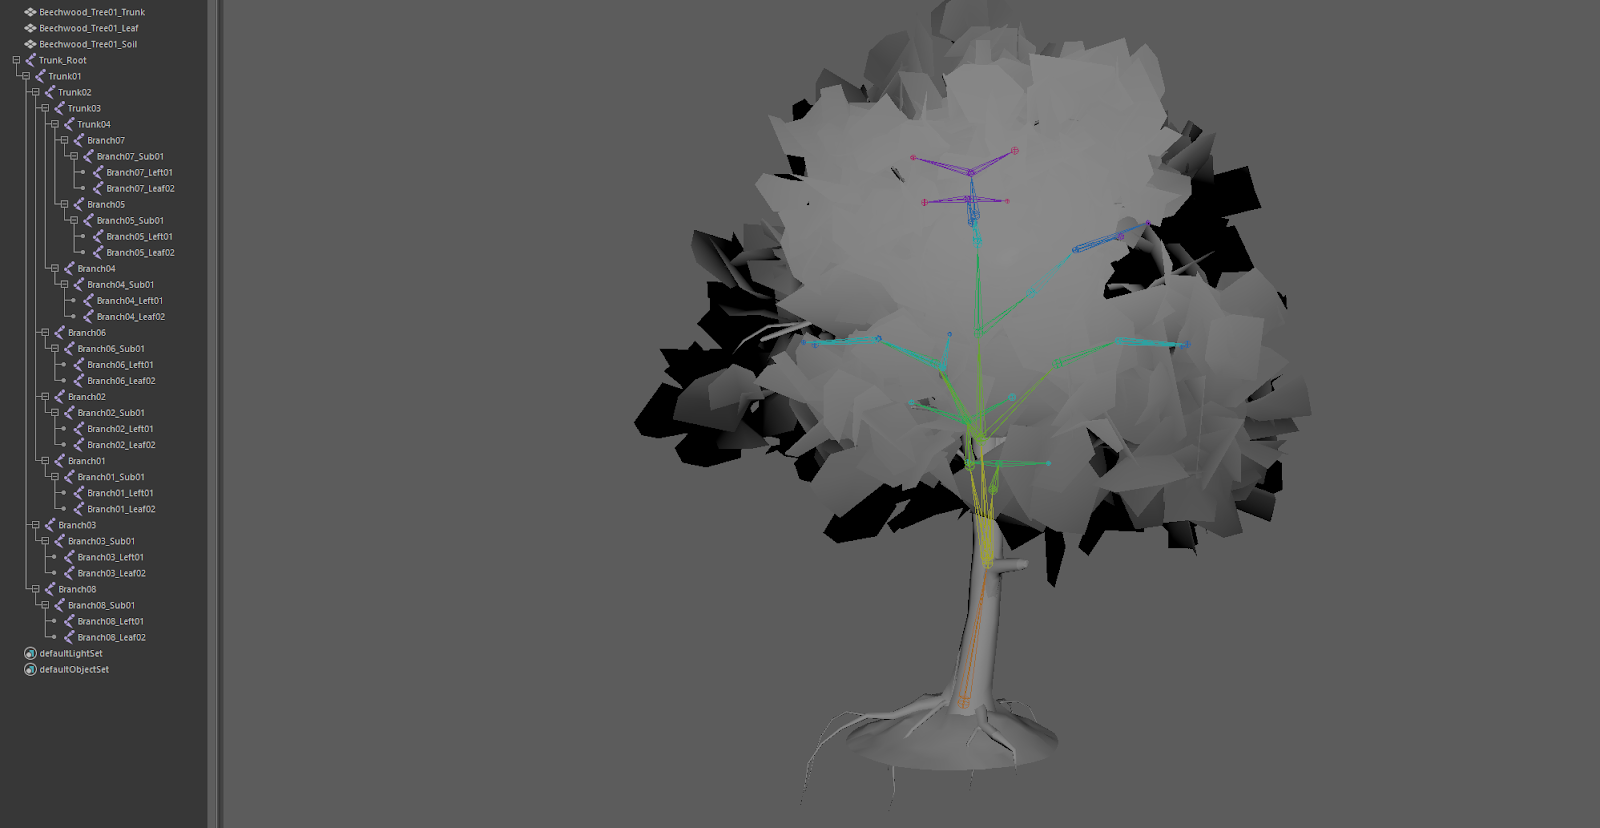
After we rig and skin the Beechwood tree, we could then import it and apply the exact same animation. This meant iterating and editing only needed to be done on one file, and it also saved on performance with fewer animations when running the experience.
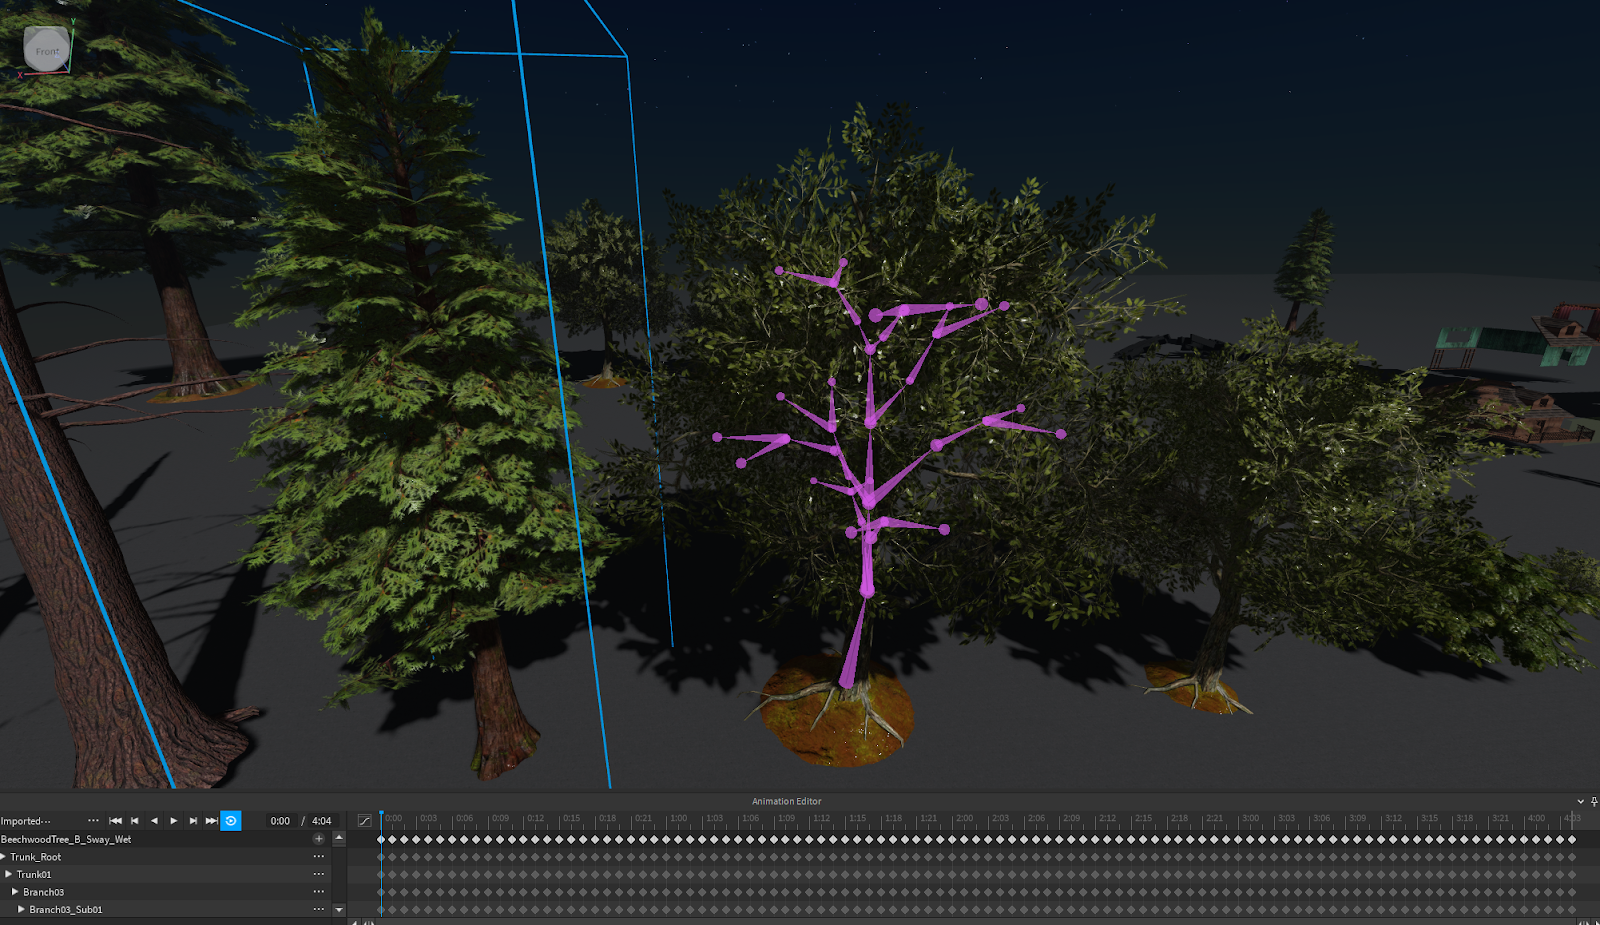
Once we had all the tree types we wanted animated, we made each into packages so we could continue to edit and update while playing several of the animations around the main area of the experience. Since we knew they had a performance cost, we used them sparingly around the house where the effect was most valuable! In the future as this becomes more performant, you'll be able to add more and more skinned mesh instances!
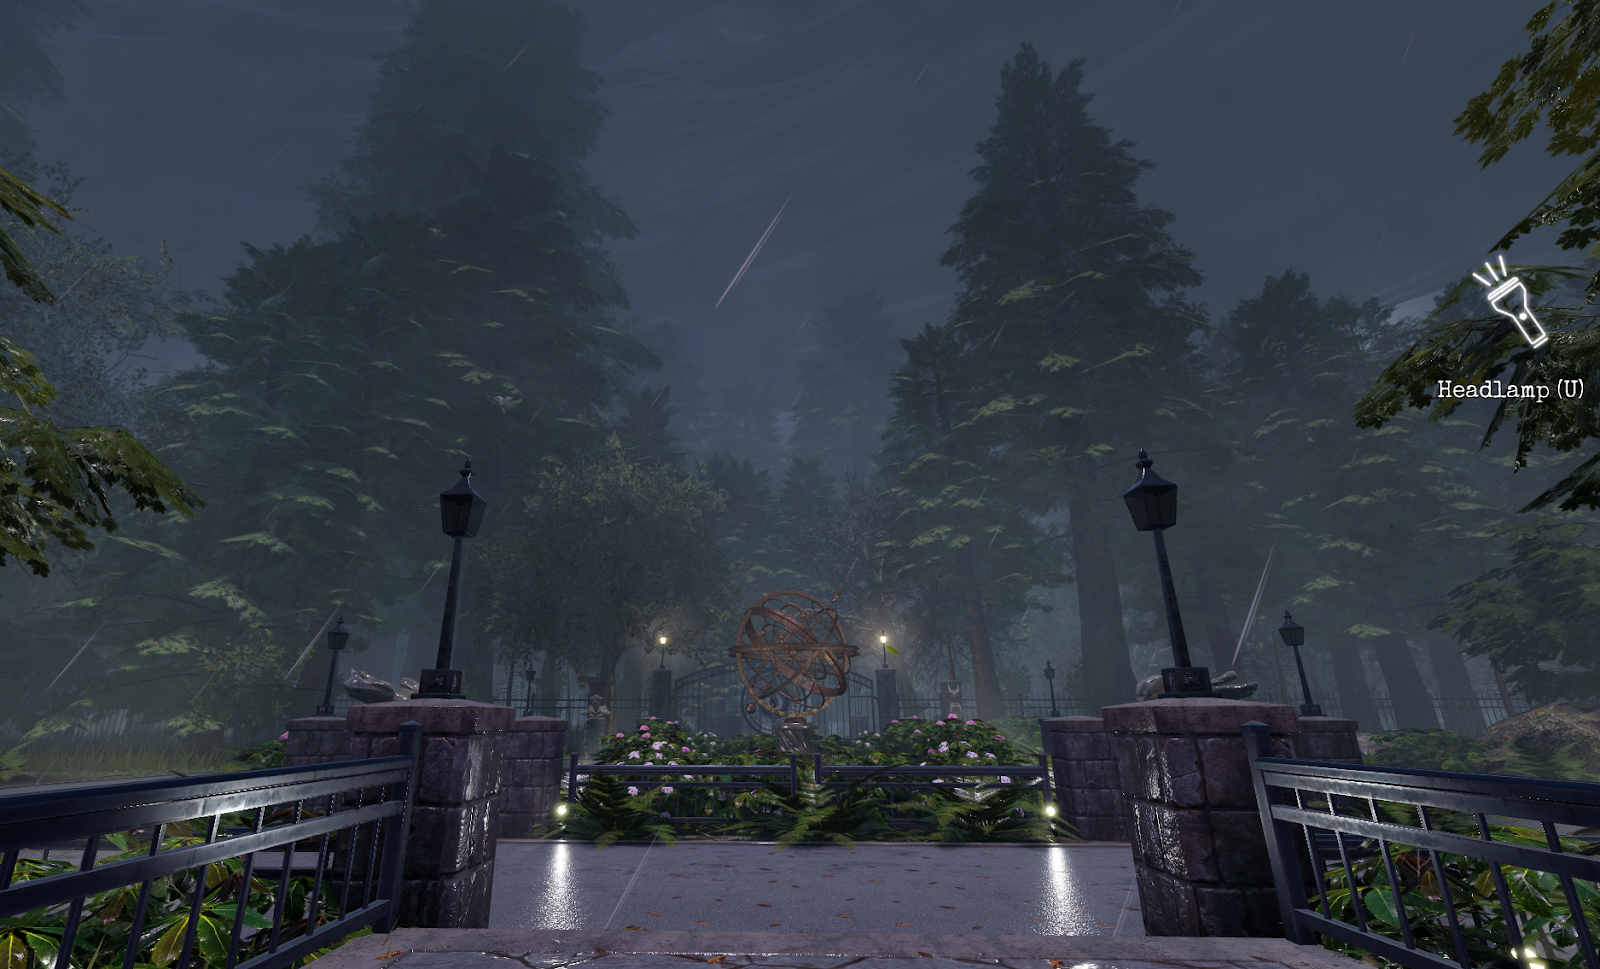
Make storm debris
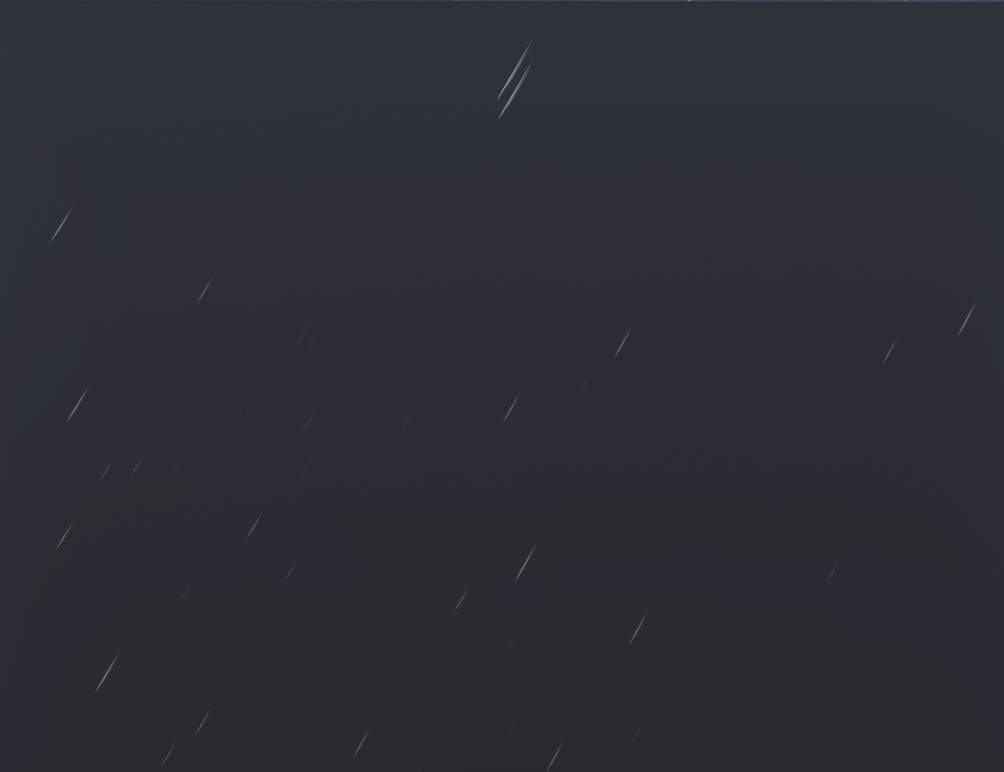
We wanted the rain to appear heavy, and for the fog and debris to blow through the trees. To do this, we set up a few invisible parts to act as particle volumes with child particle emitters immediately below the large storm clouds. Because of the particle count limit in Studio, we couldn't use one particle emitter for the entire space. Instead we added several that were the same size as each other in a grid pattern over the playable area space, because the presence of the trees means the players wouldn't be able to see very far.
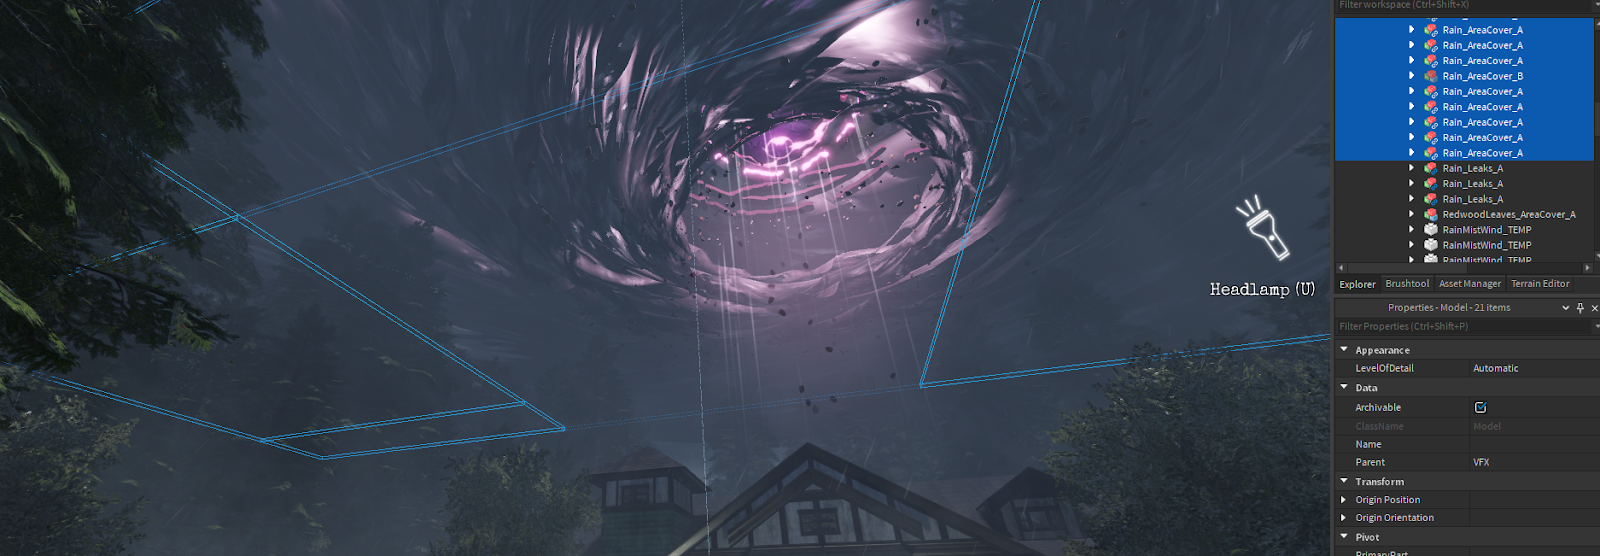
The rain particles leveraged a new particle emitter property ParticleEmitter.Squash that allows you to make a particle longer, or squatter. It is particularly useful for rain because it meant we didn't need a large rain texture, just stretch the one that was there. Just know that if you increase the value of ParticleEmitter.Squash, you may need to increase the overall ParticleEmitter.Size property too so that it's not too skinny! Overall, it was just a matter of playing around with the values until we got the rain heavy enough, but not so much that it blocked the visibility of the experience!

For the mist, fog, and leaves blowing through, it was much simpler to add a single larger part volume covering fewer areas because we didn't need a ton of particles running at one time. We started by setting up a volume and got the frequency of the particles where wanted them.
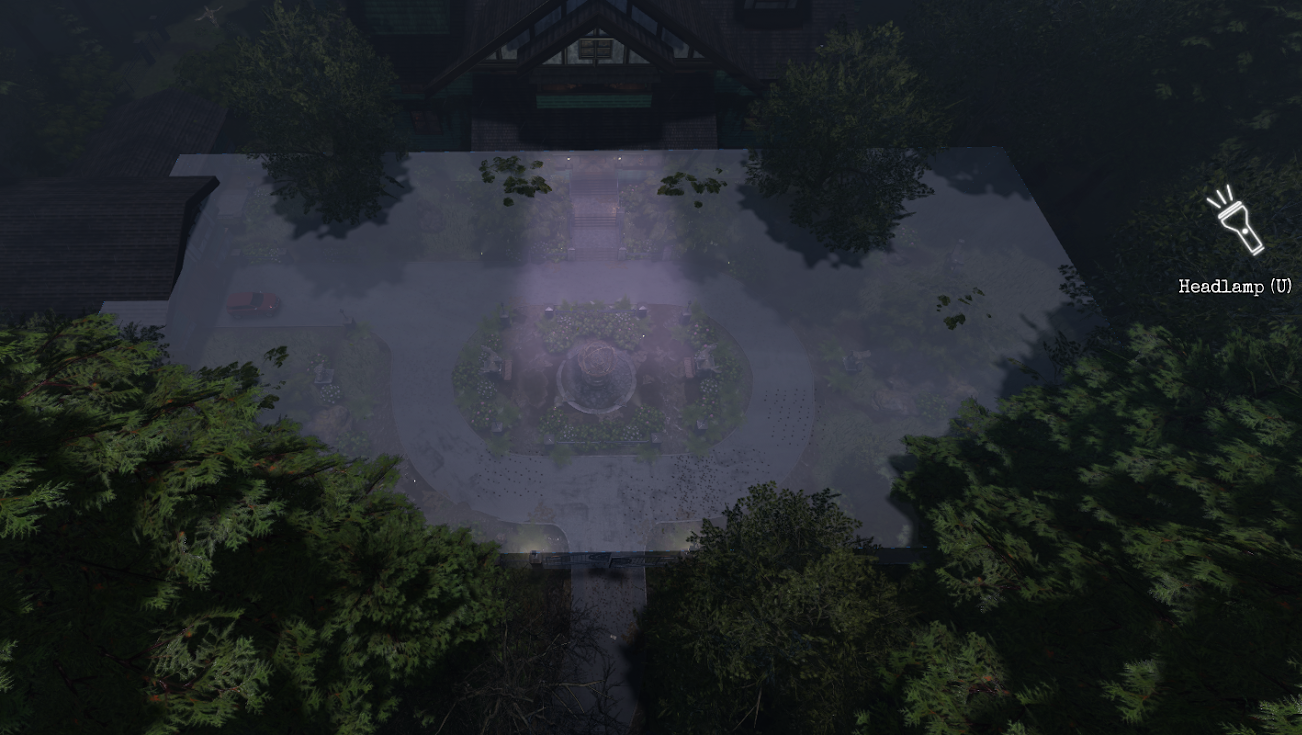
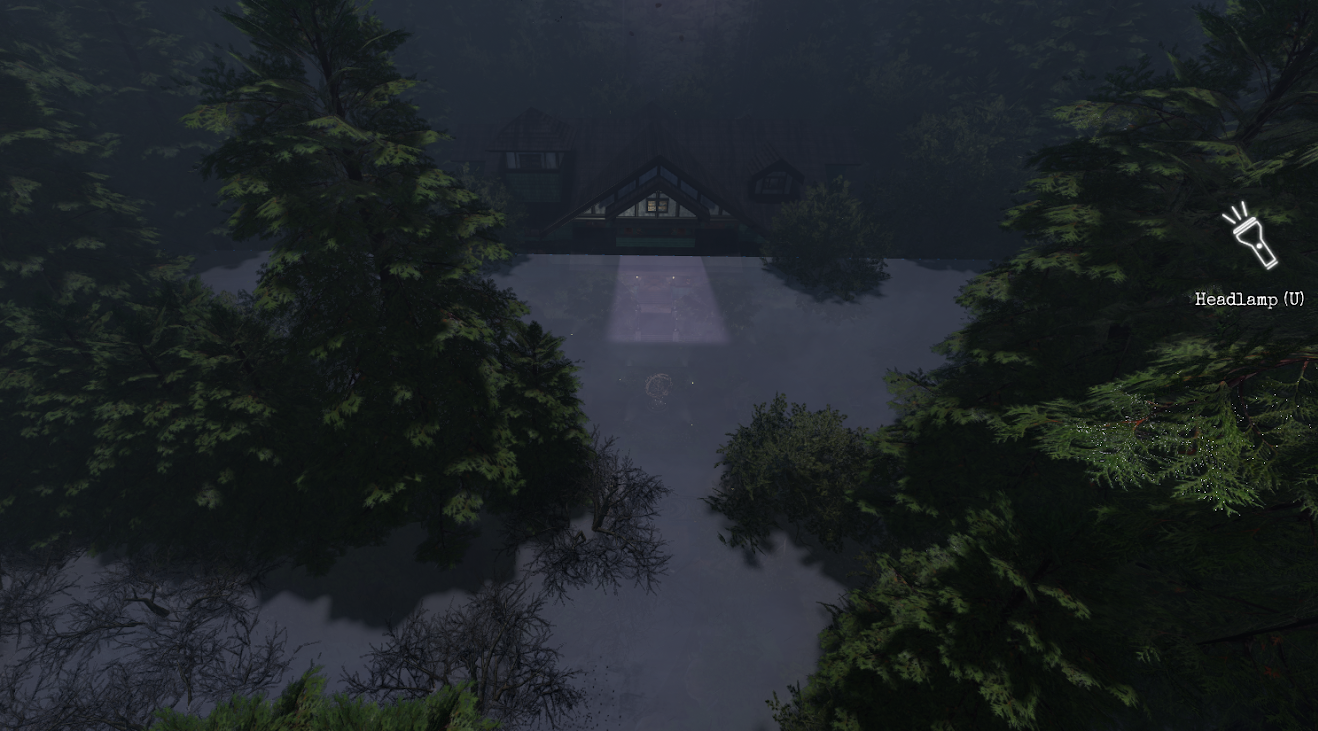
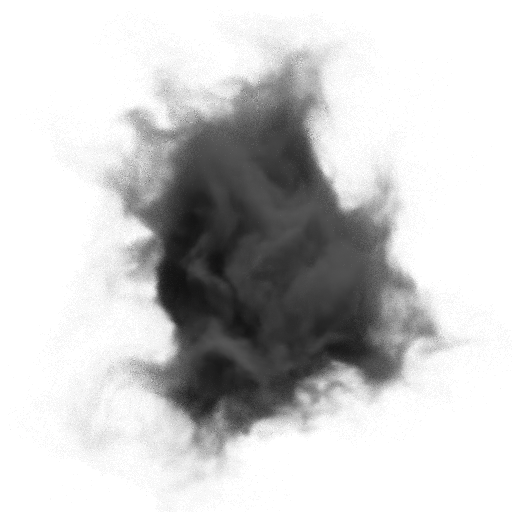
After that, we made our leaf blowing and wind textures, and set the particles to all rotate/move at different rates and start at different speeds. This meant that the larger fog particles would interact more naturally and not look so much like a repeating texture, especially given their size.
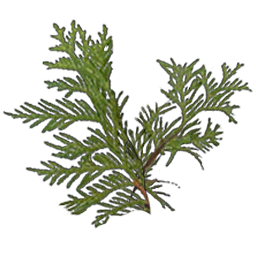
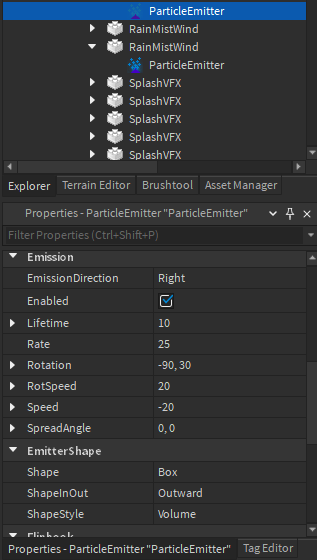
The result was some great action between the trees moving, the window blowing, and the lightning to create the effect of the storm surrounding the central eye of the storm.
Set up the eye of the storm
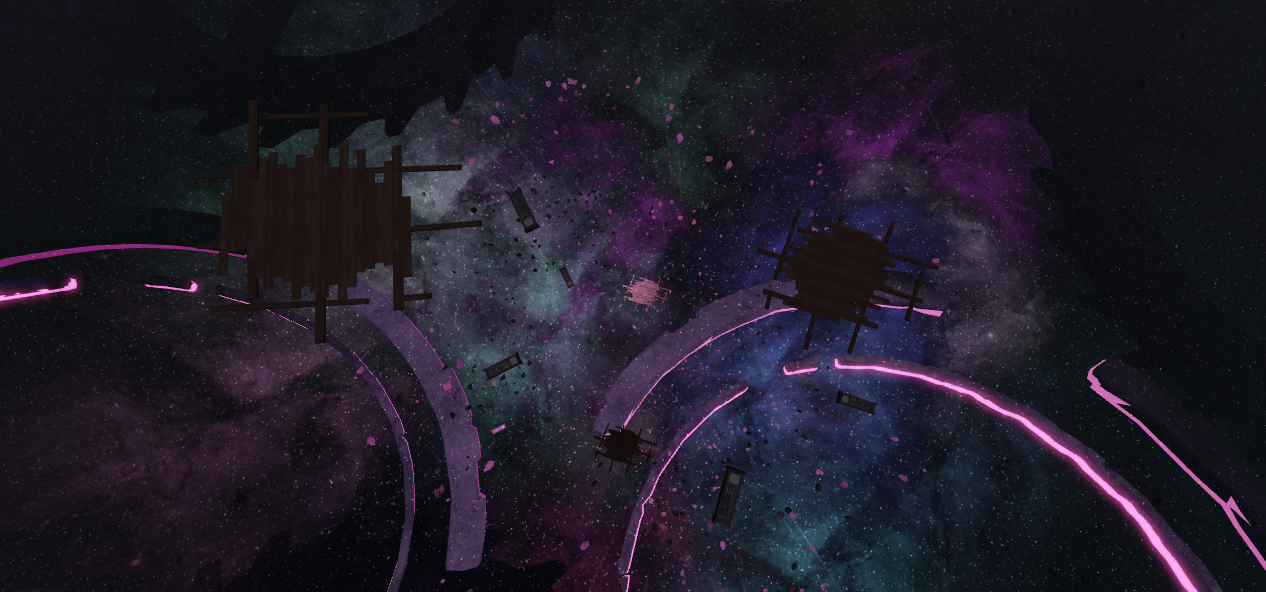
The fractured stone eye with a glowing core is meant to give players the first hint that there is something sinister and arcane occurring at the house that they should explore further. Since our scene is dark and the eye is far up in the sky, it was important to create a believable fractured stone silhouette, but it wasn't as important to create believable stone surface details because players wouldn't be able to see that. Knowing what is realistic for your players to see within your scene's lighting before putting in a ton of time into unnecessary details can save you many resources in the development process.
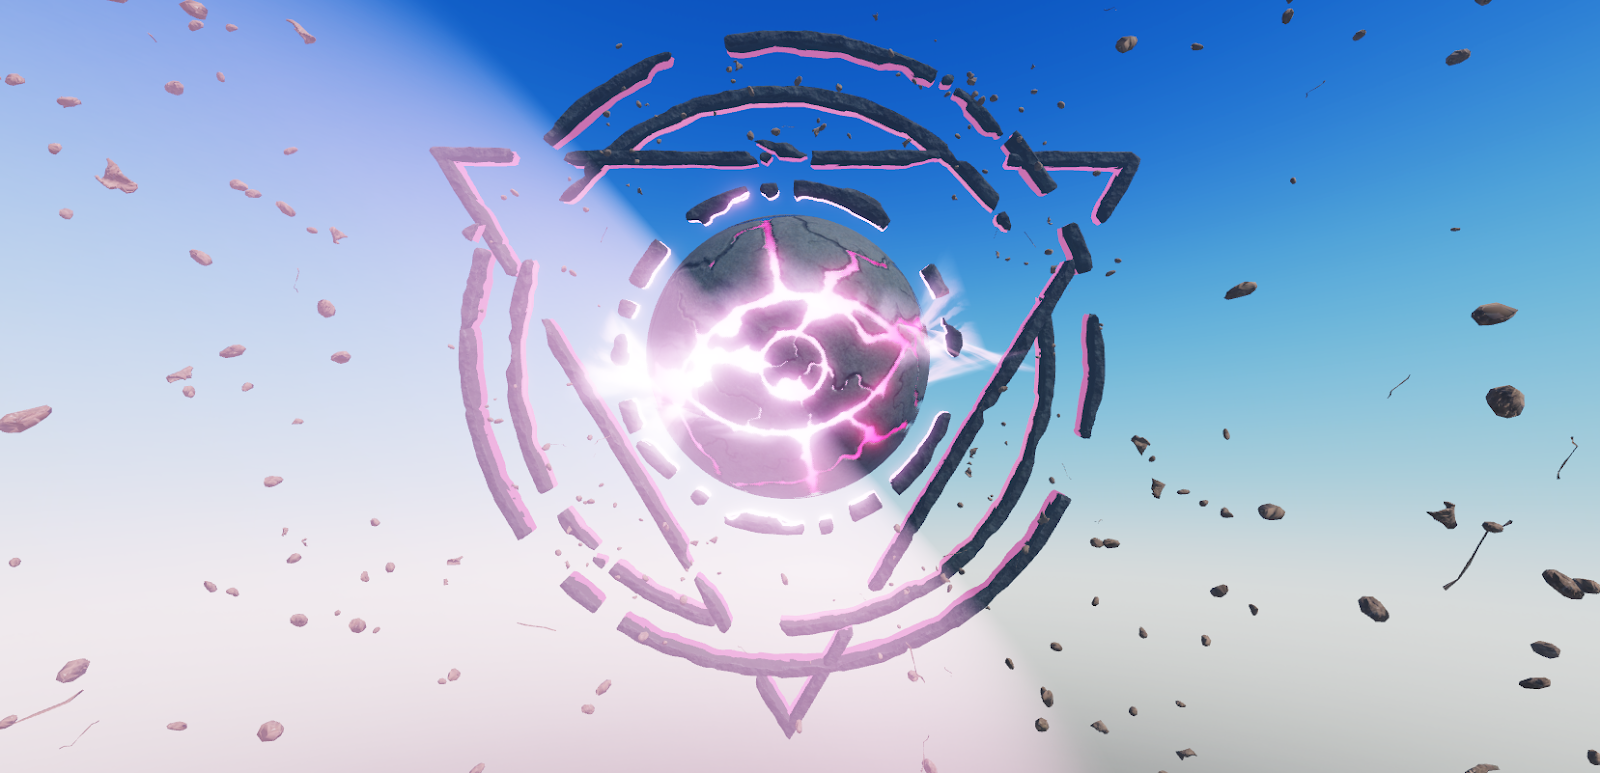
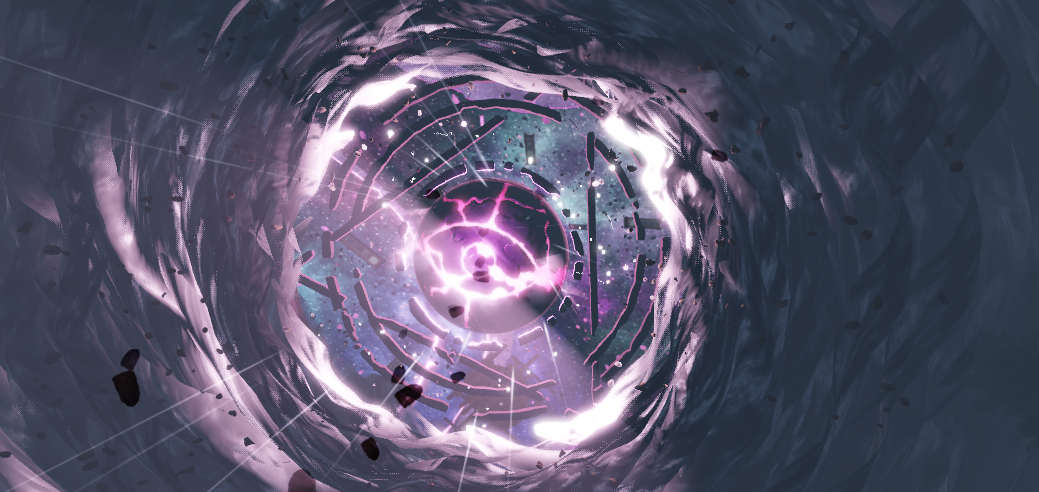
The distance from the player also meant that we could rely entirely on a normal map for the surface details of the eye so the mesh is just a plain sphere! We sculpted the details into a high poly mesh and baked its normal map onto a much lower poly sphere so that we could get all that beautiful detail without the massive performance cost.
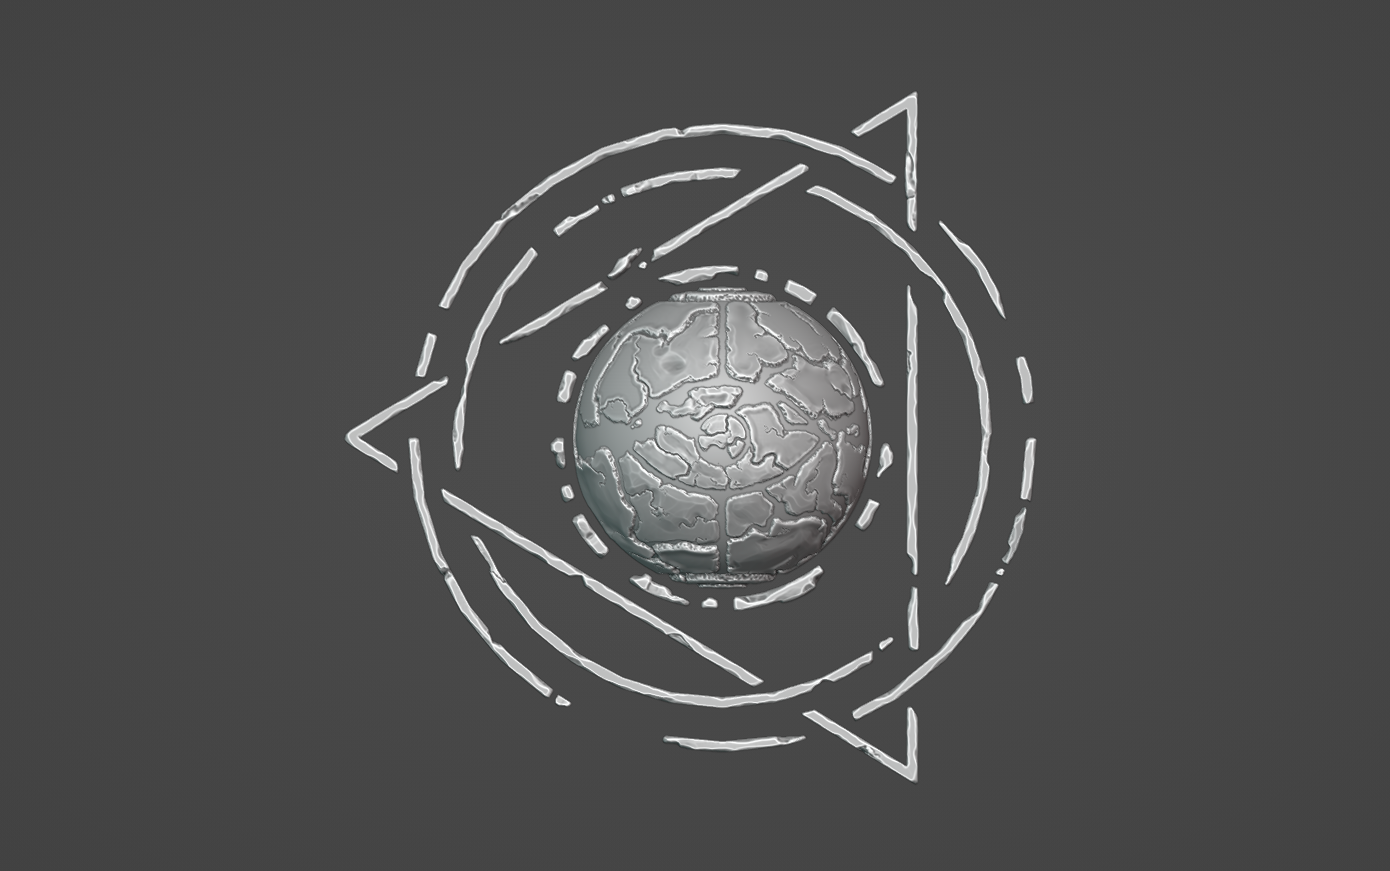
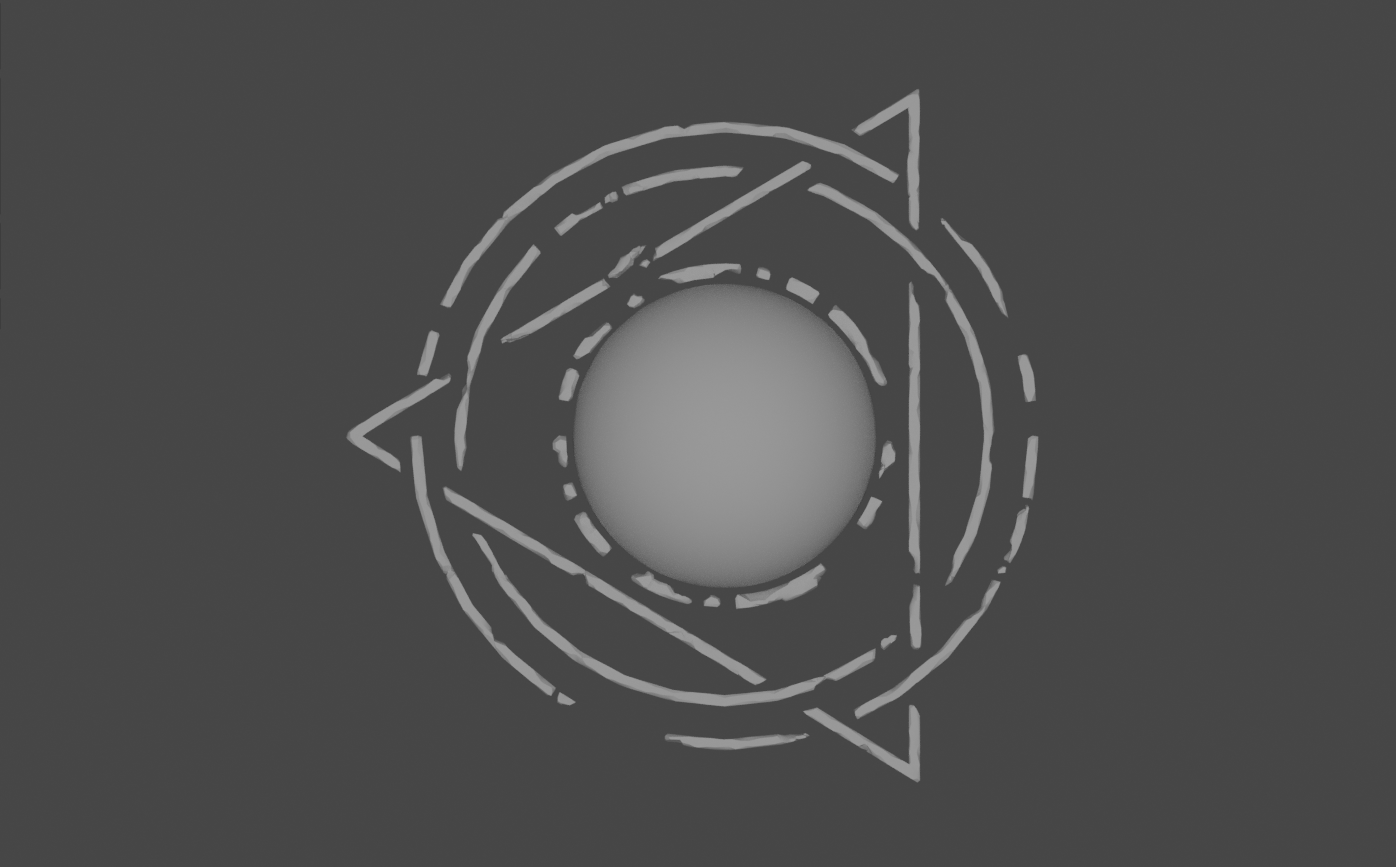
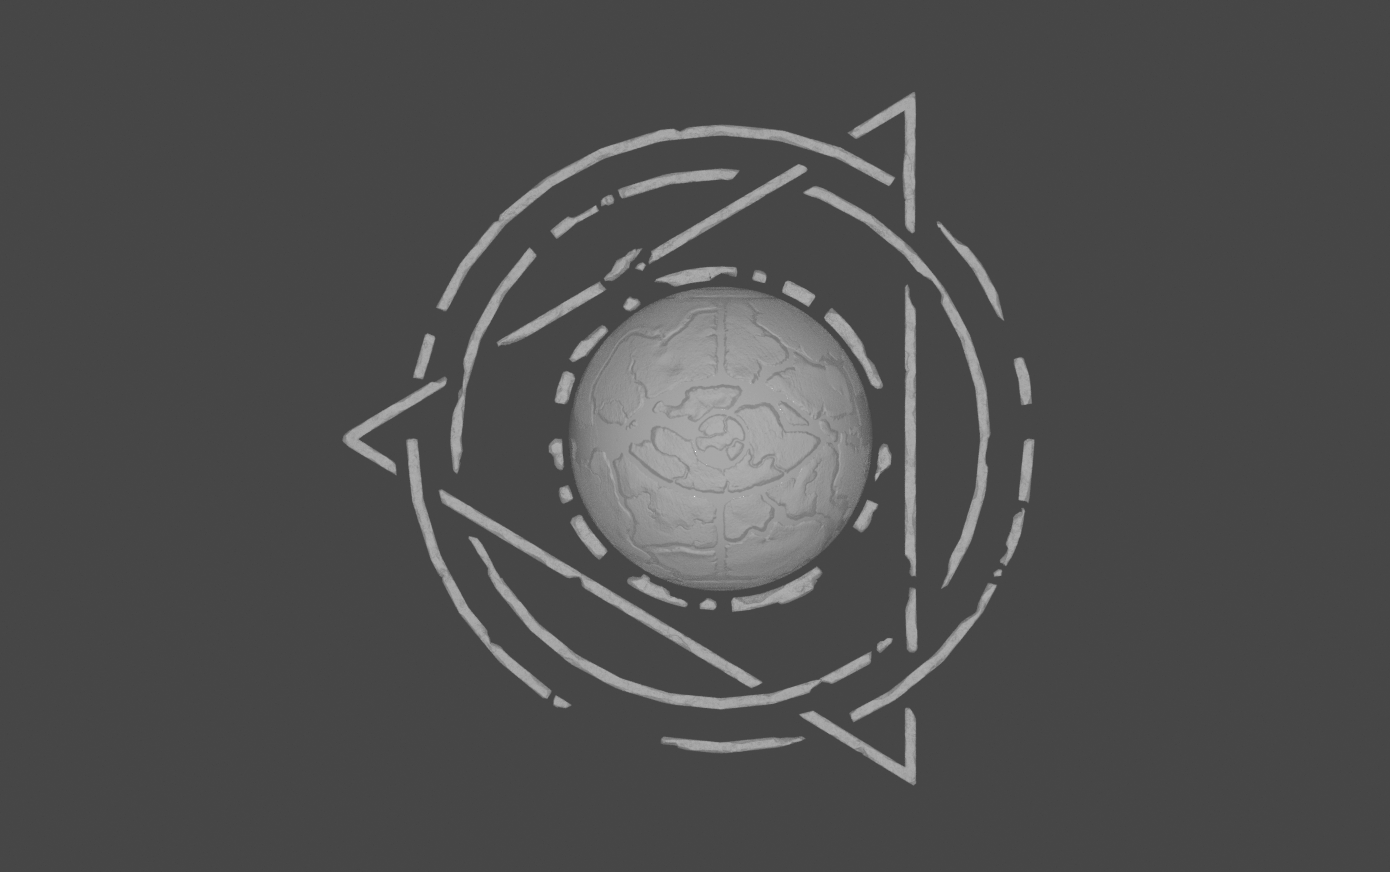
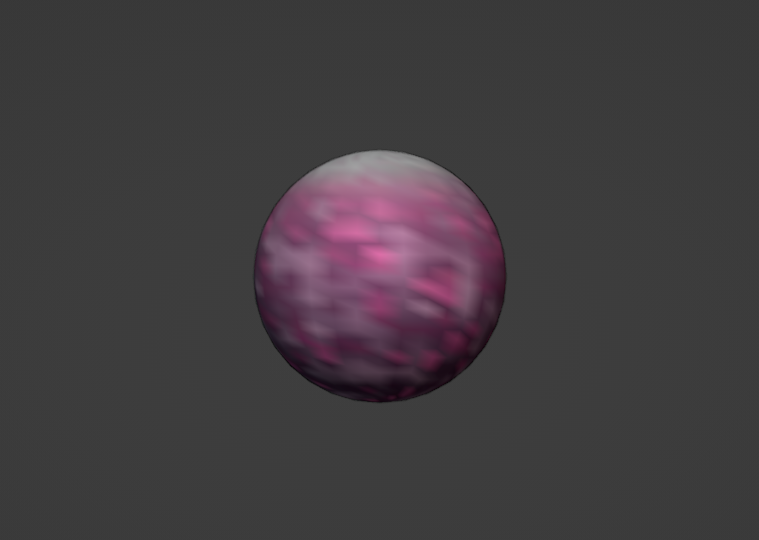
In order to add a supernatural feeling to the eye and to emphasize its presence, we decided to create a glowing, neon magma that would seep through its cracks. While there's no emissive channel for surface appearance, we overcome this hurdle by creating the eye out of 2 spheres: one for the rocky outside surface and a second, slightly smaller one for the glowing magma. In Substance Painter, we created a base color texture for the outer sphere with transparency in the areas where we wanted the inner core to come through. In Blender, we "vertex painted" the inner sphere for a cheap and easy way to get some color variation on it.
Another challenge we ran into when creating the eye was imposed by our use of streaming combined with the eye's distance from the player. Given the centrality of this structure, we wanted it to always be visible despite its distance but, without any hacks to its mesh, players were not able to see the eye unless they were in the solarium. We were able to force the eye's constant presence in the scene by adding some geometry to the eye and its rings. This geometry sits right below the terrain's surface, and this is enough to trick the engine into thinking the sphere is closer to the player than it is and always streaming it in. This should be done pretty sparingly though as forcing too many large objects to be streamed in could negate the benefits of streaming enabled and negatively impact game performance.
We were able to add movement to the eye and its rings thanks to the same script we used to rotate the cloud meshes. For a final touch, we decided to add a hint to the presence of another world beyond the clouds, but we had to take a creative approach in order to avoid adding more geometry to the scene and additionally having to deal with the previously mentioned hurdles posed by streaming enabled. We created a scene that had a lot of depth due to the relative size and distance of objects, rendered an image of this scene, then used said image as a decal on a part placed just behind the eye of the storm. We used the same method for rotating this part as we used for the eye and its rings.
Make the expanding pantry
One of the most fun things to produce were the corrupt spaces, where we could subvert players expectations of reality by literally changing it around them. For example, in the father's puzzle we wanted to emulate a moment similar to a nightmare where no matter how fast you run, the room feels like it keeps getting longer. We decided to make an expanding pantry that would run away from players as they were looking for ingredients to turn the room back into its normal state.
We set this up with a simple movement of the walls, and a clever layout of our rooms that would appear on either side of the pantry. In the room's normal state, the pantry was a simple hallway, but in the corrupt space, it was actually much longer with several wings and a false wall!
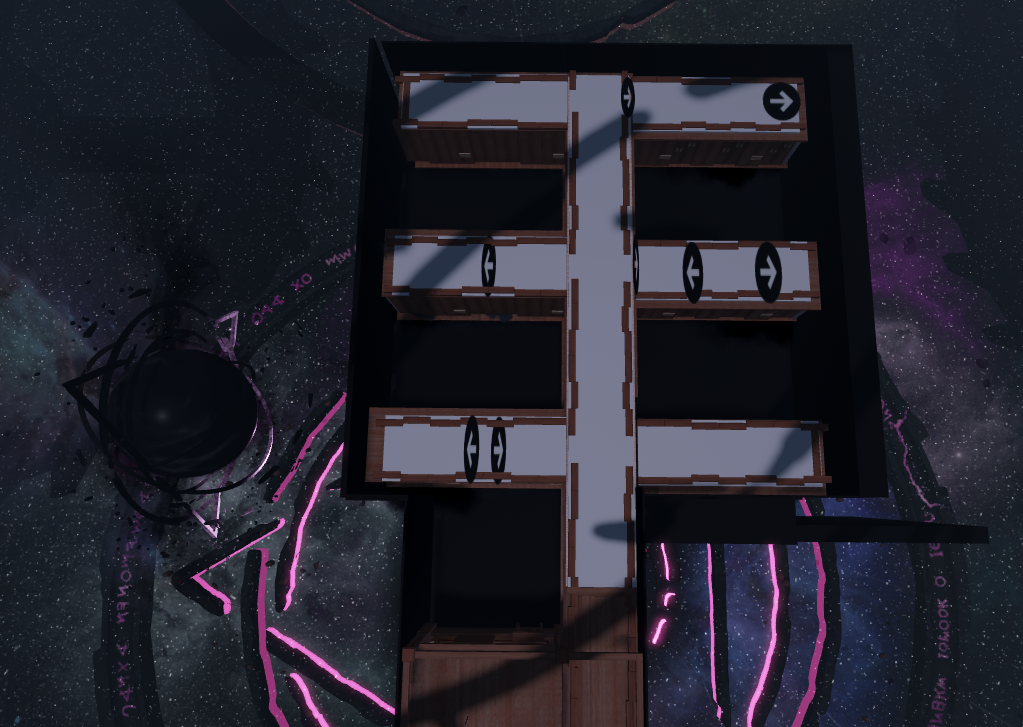
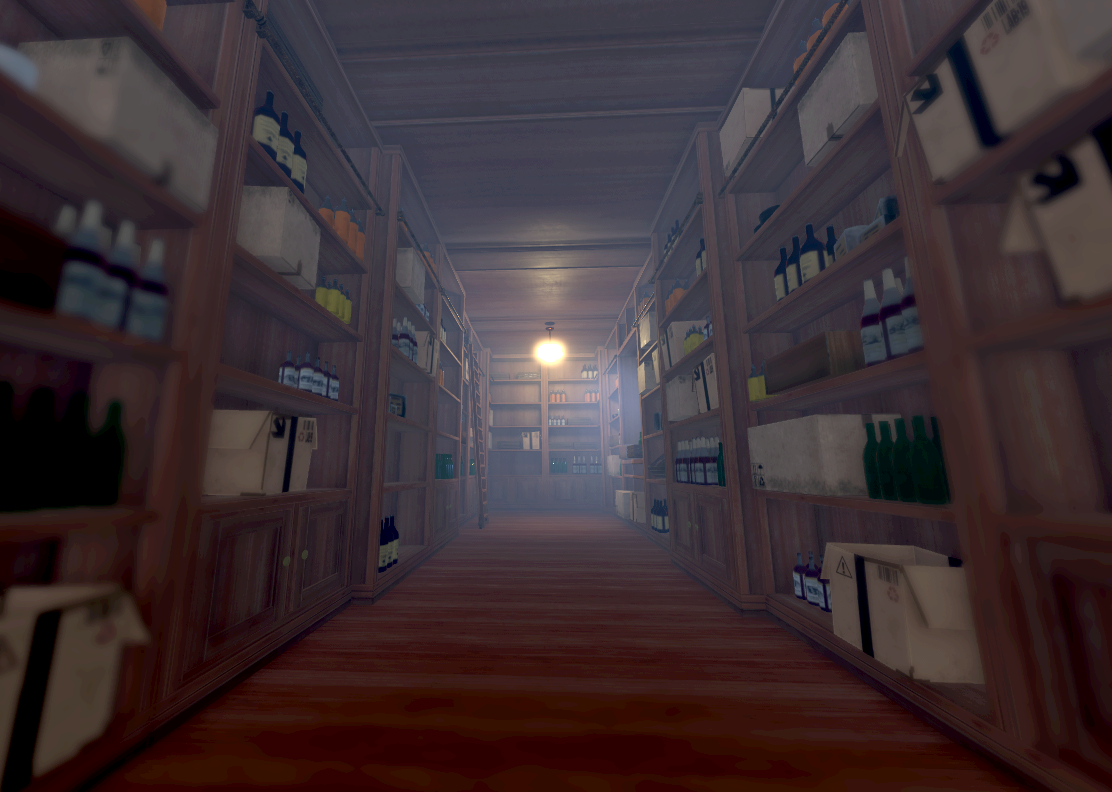
The false wall was a model group that we would move back the moment players entered a trigger volume, which was a transparent part earlier in the pantry that they would walk through. That trigger was also used in a script similar to ones used on all our doors, which called the TweenService to move from one goal to another. We used part volumes to tell the tweening operation where the start and end positions were for the wall.
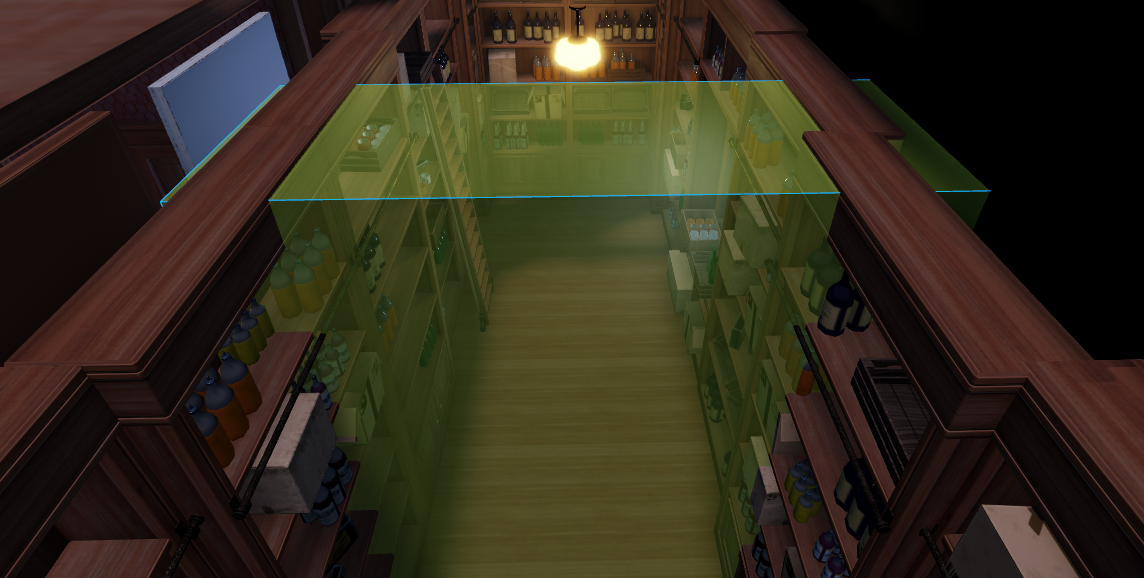
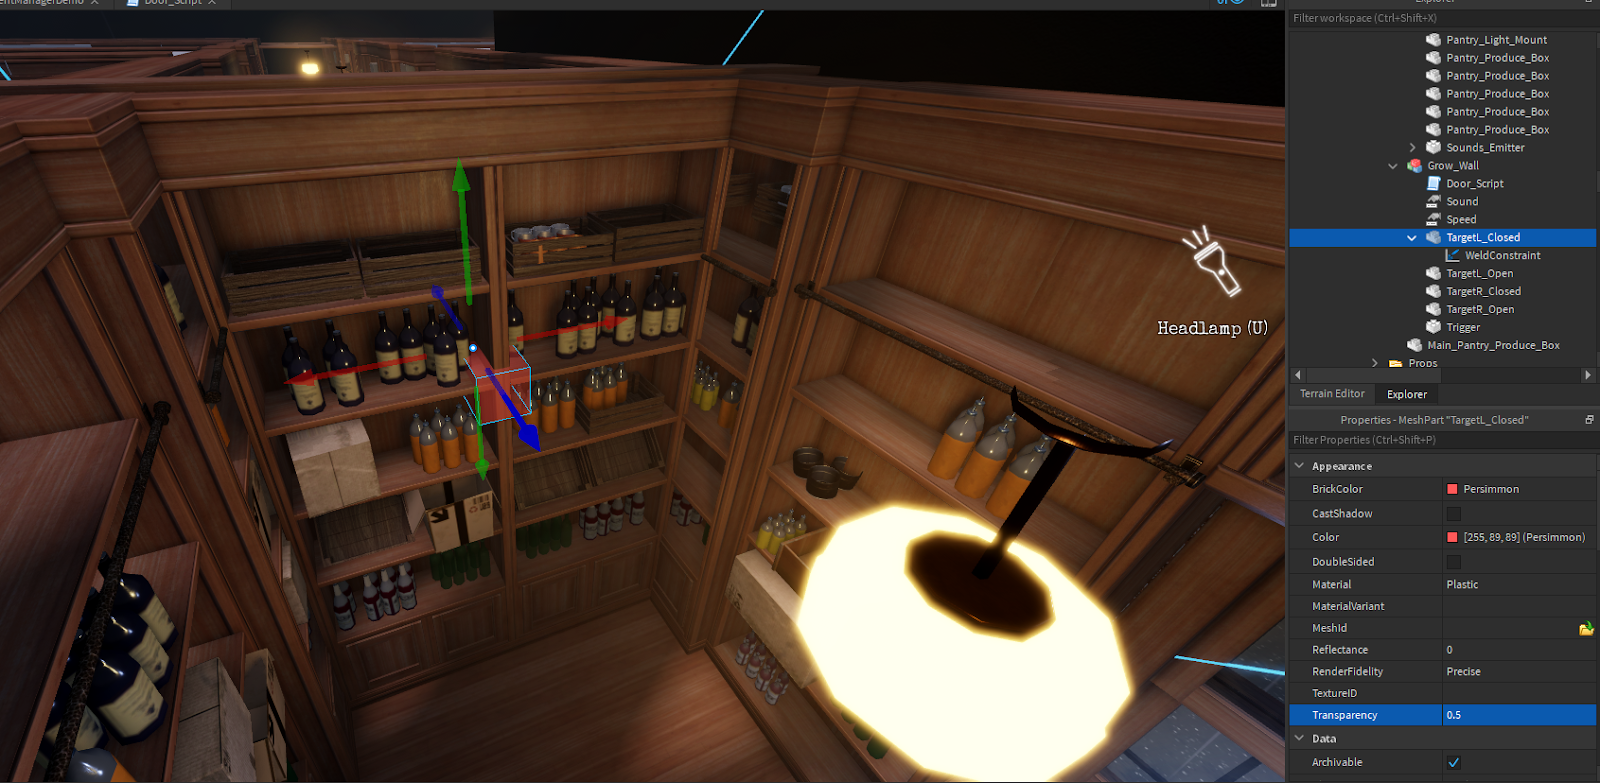
Because TweenService is such a general system, all our wall data model had to contain was the same components. For example, the following image is an example of a general door script that calls a sound defined by a "value" below the "Grow_Wall" model.

That same script, with some modifications in the following code sample, also triggered audio for the pantry moving. This added a lot to the movement!
local Players = game:GetService("Players")
local TweenService = game:GetService("TweenService")

local model = script.Parent
local sound = model.Sound.Value
local trigger = model.Trigger

local left = model.TargetL_Closed
local right = model.TargetR_Closed

local tweenInfo = TweenInfo.new(
	model.Speed.Value, --Time/Speed of Door Tween
	Enum.EasingStyle.Quart, --Easing Style
	Enum.EasingDirection.InOut, --EasingDirection
	0, --Repeat Count
	false, --Reverse true
	0 --Delay
)

local DoorState = {
	["Closed"] = 1,
	["Opening"] = 2,
	["Open"] = 3,
	["Closing"] = 4,
}

local doorState = DoorState.Closed
local playersNear = {}

local tweenL = TweenService:Create(left, tweenInfo, {CFrame = model.TargetL_Open.CFrame})
local tweenR = TweenService:Create(right, tweenInfo, {CFrame = model.TargetR_Open.CFrame})

local tweenLClose = TweenService:Create(left, tweenInfo, {CFrame = model.TargetL_Closed.CFrame})
local tweenRClose = TweenService:Create(right, tweenInfo, {CFrame = model.TargetR_Closed.CFrame})

local function StartOpening()
	doorState = DoorState.Opening
	sound:Play()

	tweenL:Play()
	tweenR:Play()
end

local function StartClosing()
	doorState = DoorState.Closing
	--model["Door"]:Play()

	tweenLClose:Play()
	tweenRClose:Play()
end

local function tweenOpenCompleted(playbackState)
	if next(playersNear) == nil then
		StartClosing()
	else
		doorState = DoorState.Open
	end
end

local function tweenCloseCompleted(playbackState)
	if next(playersNear) ~= nil then
		StartOpening()
	else
		doorState = DoorState.Closed
	end
end

tweenL.Completed:Connect(tweenOpenCompleted)
tweenLClose.Completed:Connect(tweenCloseCompleted)

local function touched(otherPart)
	if otherPart.Name == "HumanoidRootPart" then
		local player = Players:GetPlayerFromCharacter(otherPart.Parent)
		if player then
			--print("touch")
			playersNear[player] = 1
			if doorState == DoorState.Closed then
				StartOpening()
			end
		end
	end
end
Once we had the false wall moving to the back of the room, we needed the rest of the content to move with it. To do that, we needed all loose items on the pantry to be welded to the wall as it moved. Using Weld Constraints, we were quickly able to weld all objects to the pantry wall to move as a single object. Doing this meant we had the option to unweld these items so players could bump into them and knock them around!
Make the corrupted treehouse
Studio is a fantastic physically-based engine that you can use to create everything from a swinging gate to a spinning platform. With our demo, we wanted to use physics to create a sense of realism in an otherwise unrealistic set of environments. Using just a few constraints, you can create some fun and challenging obstacle courses within your own experiences!
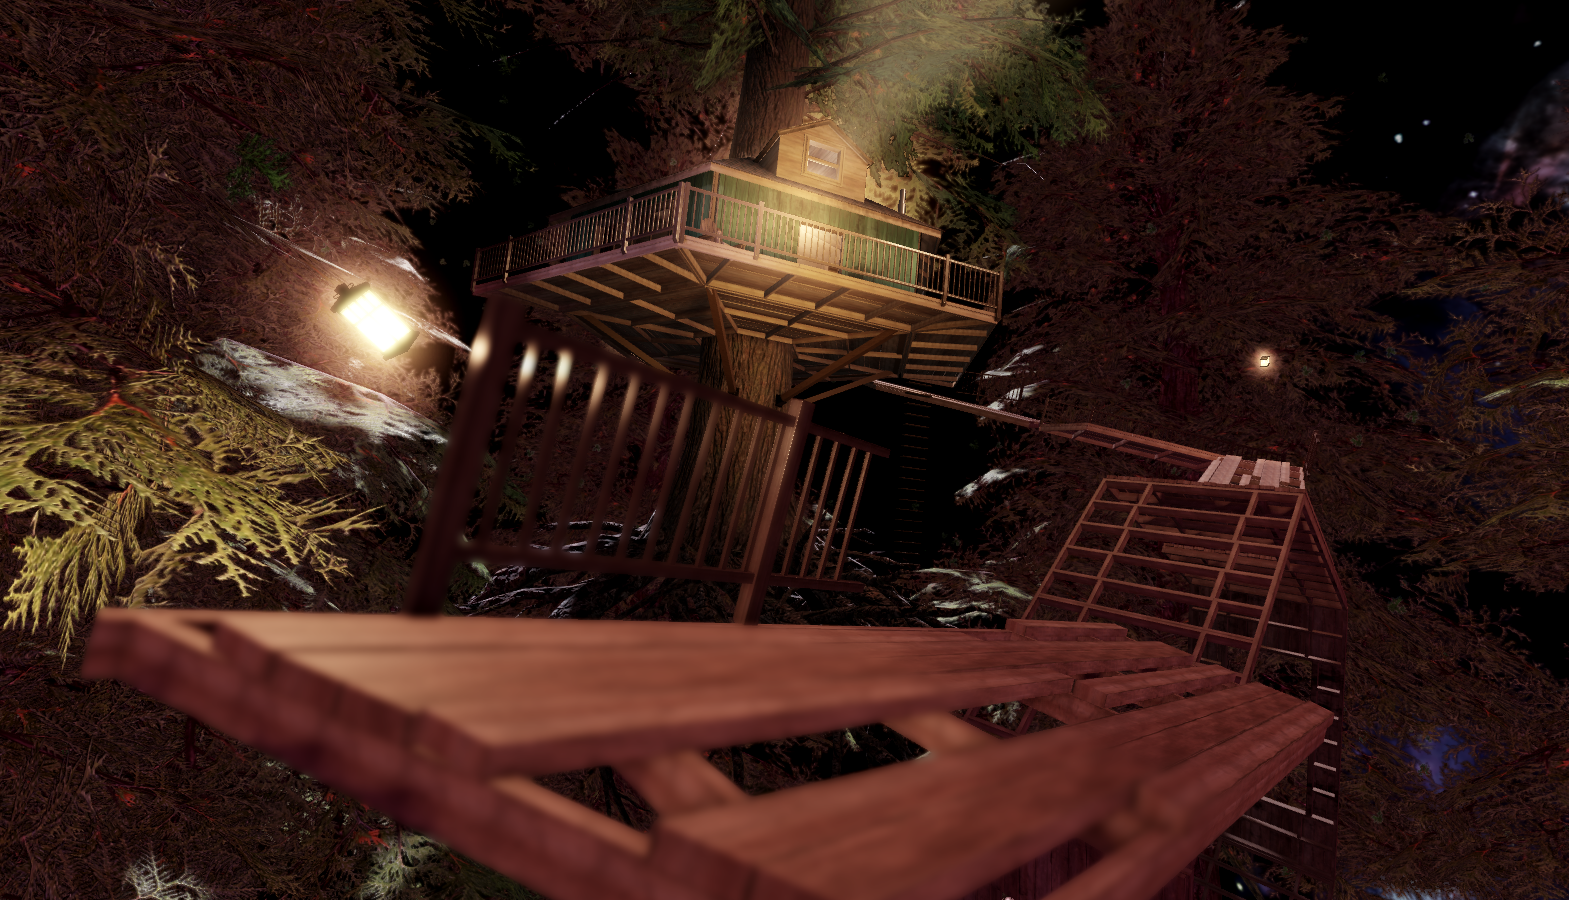
Constraints are a group of physically-based motors that align objects and constrain behaviors. For example, you can use a rod constraint to connect to objects in order to keep them a fixed distance from each other, or the rope constraint to have a lamp hanging from the end of the line. For the son's puzzle in which players are transported to the corrupt state of the study, we wanted to literally flip the world on its side. Doing so would subvert players' expectations of reality and the rules there, while still using the physics system as it was intended!
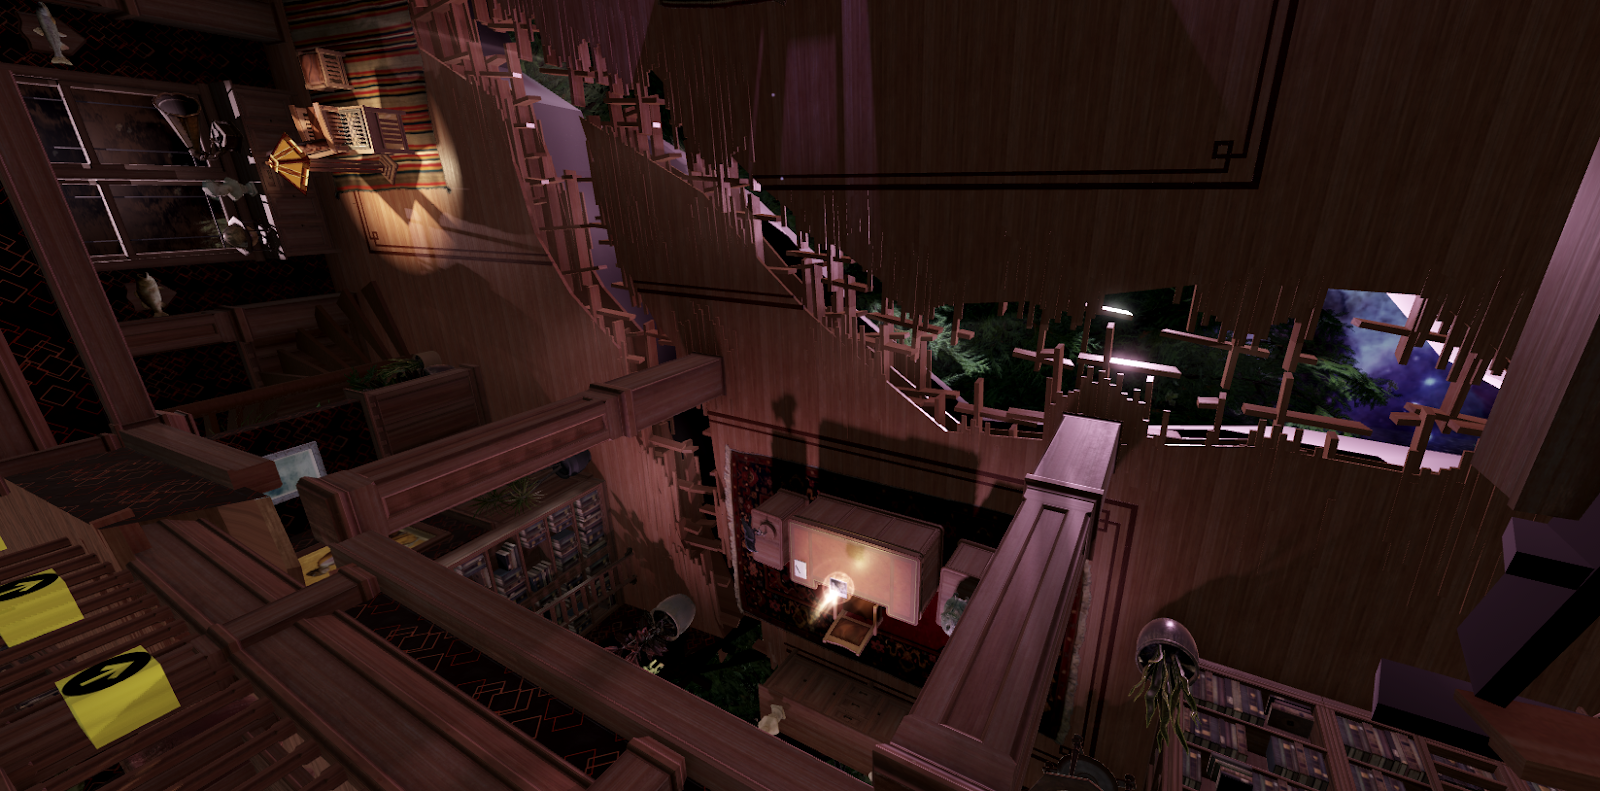
Once players worked down to the main area of the puzzle, they were greeted with a familiar sight on Roblox: an obstacle course. This particular obstacle course consisted of several spinning platforms and rotating walls, along with "safe areas" that progressed the story. We'll focus on the rotating/spinning elements.
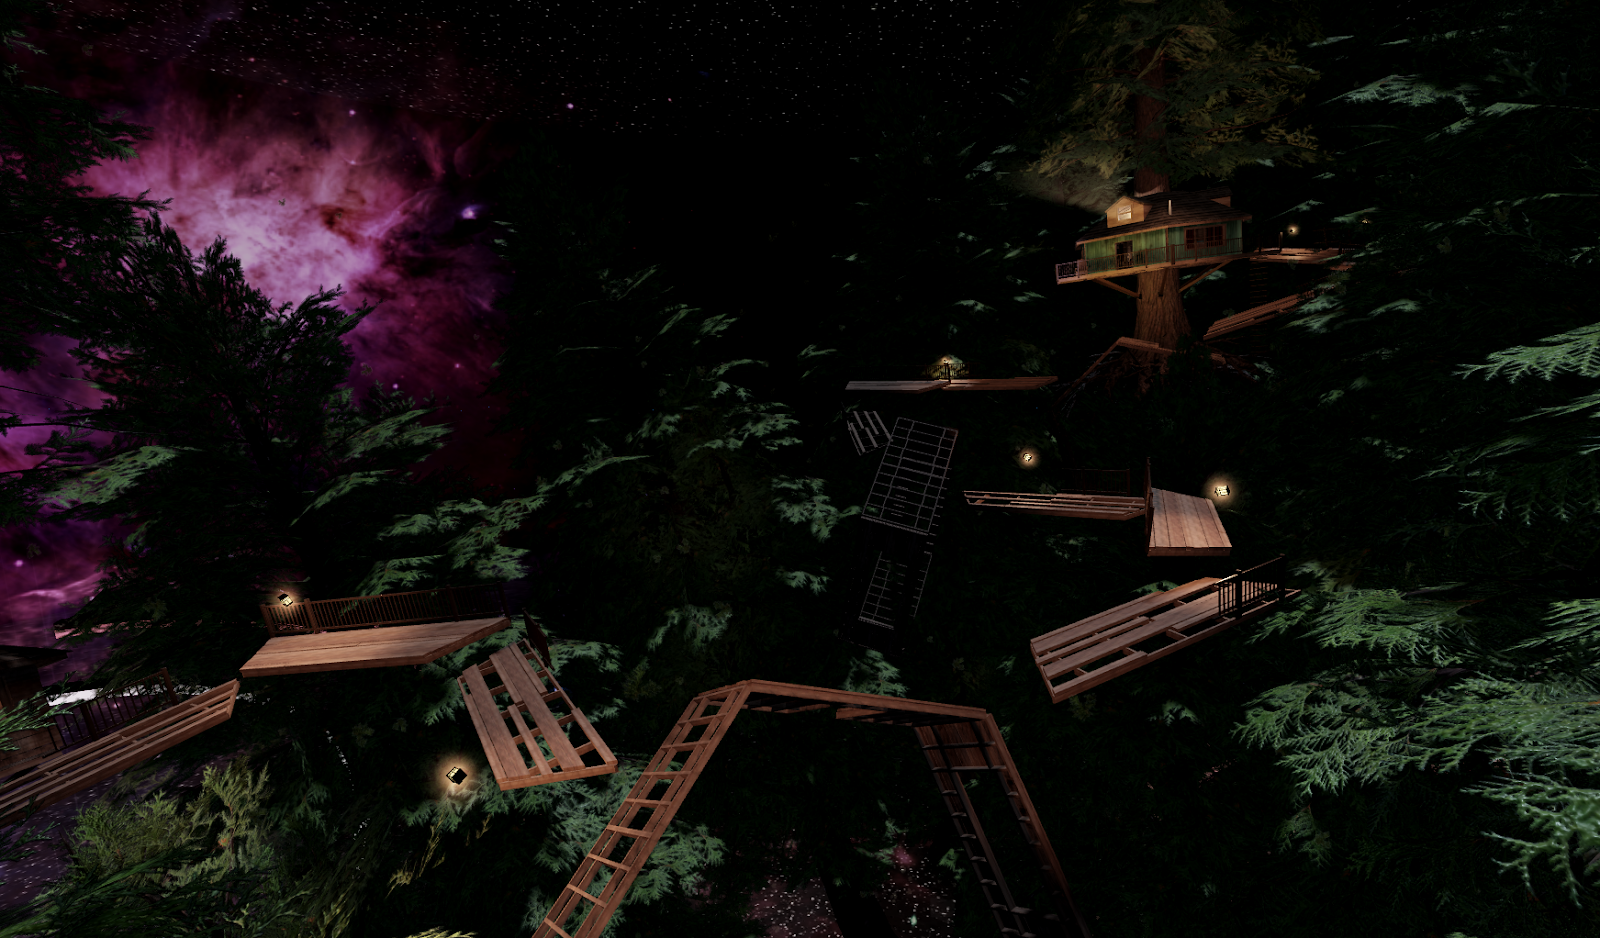
Why did we use constraints here? Because TweenService or other methods wouldn't move the player while they stood on them. Without the object moving the player, someone could jump on a platform and it would spin out from under them. Instead, we wanted players to navigate through a spinning platform while trying to make their jump onto the next one. Because of this approach, players felt rooted where they stood while making a decision with how to proceed through the course, and we didn't need to do anything special to ensure they moved with a rotating surface!
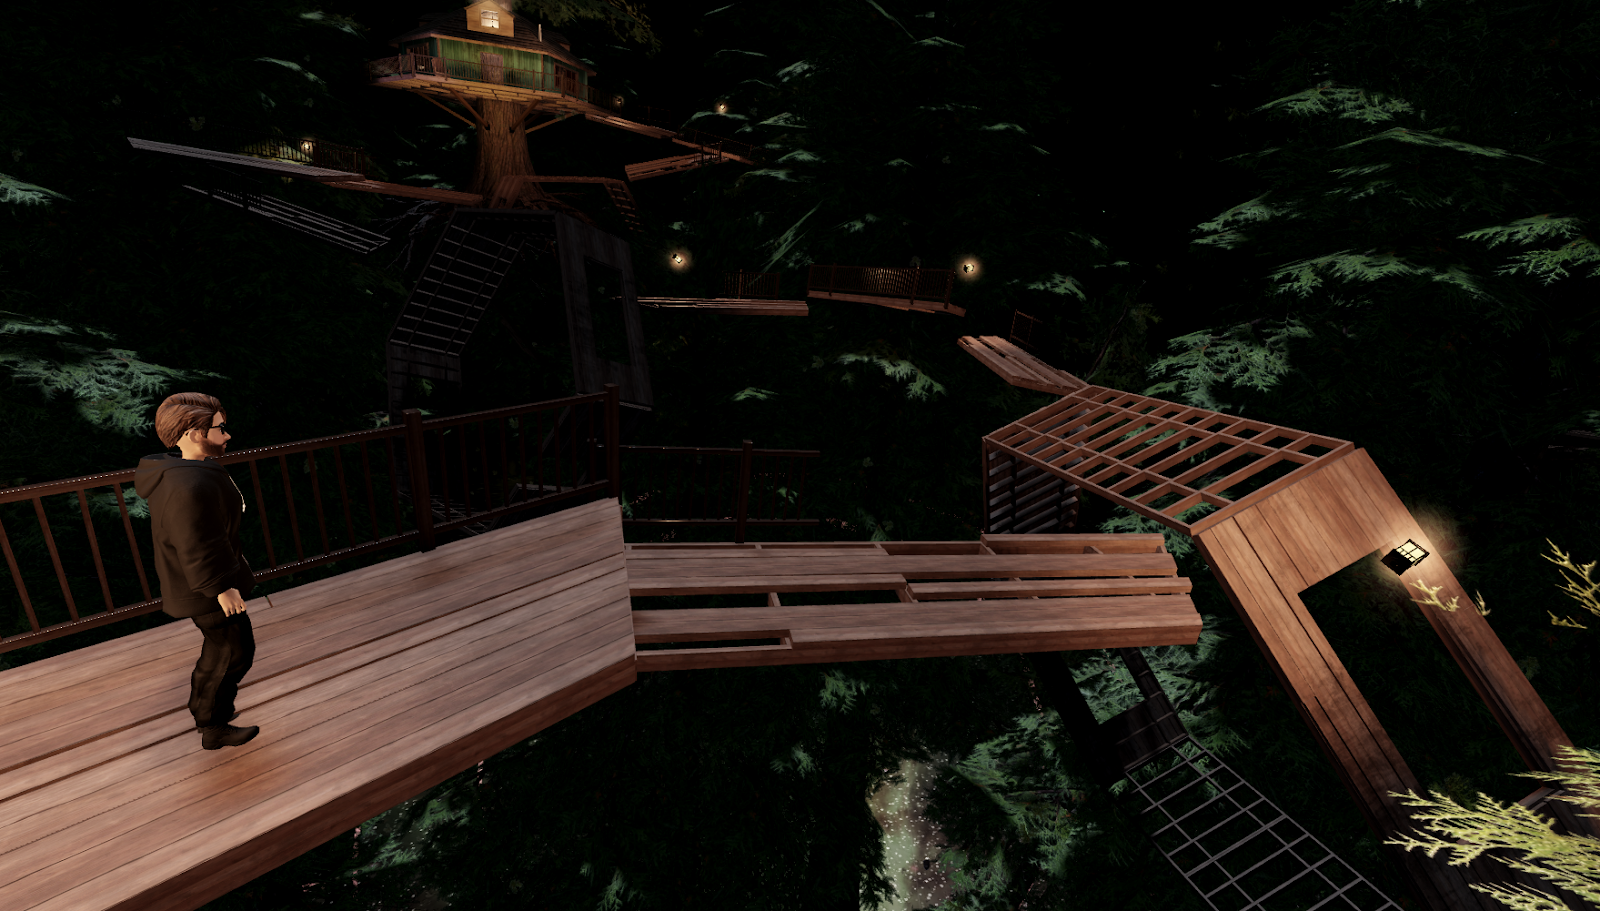
To do this, we needed to first use assets from our current kit and add any new content for a visual effect. We made a few incomplete walls and platforms with holes in them to tell the story of the grandmother building the treehouse. Because we didn't want to create a bunch of unique platforms, we made 4 different base pieces and railing pieces separately. This allowed us to mix and match individual base and railing pieces to have plenty of variety.
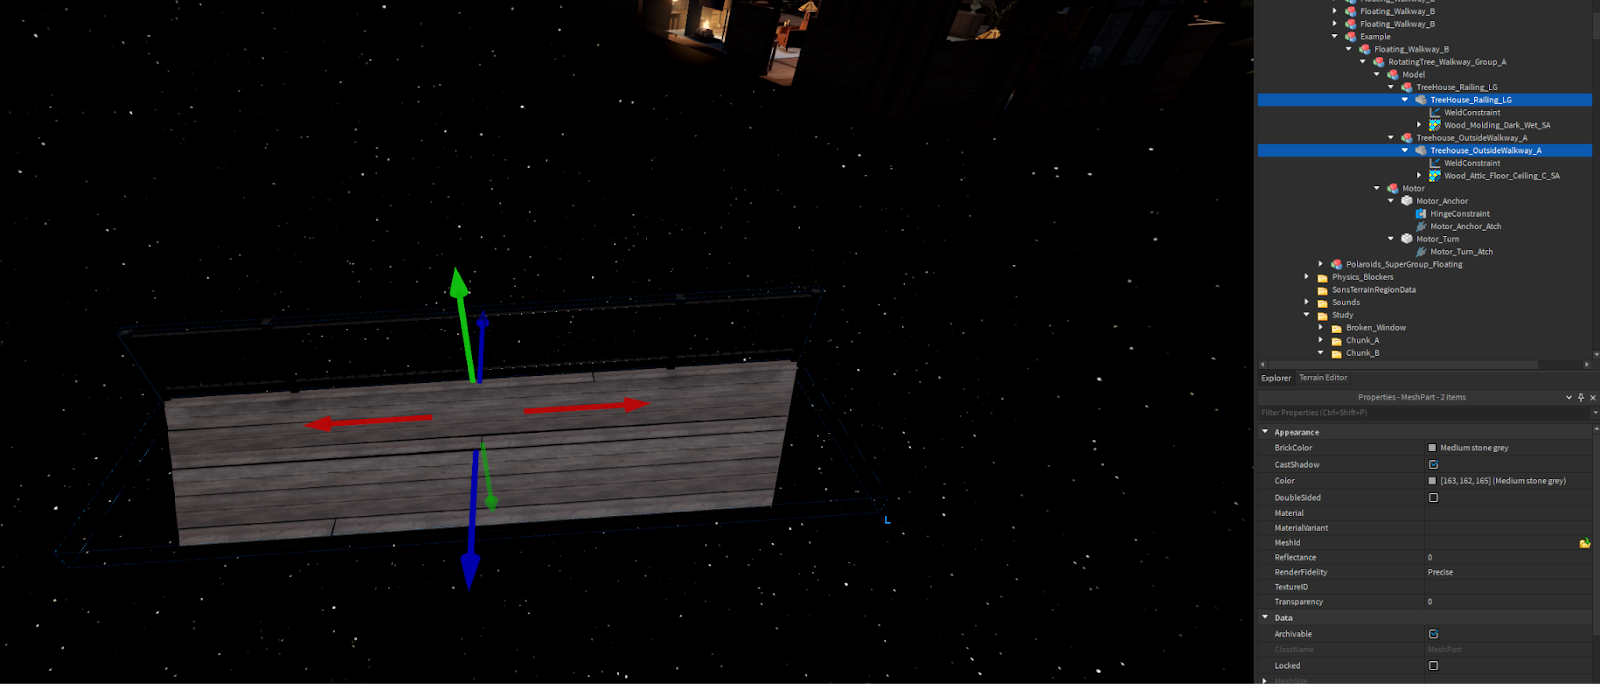
We knew that since we were using constraints, we wouldn't be able to anchor these meshes because they wouldn't move even with the presence of a constraint/motor driving them. The constraint needed to be a child of something that was anchored in order for the platform to not just fall out of the world. We solved this through a part we named Motor_Anchor that had a hinge constraint to drive the overall movement of the platform. After that, we needed the two meshes to move as one, so we created a part we named Motor_Turn, then we welded the two meshes to it. This way the constraint would be able to work on a single part, as opposed to multiple hinges working with multiple parts.
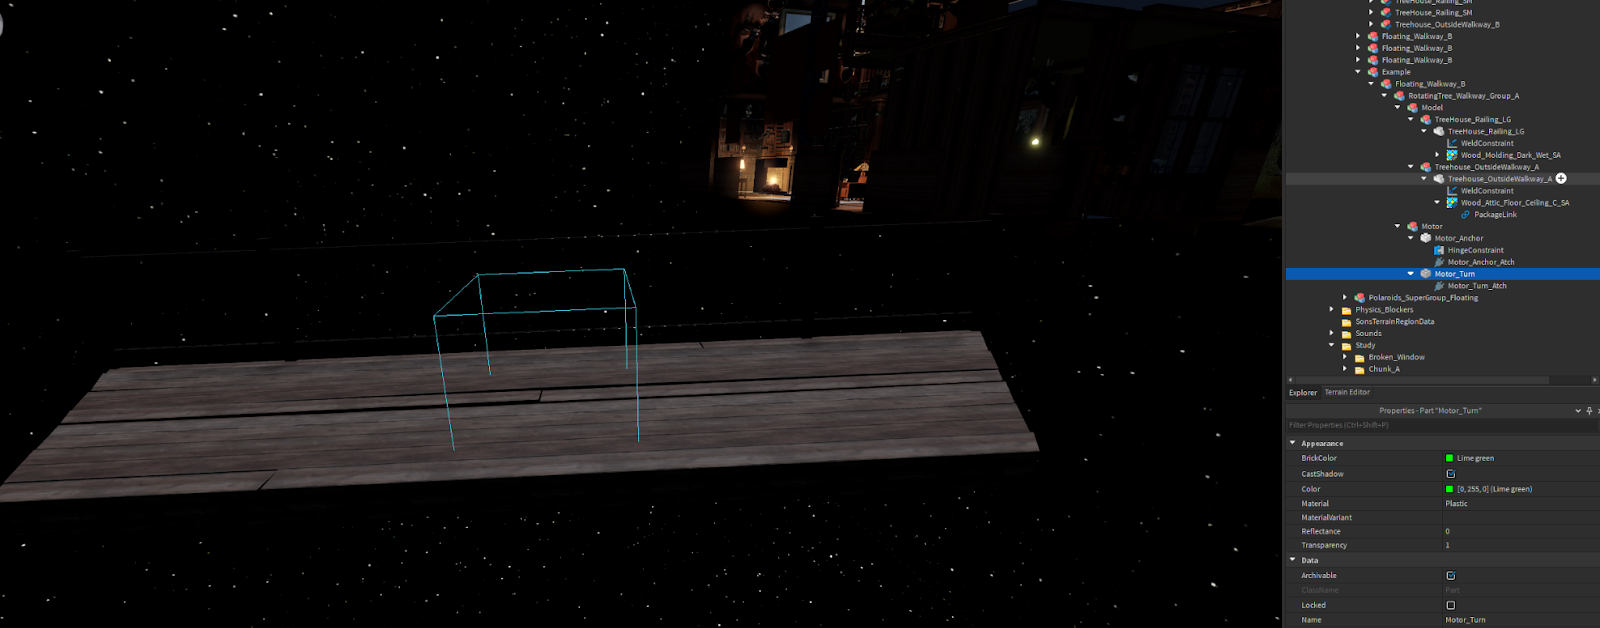
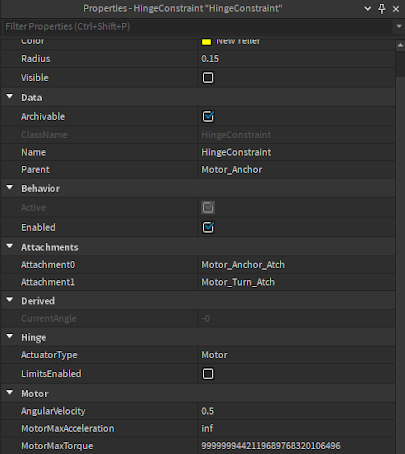
It was now time to set up the actual behavior of the hinge constraint itself, and add the attachments that would act as the orientation of the part and the constraint together. We placed the turning attachment on the Motor_Turn, which the walkway pieces were welded to, and another attachment for the anchor behavior on the Motor_Anchor itself, beside the hinge constraint. Since this needed to rotate on its own, as opposed to being influenced by the player (like a door hinge), we set the HingeConstraint.ActuatorType to Motor, treating the constraint like a self-moving motor.
To keep the platforms spinning at a constant speed, we then set up the HingeConstraint.AngularVelocity, HingeConstraint.MotorMaxAcceleration, and HingeConstraint.MotorMaxTorque properties to values that would allow movement and prevent interruption if a player jumped on it.
Now we needed to make the rotating walls. The walls needed to rotate on their apparent center, and we knew we wanted them to be able to handle any orientation relative to the rest of the level. Like the platforms, we constructed these so that all the walls were unanchored and welded to the Motor_Turn.
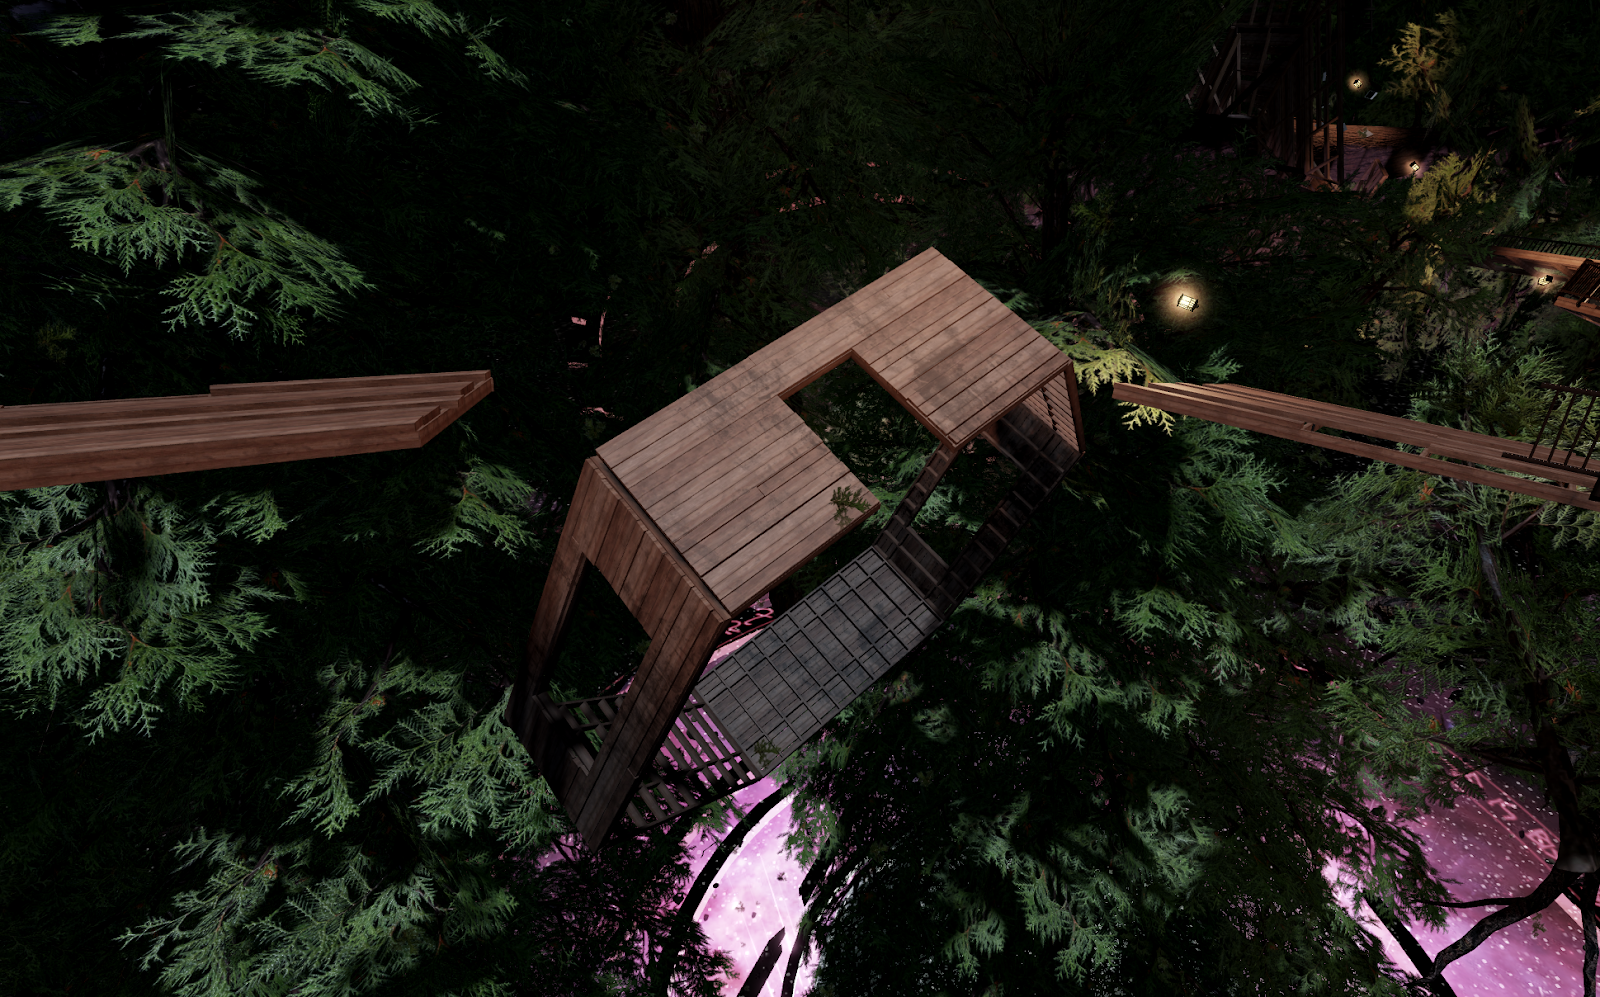
We used Texture objects on top of SurfaceAppearance objects to add some variation to our base materials. Textures, similar to Decals, allow you to place an image on a plane of a mesh. This can be useful if you want to add dirt to a brick wall, or make wood look aged while using the same base wood material. Texture objects have a slightly different behavior than Decal objects in that you can tile and offset the image however you want, which is very useful if you want to be able to scale your overlay texture and don't mind it repeating!
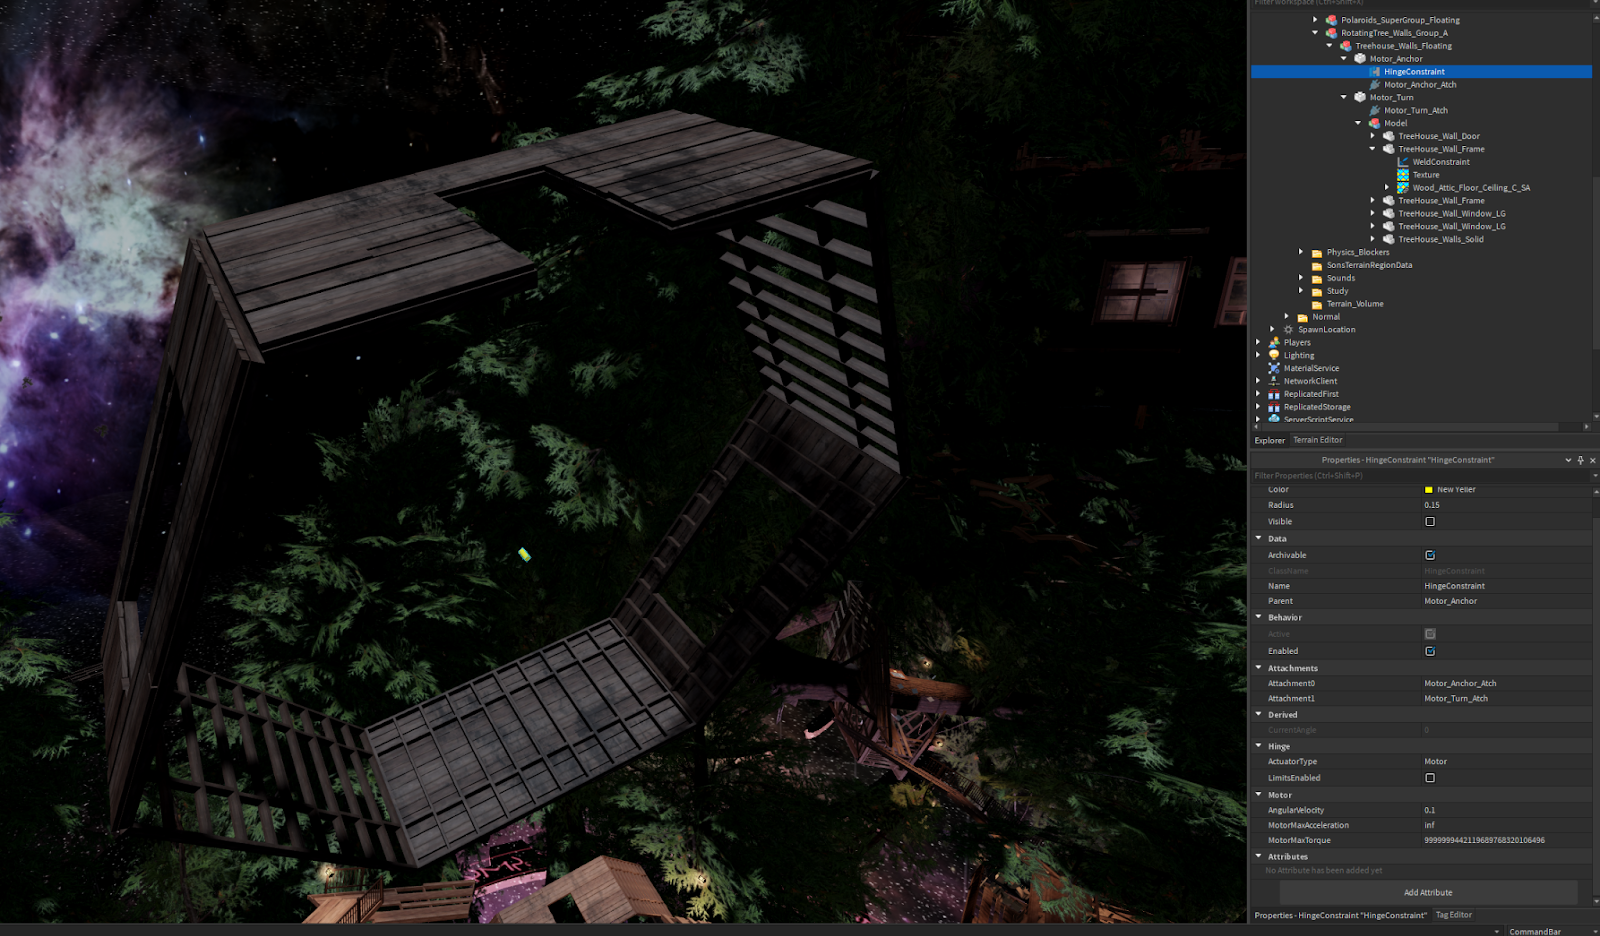
Once we'd tested a few platforms and rotating walls, we made several variations and played with their placement to make sure the obstacle course was challenging, mind-bending, and also clear where the player needed to go! It took some tuning to both their values and positions to get them to run well. We had several points where the platforms and walls were hitting each other or the surroundings, but with some moving around and frequent testing, we were able to land on the settings we have in the demo!
If you're not sure what your physical objects are hitting, you can toggle on Collision fidelity from the Visualization Options widget in the upper‑right corner of the 3D viewport.

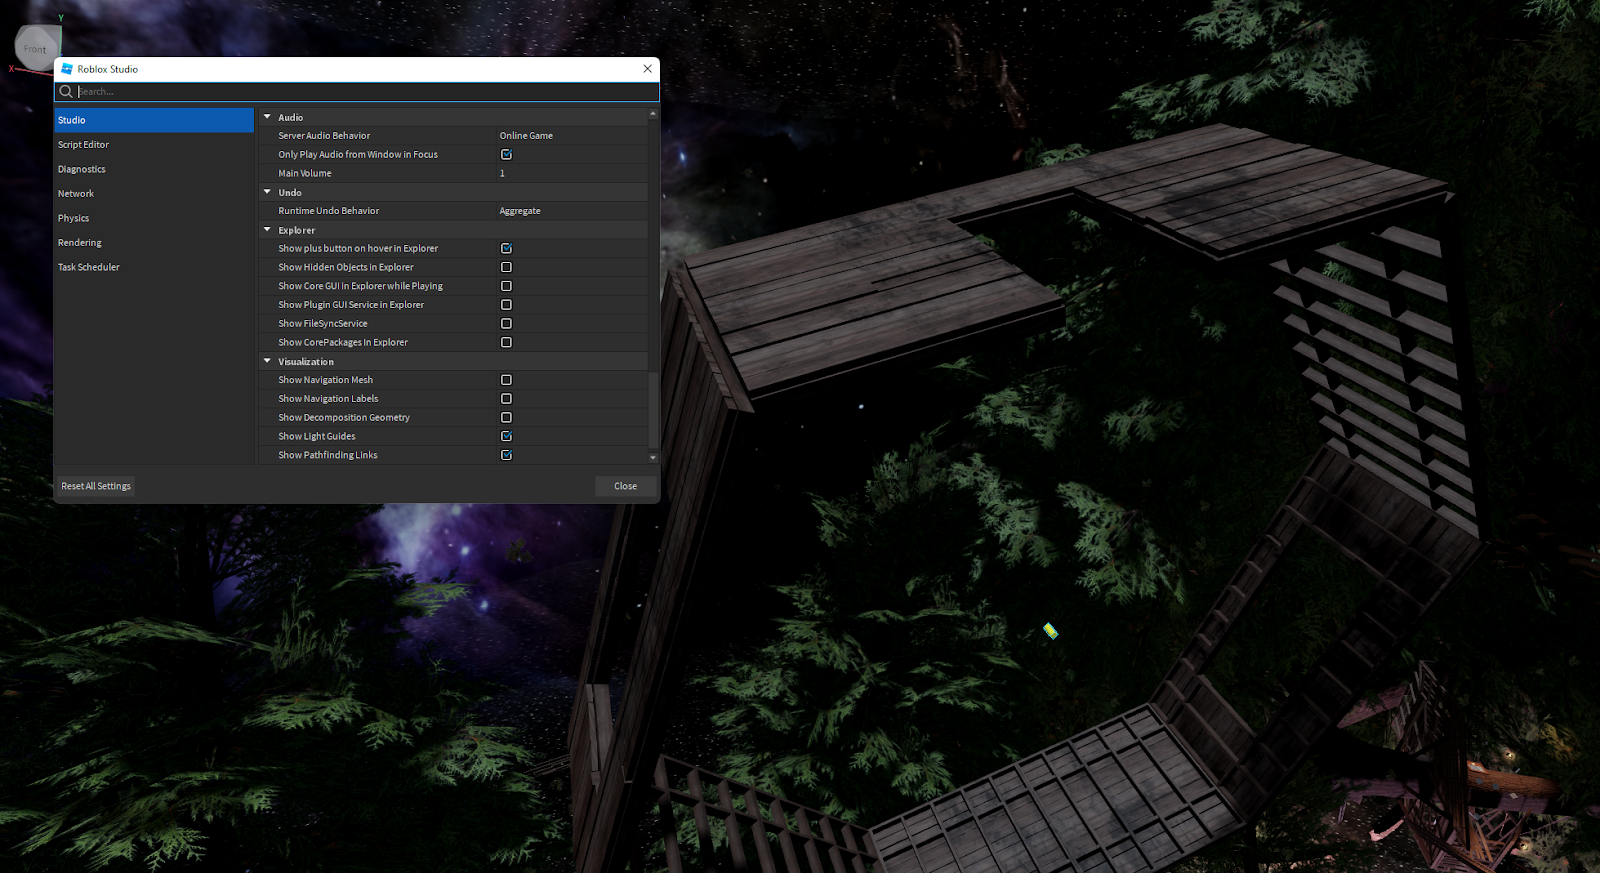
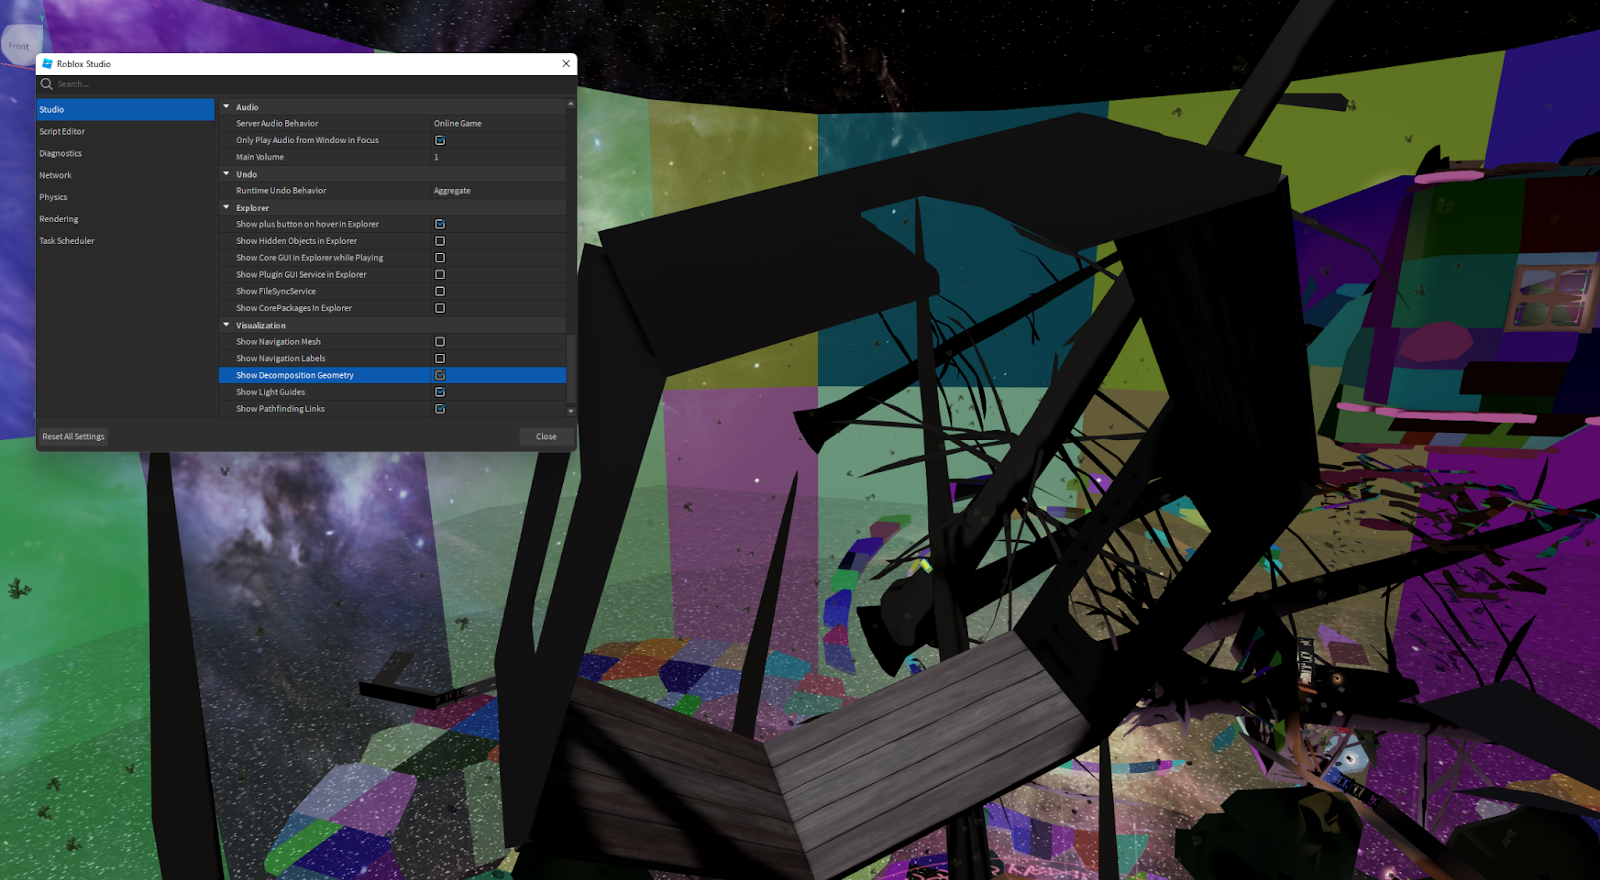
As you can see below the doorway/window holes are visible, but the smaller details like the sub-paneling are not. This is because the CollisionFidelity property for the walls was set to Box. We didn't need the precision for these panels, so to save on performance cost, this was detailed enough for players to jump onto. With the platforms and rotating walls done, we only needed to add detailing assets like boxes and lamps, then it was ready to be played!
