The Creator Store features assets made by Roblox and the Roblox community for the community to use within their experiences, including models, images, meshes, audio, fonts, videos, and plugins.
You can create and distribute models, images, meshes, plugins, and audio sound effects under 10 seconds to the Creator Store for others to use as long as you are the original creator, and it adheres to Roblox's Community Rules and Terms of Use. If you have a seller account, you can also sell your plugins to other creators.
Asset moderation
Roblox performs both human and automated asset moderation on a proactive and reactive basis to ensure assets adhere to the Community Rules, Terms of Use, and Digital Millennium Copyright Act (DMCA). If any asset violates these moderation policies, such as including discriminatory or adult content, the moderation team flags and removes the asset to protect users from harmful or non-compliant content. This process generally happens within a few hours after you upload the asset.
In addition, the Creator Store restricts use of the following practices to ensure asset safety:
- Requiring remote assets, including require(assetId), loadstring(), InsertService:LoadAsset(), and ModuleScript.LinkedSource. Assets that may look useful on the surface could load another "virus" asset at runtime.
- Including obfuscated code. For publicly-shared assets, it's important for creators to understand what they are putting into their experiences. If code is obfuscated, creators cannot trust that the script is only doing what it should be doing.
Open the Creator Store
To open the Creator Store:
Navigate to the View tab in Studio's toolbar.


Find assets
With millions of assets available, it's helpful to narrow the search results to find exactly what you are looking for. To find a specific asset:
In the top-left corner within the Creator Store tab, select the filter dropdown and choose an asset filter category.
(Optional) In the top-right corner, select the filter icon. The All Views and Creator filter display.
- To view an individual creator's assets, enter a specific creator's username within the Search for users field.
- Click the Apply button.
In the Search field, type what you want to find and select the search icon.
The Creator Store curates a selection of assets according to your filters.

Community ratings
In addition to the Creator Store's filters, you can view an asset's community approval when you hover over its tile. There are four asset community ratings:
- Gray - The asset has minimal data for the Creator Store to determine community confidence.
- Red - The asset has low community confidence.
- Yellow - The asset has moderate community confidence.
- Green - The asset has high community confidence.
Trusted reviews
Users can now leave reviews on Creator Store assets in addition to the currently available thumbs up or down ratings. To improve reliability and ensure authentic feedback, only users that acquire the asset are able to submit reviews. After submitting a review:
- Asset creators can respond to reviews, closing the feedback loop.
- The community can mark reviews as helpful for future users.
Add assets to experiences
To add an asset to your experience from the Toolbox, click it or drag‑and‑drop it into the 3D viewport.
- If the asset is a model, mesh, image, video, or audio file, it displays in the Explorer window. Assets with 3D content also display in the 3D viewport.
- If the asset is a plugin, it displays in the toolbar's Plugins tab.
- If the asset is a font, it displays in your font library within user interface elements such as text labels or buttons, as well as your inventory.
Verify your account
In addition to being able to distribute more of each asset type, verifying your account ensures that you are eligible to distribute audio assets under 10 seconds, and that your assets are visible to creators, as the default option for discoverability for assets on the Creator Store is reserved for verified accounts. In order to verify your account, you must:
- Be at least 13 years of age.
- Have a government-issued photo ID with your picture on it, such as a driver's license, passport, or residency permit.
- Have a mobile device with a camera that can take photos of your face and ID.
For information on how to verify your account either through a government-issued ID or through a phone number, see Account verification.
Distribute and sell assets
Distributing to the Creator Store is the only way to make your assets publicly available to all users to use within their own experiences in Studio. You can distribute any mesh or image that you have imported through the Asset Manager, or any model, plugin, or audio asset sound effect under 10 seconds that you have uploaded to your inventory.
Every asset that you import must adhere to the Community Rules and Terms of Use, and respect the DMCA Guidelines regarding copyright. In addition, there are limits on the number of assets you can distribute per 30 days, depending on whether you've verified your account:
| Mesh assets | Image assets | Model assets | Audio assets | Plugins | |
|---|---|---|---|---|---|
| Verified account | 200 | 200 | 200 | 100 | 10 |
| Unverified account | 10 | 10 | 10 | 10 | 2 |
You can also choose to sell plugins on the Creator Store for United States Dollars. Roblox offers a market-leading revenue share for these sales, as only taxes and payment processing fees are deducted. Note that you can only set USD pricing for plugins through the Creator Dashboard. For more information, see Sell on the Creator Store.
Through Creator Dashboard
To distribute an asset through the Creator Dashboard:
- In the horizontal navigation, select Development Items. All assets you have previously imported display within their respective category.
- Select the asset that you want to distribute. The asset's Configure page displays.
- In the Settings section, enable the Distribute on Creator Store toggle.
- (Optional) If you have a seller account and are distributing a plugin, set a price in USD for the asset in the USD Pricing field. If you keep the default value of Free, the asset will be free to all creators.
- (Optional) If you are ID or phone verified, add up to 5 supplementary thumbnails for your asset.
- Click the Save button.
- If you are distributing an audio asset for the first time, enable all legal agreements, then click the Submit button.
The asset will become public and visible to everyone within the Creator Store, provided it adheres to the moderation rules.
Through Studio
You can upload assets directly in Studio from the Toolbox or Explorer window. However, you must complete the process on the Creator Dashboard to list an asset for sale on the Creator Store, distribute audio assets under 10 seconds, or set a USD price for a plugin.
Assuming the asset is in your inventory and you want to distribute it in the Creator Store:
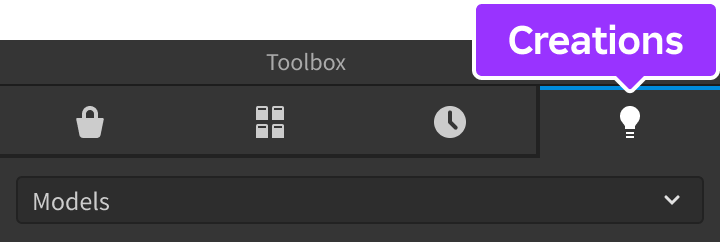
In the Toolbox, select the Creations tab. All assets you have previously imported display within the chosen category.
Right-click the asset you'd like to distribute and select Edit Asset.
In the Asset Configuration window that opens, confirm and/or update asset details such as Title and Description.
Click Save. Once the asset has uploaded, click the dashboard link formatted as https://create.roblox.com/dashboard/creations/store/.../configure.
In the browser window that opens, follow the instructions through the Creator Dashboard.
