The cross-platform Input Action System lets you connect actions and arrange bindings across various hardware inputs at edit time. Combined with contexts, you can easily configure and edit a modular input system that works on any device in any phase of play. Use cases include:
- A first-person shooter system with actions dynamically swapping in and out depending on if the player is in battle mode or spectator mode.
- A comprehensive driving system equipped with acceleration/deceleration, car boosters, and refuel stations.
- Hotkeys for an abilities system in a fighting game to swap out moves seamlessly without players missing a punch.
Input contexts
An InputContext is a collection of actions which holds related input actions, for example PlayContext for in‑game character controls and NavContext for controls to navigate around UI menus. You can enable/disable contexts (and their corresponding actions) through their Enabled property, such as to enable the NavContext when an inventory menu is open and then change to the PlayContext when the player closes the menu and returns to primary gameplay.
Even if a game may not use multiple input contexts initially, it's recommended to create a primary context at the top level of any input system, for example the PlayContext instance for input that occurs during gameplay.
Insert a new InputContext into the folder and rename it to PlayContext.
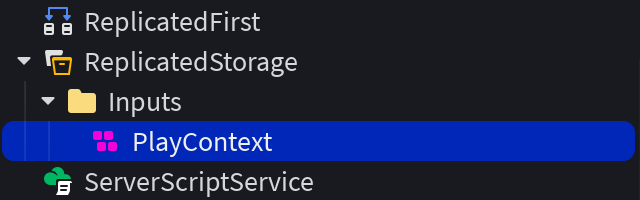
- OPTIONALIn the Properties window, set Priority to 2000 and enable Sink. A context with Sink enabled consumes input events for its bound KeyCodes at its priority level, blocking those inputs from reaching lower-priority contexts. This is practical for use cases like an inventory screen that should suppress specific gameplay inputs while open. In this example, PlayContext is given a high enough Priority to sink its bound inputs before the default PlayerScripts contexts process them.


Input actions
An InputAction defines a gameplay action mechanic such as "Jump," "Sprint," or "Shoot." These actions are then mapped to hardware inputs using input bindings.
An InputAction can be of several variations depending on its Type property (Enum.InputActionType). The default is Bool, designed to receive true/false values from press/release of inputs such as ButtonA, E, or MouseLeftButton.
| Input Action Type | Example Usage |
|---|---|
| Bool | Triggered actions such as jump, shoot, sprint, etc. with support for pressed/released thresholds on analog inputs. |
| Direction1D | Variable zero-to-full actions such as a car's accelerator pedal or a view scope's zoom level. |
| Direction2D | 2D directional movement such as camera rotation, or the standard Roblox character movement. |
| Direction3D | 3D directional movement like an airborne vehicle that can levitate up/down, accelerate/decelerate, and drift left/right. |
| ViewportPosition | 2D viewport coordinates like mouse input, such as for custom cursors or raycasting to select world objects. |
To test an InputAction for simple character sprinting:
- RECOMMENDEDSelect the top-level Workspace object in the Explorer and then, in the Properties window, set the PlayerScriptsUseInputActionSystem property to Enabled.
Create a new InputAction inside the PlayContext context within ReplicatedStorage. Rename it to CharacterSprint to indicate its dedicated action.

In the Properties window, notice that the action's Type is Bool (default). This is a logical type for simple character sprinting as a boolean true/false action (character is either sprinting or not sprinting).


Input bindings
An InputBinding defines which hardware binding should trigger the parent InputAction, for example a key press, gamepad button, or tap on a touch‑enabled device. For cross‑platform compatibility, each InputAction should have an InputBinding for gamepad, keyboard/mouse, and touch as illustrated here.

Roblox provides default input bindings for movement, camera control, and basic environment interaction — Roblox players are familiar with these controls, so you should only override them in specific cases. Also note that the reserved inputs cannot be overridden and will always operate with their intended purpose.
| Action | Mouse/Keyboard | Gamepad | Touch |
|---|---|---|---|
| Open Roblox menu | Esc | Start button (ButtonStart) | N/A |
| Developer Console | F9 | N/A | N/A |
| Fullscreen mode (Windows) Show desktop (Mac) | F11 | N/A | N/A |
| Record video (Windows) | F12 | N/A | N/A |
| Take screenshot | PrintScreen | N/A | N/A |
The Type assigned to the parent InputAction directly affects which general input types (key/button/tap, analog trigger, thumbstick, etc.) are valid for child InputBinding instances. In turn, values sent to the parent action's connected events depend on a binding's chosen input type. See input events for details on the correlation between action types, bindings, and return values.
To hook up bindings for simple character sprinting:
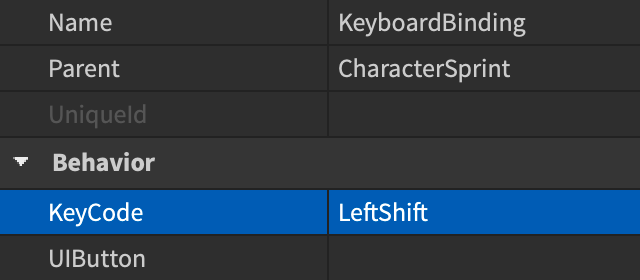
Insert a new InputBinding into the CharacterSprint action and rename it to KeyboardBinding. Then set the binding's KeyCode property to LeftShift.
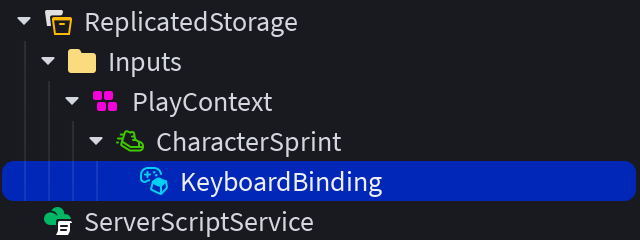
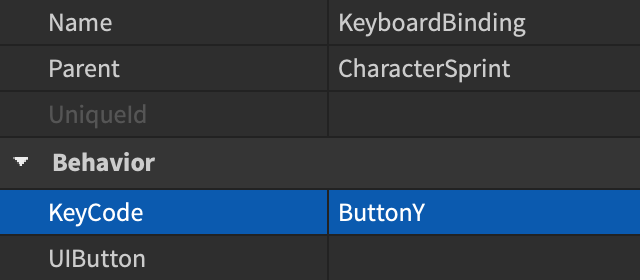
Insert a second InputBinding into the CharacterSprint action and rename it to GamepadBinding. Then set the binding's KeyCode property to ButtonY.

Inside a ScreenGui container inside StarterGui, create an on-screen button, rename it to SprintButton, and position/resize it as desired.


Insert a third InputBinding into the CharacterSprint action and rename it to TouchBinding. Then, in the Properties window, link the binding's UIButton property to the SprintButton button you created previously inside StarterGui.


Input events
The InputAction instance has three built-in events to handle player input coming from InputBindings.
- StateChanged — This event fires for all input action types whenever the state changes, except if the state attempts to transition to the same state.
Depending on the input action's Type (Bool, Direction1D, Direction2D, Direction3D, or ViewportPosition) and the general input type coming from a child InputBinding (key/button/tap, analog trigger, thumbstick, etc.), different values are returned to the Pressed, Released, and StateChanged event handlers. Examine the following tables to better understand the correlation.
The Bool type is best for triggered actions such as jump, shoot, sprint, etc. with support for pressed/released thresholds on analog inputs.
| Valid Input Types on InputBindings | Returned to the InputAction Event(s) |
|---|---|
| Boolean inputs from keyboard keys or basic mouse/gamepad buttons through the binding's KeyCode property, or a GuiButton press/release through the binding's UIButton property. |
|
| Variable input amounts from analog inputs like gamepad triggers (ButtonL2/ButtonR2) through the binding's KeyCode property. |
|
To connect events for simple character sprinting:
Insert a new Script into the CharacterSprint tree, alongside the various input bindings. Then set its RunContext to Client and rename it to OnActivate.
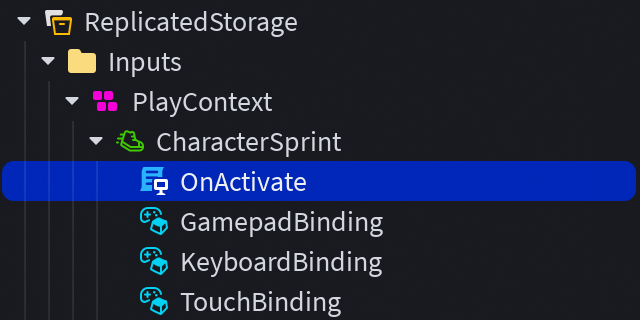
Paste the following code into the OnActivate script. Note the Pressed event connection on lines 13‑15 which doubles the character's walk speed when a sprint input binding is pressed, and the corresponding Released event connection on lines 16‑18 which resets the walk speed to default when a sprint input binding is released.
OnActivate (Client Script)local Players = game:GetService("Players")local player = Players.LocalPlayerlocal character = player.Characterif not character or character.Parent == nil thencharacter = player.CharacterAdded:Wait()endlocal humanoid = character:WaitForChild("Humanoid")local defaultWalkSpeed = humanoid.WalkSpeedlocal inputAction = script.ParentinputAction.Pressed:Connect(function()humanoid.WalkSpeed = defaultWalkSpeed * 2end)inputAction.Released:Connect(function()humanoid.WalkSpeed = defaultWalkSpeedend)Playtest your game and test the character sprint action with the bindings you chose previously: LeftShift for keyboard, ButtonY for gamepad, and the on‑screen SprintButton for touch‑enabled devices. Remember that you can use the Controller Emulator to test gamepad inputs directly in Roblox Studio.

Context changes
Once you have an input context such as PlayContext, you can enable/disable it during gameplay through scripting, change its Priority to determine which actions take precedence over others, and Sink inputs from being processed within contexts of lower priority.
To make it easier to switch contexts from other scripts, insert a new BindableEvent into your inputs folder within ReplicatedStorage and rename it to ContextEvent.

Create a new Script at the same level, set its RunContext to Client, and rename it to UpdateContext.
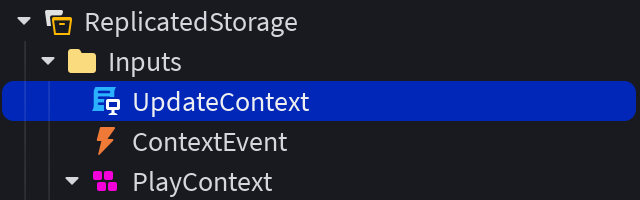
Inside the UpdateContext script, paste the following code:
UpdateContext (Client Script)local ReplicatedStorage = game:GetService("ReplicatedStorage")local inputsFolder = ReplicatedStorage:WaitForChild("Inputs")local contextEvent = inputsFolder:WaitForChild("ContextEvent")-- Connect bindable eventcontextEvent.Event:Connect(function(targetContext, enabled)local context = inputsFolder:FindFirstChild(targetContext)if context thencontext.Enabled = enabledprint(context.Name .. ": " .. tostring(context.Enabled))elsewarn("InputContext not found!")endend)With the UpdateContext script in place, you can now update a named InputContext by firing the bindable event, for example from a LocalScript that powers a GuiButton inside a ScreenGui container.
 Button Scriptlocal ReplicatedStorage = game:GetService("ReplicatedStorage")local inputsFolder = ReplicatedStorage:WaitForChild("Inputs")local contextEvent = inputsFolder:WaitForChild("ContextEvent")local button = script.Parentbutton.Activated:Connect(function()-- Fire bindable event with target input context and enabled statecontextEvent:Fire("PlayContext", true)end)


Displaying bindings
Once you've set up actions and bindings, you'll typically need to show players, via on‑screen assistive hints, which key or button triggers each action:

The Input Action System provides two approaches:
- RECOMMENDEDInputActionLabel — A no-code, drag-and-drop GuiObject that automatically displays the correct input per platform.
- INTERMEDIATEPreferredBinding — A read-only InputAction property for creators who want full control over how bindings are displayed in custom UI.
InputActionLabel is a GuiObject that you can insert into any ScreenGui or SurfaceGui. Once its InputAction property is set to reference an existing InputAction instance, it automatically resolves and displays the correct keybinding for the player's current input device — no scripting required. When the player switches devices (for example, picking up a gamepad after using a keyboard) or rebinds a control, the label updates instantly.
To add an InputActionLabel:
Inside a ScreenGui container inside StarterGui, insert an InputActionLabel just like any other GuiObject.
In the Properties window, set its InputAction property to the InputAction instance you want to display (for example, your "Sprint" action under ReplicatedStorage) and position/resize it as desired.
When the label resolves what to show, it checks the following in order:
Custom Images — If child InputBindings have their DisplayImage property set, the label renders those images directly.
Platform Key Images — Lacking custom images, the label renders platform-provided images for child InputBindings through UserInputService:GetImageForKeyCode(), if such images are available. Composite bindings with modifiers show multiple icons with + separators.
Custom Names — Lacking available images, if child InputBindings have their DisplayName property set, the label renders that text using the label's style properties.
Platform Key Strings — Lacking all of the above, the label renders platform-provided strings through UserInputService:GetStringForKeyCode().
If no InputAction is assigned or no child InputBinding exists, the label renders a placeholder icon.
Input Action Manager
The Input Action Manager tool is a unified, matrix-style interface to design, audit, and scale your input architecture.
To access it, navigate to the Window menu in Studio and select Input ⟩ Input Action Manager. If your game already uses input contexts, actions, or bindings, the manager will automatically scan the DataModel and extract those existing instances into the editor grid. Any new input‑related instances will automatically populate into an Inputs folder within ReplicatedStorage.

To configure an input setup for character sprint as outlined in the sections above:
- RECOMMENDEDSelect the top-level Workspace object in the Explorer and then, in the Properties window, set the PlayerScriptsUseInputActionSystem property to Enabled.
Inside a ScreenGui container inside StarterGui, create an on-screen button, rename it to SprintButton, and position/resize it as desired.
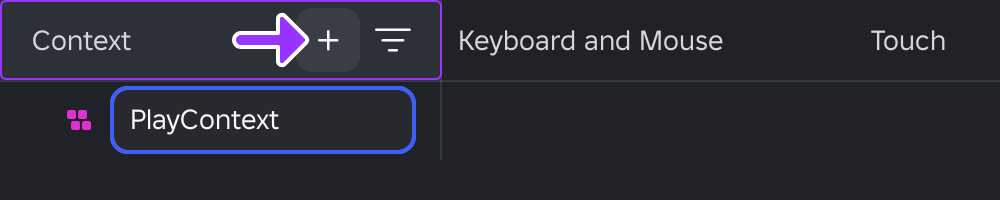
In the Input Action Manager, hover over the Context column header and click the + button. Enter an appropriate name for the new context such as PlayContext and press Enter. An InputContext of the matching name appears in ReplicatedStorage.
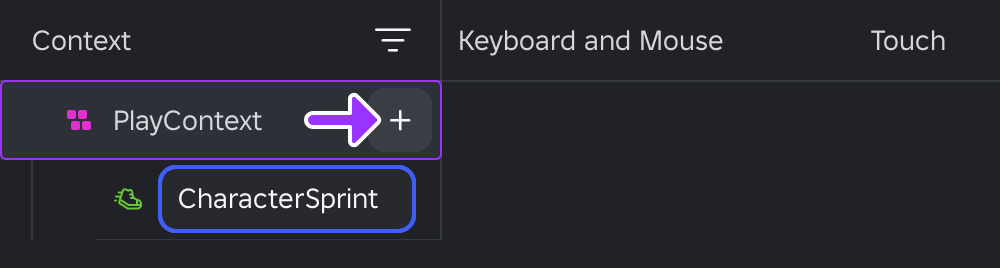
Hover over the new context and click the + button. From the popup menu, select Bool, enter CharacterSprint for the action's name, and press Enter. An InputAction of the matching name appears under the context.
Insert a new Script into the CharacterSprint tree, alongside the various input bindings. Then set its RunContext to Client and rename it to OnActivate.
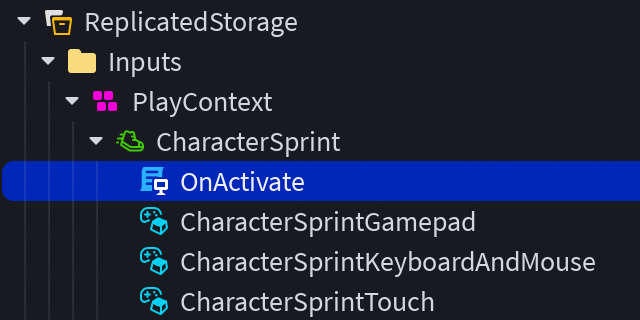
Paste the following code into the OnActivate script. Note the Pressed event connection on lines 13‑15 which doubles the character's walk speed when a sprint input binding is pressed, and the corresponding Released event connection on lines 16‑18 which resets the walk speed to default when a sprint input binding is released.
OnActivate (Client Script)local Players = game:GetService("Players")local player = Players.LocalPlayerlocal character = player.Characterif not character or character.Parent == nil thencharacter = player.CharacterAdded:Wait()endlocal humanoid = character:WaitForChild("Humanoid")local defaultWalkSpeed = humanoid.WalkSpeedlocal inputAction = script.ParentinputAction.Pressed:Connect(function()humanoid.WalkSpeed = defaultWalkSpeed * 2end)inputAction.Released:Connect(function()humanoid.WalkSpeed = defaultWalkSpeedend)


