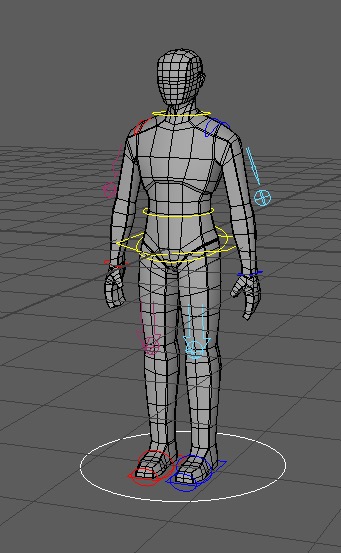
Avatar animations are animations that you can create and assign to play for any avatar action, such as walking, swimming, or dancing. In addition to using the Animation Editor or Animation Capture tools within Studio, you can create avatar animations through third-party modeling and animation tools like Maya, then import your avatar animations directly into Studio to apply to any avatar with Roblox. By using this guide as a checklist of the specific settings your rig and animation must meet for the export process, you can ensure that your animations import successfully.

Configure the rig
Before you export your avatar animation from Maya, you must configure your rig to be compatible with Studio's import requirements, including making sure that the rig follows a specific hierarchy and naming conventions so that Studio is able to recognize the file as an avatar animation, and that the rig's translation channel is muted so that the root node doesn't move with the animation.
Hierarchy and naming conventions
Studio requires a specific hierarchy and naming conventions for a humanoid rig's internal joint structure so that it can recognize what you're importing as an avatar animation. If you aren't using the downloadable R15 mannequin reference rig to create your animations, make sure your rig uses the following joint hierarchy and naming convention exactly as it is:
- Root
- HumanoidRootPart
- LowerTorso
- UpperTorso
- Head (representing the base of the neck)
- LeftUpperArm
- LeftLowerArm
- LeftHand
- RightUpperArm
- RightLowerArm
- RightHand
- LeftUpperLeg
- LeftLowerLeg
- LeftFoot
- RightUpperLeg
- RightLowerLeg
- RightFoot
Mute the translation channel
Roblox avatar animations cannot move a character when they play; instead, avatar animations animate rigs at their world position. If your avatar animation is a locomotion-type of animation where the root node moves in space, such as a character that moves forward as their walk animation plays, you must mute the rig's translation channel so that the animation plays without moving the rig on export.
To mute the translation channel:
Open the Graph Editor.
In the menu bar, click Windows. A contextual menu displays.
Hover over Workspaces, then click Animation. The Graph Editor displays.

Move the Time Marker to frame 0.

In the Outliner, select the root node. If you are using the reference file, this is TSM3_root.
In the Channel Box, right-click on the Translate Z value. A contextual menu displays.
Select Mute Selected. The Translate Z value's channel box color changes to orange to confirm that it's muted.


When you play the animation, the character's root node doesn't move in space anymore, and the character animates in place at the origin of the scene.
Export the animation
Now that your rig animates in place and has a hierarchy and naming data that is compatible with Studio, you can export the animation into a .fbx format. Maya doesn't load this capability by default, so you need to enable an FBX plugin to gain the additional settings necessary to export the file in a format Studio can recognize.
To export your avatar animation from Maya:
Install the FBX plugin.
In the menu bar, click Windows. A contextual menu displays.
Hover over Settings/Preferences, then click Plug-in Manager. The Plug-in Manager window displays.

In the search field, input fbxmaya. The fbxmaya.mll plugin displays.
Enable the Loaded and Auto load options.

In the menu bar, click File. A contextual menu displays.
Select Export All. The Export All window displays.

At the bottom of the window,
- In the File name field, input a name for your avatar animation.
- Click the Files of Type dropdown menu, then select FBX export. The Options pane updates its settings.
In the Options pane, click the Animation dropdown for additional animation settings, then in the Bake Animation section,
Enable Bake Animation.
Verify that the Start and End fields correlate to the frames you want to export for your animation loop.
Set Step to 1.

Click the Advanced Options dropdown for additional export settings, then in the FBX File Format section,
Set Type to Binary.
If required, set Version to FBX 2020.

In the bottom right corner, click the Export All button. After a moment, the avatar animation .fbx file displays in your file browser.
Test the animation in Studio
Once you have your avatar animation .fbx file, you can test it within Studio to make sure that the animation plays without any errors.
To test the animation in Studio:
Open a pre-built character rig.
- From the toolbar's Avatar tab, click Rig Builder.
- Select any rig you want to use as a test. The rig displays within the viewport.
Connect the rig to the Animation Editor.
- In the viewport, click your rig. A dialog displays in the editor.
- In the Animation Name field, enter a new animation name, then click the Create button. The Animation Editor window displays the media and playback controls, timeline, and track list.
Import your avatar animation into the rig.
Navigate to the Media and Playback Controls and click the ⋯ button. A contextual menu displays.
Hover over Import, then select From FBX Animation. A file browser displays.

Select the FBX animation you just exported from Maya, then click Open. The animation's keyframes load into the Animation Editor.
Navigate to the Media and Playback Controls and click the Play button to play the avatar animation.