A waterfall is a point in a river or stream where water flows over one or more vertical drops into a body of water. Experiences often include waterfalls for visual aesthetics, such as to enhance the environment or create a visual point of interest, or for functional gameplay purposes, such as to hide resources or transition players between different areas in the place itself.
Using the Waterfall Island .rbxl file as a reference, this tutorial shows you how to create a waterfall with VFX objects that represent real-world physical behavior, including guidance on:
- Breaking down referential material into individual components with distinct visual and behavioral characteristics.
- Configuring cascades that fall at different rates to emulate water dispersing as it descends from a cliff.
- Configuring splashes to emulate water becoming aerosolized as cascades impact the underlying plunge pool.
- Configuring white water to emulate turbulent aerated water where the outflow crashes into boulders.
- Configuring foam to emulate a capillary wave breaking surface tension.
- Configuring mist to emulate mist vapors rising away and upward from the impact point, creating a rainbow players can view from any angle.
Break down reference
To create credible waterfalls, it's important to reference real-world natural features in the design process because it allows you to break down the subject matter into individual components with distinct visual and behavioral characteristics. For example, the sample Waterfall Island experience references Snoqualmie Falls in Washington state to inform all texture and VFX design decisions relating to the waterfall and its surrounding terrain.
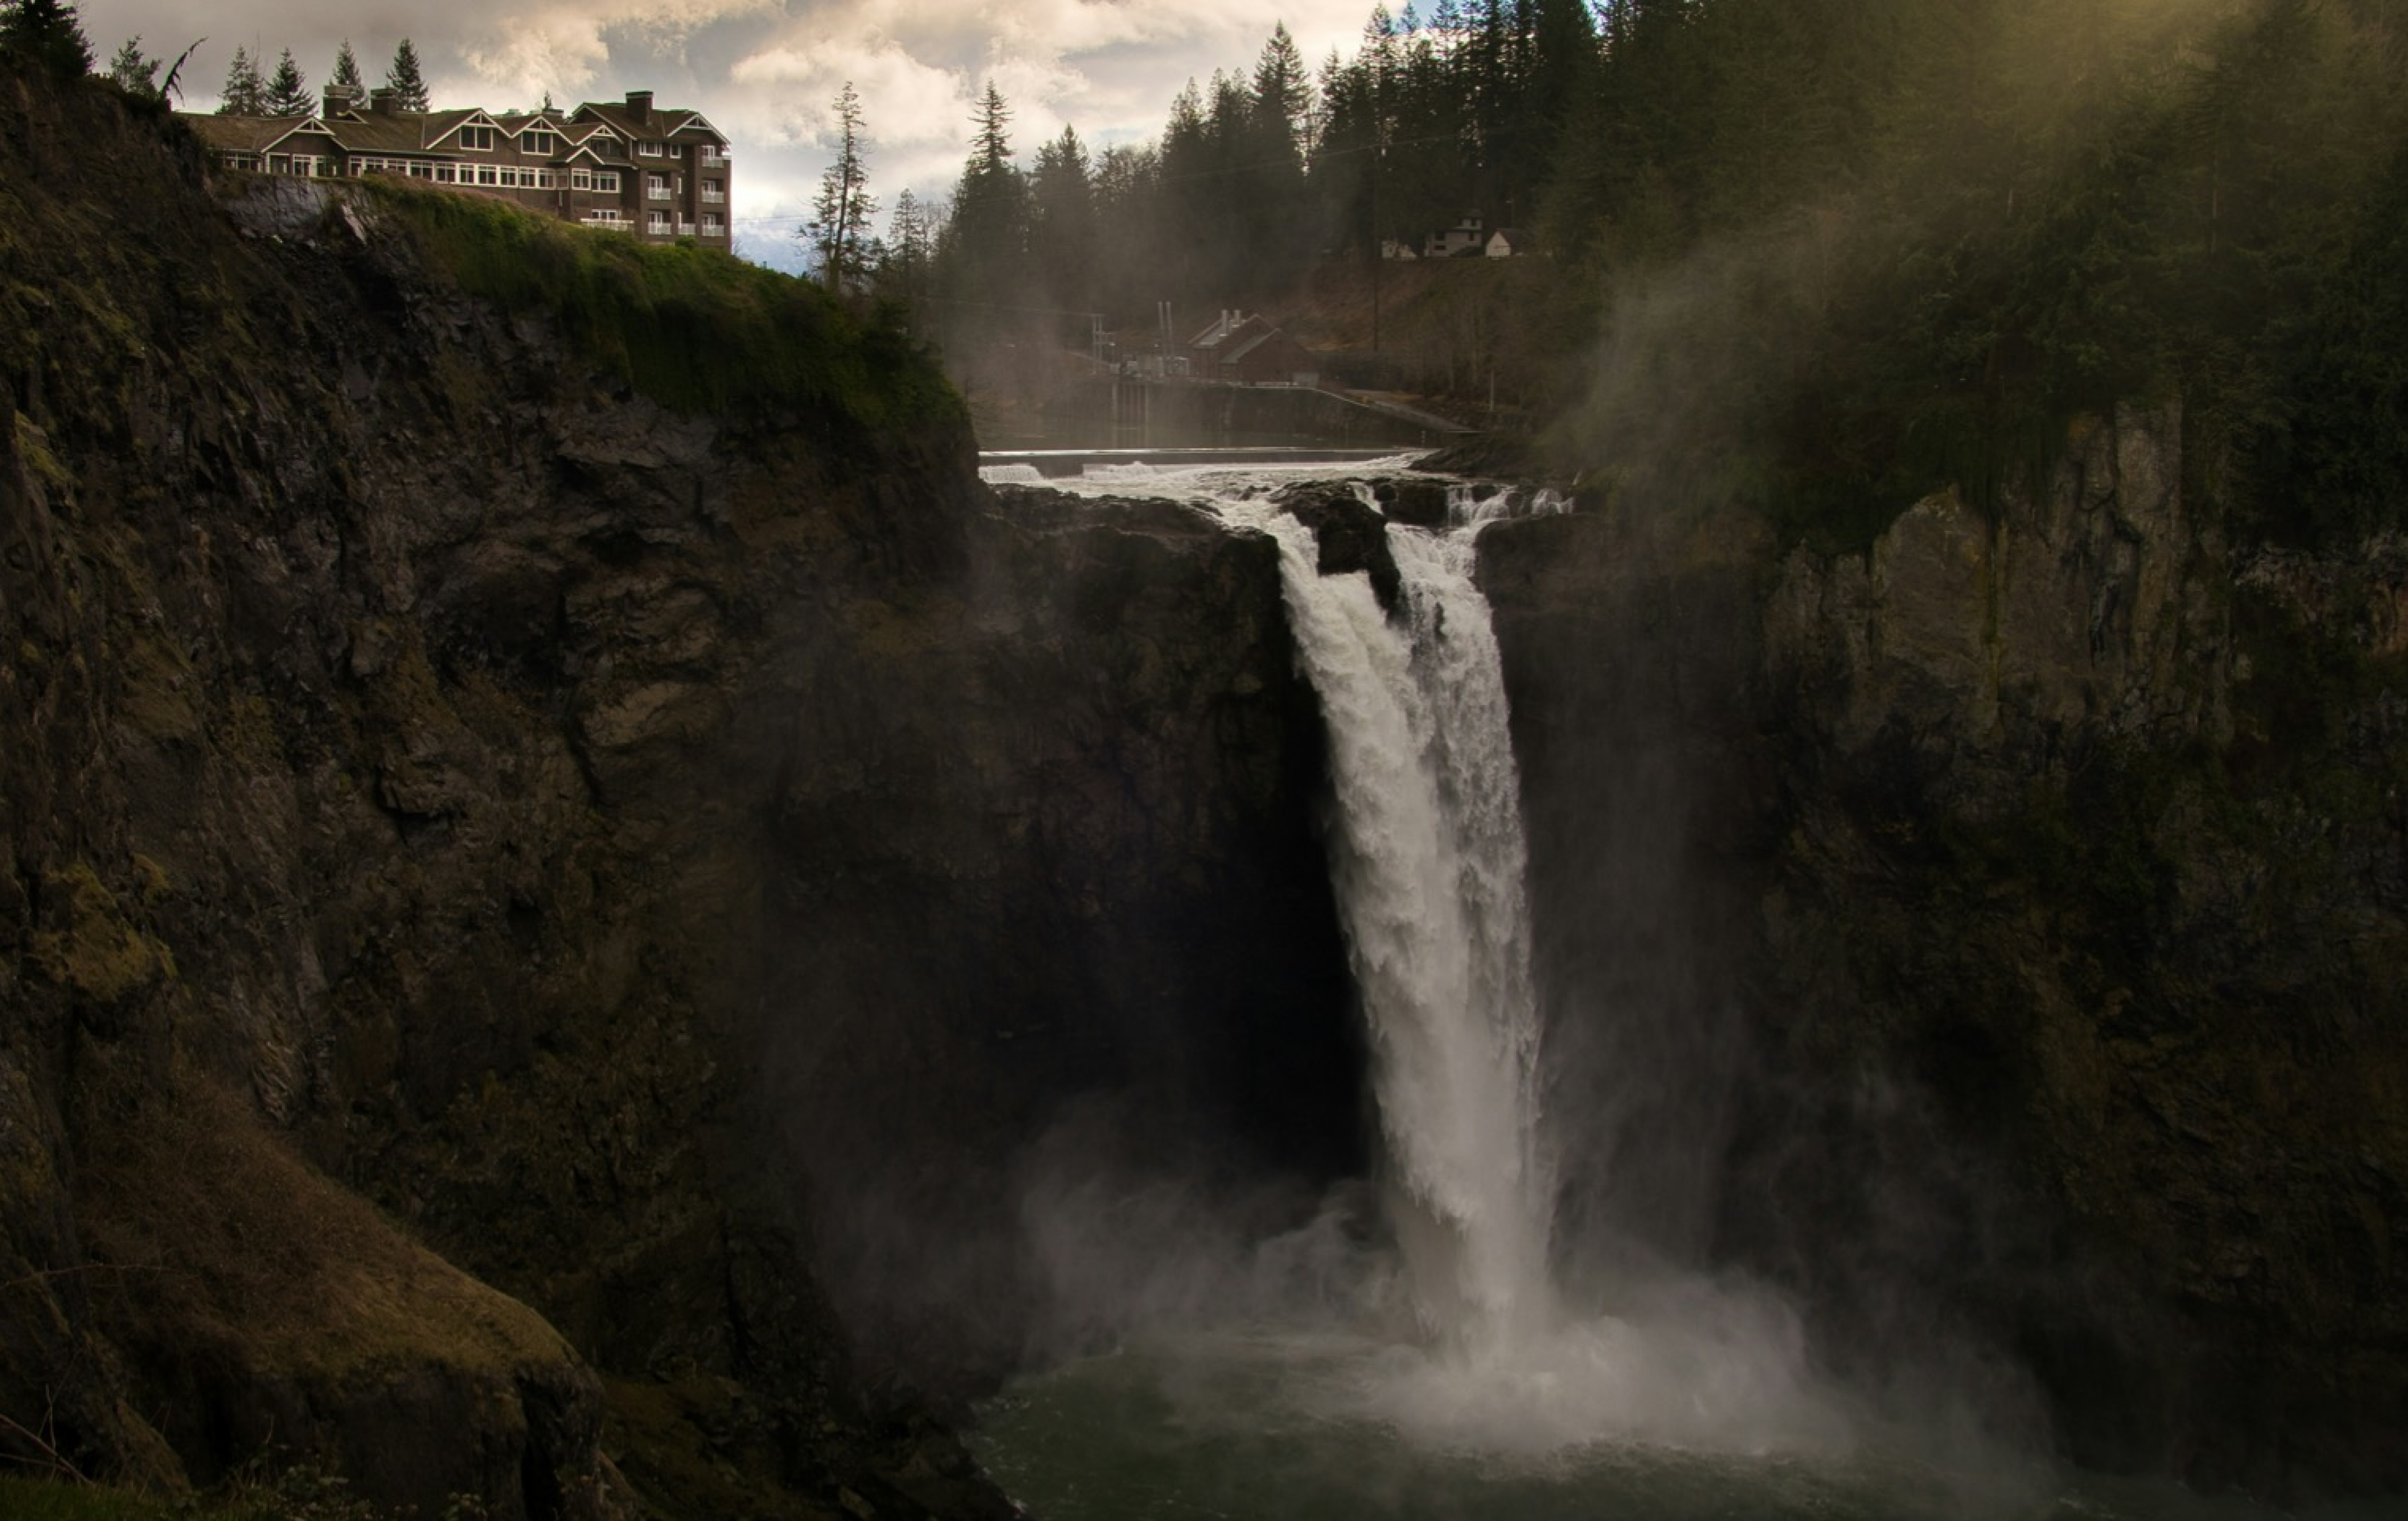
While a waterfall is a continuous and connected stream of water that involves multiple states of matter with dynamic fluid and air motion, it's useful to break down this complex system into individual components so that you can plan how to utilize different VFX objects to mimic their real-world counterparts. To demonstrate, this tutorial breaks the sample waterfall down into five unique components:
- Cascades – The water that descends off the cliff.
- Splashes – The water that scatters as cascades collide with the underlying plunge pool.
- White Water – The turbulent water that arises as the water source approaches the edge of the cliff.
- Foam – The aerated water that scatters horizontally upon the collision of the cascades and the plunge pool.
- Mist – The cloud-like water that evaporates in the air as a result of the overall waterfall.
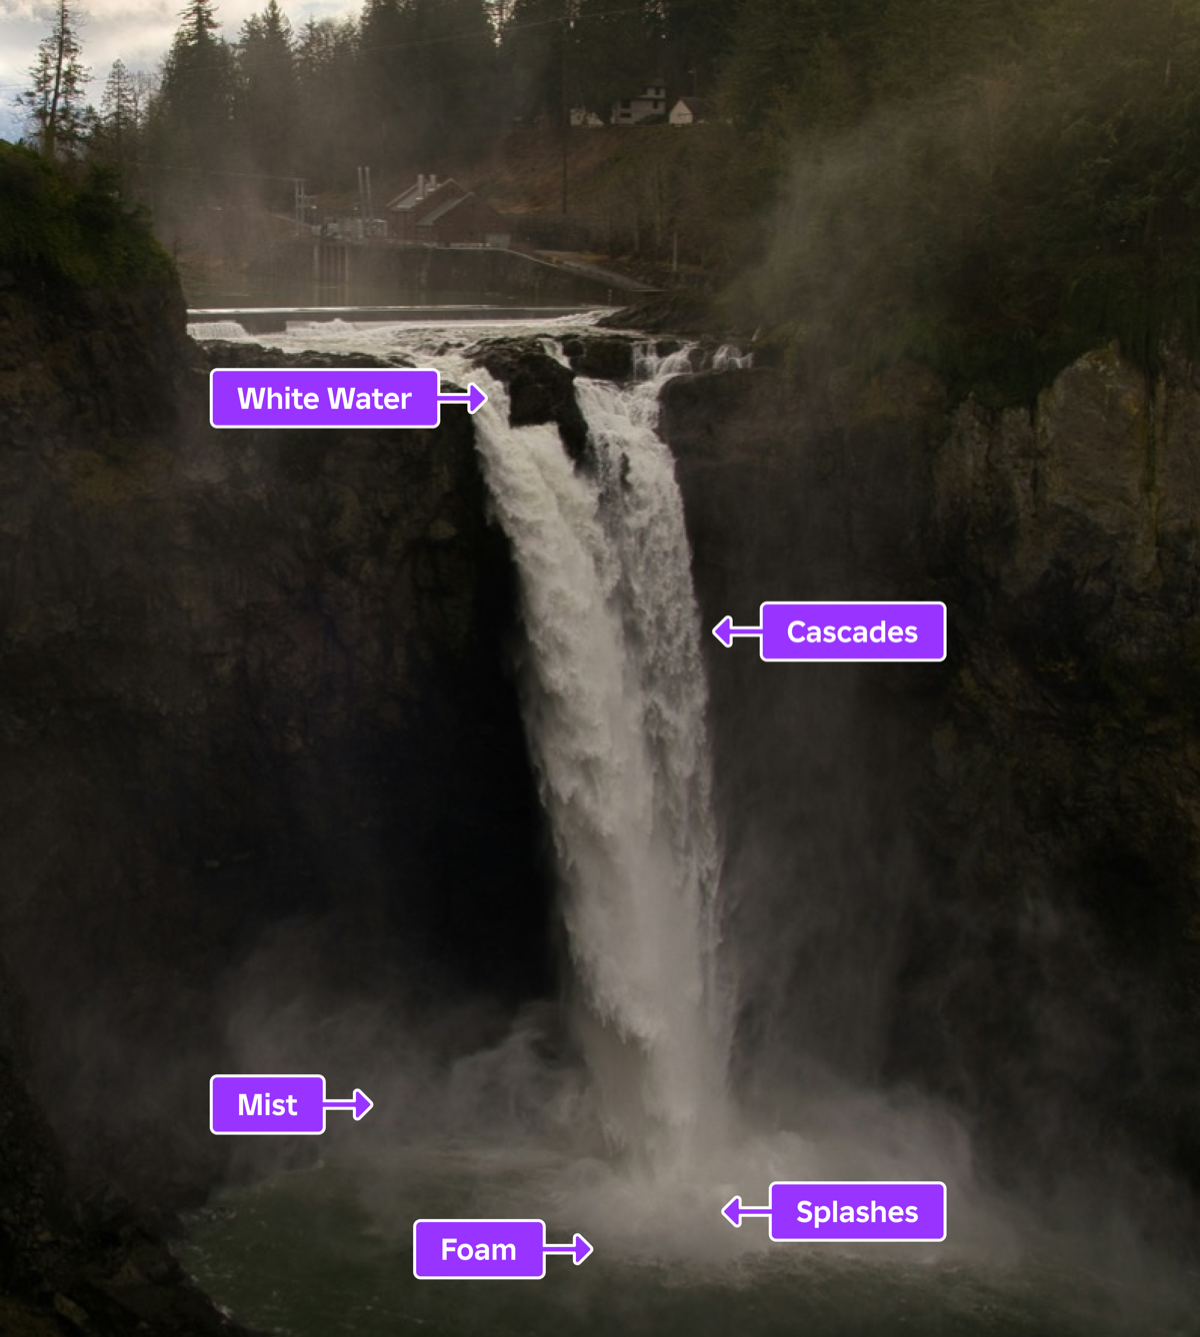
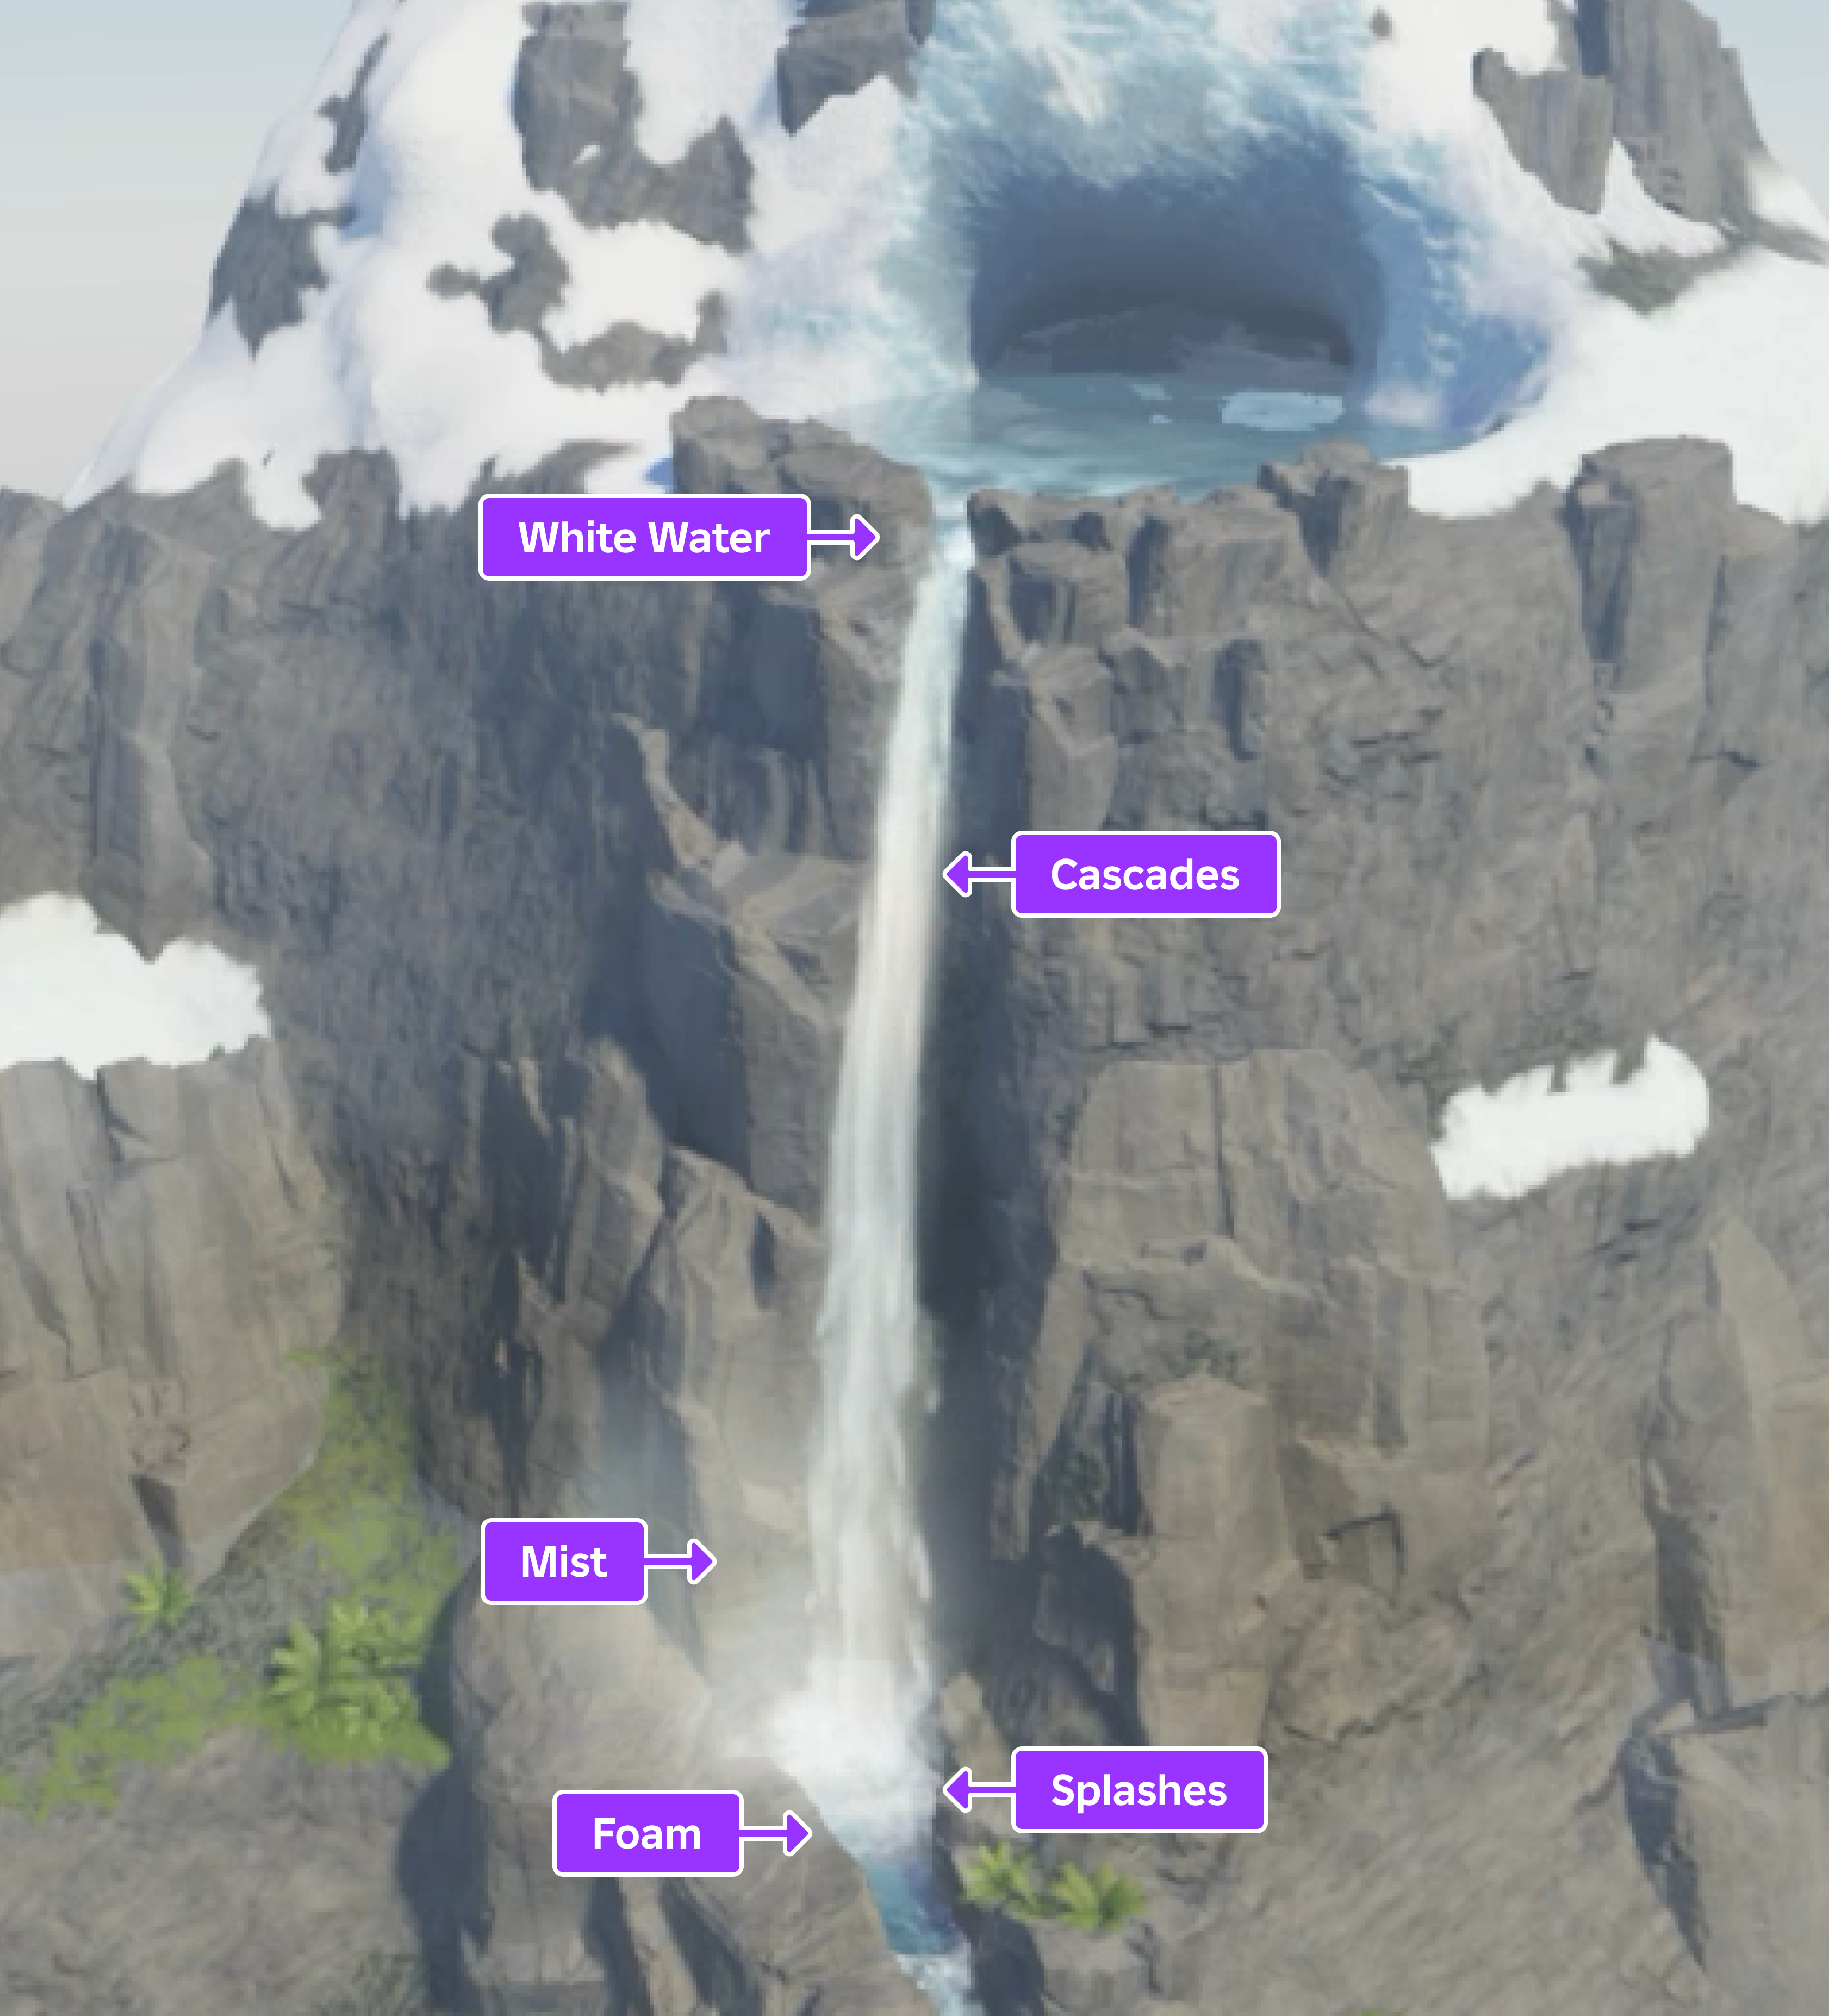
The following sections provide an in-depth analysis of the different design decisions and techniques you can use to recreate each of these waterfall components that make up the main drop in the sample's 3D space. As you review these decisions and experiment with various Beam and ParticleEmitter properties, you will learn how to utilize VFX to solve the unique environmental requirements for your own experiences.
Configure cascades
A cascade is the falling water that descends over the edge of cliffs or bluffs into underlying plunge pools. Cascades fall at different rates depending on both their volume of water and the scale of their drop into the plunge pool. For example, the sample's main drop appears to fall more slowly because there is a large volume of water falling over a large distance, but the sample's second drop appears to fall more quickly because a smaller volume of water is falling over a short distance.
Furthermore, waterfalls often have layers of cascades that fall at different rates because the water disperses as it descends into the plunge pool. To demonstrate this principle, the sample uses multiple Beam objects with seamless textures that render between Attachment objects at varying speeds and lengths. In addition to providing the main drop with a more realistic falling behavior, this technique also creates an illusion of parallax to make the cascade seem like it has a sense of depth and volume even though it's only a 2D image.
To recreate the cascades for the main drop in the sample Waterfall Island place file:
Create the outflow for the cascading water.
In the Explorer window, create a Folder in the Workspace to contain all outflow objects, then rename the folder Outflow.
Insert two block parts into the Outflow folder, then rename them OutflowStart and OutflowStop, respectively.
Move OutflowStart to where you want the outflow to begin, and move OutflowStop to the edge of the cliff.

Insert an attachment into both OutflowStart and OutflowStop, then rotate the attachments until the yellow visual aid points upward.

Insert a Beam into the Outflow folder, then rename it OutflowWater.
Assign each part's attachment to OutflowWater.
- In the Explorer window, select OutflowWater.
- In the Properties window,
- Set Attachment0 to the attachment in OutflowStart.
- Set Attachment1 to the attachment in OutflowStop. The beam renders its default texture between the two attachments.

Customize the beam's visual appearance so it looks like flowing water approaching the edge of the cliff.
- In the Explorer window, verify OutflowWater is still selected.
- In the Properties window,
Set Texture to rbxassetid://4787437624 to render a new texture that looks like flowing foam.
Set Width0 to 60 to widen the texture from the axis that it starts to render.
Set Width1 to 20 to funnel the texture to the cliff's edge.
Set TextureSpeed to 0.4 to slow down the flow of the texture.
Set TextureLength to 64 to stretch the texture's length.
Set TextureMode to Wrap to repeat the texture to the amount of the beam's overall length in the 3D world between the attachments divided by its TextureLength. This allows the texture to look a lot more realistic to flowing water.
Set Color to a color sequence that alternates in color from dark and light blues to white.
Click the Color property, then click the ⋯ button. A color sequence pop-up displays.

Each triangle on the bottom axis of the color sequence is a keypoint that determines the color value of the property at that point of the particle's lifetime.
Set the following time and value properties throughout the color sequence:
- Time = 0, RGB Value = 208, 247, 255
- Time = 0.135, RGB Value = 146, 235, 255
- Time = 0.248, RGB Value = 255, 255, 255
- Time = 0.384, RGB Value = 128, 183, 202
- Time = 0.757, RGB Value = 166, 213, 248
- Time = 1, RGB Value = 255, 255, 255

Set Transparency to a number sequence that makes the water become more vibrant as it approaches the cliff's edge.
Click the Transparency property, then click the ⋯ button. A number sequence pop-up displays. By default, the graph is a straight line and the image remains the same transparency from left to right.

Each square at the start and end of the number sequence is a keypoint that determines the transparency value of the property at that point of the texture from left to right.
Set the following time and value properties throughout the number sequence:
- Time = 0, Value = 1
- Time = 0.375, Value = 0.725
- Time = 0.615, Value = 0
- Time = 0.92, Value = 1
- Time = 1, Value = 1

Scale each part to ensure the texture covers the width of the outflow pool. The outflow now appears to be flowing toward the edge of the cliff from all angles.
Create the fast running cascading water from the main drop.
In the Explorer window, create a Folder in the Workspace to contain all cascading water objects, then rename the folder Cascades.
Insert two block parts into the Cascades folder, then rename them MainDropStart and MainDropStop, respectively.
Move MainDropStart to the edge of the cliff, and move MainDropStop to where it's underneath the plunge pool.

Configure attachments for all cascading water beams from the main drop to use to render their textures.
- Insert an attachment into MainDropStart, then rotate the attachment until the yellow visual aid points away from the cliff.
- Insert an attachment into MainDropStop, then rotate the attachment until the yellow visual aid points toward from the cliff.

Insert a Beam into the Cascades folder, then rename it FastDrop.
Assign each part's attachment to FastDrop.
- In the Explorer window, select FastDrop.
- In the Properties window,
- Set Attachment0 to the attachment in MainDropStart.
- Set Attachment1 to the attachment in MainDropStop. The beam renders its default texture between the two attachments.

Customize the beam's visual appearance so it looks like fast-running cascading water from the main drop.
In the Explorer window, verify FastDrop is still selected.
In the Properties window,
- Set Texture to rbxassetid://16808804567 to render a new texture that looks like flowing water.
- Set Width0 to 5 to widen the texture from the axis that it starts to render.
- Set Width1 to 10 to widen the texture as it meets the plunge pool.
- Set CurveSize0 to 10 to curve the texture away from the cliff.
- Set CurveSize1 to 20 to curve the texture into the plunge pool.
- Set TextureSpeed to 1.3 to make the texture flow quickly.
- Set TextureLength to 2 to slightly stretch the texture's length.
- Set Color to a color sequence that alternates in color from dark and light blues to white.
- Time = 0, RGB Value = 208, 247, 255
- Time = 0.135, RGB Value = 210, 246, 255
- Time = 0.25, RGB Value = 255, 255, 255
- Time = 0.384, RGB Value = 163, 187, 202
- Time = 0.757, RGB Value = 214, 229, 248
- Time = 1, RGB Value = 255, 255, 255

- Set Transparency to a number sequence that allows the cascading water to be more vibrant between the attachment points.
- Time = 0, Value = 1
- Time = 0.115, Value = 0
- Time = 0.835, Value = 0
- Time = 0.881, Value = .994
- Time = 1, Value = 1

- Set ZOffset to 2 to offset the texture to be slightly away from the cliff.
- Enable FaceCamera to ensure the cascading water is visible no matter the angle of the player from the water.
Create the slow running cascading water from the main drop.
Duplicate FastDrop, then rename the duplicate beam SlowDrop.
Customize the beam's visual appearance so it looks like fast running cascading water from the main drop.
- In the Explorer window, select SlowDrop.
- In the Properties window,
- Set Width1 to 20 to widen the texture even more as it meets the plunge pool.
- Set TextureLength to 1.5 to slightly shorten the texture's length.
- Set TextureSpeed to 1 to make the texture flow less quickly.
- Set ZOffset to 0 to allow the texture to flow directly from the cliff's edge.
In the Explorer window, select all block parts in the Outflow folder, then in the Properties window, set Transparency to 1 to make the blocks invisible.
Configure splashes
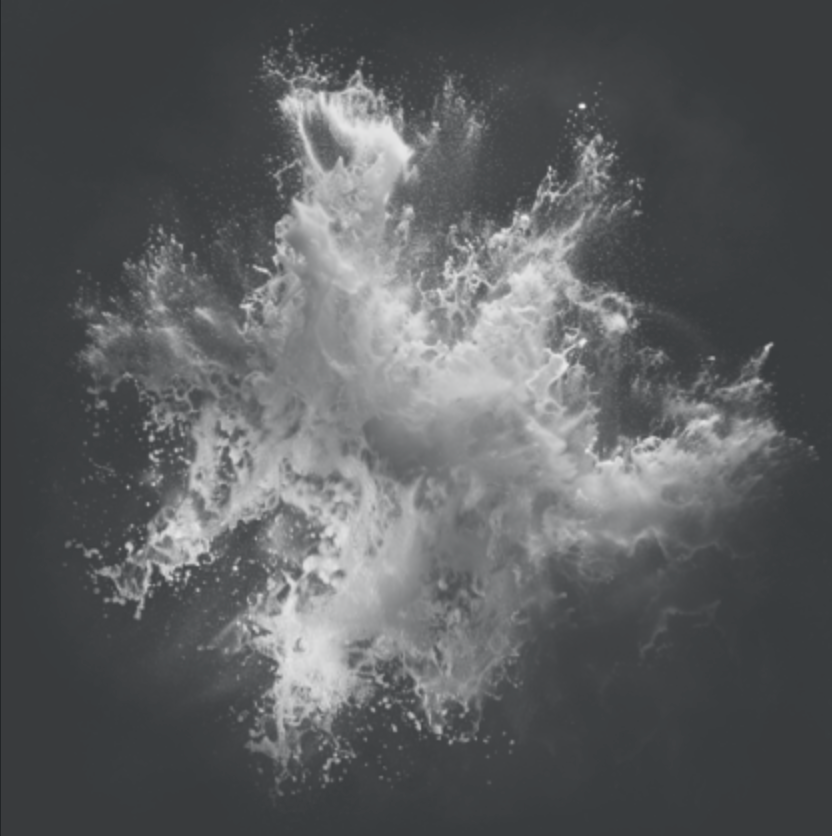
When cascades impact the density of the underlying plunge pool, the water propels upward from the impact point to create splashes. As this aerosolized water propels upward, it expands and breaks apart from itself to produce droplets that scatter in various directions.
To demonstrate this process, the sample uses two ParticleEmitter objects at the base of the main drop. The first particle emitter emits particles that look like dense splashes that represent the weight of the water that begins to propel upward as the cascades impact the plunge pool. The second particle emitter emits particles that look like droplets that represent the water becoming aerosolized.
When you configure these particle emitters to emit both of these particles at the same time but at different rates, the resulting visual effect emulates the real-world physical behavior of splashes. These types of details contribute to the realism of your VFX, and immerse players within the 3D space.
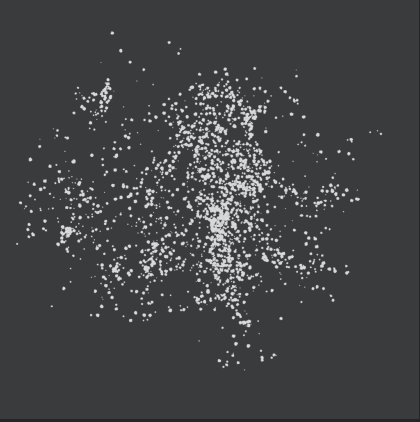
To recreate the splashes at the base of the main drop in the sample Waterfall Island place file:
In the Explorer window, create a Folder in the Workspace to contain all splash objects, then rename the folder Splashes.
Insert a block part into Splashes, then rename it MainDropSplashes.
Position and scale MainDropSplashes to the full surface area where the cascade impacts the plunge pool.

Create the dense splash where the main drop's cascading water impacts the plunge pool.
Insert a ParticleEmitter into MainDropSplashes, then rename the emitter SplashDense.
Select SplashDense, then in the Properties window,
- Set Texture to rbxassetid://16829556885 to render particles that look like dense splashes.
- Set Color to a color sequence that starts blue then turns white.
- Time = 0, RGB Value = 189, 246, 255
- Time = 1, RGB Value = 255, 255, 255

- Set Size to a number sequence that steadily increases in size with a window of variation.
- Time = 0, Value = 1.81, Envelope = 0.562
- Time = 1, Value = 5.75, Envelope = 1.31

- Set Transparency to a number sequence in which particles start as transparent, turn opaque, then become transparent again across their lifetime with a large window of variation.
- Time = 0, Value = 1, Envelope = 0
- Time = 0.5, Value = 0.181, Envelope = 0.181
- Time = 1, Value = 1, Envelope = 0

- Set Lifetime to 0.25, 0.35 to randomly set each particle's lifetime between 250 and 350 milliseconds.
- Set Rate to 30 to emit 30 particles per second.
- Set Rotation to -45, 45 to randomly orient each particle between -45 and 45 degrees per second.
- Set RotSpeed to -40, 40 to randomly emit each particle between -45 and 40 degrees per second.
- Set Speed to 20, 35 to randomly emit each particle between 20 and 35 studs per second.
- Set SpreadAngle to 50, 50 to emit particles in an angle along the X and Z axis.
- Set Acceleration to 0, -40, 0 to simulate gravity and pull particles downward.
- Set LightEmission to 0.5 to brighten the particles.
- Set LightInfluence to 0.1 to significantly reduce how much the environmental light affects the color of particles.
Create the droplets where the main drop's cascading water impacts the plunge pool.
Duplicate SplashDense, then rename it SplashDroplets.
Select SplashDroplets, then in the Properties window,
- Set Texture to rbxassetid://17082061238 to render particles that look like droplets.
- Set Size to a number sequence that rapidly increases in size with a window of variation.
- Time = 0, Value = 1.81, Envelope = 0.562
- Time = 1, Value = 8.69, Envelope = 1.31

- Set Transparency to a number sequence in which particles start as transparent, rapidly turn opaque, then slowly start to become transparent again near the middle of their lifetime.
- Time = 0, Value = 1, Envelope = 0
- Time = 0.104, Value = 0.0625, Envelope = 0.0625
- Time = 0.429, Value = 0.0562, Envelope = 0.0562
- Time = 1, Value = 1, Envelope = 0

- Set Lifetime to 0.15, 0.6 to randomly set each particle's lifetime between 150 and 600 milliseconds.
- Set Rate to 20 to emit 20 particles per second.
In the Explorer window, select all block parts in the Splashes folder, then in the Properties window, set Transparency to 1 to make the blocks invisible.
Configure white water
White water arises as the water source becomes more turbulent as it gains velocity when approaching its descent and colliding with objects in its path. This results in aerated, webby water that appears white due to more air bubbles in the water source.
To mimic this process, the sample uses two ParticleEmitter objects that emit particles that look like heavily aerated splashes where the outflow crashes into the boulders at the edge of the cliff. The emitter doesn't use built in lighting, and instead prioritizes white and gray hues with various falling rates to demonstrate the quantity of air in the water.
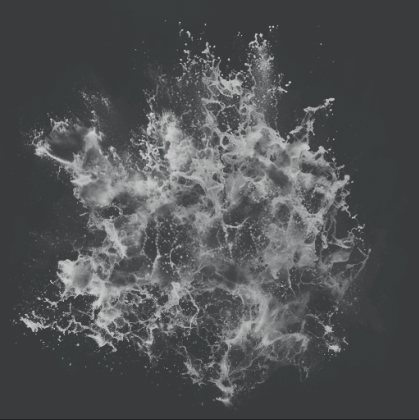
To recreate the white water where the outflow collides with the cliff's boulders in the sample Waterfall Island place file:
In the Explorer window, create a Folder in the Workspace to contain all white water objects, then rename the folder WhiteWater.
Insert a block part into WhiteWater, then rename it MainDropWW.
Position and scale MainDropWW to the full surface area where the outflow begins to flow over the cliff.

Create the less turbulent white water where the main outflow collides with the surrounding boulders.
Insert a ParticleEmitter into MainDropWW, then rename the emitter GentleWW.
Select GentleWW, then in the Properties window,
- Set Texture to rbxassetid://16808075391 to render particles that look like webby splashes.
- Set Color to a color sequence that starts blue then turns white.
- Time = 0, RGB Value = 189, 246, 255
- Time = 1, RGB Value = 255, 255, 255

- Set Size to a number sequence that steadily increases in size with a window of variation.
- Time = 0, Value = 1.13, Envelope = 0.562
- Time = 1, Value = 5.56, Envelope = 0.563

- Set Transparency to a number sequence in which particles start as transparent, turn about halfway opaque, then have slight peaks to become transparent again across their lifetime.
- Time = 0, Value = 1, Envelope = 0
- Time = 0.143, Value = 0.462, Envelope = 0.0625
- Time = 0.336, Value = 0.462, Envelope = 0.0562
- Time = 0.622, Value = 0.788, Envelope = 0.0538
- Time = 1, Value = 1, Envelope = 0

- Set ZOffset to 2 to offset the texture to be slightly away from the cliff.
- Set Lifetime to 1.25, 1.5 to randomly set each particle's lifetime between 1250 and 1500 milliseconds.
- Set Rate to 12 to emit 12 particles per second.
- Set Rotation to -45, 45 to randomly orient each particle between -45 and 45 degrees per second.
- Set RotSpeed to -40, 40 to randomly emit each particle between -45 and 40 degrees per second.
- Set Speed to 15, 18 to randomly emit each particle between 20 and 35 studs per second.
- Set SpreadAngle to 5, 5 to emit particles in a small angle along the X and Z axis.
- Set Acceleration to 0, -35, 0 to simulate gravity and pull particles downward.
- Set Drag to 0.25 to have particles lose their speed with exponential decay.
- Set LightEmission to 0.6 to brighten the particles.
- Set LightInfluence to 0.1 to significantly reduce how much the environmental light affects the color of particles.
Create the more turbulent white water where the main outflow collides with the surrounding boulders.
Duplicate GentleWW, then rename it TurbulentWW.
Select TurbulentWW, then in the Properties window,
- Set Size to a number sequence that subtly increases in size with a window of variation.
- Time = 0, Value = 1.6, Envelope = 0.562
- Time = 1, Value = 2.63, Envelope = 0.563

- Set Transparency to a number sequence in which particles start as transparent, turn opaque, then become transparent again near the middle of their lifetime.
- Time = 0, Value = 1, Envelope = 0
- Time = 0.156, Value = 0.0437, Envelope = 0.0437
- Time = 0.55, Value = 0.075, Envelope = 0.0252
- Time = 1, Value = 1, Envelope = 0

- Set Lifetime to 0.25, 0.5 to randomly set each particle's lifetime between 250 and 500 milliseconds.
- Set Rate to 20 to emit 20 particles per second.
- Set Speed to 5, 6 to randomly emit each particle between 5 and 6 studs per second.
- Set Acceleration to 0, -15, 0 to simulate gravity and pull particles downward.
In the Explorer window, select all block parts in the WhiteWater folder, then in the Properties window, set Transparency to 1 to make the blocks invisible.
Configure foam
Unlike splashes that propel upward as cascades impact the plunge pool, foam is aerated water that ripples outward from the base of the impact point. Similar to splashes, foam expands and breaks apart from itself into web-like droplets as it becomes aerosolized.
To mimic this effect, the sample uses a ParticleEmitter object to emit particles that look like foam ripples, and it emits them slowly parallel to the plunge pool. This allows the particle to emulate the visual and behavioral effect of a capillary wave breaking the surface tension of the underlying pool of water.
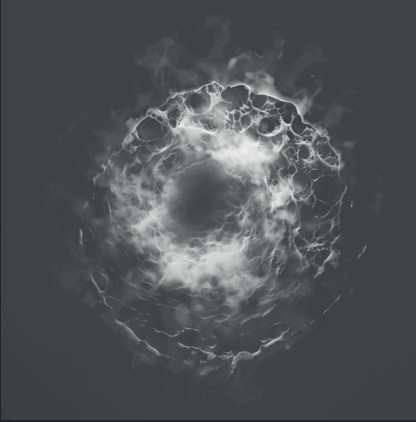
To recreate the foam at the base of the main drop in the sample Waterfall Island place file:
In the Explorer window, create a Folder in the Workspace to contain all foam objects, then rename the folder Foam.
Insert a block part into Foam, then rename it MainDropFoam.
Position and scale MainDropFoam to the full surface area where the densest part of the main cascade impacts the plunge pool.

Insert a ParticleEmitter into MainDropFoam, then rename the emitter FoamRipples.
In the Explorer window, select FoamRipples, then in the Properties window,
Set Texture to rbxassetid://16811365086 to render particles that look like foam ripples.
Set Orientation to VelocityPerpendicular to emit particles perpendicular to the direction of their movement.
Set Transparency to a number sequence in which particles start as transparent, rapidly become opaque, then quickly become transparent toward the end of their lifetime.
- Time = 0, Value = 1, Envelope = 0
- Time = 0.143, Value = 0.119, Envelope = 0.1
- Time = 0.664, Value = 0.125, Envelope = 0.112
- Time = 1, Value = 1, Envelope = 0

Set Lifetime to 0.5, 0.7 to randomly set each particle's lifetime between 500 and 700 milliseconds.
Set Rate to 5 to emit 5 particles per second.
Set Rotation to 0, 360 to randomly orient each particle in a circle from the emission point.
Set RotSpeed to -15, 15 to randomly emit each particle between -15 and 15 degrees per second.
Set Speed to 0, .01 to randomly emit each particle between 0 and .01 studs per second.
Set LightEmission to 0.25 to subtly brighten the particles.
Set LightInfluence to 0 to prevent the environmental light from affecting the color of particles.
In the Command Bar, input the following string to increase each particle's size from 5 to 20 studs across their lifetime with a small window of variation:
workspace.Foam.MainDropFoam.FoamRipples.Size = NumberSequence.new{NumberSequenceKeypoint.new(0,5,0), NumberSequenceKeypoint.new(1,20,5)}In the Explorer window, select all block parts in the Foam folder, then in the Properties window, set Transparency to 1 to make the blocks invisible.
Configure mist
As cascades make impact with the plunge pool, some of the water evaporates and condenses in the cool, humid air to create mist. Mist vapors don't catch lighting in the same way that hard surfaces do; instead, they reflect light in often unexpected ways to appear bright within the overall environment until they completely evaporate.
The sample emulates this process by using two ParticleEmitter objects at the base of the drop. The first particle emitter energetically emits particles away from the impact point and cliff, and the second emits particles that slowly rise toward the sky. Both particle emitter's particles are bright at the start of their lifetime, and slowly become transparent toward the end of their lifetime as they evaporate.
Similar to the real-world, the mist evaporation process allows a rainbow to form as light reflects off of the small water droplets, which the sample also emulates with a ParticleEmitter object that emits rainbow particles with a short lifespan. These particles face the camera no matter the player's angle from the waterfall to produce an optical illusion of light catching on the vapor itself.
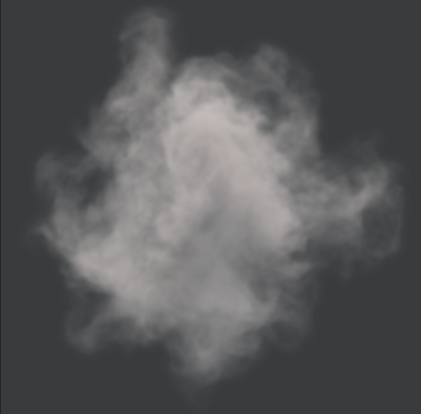
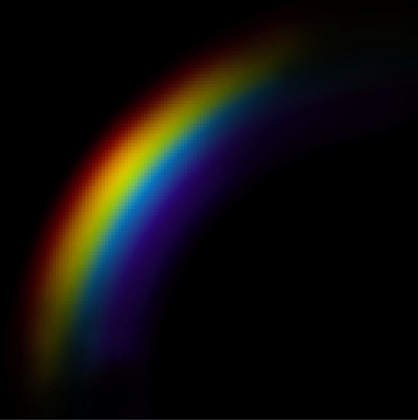
To recreate the mist that moves outward and upward from the base of the main drop in the sample Waterfall Island place file:
In the Explorer window, create a Folder in the Workspace to contain all mist related objects, then rename the folder Mist.
Create the mist that radiates away from the cascade's impact on the plunge pool.
Insert a block part into Mist, then rename it BaseMist.
Position, orient, and scale BaseMist to face away from the densest part of the location where the main cascade impacts the plunge pool.

Insert a ParticleEmitter into BaseMist, then rename the emitter Mist.
Select Mist, then in the Properties window,
- Set Texture to rbxassetid://16830667309 to render particles that look like thick mist.
- Set Color to a color sequence that starts blue then turns white.
- Time = 0, RGB Value = 171, 244, 255
- Time = 0.339, RGB Value = 251, 254, 255
- Time = 1, RGB Value = 255, 255, 255

- Set Size to a number sequence that steadily increases in size.
- Time = 0, Value = 8, Envelope = 0
- Time = 1, Value = 10, Envelope = 0

- Set Transparency to a number sequence in which particles start as transparent, quickly turn slightly opaque, then rapidly become transparent again across their lifetime.
- Time = 0, Value = 1, Envelope = 0
- Time = 0.0971, Value = 0.8, Envelope = 0.0625
- Time = 1, Value = 1, Envelope = 0

- Set ZOffset to 2 to offset the texture to be slightly away from the plunge pool.
- Set Lifetime to 0.5, 1 to randomly set each particle's lifetime between 500 and 100 milliseconds.
- Set Rate to 20 to emit 20 particles per second.
- Set Rotation to -360, 360 to randomly orient each particle in a circle.
- Set RotSpeed to -50, 50 to randomly emit each particle between -50 and 50 degrees per second.
- Set Speed to 35, 50 to randomly emit each particle between 35 and 50 studs per second.
- Set SpreadAngle to 25, 25 to emit particles in a small angle along the X and Z axis.
- Set Acceleration to -10, -25, -10 to simulate the impact of the splash exploding outward from the plunge pool.
- Set Drag to 1.5 to have particles lose their speed with exponential decay.
Create the mist that rises upward from the plunge pool.
- Duplicate BaseMist, then rename it RiseMist.
- Orient RiseMist so that the top of the part that emits particles faces toward the sky.
- Select its child particle emitter, then in the Properties window,
- Set Lifetime to 4 to set each particle's lifetime to 4 seconds.
- Set Rate to 3 to emit 3 particles per second.
- Set RotSpeed to -10, 10 to randomly emit each particle between -10 and 10 degrees per second.
- Set Speed to 25 to emit each particle 25 studs per second.
- Set Acceleration to 0, 0, 0 to remove the previous simulation.
- Set Drag to 1 to have particles lose their speed with exponential decay.
- In the Command Bar, input the following string to increase each particle's size from 20 to 20 studs across their lifetime with a small window of variation:
workspace.Mist.RiseMist.Mist.Size = NumberSequence.new{NumberSequenceKeypoint.new(0,20,1), NumberSequenceKeypoint.new(1,25,5)}Create the rainbow.
Insert a block part into Mist, then rename it RainbowPart.
Position RainbowPart slightly above the other block parts.

Insert a ParticleEmitter into Rainbow, then rename the emitter Rainbow.
Select Rainbow, then in the Properties window,
- Set Texture to rbxassetid://16828911033 to render particles that look like a faint rainbow.
- Set Size to 25 to render large particles.
- Set Transparency to a number sequence in which particles start as transparent, turn slightly opaque, then become transparent again across their lifetime.
- Time = 0, Value = 1, Envelope = 0
- Time = 0.497, Value = 0.363, Envelope = 0.05
- Time = 1, Value = 1, Envelope = 0

- Set Lifetime to 2, 4 to randomly set each particle's lifetime between 200 and 400 milliseconds.
- Set Rate to 0.25 to emit a particle every 4 seconds.
- Set Rotation to -20 to orient each particle to a slight degree.
- Set Speed to 0 to emit each particle 0 studs per second.
- Set Drag to 1 to have particles lose their speed with exponential decay.
- Set LightEmission to 1 to use additive blending to render the particles with the colors behind them. This step also removes the black background from the texture itself.
- Set LightInfluence to 0 to prevent the environmental light from affecting the color of particles.
In the Explorer window, select all block parts in the Mist folder, then in the Properties window, set Transparency to 1 to make the blocks invisible.