A volcano is a crater within the earth's crust that spews lava and smoke due to internal pressure from magma and dissolved gasses. Experiences often include volcanoes within challenging gameplay areas, such as locations where players must balance the danger of lava and molten rock hazards with the reward of valuable resources, boss battle arenas, or environments that dynamically change as the volcano cyclically erupts.
Using the Volcano Island - Start .rbxl file as a starting place and Volcano Island - Complete as a reference, this tutorial shows you how to transform the environment into a volcanic eruption with custom lighting and VFX objects that represent real-world physical behavior, including guidance on:
- Breaking down referential material into individual components with distinct visual and behavioral characteristics.
- Configuring surface ripples to emulate hot fluid rising to the surface and disrupting the surface of the caldera.
- Configuring embers to emulate pieces of molten rock quickly cooling as they rise into the atmosphere.
- Configuring lava that splashes and flows from the caldera to emulate various types of lava viscosity states.
- Configuring a smoke plume to emulate harsh impurities rising into the sky that catch players' attention.
Break down reference
To create credible volcanoes, it's important to reference real-world volcanic eruptions in the design process because it allows you to break down the subject matter into individual components with distinct visual and behavioral characteristics. For example, the sample Volcano Island - Complete experience references the volcanic eruption in Iceland to inform all texture and VFX design decisions relating to the caldera and its surrounding terrain.
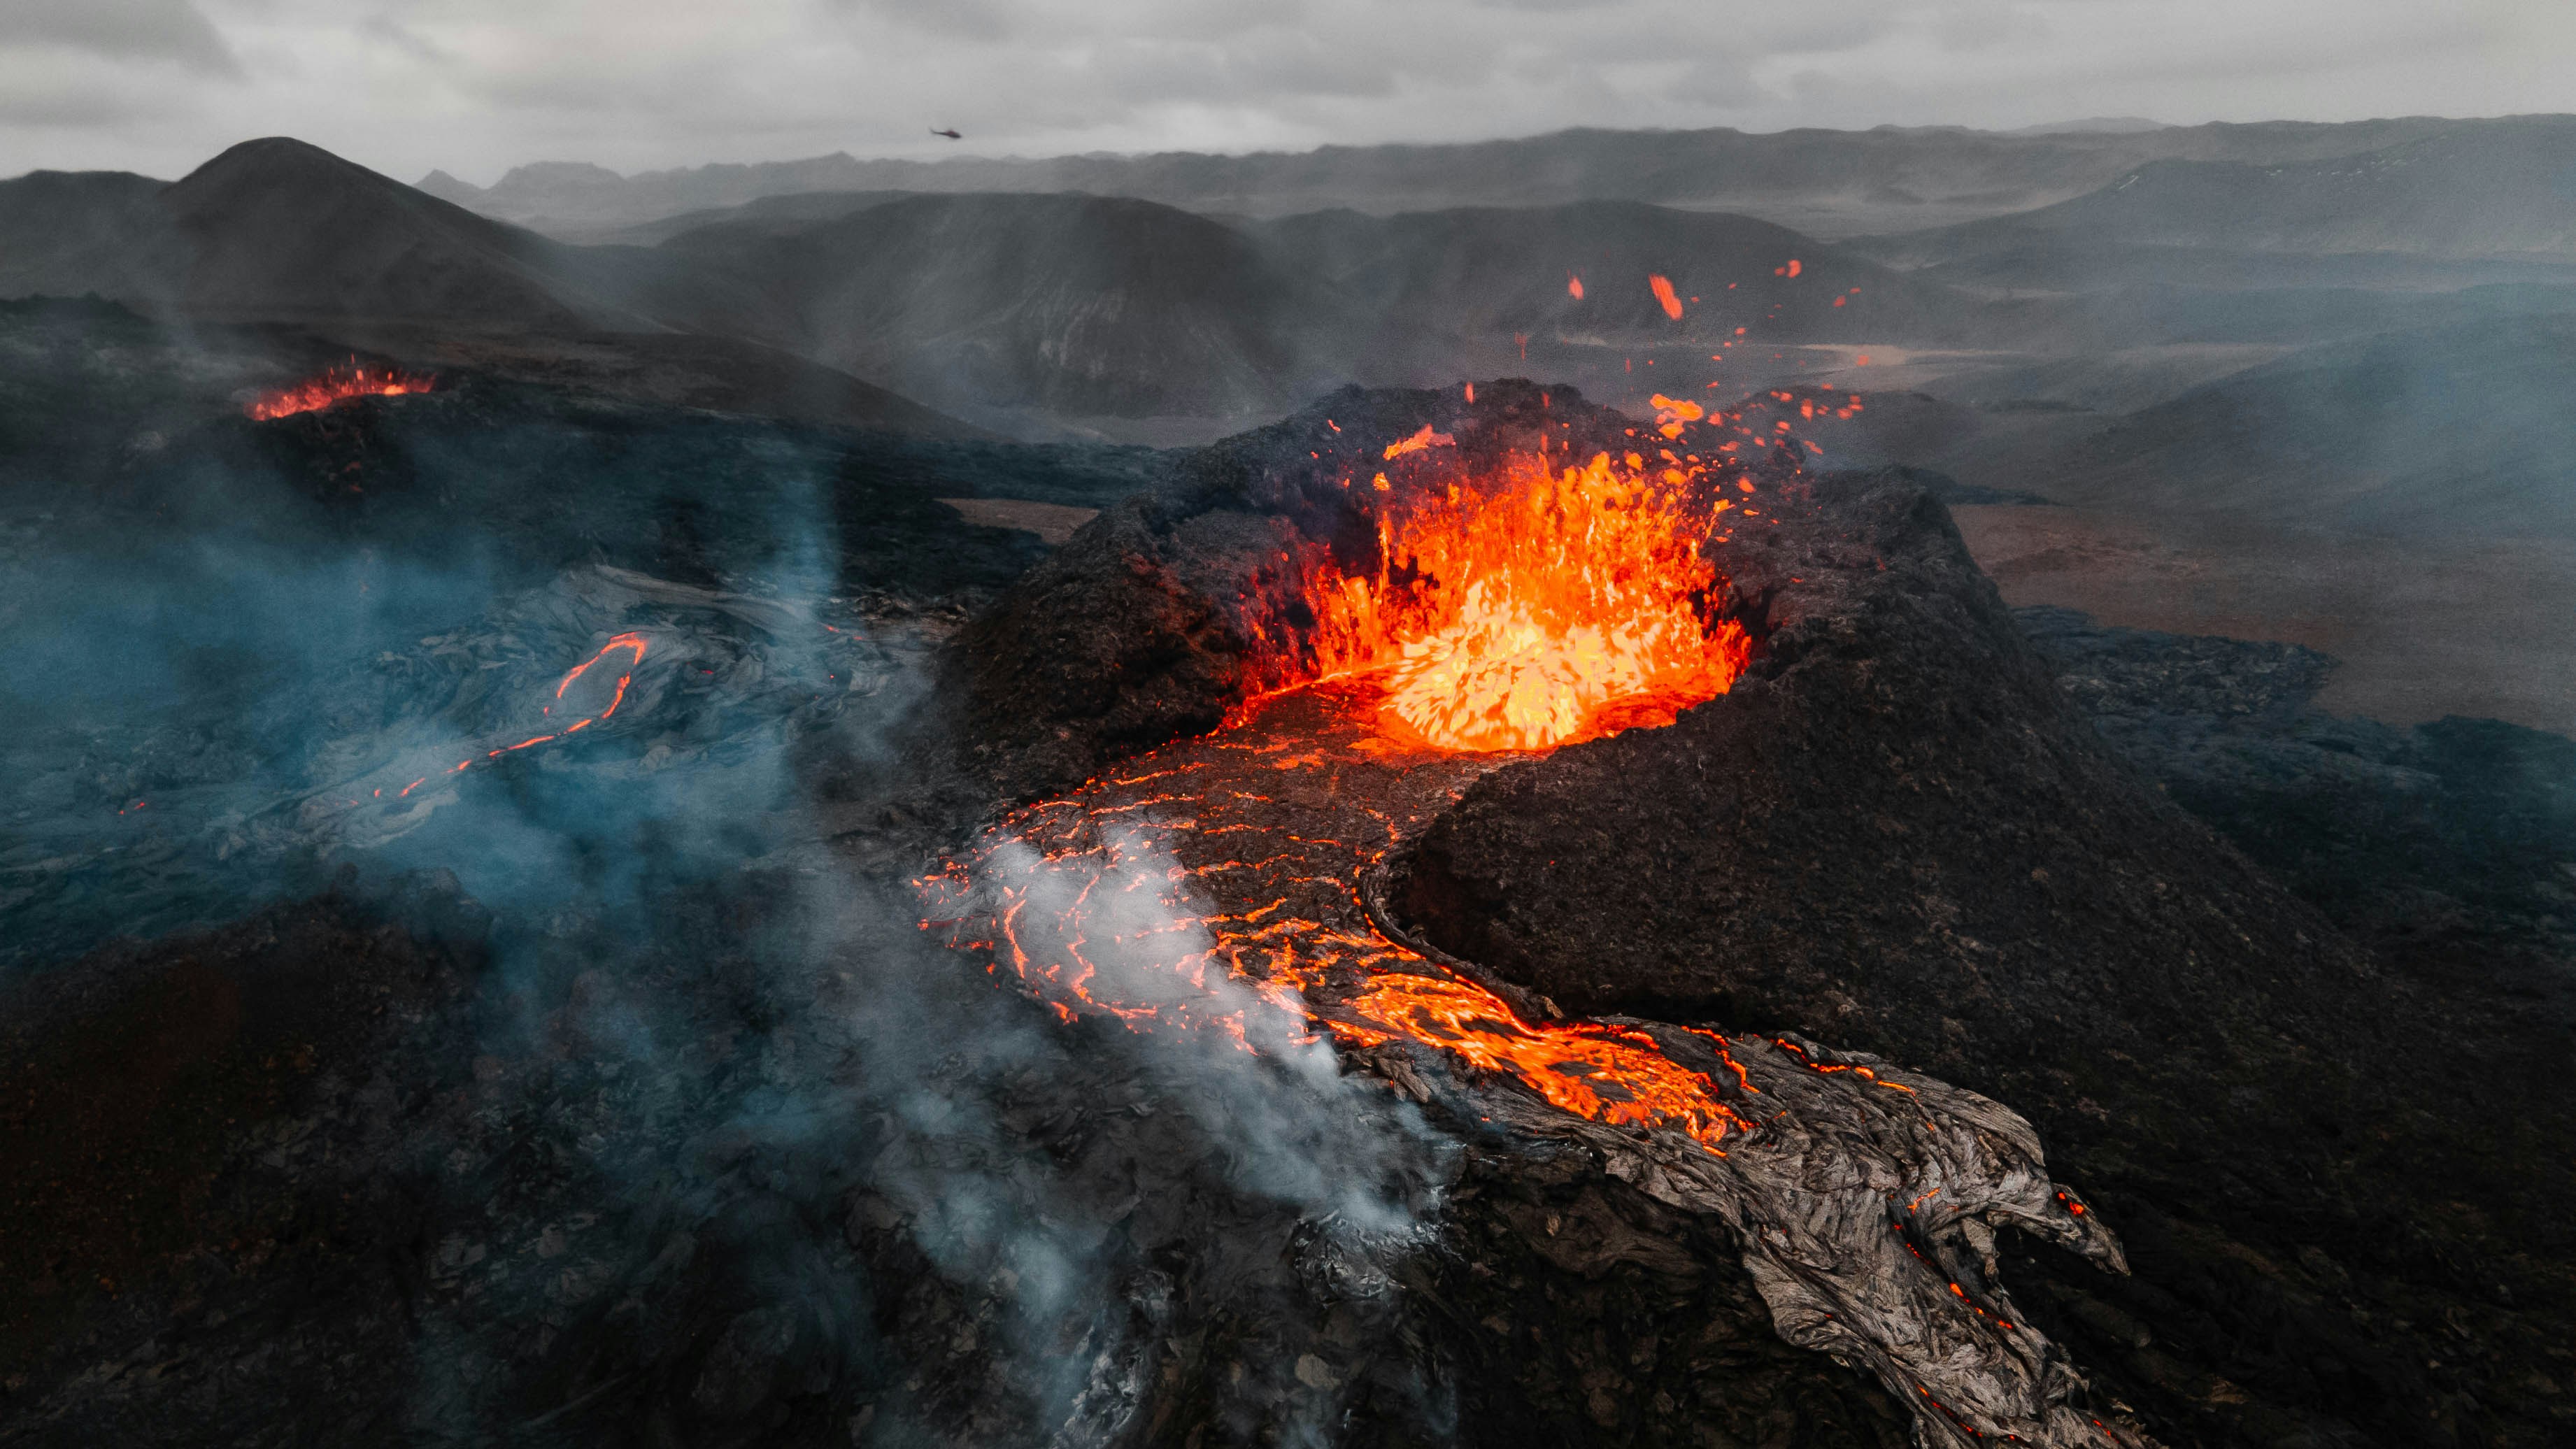
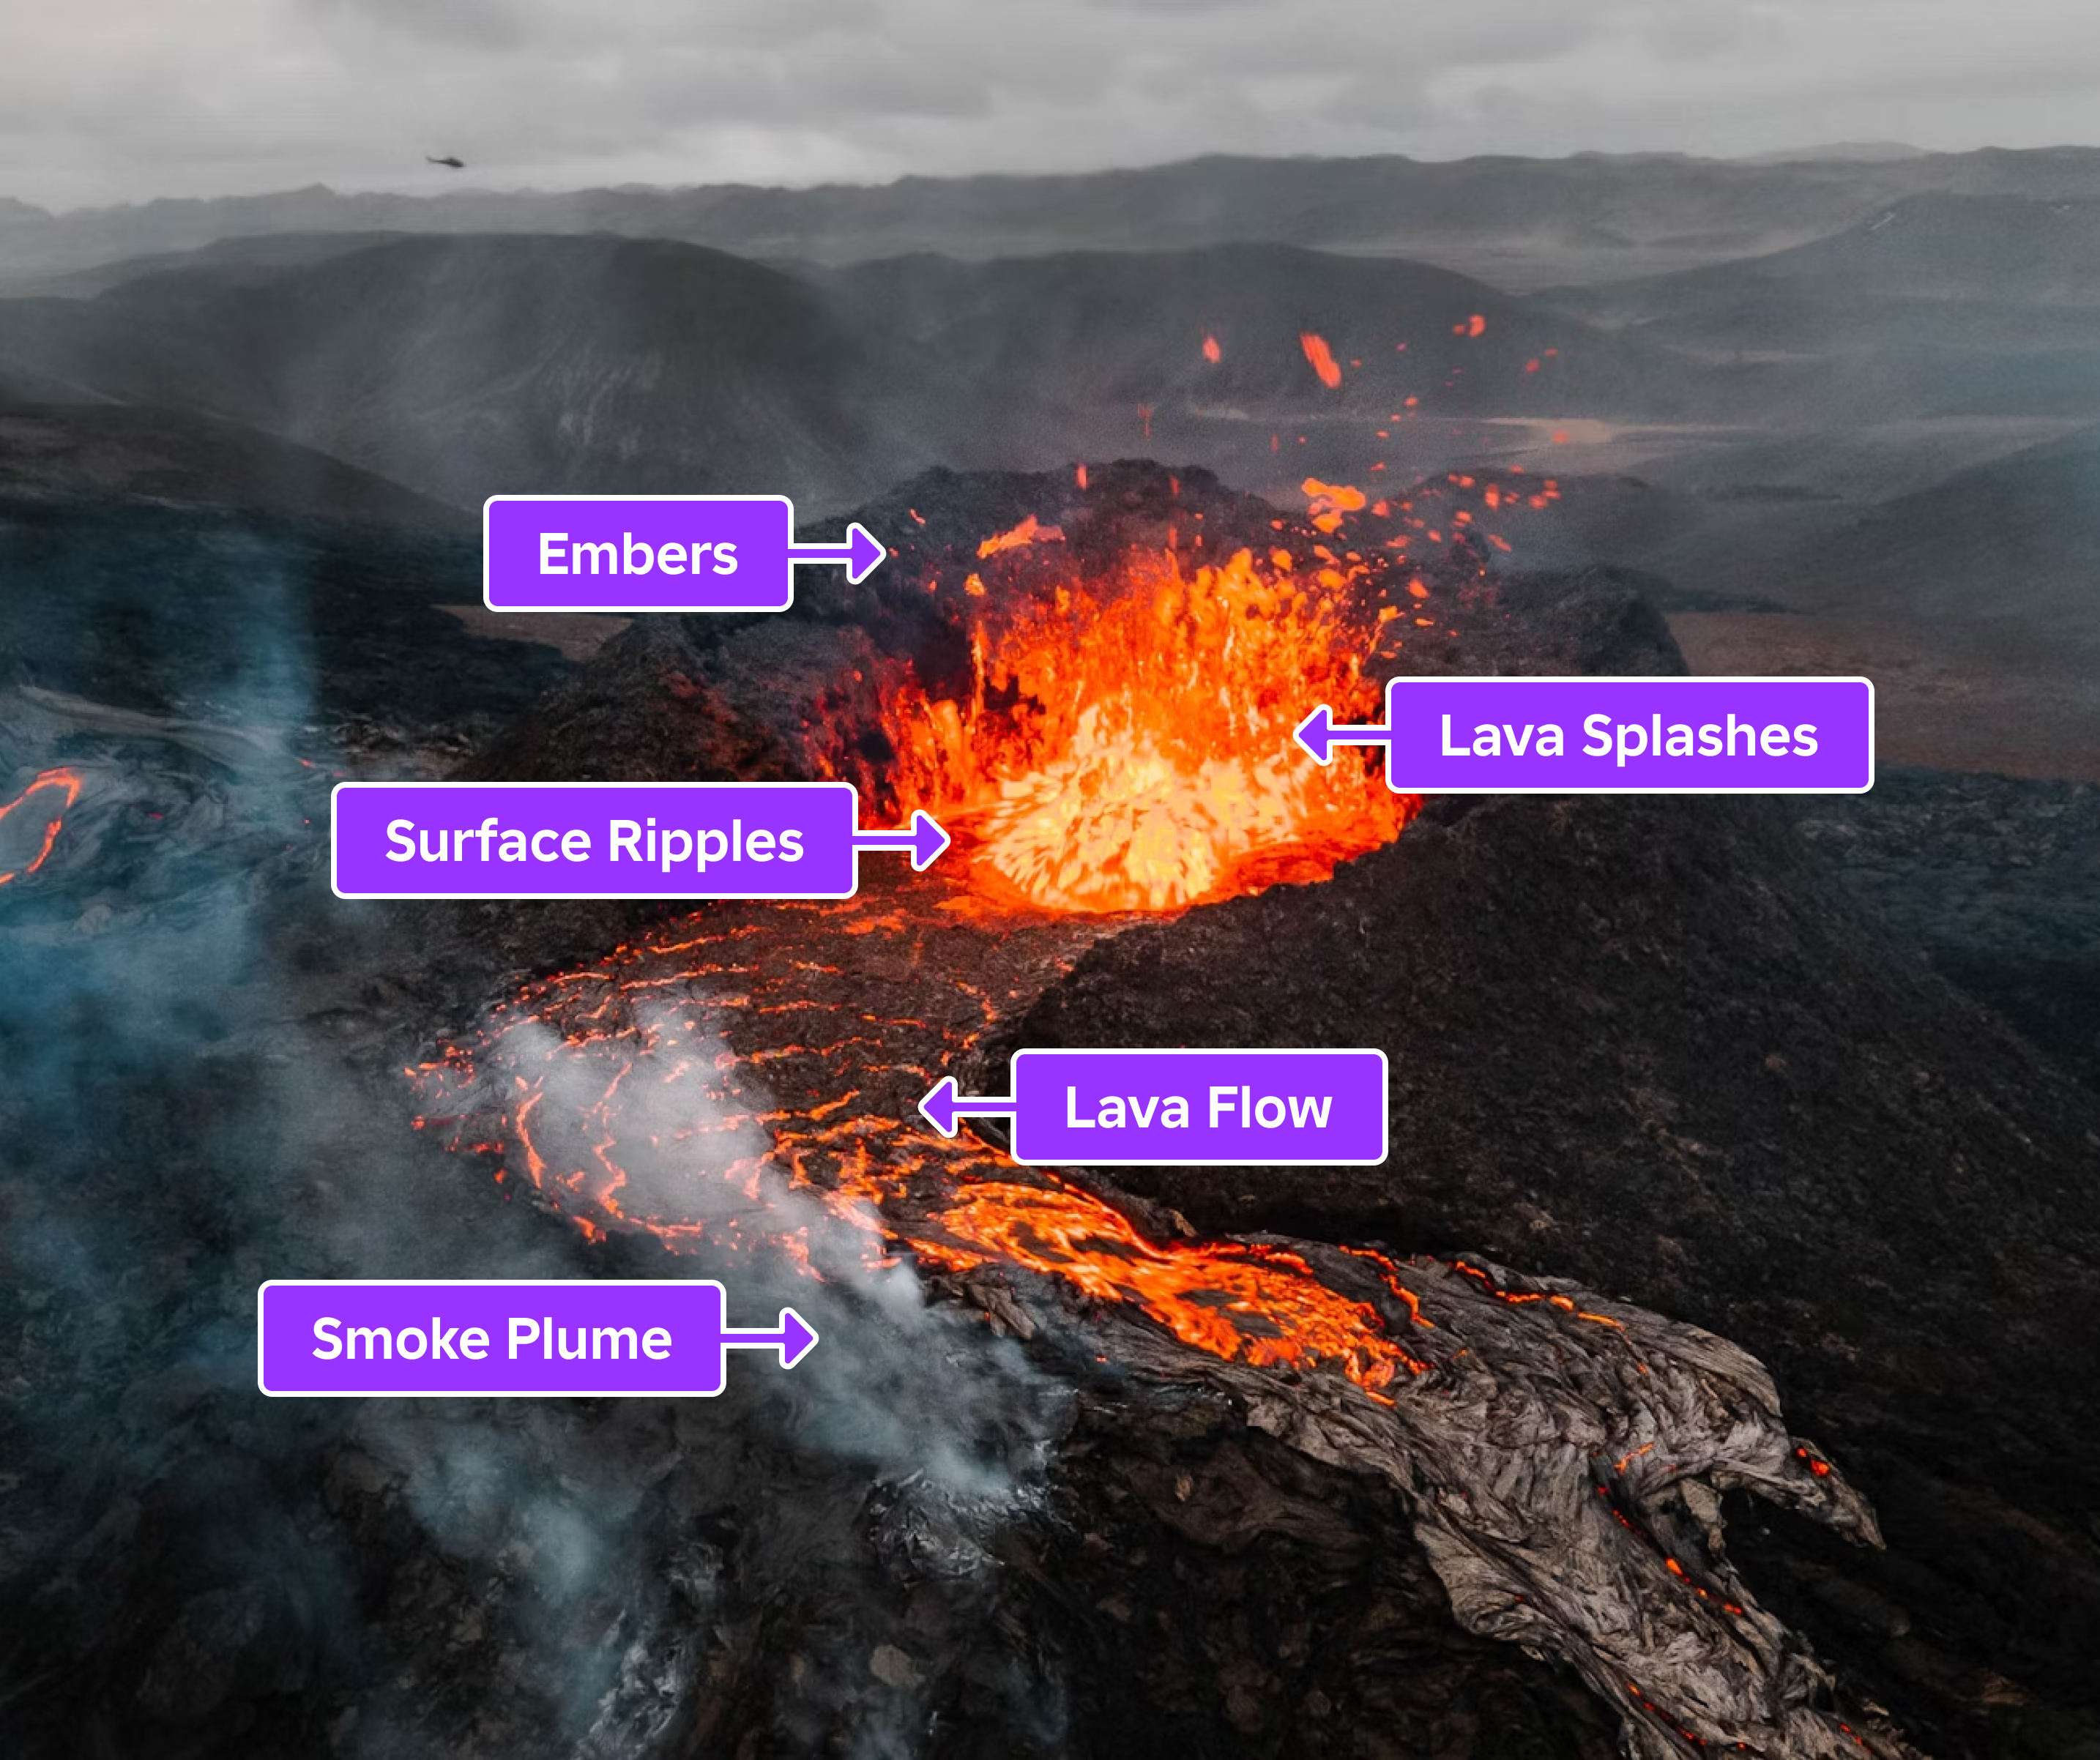
It's useful to break down a volcano that's erupting into individual components so that you can plan how to utilize different VFX objects to mimic their real-world counterparts. To demonstrate, this tutorial breaks the sample volcano into six unique components:
- Surface Ripples – The small waves of lava on the surface of the caldera.
- Embers – The small, light pieces of molten rock that rise to the sky from the caldera.
- Lava Splashes – The thin molten rock that bursts out from the caldera due to internal pressure within the volcano.
- Lava Flow – The viscous molten rock that oozes away from the caldera.
- Smoke Plume – The warm, billowing gas that rises into the sky from the caldera.
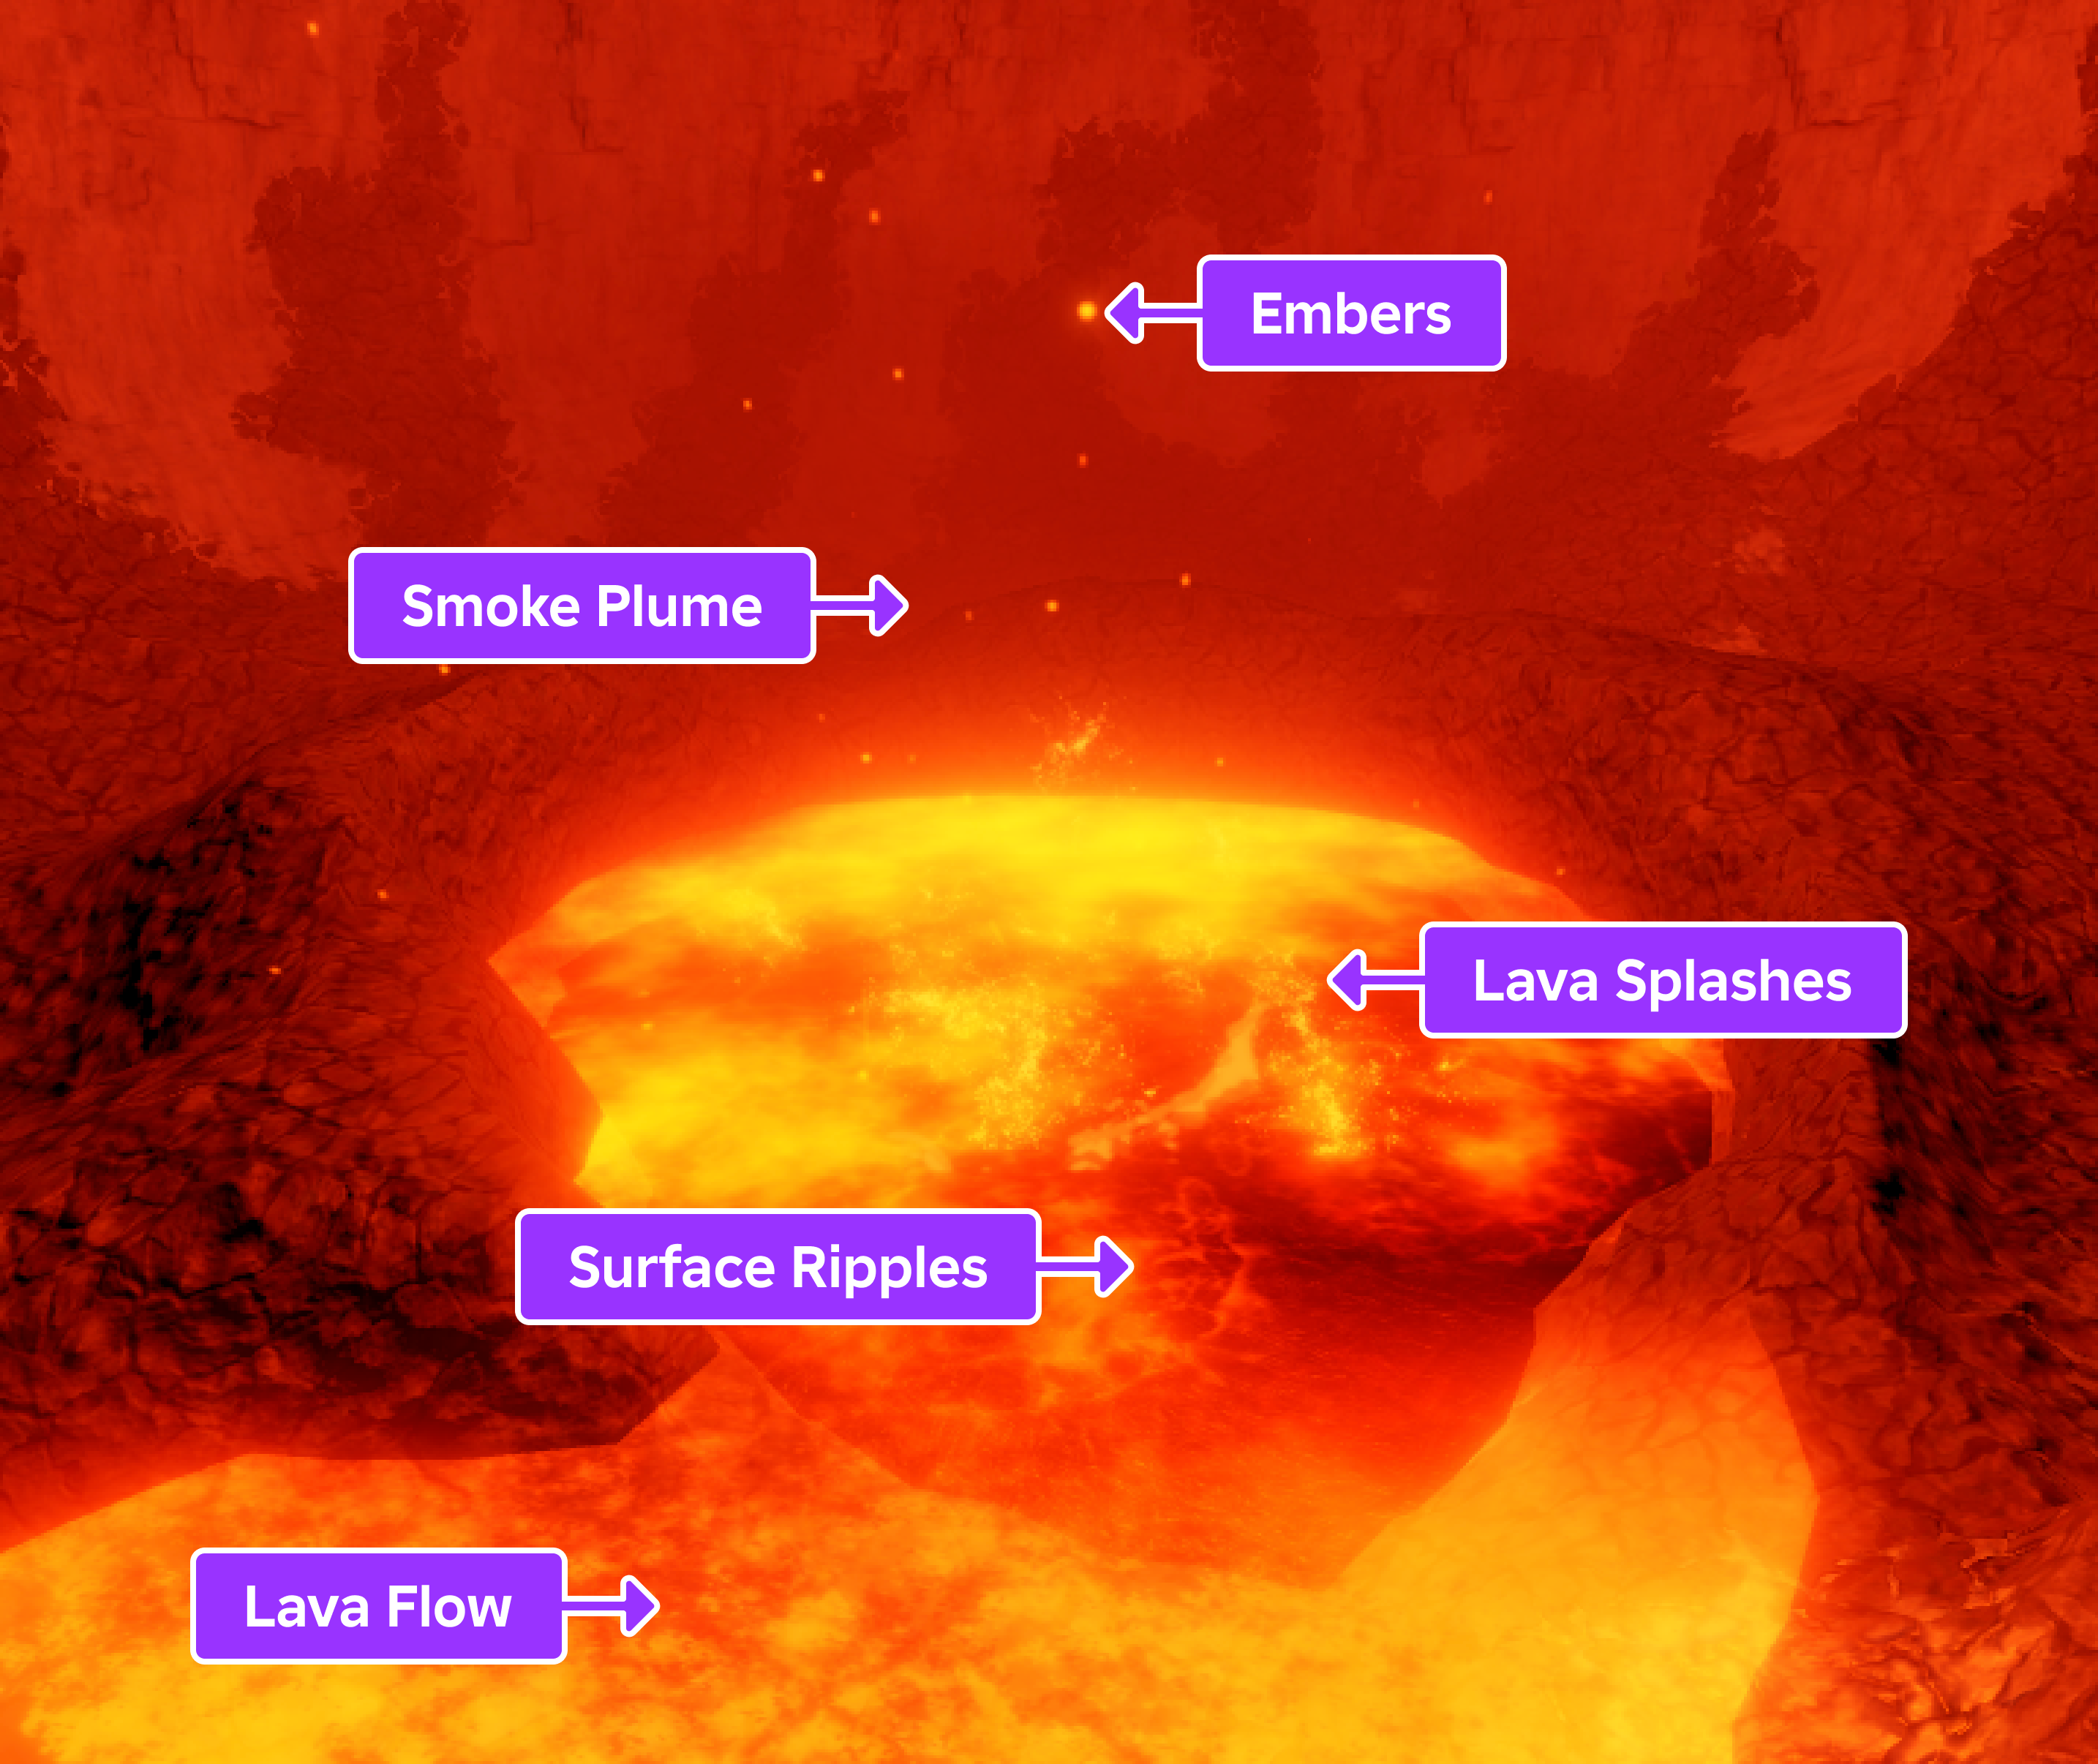
The following sections provide an in-depth analysis of the different design decisions and techniques you can use to recreate each of these components. As you review these decisions and experiment with various lighting, ParticleEmitter, and Beam properties, you will learn how to utilize lighting and VFX to solve the unique environmental requirements for your own experiences.
Configure lighting
To make an environmental element a point of interest within your experience, it's important to increase its contrast against the overall environment so that it stands out as something that players should explore. For example, to draw players into the caldera, you can configure your lighting sources so that the volcano's lava appears to glow as the only light source within an otherwise dark environment.
Studio provides two high-level types of lighting sources you can use for this technique:
- Global lighting - Produces lighting for the entire outdoor environment.
- Local lighting - Produces lighting around where you place them within your experience.
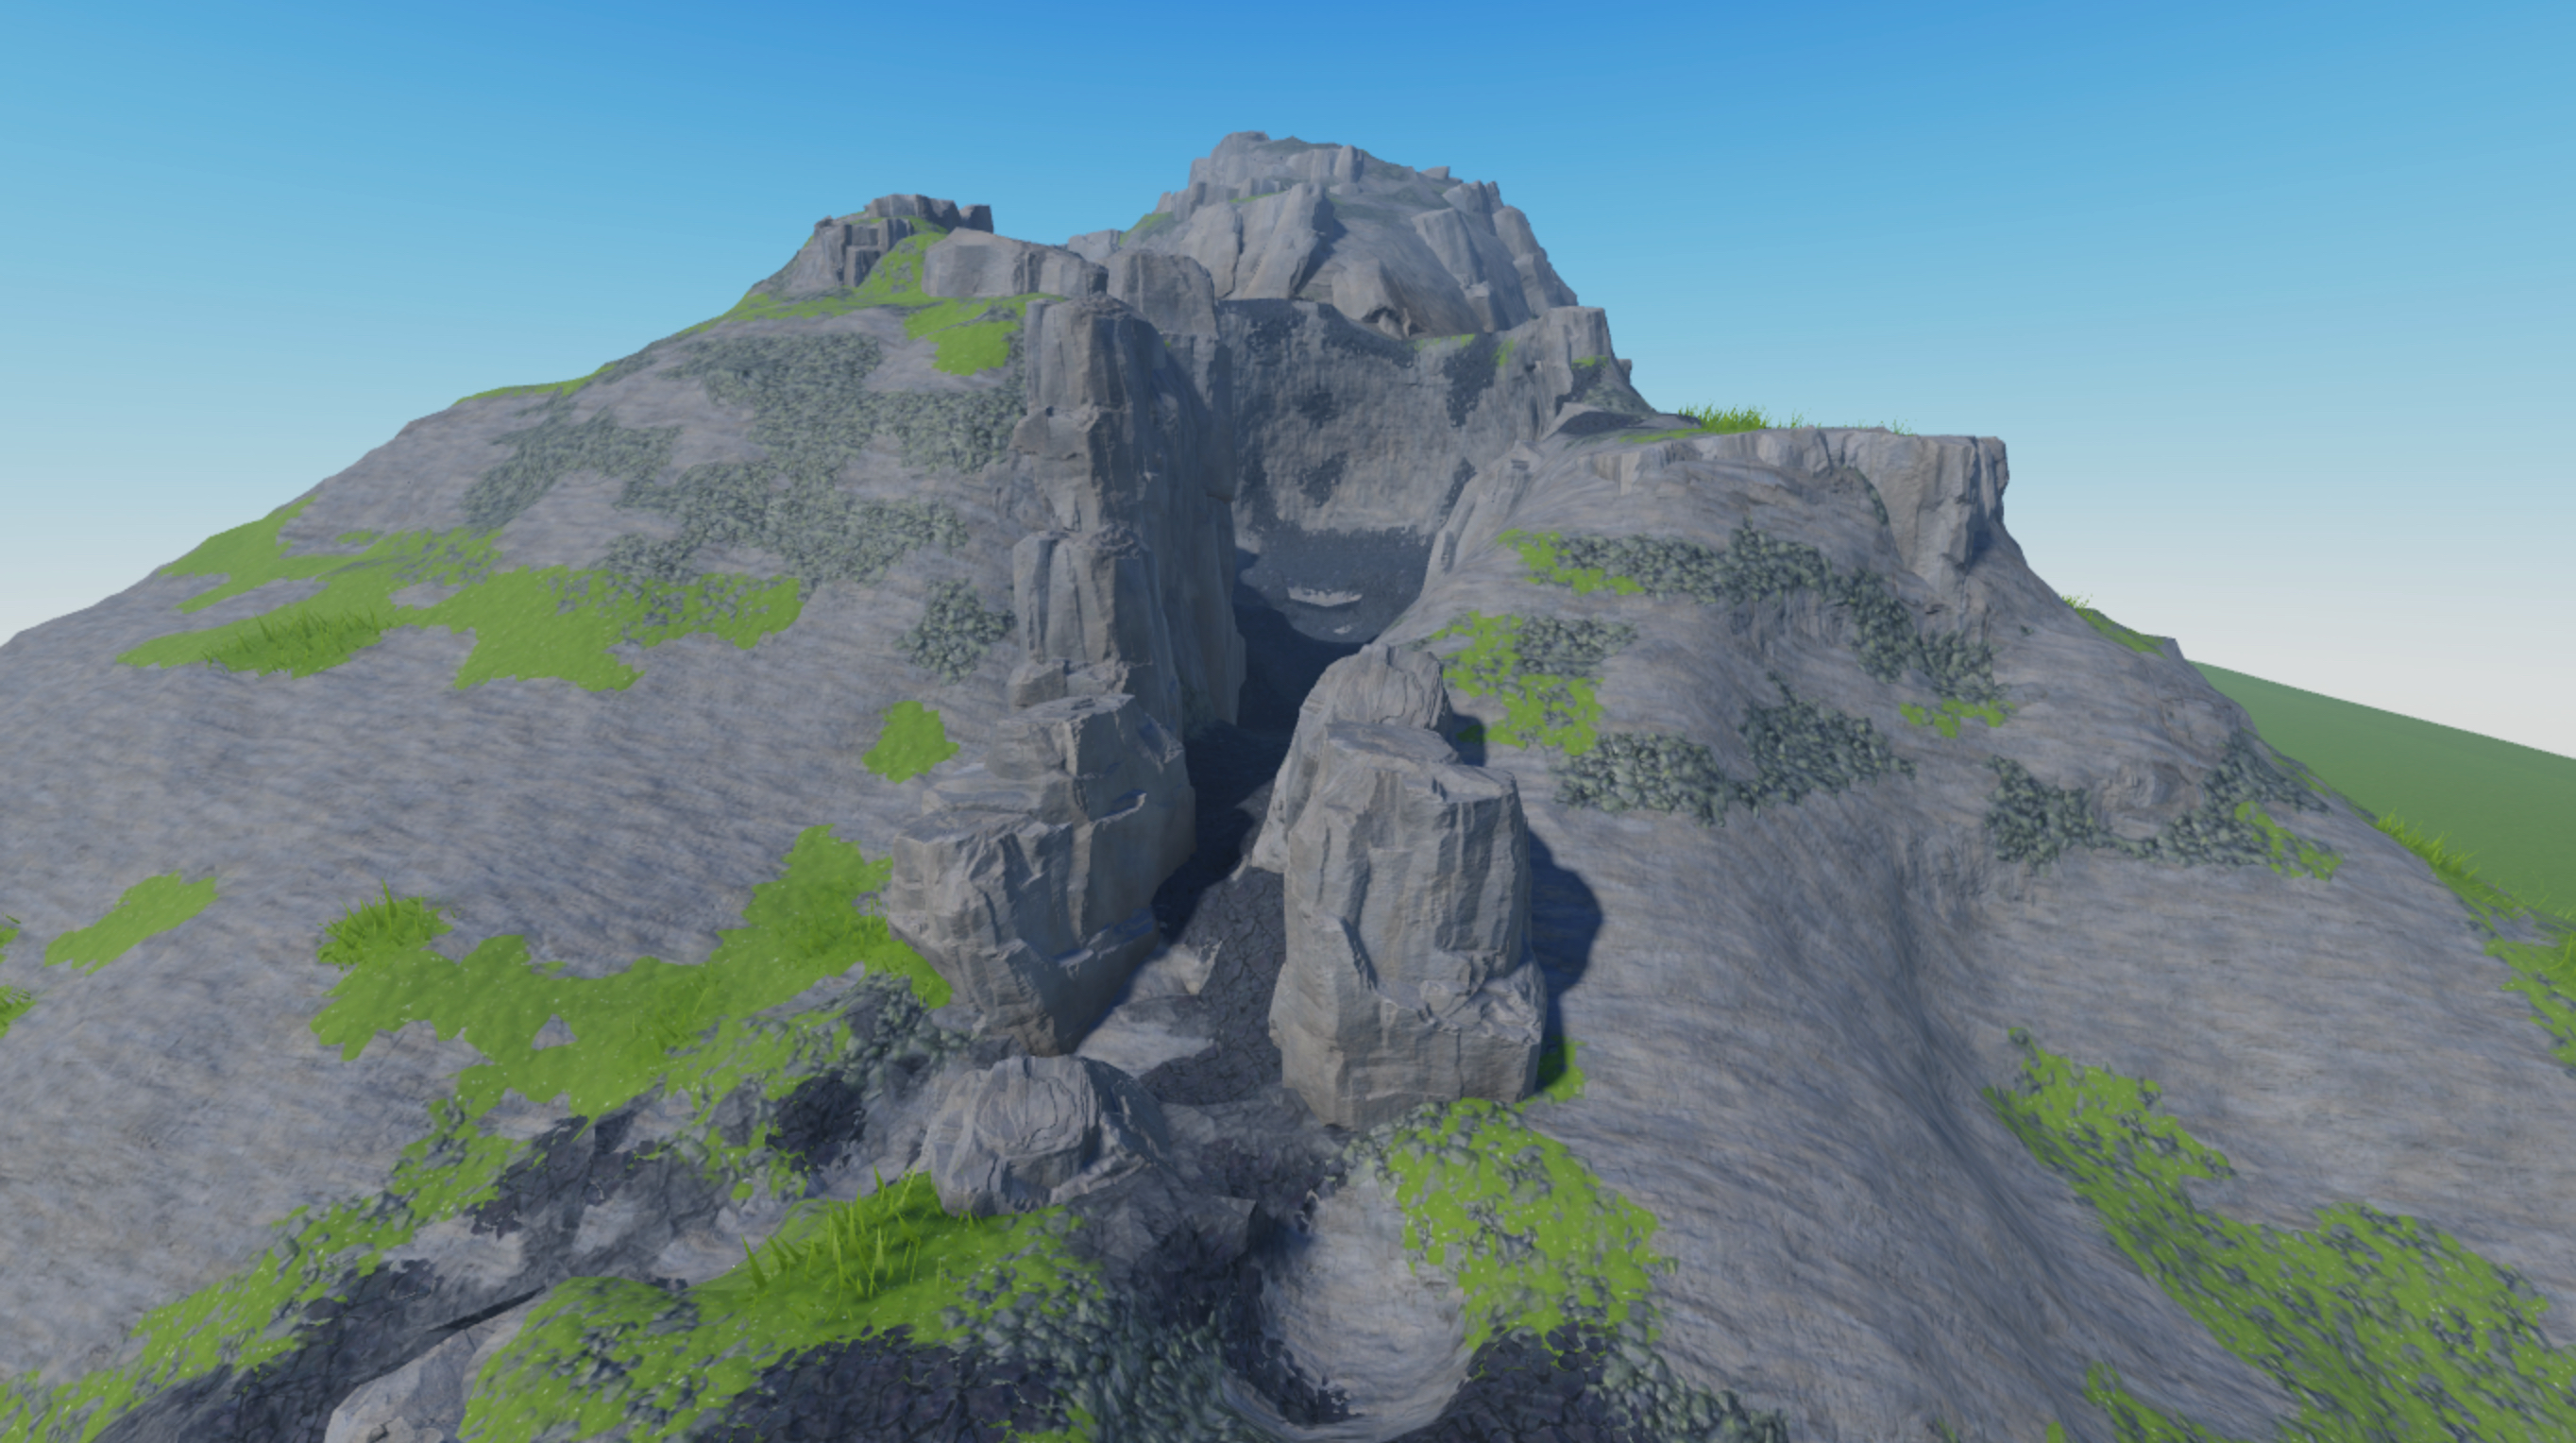
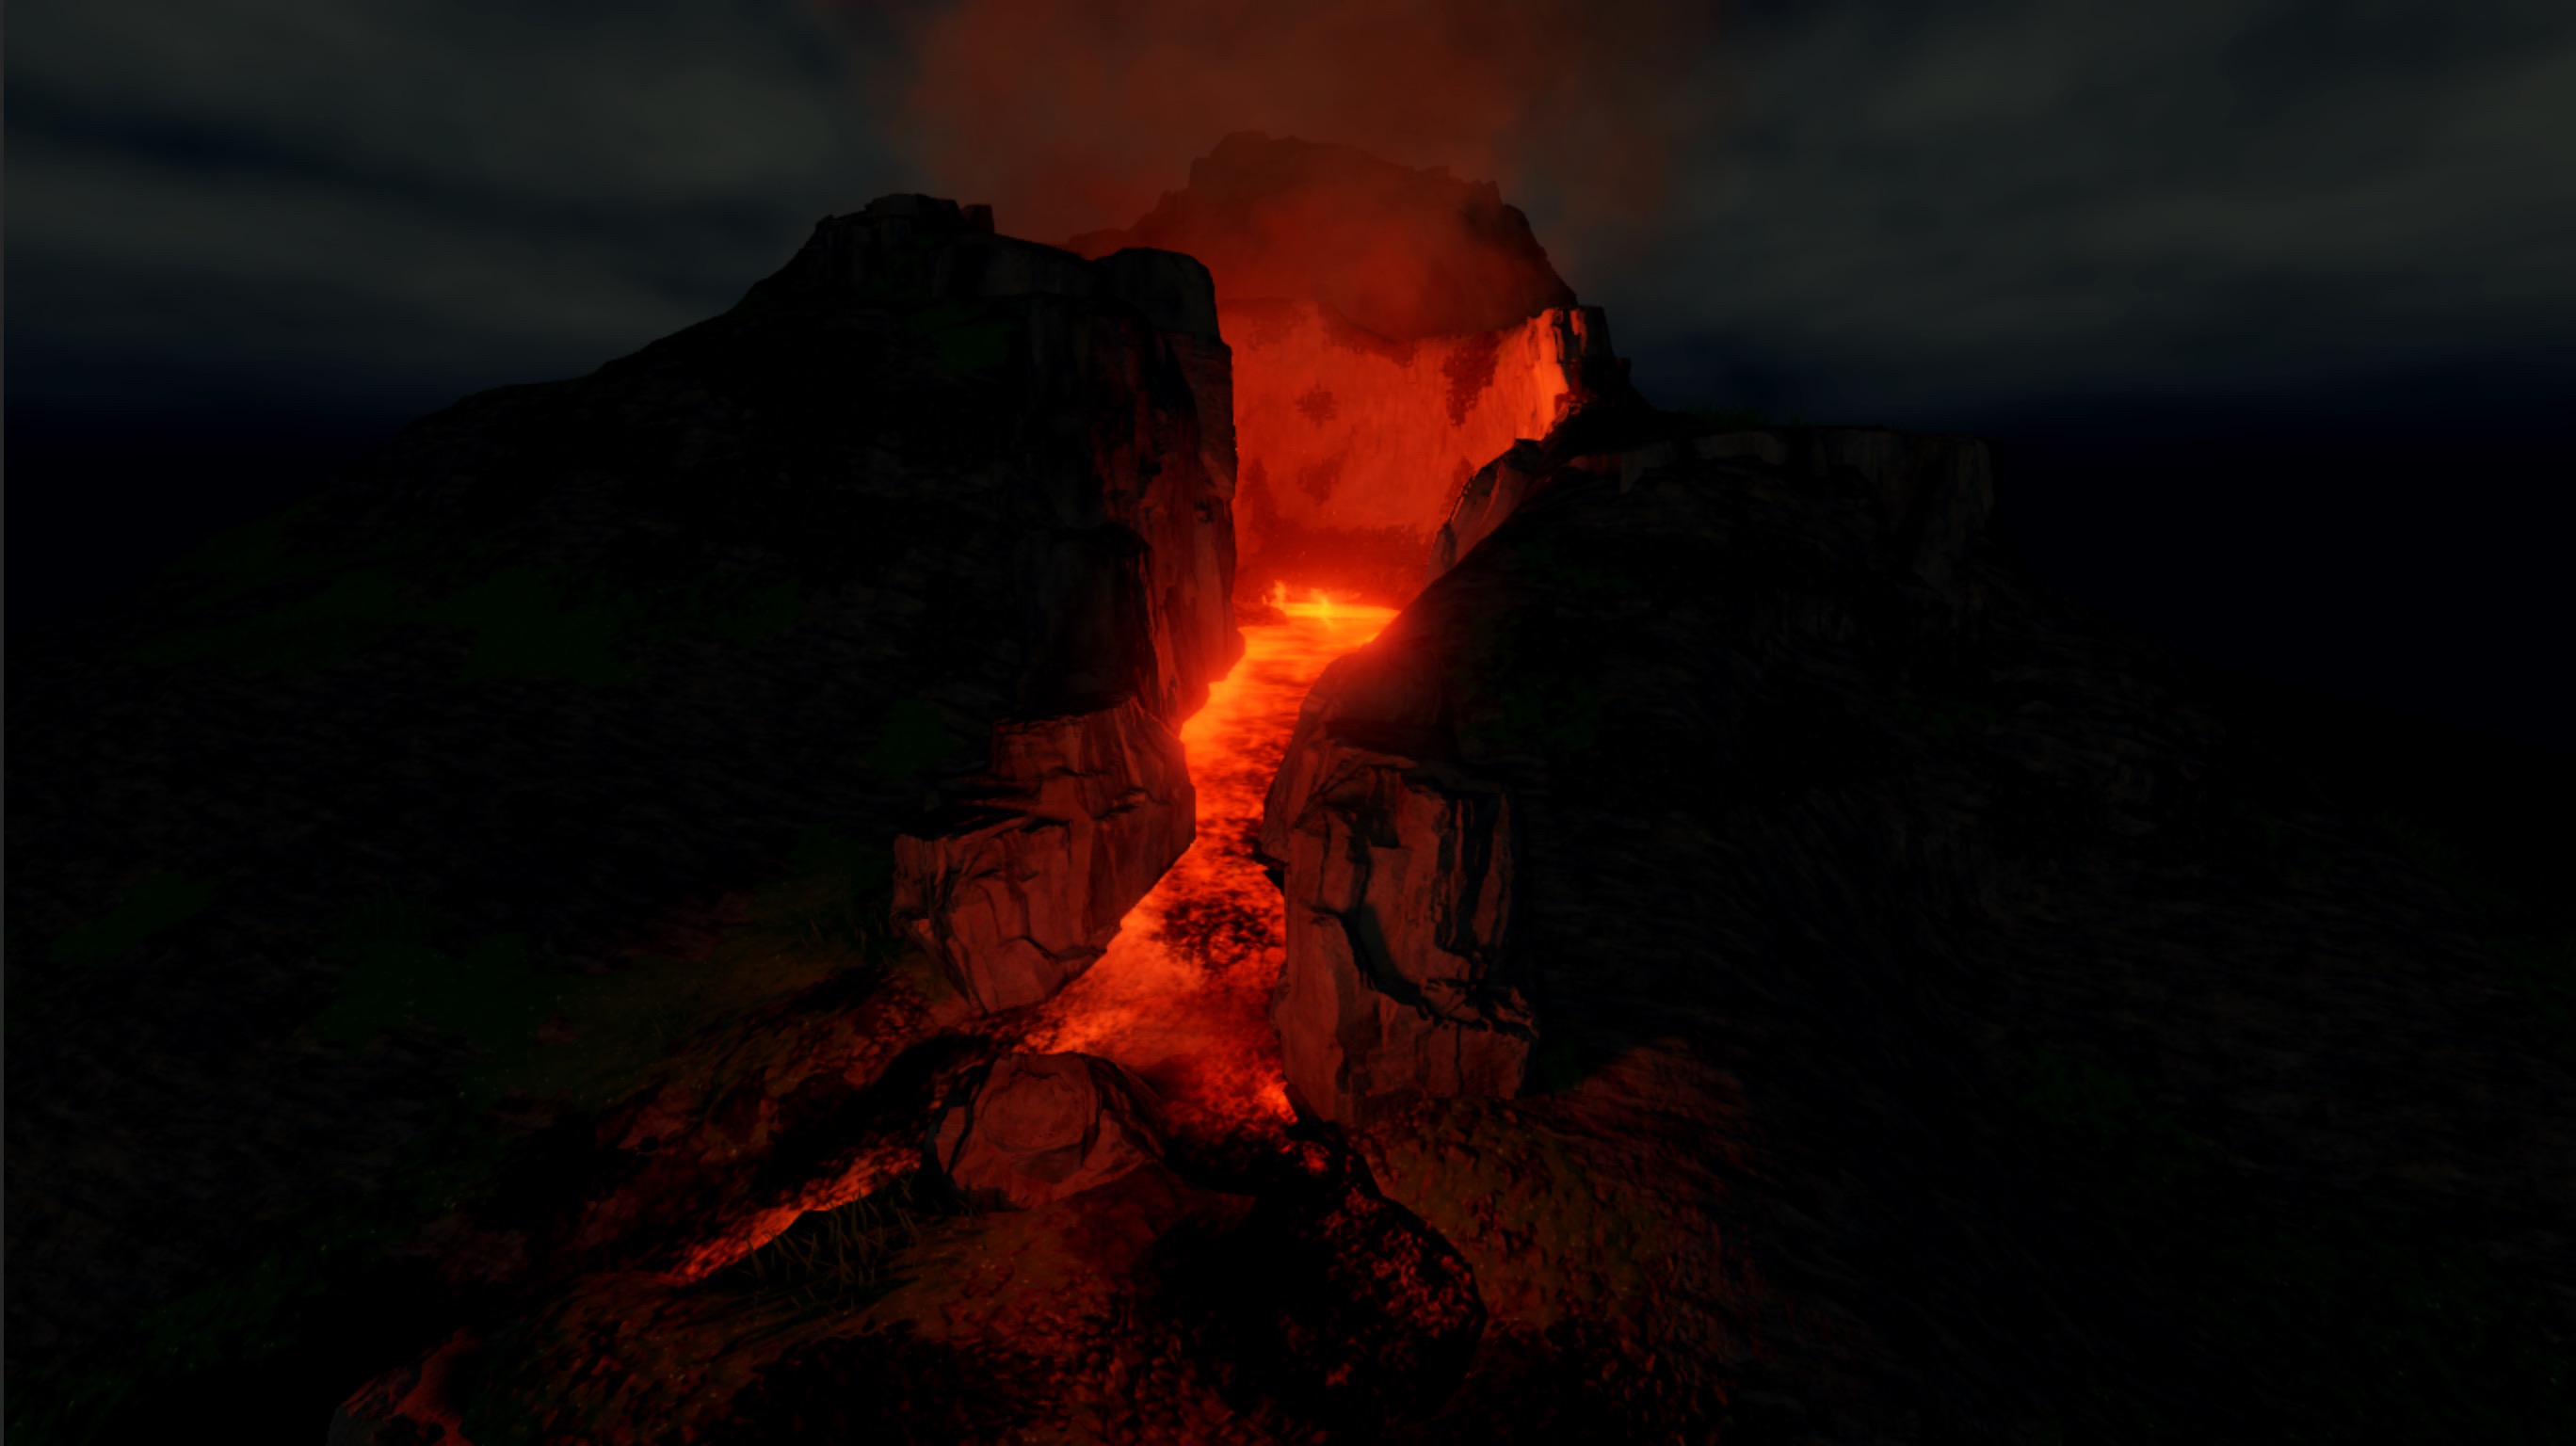
This section of the tutorial teaches you how to utilize both types of lighting sources to make your volcanic eruption the most significant point of interest within your scene, as well as create a dramatic effect for your environmental storytelling. To illustrate, review how the same final volcano without custom lighting feels like an unobtrusive hazard in an otherwise cheerful environment while the volcano with custom lighting feels like a dangerous presence in a dark, melancholic environment.
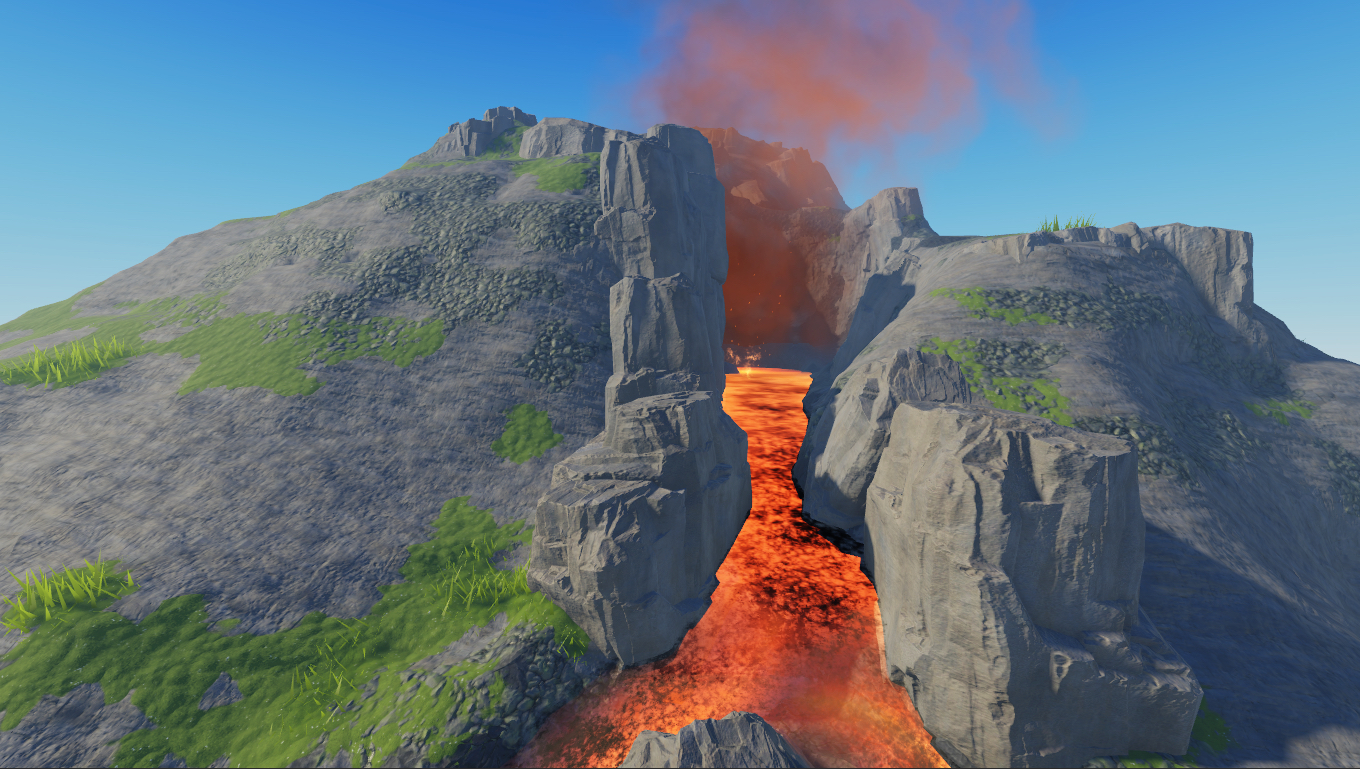
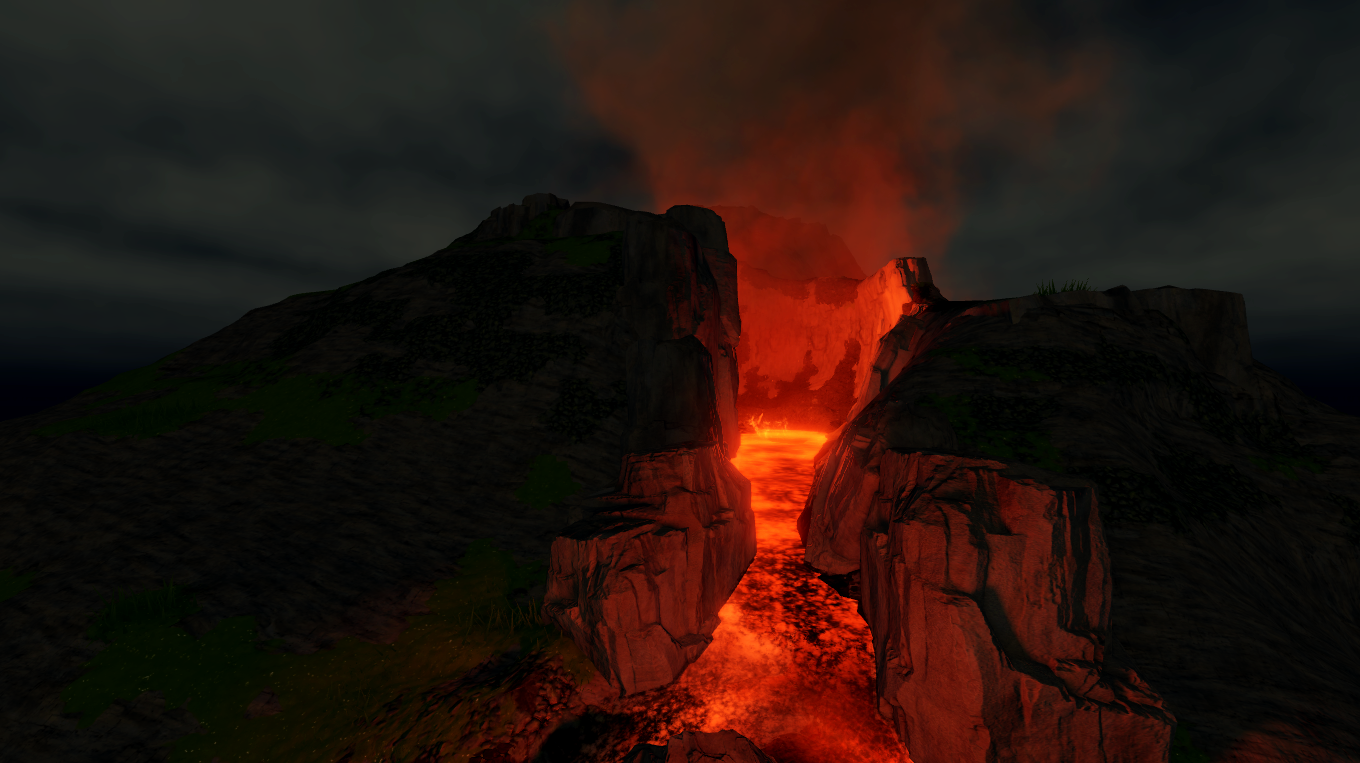
Local lighting
Local lighting is the luminescence from local light sources in your experience, such as SpotLight, SurfaceLight, and PointLight objects. Local lighting is important to add to your volcano because while you can apply brightness to your ParticleEmitter and Beam textures, they cannot fill the canyon with enough light alone to realistically simulate how the caldera and its flowing lava would illuminate the environment in the real world.
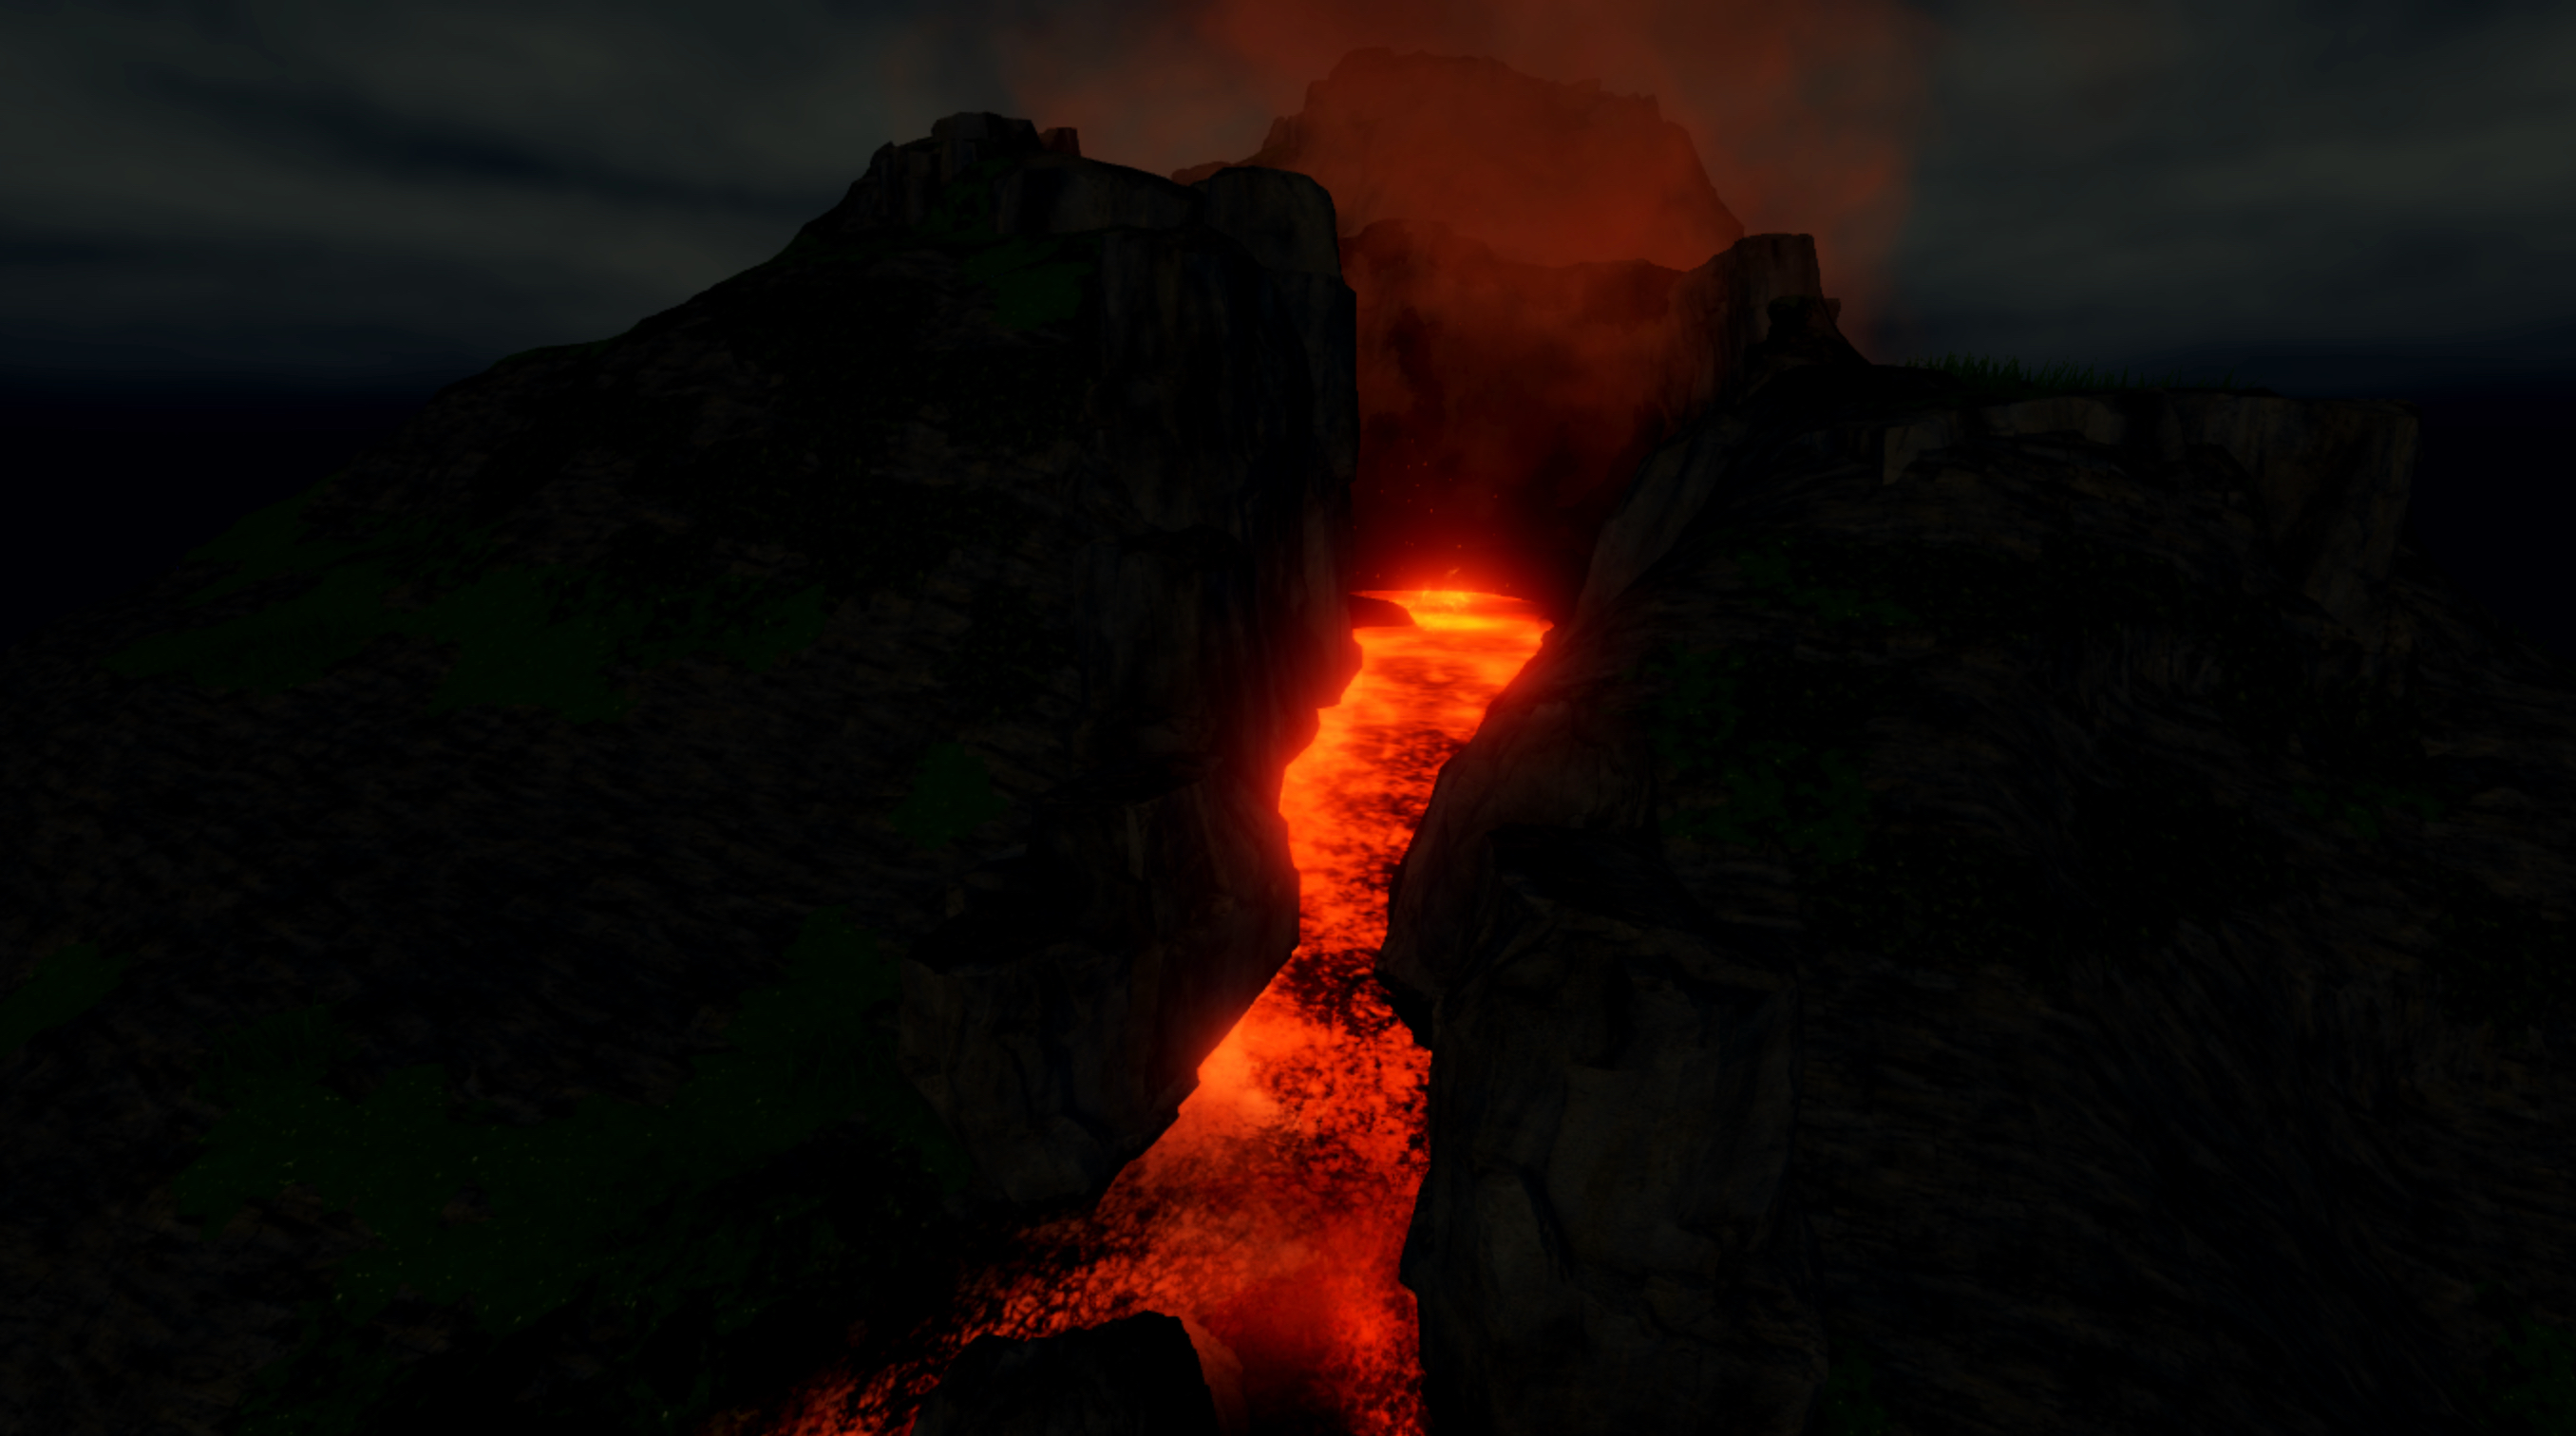

It's helpful to configure your local lighting before your global lighting for this tutorial because without the local light sources, you cannot see the 3D space to configure your VFX objects. However, common workflows require you to iterate on both local and global lighting concurrently to see the effects of your changes on VFX objects, so it's important to be flexible to design requirements of your own experiences.
To recreate the local lighting for the volcano in the sample Volcano Island - Complete place file:
In the Explorer window, create a Folder in the Workspace to contain all local light source objects, then rename the folder LocalLighting.
Insert three block parts into the LocalLighting folder, then rename them LightCaldera, LightMagma, and LightOutflow, respectively.
Move the parts to a position where they can light the entirety of the volcano.
- Move LightCaldera to the center of the space between the caldera and the cliff.
- Move LightMagma to the center of the crevice between the caldera and the magma outflow.
- Move LightOutflow to slightly above where the outflow forks into two streams.

Insert a Pointlight into each part.

Select the PointLight child of LightCaldera, then in the Properties window,
- Set Brightness to 15 to make the light source much brighter.
- Set Color to 255, 85, 0 to tint the light to a dark orange hue.
- Set Range to 60 to illuminate the entire caldera area.

Select the PointLight children of LightMagma and LightOutflow, then in the Properties window,
- Set Brightness to 2 to make the light source slightly brighter.
- Set Color to 255, 81, 0 to tint the light to an orange hue.
- Set Range to 50 to illuminate the crevice and outflow areas.

In the Explorer window, select all block parts in the LocalLighting folder, then in the Properties window, set Transparency to 1 to make the blocks invisible.

Global lighting
Global lighting is the luminescence from either the sun or moon in an experience. By adjusting a couple of key default properties in the Lighting service and its child post-processing effects objects, you can dramatically change how global light appears to players, as well as how it interacts with any other object you place in the experience, including ParticleEmitter and Beam textures.
For example, to ensure that the Beam textures that produce a flowing lava effect later in the tutorial are able to glow, you must configure BloomEffect properties to exaggerate the lighting like a camera viewing a bright light. Similarly, to simulate more realistic colors at night, you must also adjust the effect's properties to desaturate the overall environment.
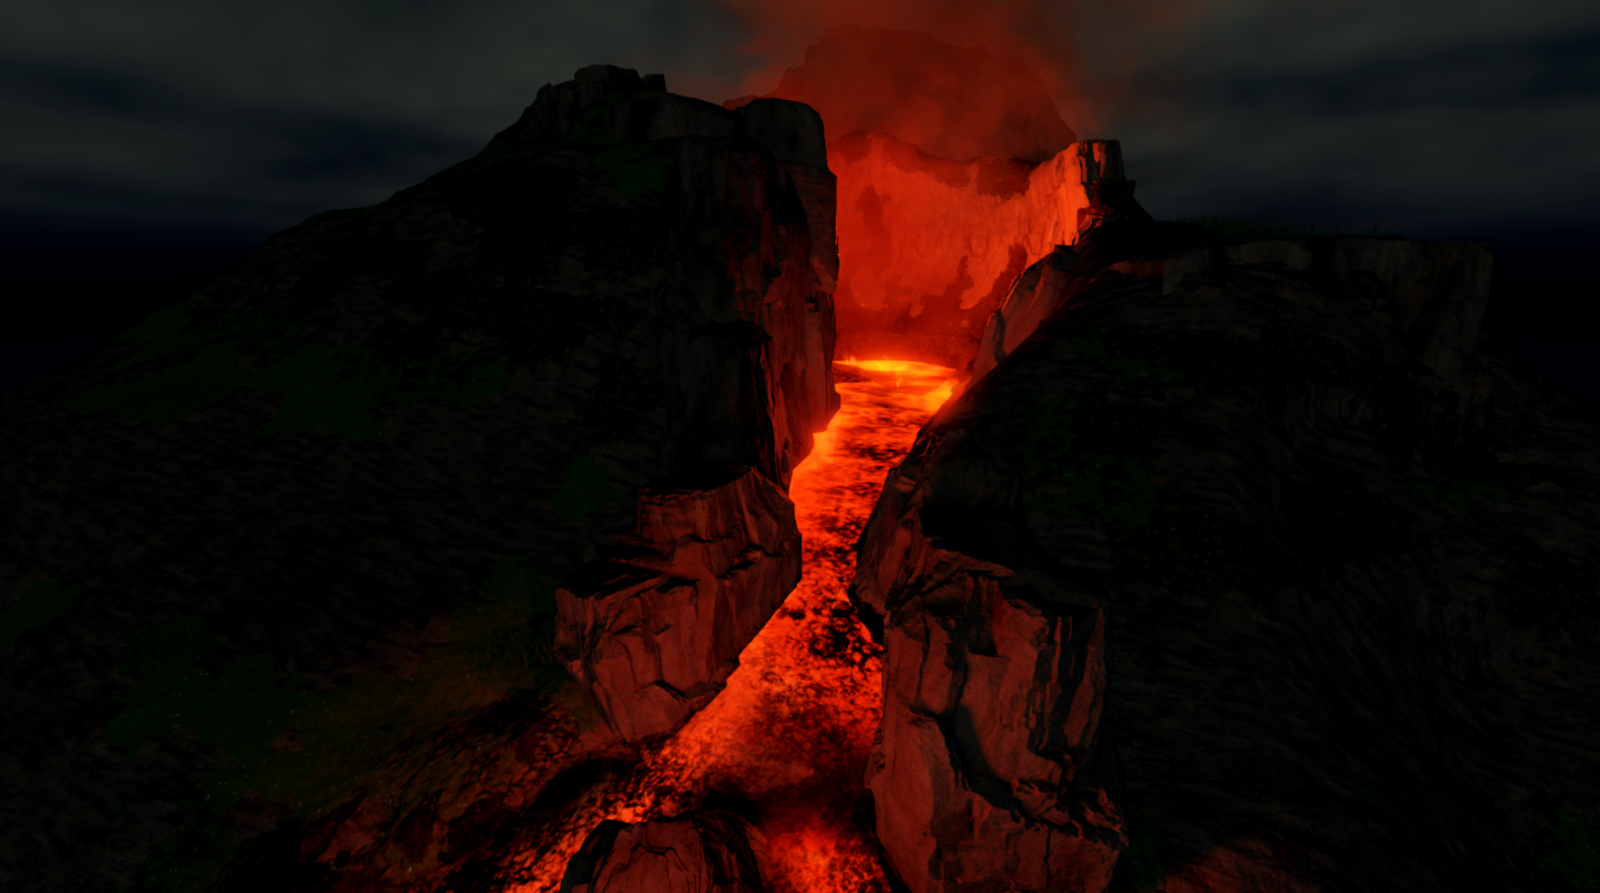
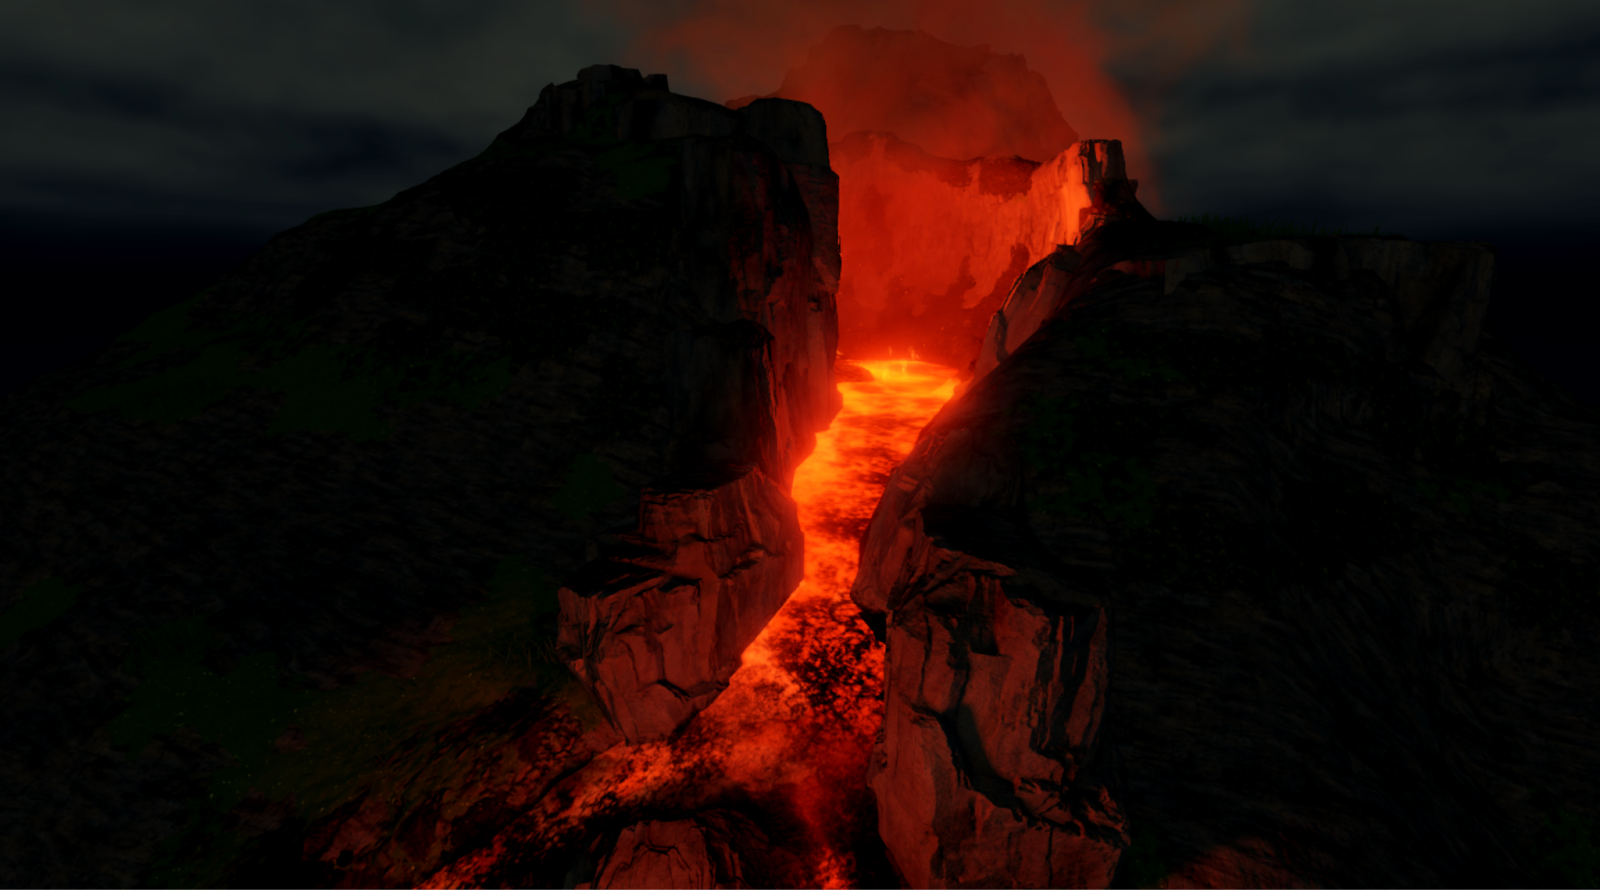
To recreate the global lighting in the sample Volcano Island - Complete place file:
In the Explorer window, select the Lighting service, then in the Properties window,
- Set Ambient to 133, 152, 176 to set a light gray hue over the entire outdoor environment.
- Set Brightness to 2 to make the global light source slightly dimmer.
- Set ColorShift_Top to 207, 178, 72 to set a yellow hue to the light that reflects from surfaces facing the global light source.
- Set Technology to Future to update the lighting technology system.
- Set ClockTime to 4.3 to set the time of day about a quarter after 4am.
- Set GeographicLatitude to 199 to modify the position of the moon.
- Set ExposureCompensation to -1 to expose the environment to half of the exposure from the moon.

In the Explorer window, select Bloom child of the Lighting service, then in the Properties window,
- Set Intensity to 0.75 to slightly dim all colors within the environment.
- Set Size to 80 to create a wider bloom effect.
- Set Threshold to 0.85 to allow more colors in the environment to glow.

In the Explorer window, insert a ColorCorrection object into the Lighting service, then in the Properties window,
- Set Brightness to 0.017 to slightly shift the color of your pixels.
- Set Contrast to 0.25 to make a sharper contrast between light and dark colors in the environment.
- Set Saturation to -0.15 to desaturate colors in the environment.
- Set TintColor to 255, 214, 143 to tint pixels with a light yellow hue.

(Optional) Provide indirect light with clouds in the sky.
- In the Explorer window, insert a Clouds object into the Terrain service.
- Select the Clouds object, then in the Properties window,
- Set Cover to 1 to provide full cloud cover to the sky.
- Set Density to 0.08 to make the cloud cover less dense.
- Set Color to 136, 143, 152 to set a light gray hue to the cloud cover.

Configure volcano
Now that your local and global lighting configuration is complete, it's time to configure all of the VFX objects relating to the actual volcano and its surrounding terrain. As you follow these instructions that exactly recreate the final environment within the sample Volcano Island .rbxl file, observe how each step works together to add character, movement, and illuminance to the environment.
Surface ripples
Surface ripples are the small lava waves that flow across the surface of the caldera as a result of internal magma and pressurized gasses moving upward from beneath the earth's crust. This visual phenomenon conveys the real-world physical process of convection, or the movement within a fluid when hotter fluid rises to the surface, and it adds to the realism of your scene.
Surface ripples provide valuable insight for players into the state of the volcanic eruption. For example, if magma and gas are moving upward with enough force to disrupt the state of the lava on top of the caldera and cause it to churn, players can deduce that the volcano is actively erupting with boiling magma, so they should exercise caution around this gameplay area.
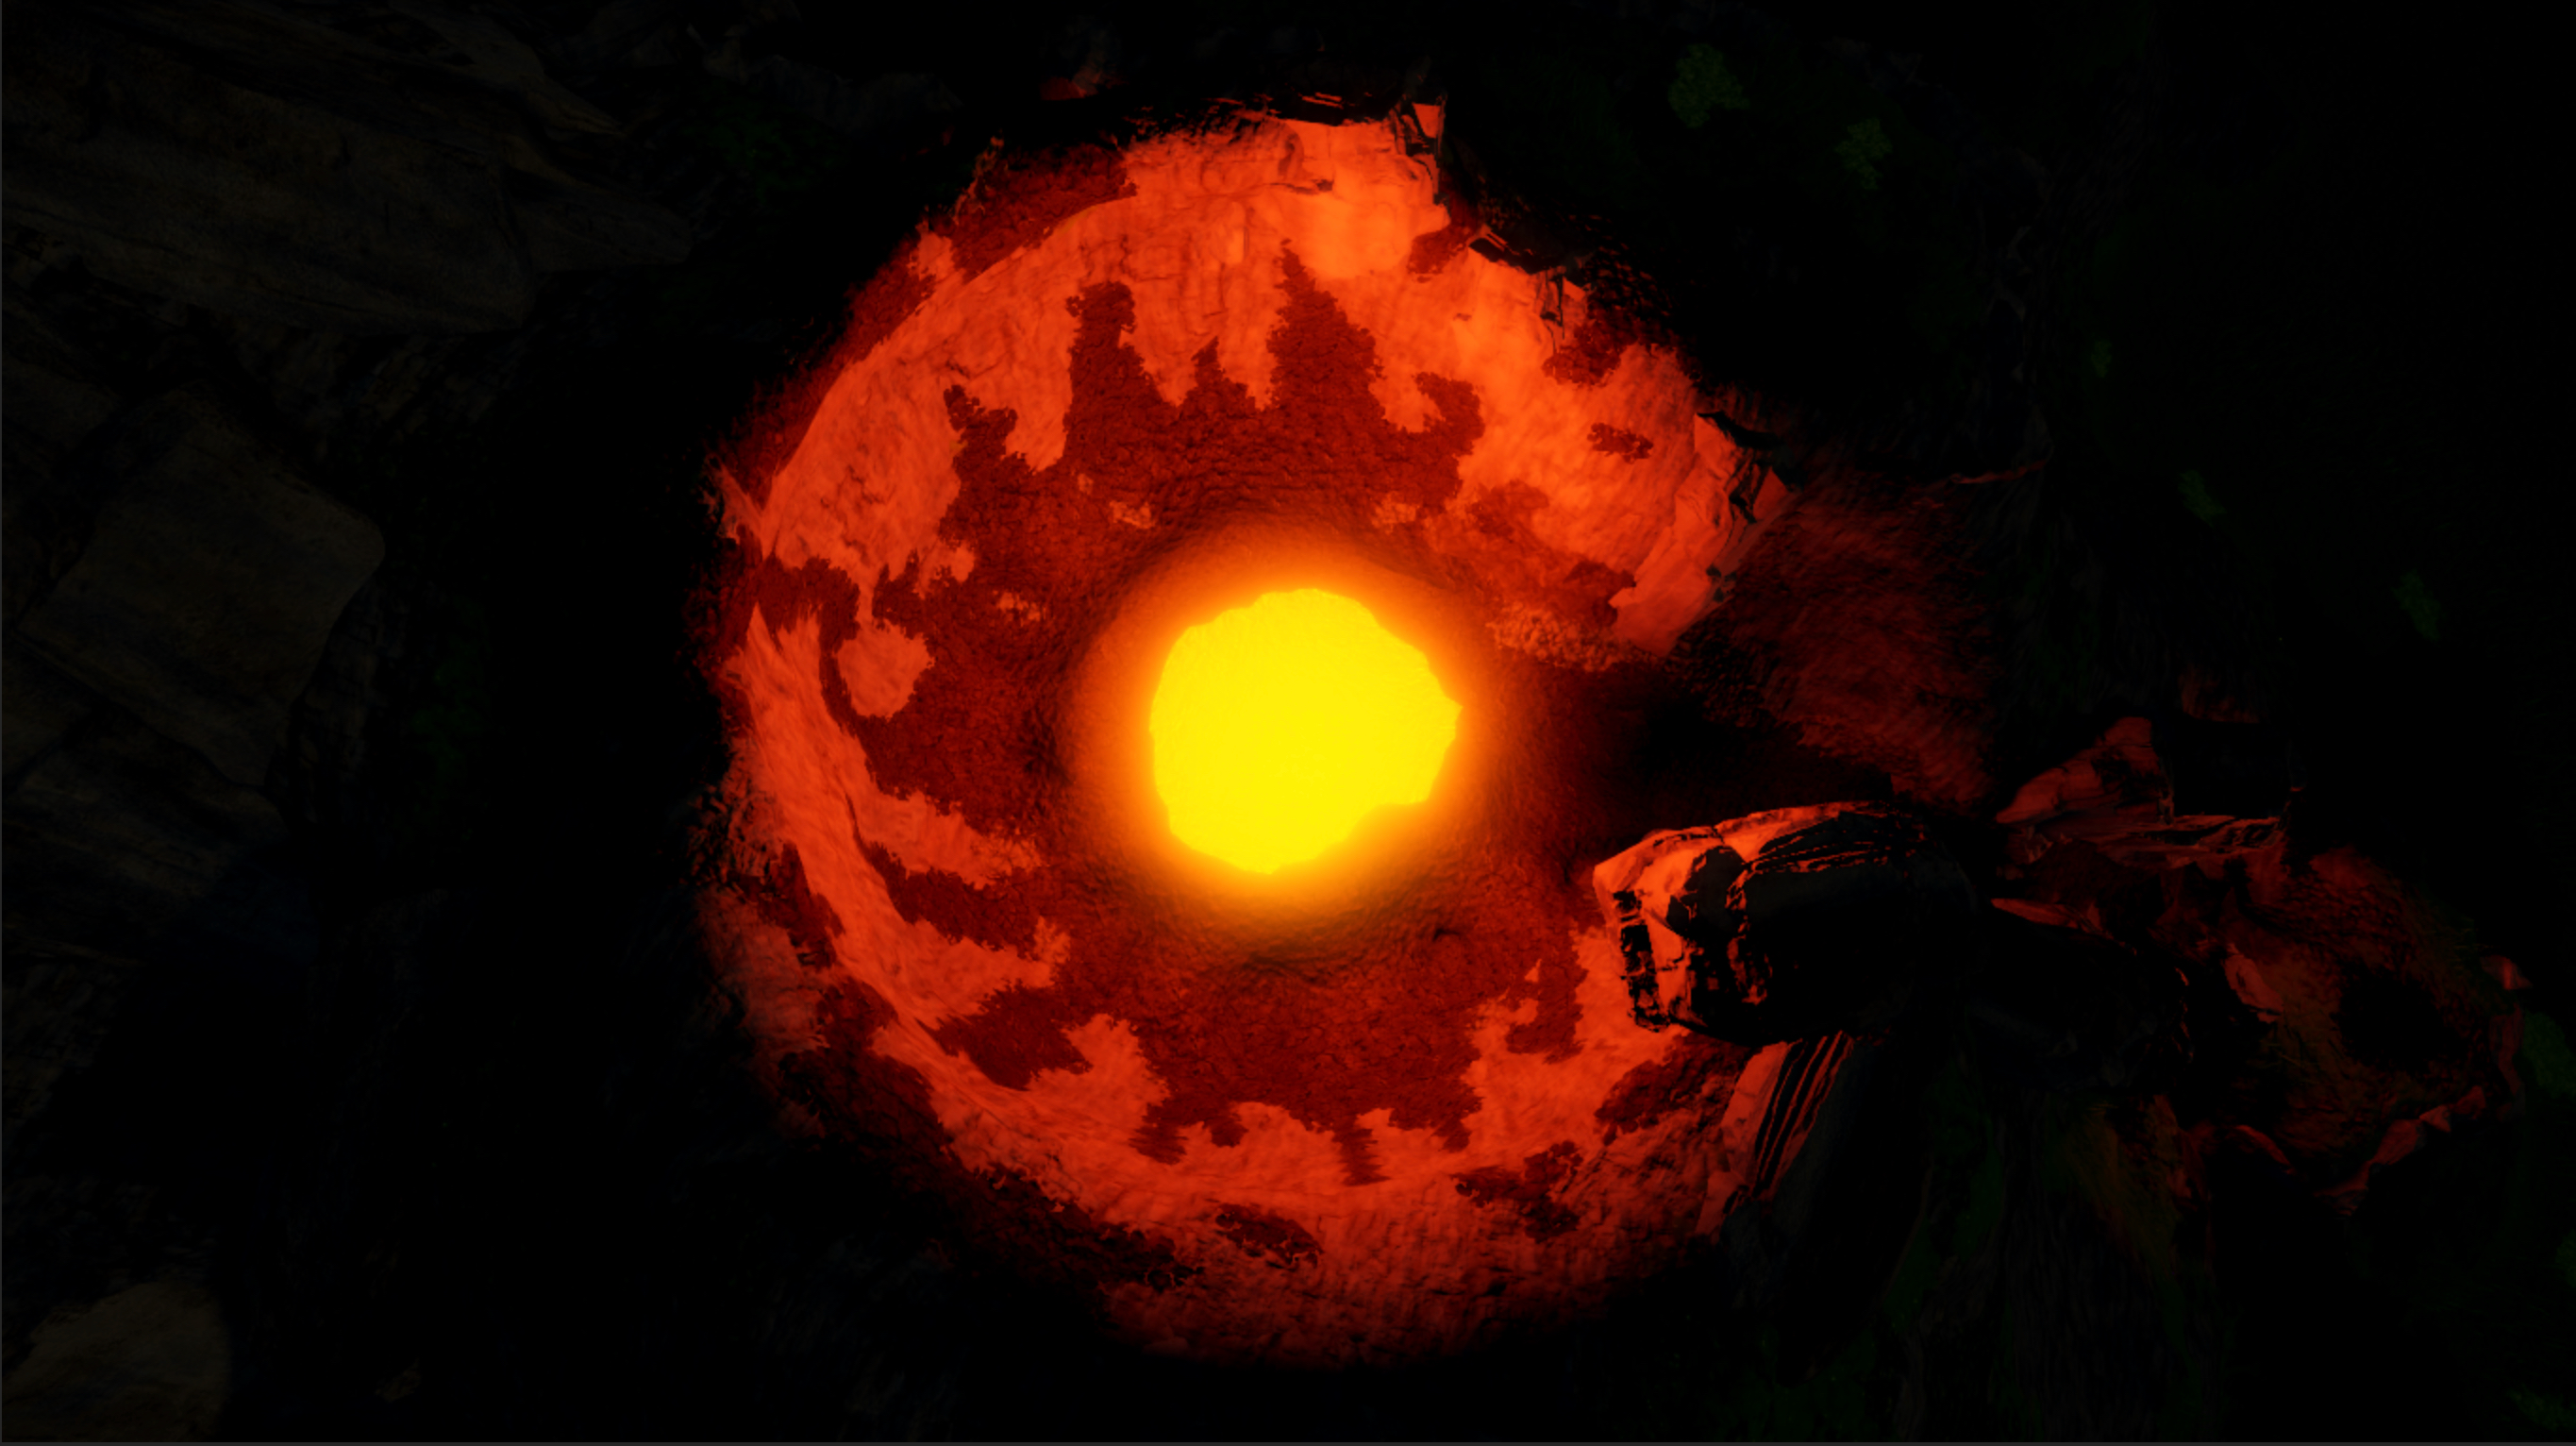
To demonstrate this process, the sample uses a ParticleEmitter object slightly below the base of the caldera to emit flat, bright particles that slowly expand and contract on top of a dark backdrop. This allows the particles to emulate the behavior of lava smoothly and continuously churning in a way that's similar to the realistic way elements move in nature.
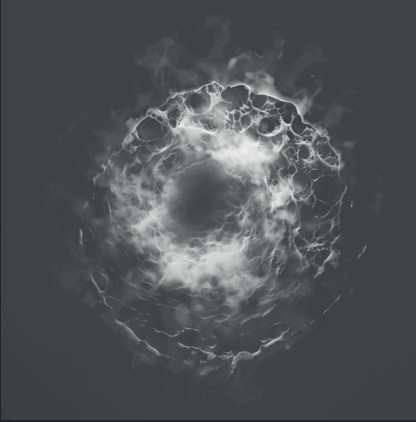
To recreate the surface ripples on top of the caldera in the sample Volcano Island - Complete place file:
In the Explorer window, create a Folder in the Workspace to contain all caldera objects, then rename the folder Caldera.
Create a backdrop to provide a high contrast background for the surface ripples.
Insert a block part into the Caldera folder, then rename it Backdrop.
Position and scale Backdrop to slightly beyond the full surface area of the caldera. The part appears as though it's glowing because of its close proximity to the caldera's local light source.

Select Backdrop, the in the Properties window,
Set Color to 0, 0, 0 to make the block black.
Set Material to Foil to provide texture to the backdrop.

Create the ripple effect.
- Duplicate Backdrop, rename it MagmaRipples, then scale it slightly down to the surface area of the caldera.
- Select MagmaRipples, then in the Properties window, set Transparency to 1 to make the block invisible.
- Insert a ParticleEmitter into MagmaRipples, then rename the emitter Ripples.
- Select Ripples, then in the Properties window,
Set Texture to rbxassetid://16829556885 to render particles that look like foam ripples.
Set Orientation to VelocityPerpendicular to emit particles perpendicular to the direction of their movement.
Set Color to a color sequence in which particles are brown, become bright red, then turn maroon.
- Click the Color property, then click the ⋯ button. A color sequence pop-up displays.

Each triangle on the bottom axis of the color sequence is a keypoint that determines the color value of the property at that point of the particle's lifetime.
- Set the following time and value properties throughout the color sequence:
- Time = 0, RGB Value = 130, 53, 2
- Time = 0.5, RGB Value = 224, 37, 0
- Time = 1, RGB Value = 147, 5, 0

Set Size to a number sequence in which particles increase in size toward the middle of their lifetime before returning to their original size with a small window of variation.
- Click the Size property, then click the ⋯ button. A number sequence pop-up displays. By default, the graph is a straight line and the image remains the same size from left to right.

Each square at the start and end of the number sequence is a keypoint that determines the size value of the property at that point of the texture from left to right.
Set the following time and value properties throughout the number sequence:
- Time = 0, Value = 4.81, Envelope = 0.438
- Time = 0.341, Value = 8.75, Envelope = 0.48
- Time = 0.497, Value = 9.38, Envelope = 0.5
- Time = 0.644, Value = 8.75, Envelope = 0.48
- Time = 1, Value = 4.81, Envelope = 0.438

Set Transparency to a number sequence in which particles start as transparent, become more opaque toward the middle of their lifetime, then become transparent again at the end of their lifetime.
Click the Transparency property, then click the ⋯ button.
Set the following time and value properties throughout the number sequence:
- Time = 0, Value = 1, Envelope = 0
- Time = 0.3, Value = 0.387, Envelope = 0.0375
- Time = 0.5, Value = 0.269, Envelope = 0.0812
- Time = 0.7, Value = 0.381, Envelope = 0.05
- Time = 0, Value = 1, Envelope = 0

Set ZOffset to -2 to offset the texture to be slightly away from the caldera.
Set Lifetime to 5, 8 to randomly set each particle's lifetime between 5 and 8 seconds.
Set Rate to 12 to emit 12 particles per second.
Set Rotation to -360, 360 to randomly orient each particle in a circle.
Set Speed to 0.01 to emit each particle one tenth of a stud per second.
Set LightEmission to 1 to significantly brighten the particles.
Set LightInfluence to 0 to prevent the environmental light from affecting the color of the particles.
Set Brightness to 15 to scale the light emitted from the emitter.
Embers
Embers are the small, light pieces of molten rock that burst out of the caldera, rapidly expelling heat as they rise into the atmosphere. Similar to surface ripples, embers reveal that internal pressure below the earth's crust is pressing upwards, causing hot elements to break the lava's surface tension to release pressure.
The sample emulates this process by using a ParticleEmitter object to emit particles with motion blur that's baked into the texture. As the particles rise and reach the end of their lifetime, the emitter squashes the particles into a 1:1 ratio to reform the particles into circles. This technique allows the particles to seem as though they are rapidly moving as they exit the caldera, then slow down as they dissipate into the sky.

In addition, as particles rise, they change their color, opacity, and size to reflect their changing temperature. For example, they begin their lifetime as large, brown particles, but quickly transform into small orange, then maroon particles. This strategy also has the benefit of subtly reflecting the lighting throughout the canyon, increasing a player's immersion within the environment.
To recreate the glowing embers from the surface of the caldera in the sample Volcano Island - Complete place file:
Insert a cylinder part into the Caldera folder, then rename it GlowingEmbers.
Position GlowingEmbers so that it is on top of the surface ripples, then scale it until it fills the interior of the caldera. The part appears as though it's glowing because of its close proximity to the caldera's local light source.

Select GlowingEmbers, then in the Properties window, set Transparency to 1 to make the cylinder invisible.
Insert a ParticleEmitter into GlowingEmbers, then rename the emitter Embers.
Select Embers, then in the Properties window,
- Set Texture to rbxassetid://17581858560 to render particles that look like an elongated oval horizontally and vertically.
- Set Orientation to VelocityParallel to emit particles parallel to their direction of movement.
- Set Color to a color sequence in which particles are brown, become orange, then turn maroon.
- Time = 0, RGB Value = 130, 53, 2
- Time = 0.5, RGB Value = 224, 82, 0
- Time = 1, RGB Value = 147, 5, 0

- Set Size to a number sequence in which particles slowly decrease in size across their lifetime.
- Time = 0, Value = 0.313, Envelope = 0.1
- Time = 1, Value = 0, Envelope = 0

- Set Squash to a number sequence in which particles slightly elongate about midway through their lifetime.
- Time = 0, Value = -3, Envelope = 0
- Time = 0.323, Value = -0.188, Envelope = 0
- Time = 1, Value = -0.5, Envelope = 0

- Set Transparency to a number sequence in which particles randomly change their opacity to simulate embers glowing as they rise. The actual values are not important, just that they change a lot during the course of their lifetimes.

- Set ZOffset to 1 to offset the texture to be slightly away from the caldera.
- Set Lifetime to 1, 5 to randomly set each particle's lifetime between 1 and 5 seconds.
- Set Speed to 5, 8 to randomly emit each particle between 5 and 8 studs per second.
- Set SpreadAngle to 180, 180 to emit particles in an angle along the X and Z axis.
- Set Acceleration to 0, 10, 0 to simulate upward force and pull particles to the sky.
- Set Drag to 0.8 to have particles lose their speed with exponential decay.
- Set LightEmission to 1 to significantly brighten the particles.
- Set LightInfluence to 0 to prevent the environmental light from affecting the color of the particles.
- Set Brightness to 20 to scale the light emitted from the emitter.
Lava splashes
Lava splashes are bursts of thin molten rock that erupt upward from the volcano as a result of internal magma and pressurized gasses applying enough force to break the surface tension of the lava on top of the caldera. This core component of a volcano is one of the most common signs in determining that a volcano is no longer dormant and is actively erupting.
The sample represents this process with two ParticleEmitter objects that utilize flipbooks to animate each particle's texture over their lifetime. The first particle emitter emits particles that look like dense, high-viscosity splashes that are heavy and thick, causing them to rise and fall slowly back down into the volcano. Conversely, the second particle emitter emits particles that look like webby, low-viscosity splashes that are light and thin, causing them to rise and fall quickly.
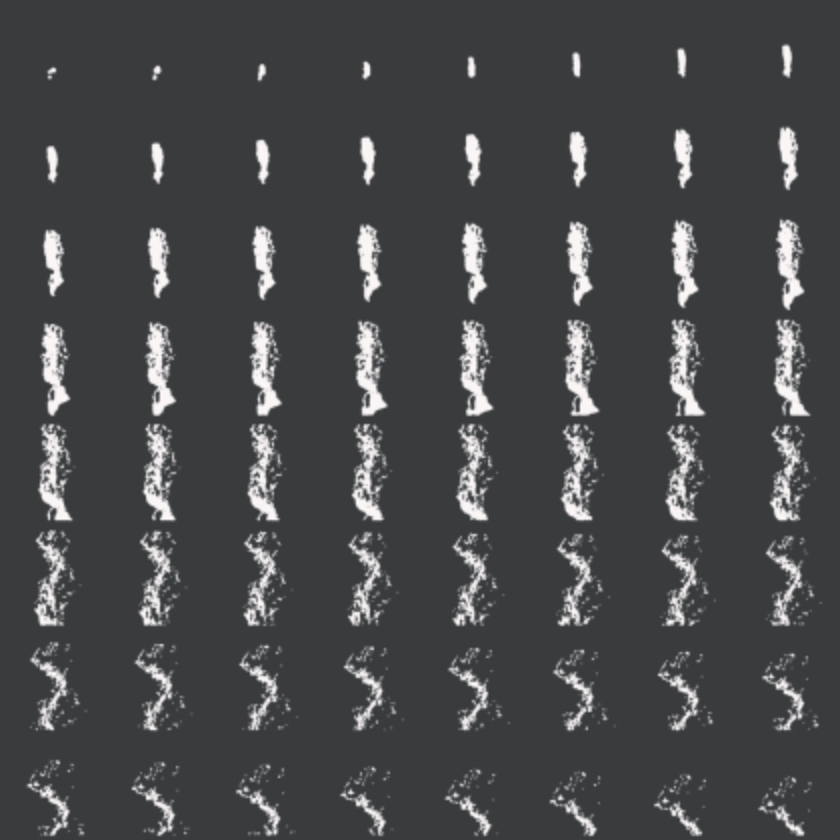
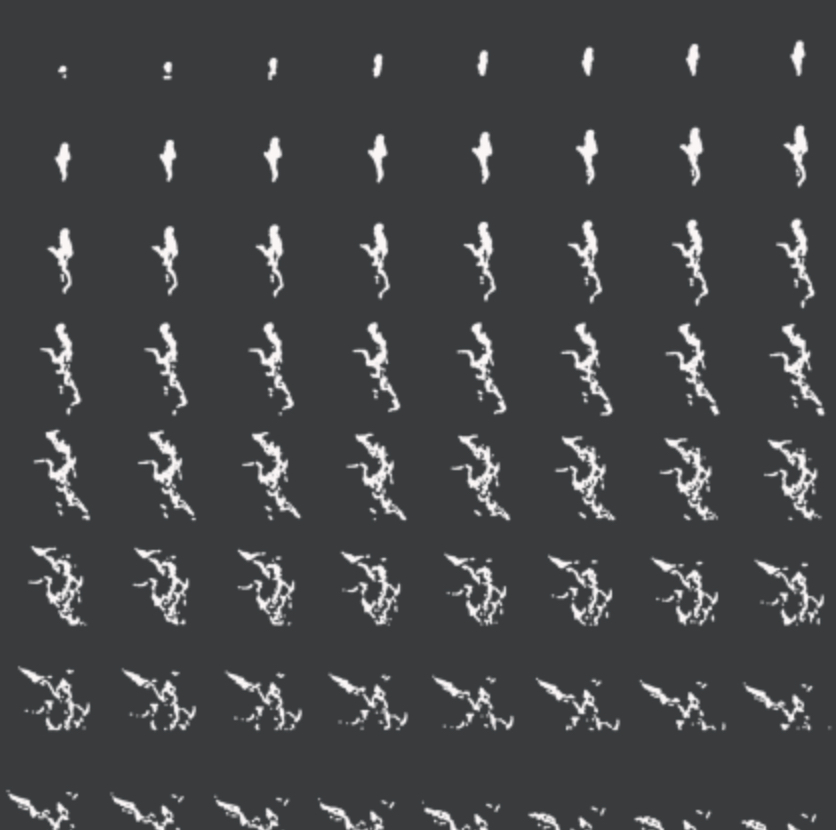
Each particle emitter animates their texture over 64 frames to emulate smooth, lifelike physical behavior. While you could use only one particle emitter, the repetition of the animation would become apparent and break the immersion for your players because they would see the exact same animation every time. However, when two particles animate flipbooks with slightly different custom properties, it is much more difficult to spot the repetition.
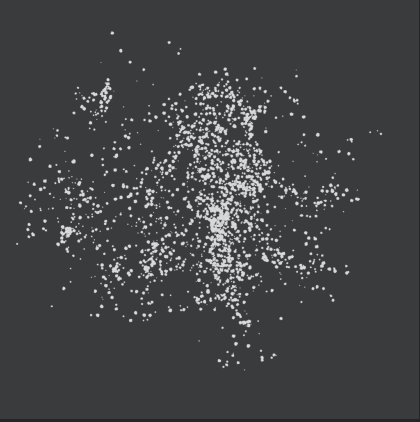
The sample also provides a ParticleEmitter object that emits particles that look like aerated splashes to represent even lighter webby splashes. This technique fills the space with dynamic movement and further hides the repetition of the flipbook animations. As an extra bonus, if your experience also includes the waterfall from Creating Waterfalls, you're able to reuse the same texture twice for different gameplay areas, saving you memory and improving performance on low-end devices.
To recreate the splashing lava from the surface of the caldera in the sample Volcano Island - Complete place file:
Insert a cylinder part into the Caldera folder, then rename it SplashingLava.
Position SplashingLava. so that it is on top of the surface ripples, then scale it until it covers the middle of the caldera where you want the lava to splash. The part appears as though it's glowing because of its close proximity to the caldera's local light source.

Select SplashingLava, then in the Properties window, set Transparency to 1 to make the cylinder invisible.
Insert a ParticleEmitter into SplashingLava, then rename the emitter WebbySplashes.
Select WebbySplashes, then in the Properties window,
- Set Texture to rbxassetid://17363668312 to render particles that look like webby splashes.
- Set Orientation to FacingCameraWorldUp to emit particles facing the camera, but rotating only on the vertical upward world Y axis.
- Set Color to 255, 152, 79 to tint the particles to a light orange hue.
- Set Size to a number sequence in which particles increase in size across their lifetime with a window of variation.
- Time = 0, Value = 4.31, Envelope = 0.762
- Time = 1, Value = 6.2, Envelope = 0.875

- Set Squash to a number sequence in which particles slightly elongate throughout their lifetime with a window of variation.
- Time = 0, Value = -0.075, Envelope = 0.263
- Time = 1, Value = -0.413, Envelope = 0.412

- Set ZOffset to 1 to offset the texture to be slightly away from the caldera.
- Set Lifetime to 1.5, 2 to randomly set each particle's lifetime between 1.5 and 2 seconds.
- Set Rate to 0.37 to emit a particle about every 3 seconds.
- Set RotSpeed to -20, 20 to randomly emit each particle between -20 and 20 degrees per second.
- Set Speed to 2 to emit each particle 2 studs per second.
- Set SpreadAngle to 5, 5 to emit particles in a small angle along the X and Z axis.
- Set FlipbookLayout to Grid8x8 to animate the texture over a 64-frame duration.
- Set FlipbookMode to Oneshot to ensure the animation only plays once during its lifetime.
- Set Drag to 0.5 to have particles lose their speed with exponential decay.
- Set LightEmission to 0.1 to slightly brighten the particles.
- Set LightInfluence to 0.25 to significantly reduce how much the environmental light affects the color of particles.
Duplicate DenseSplashes, then in the Properties window, modify the following properties to provide variation to the additional lava splashes.
- Set Name to DenseSplashes.
- Set Texture to rbxassetid://17363669906 to render particles that look like dense splashes.
- Set Size to a number sequence in which particles increase in size across their lifetime with a window of variation.
- Time = 0, Value = 5.75, Envelope = 0.762
- Time = 1, Value = 7.37, Envelope = 0.875

- Set Squash to a number sequence in which particles slightly elongate throughout their lifetime with a window of variation.
- Time = 0, Value = 0, Envelope = 0.225
- Time = 1, Value = -0.262, Envelope = 0.15

- Set Rate to 0.289 to emit a particle nearly every fourth of a second.
Fill the caldera with additional splashes.
Insert a ParticleEmitter into SplashingLava, then rename the emitter SplashFill.
Select SplashFill, then in the Properties window,
- Set Texture to rbxassetid://17082061238 to render particles that look like lighter webby splashes
- Set Orientation to FacingCameraWorldUp to emit particles facing the camera, but rotating only on the vertical upward world Y axis.
- Set Color to 255, 152, 33 to tint the particles to an orange hue.
- Set Size to a number sequence in which particles increase in size across their lifetime with a window of variation.
- Time = 0, Value = 1.25, Envelope = 0.388
- Time = 1, Value = 6.38, Envelope = 0.563

- Set Transparency to a number sequence in which particles start as transparent, become opaque, then become transparent again toward the end of their lifetime.
- Time = 0, Value = 1, Envelope = 0
- Time = 0.19, Value = 0, Envelope = 0
- Time = 0.795, Value = 0, Envelope = 0
- Time = 1, Value = 1, Envelope = 0

- Set ZOffset to 1 to offset the texture to be slightly away from the caldera.
- Set Lifetime to 1.5 to set each particle's lifetime to 1.5 seconds.
- Set Rate to 8 to emit a particle every 8 seconds.
- Set Rotation to 0, 360 to randomly orient each particle in a half circle.
- Set RotSpeed to -50, 50 to randomly emit each particle between -50 and 50 degrees per second.
- Set Speed to 12, 20 to randomly emit each particle between 12 and 20 studs per second.
- Set SpreadAngle to 45, 45 to emit particles in an angle along the X and Z axis.
- Set Acceleration to 0, -25, 0 to simulate gravity and pull particles back down.
- Set Drag to 1 to have particles lose their speed with exponential decay.
- Set LightEmission to 1 to significantly brighten the particles.
- Set LightInfluence to 0 to prevent the environmental light from affecting the color of the particles.
- Set Brightness to 8 to scale the light emitted from the emitter.
Lava flow
A lava flow is a mass of lava that erupts and oozes away from the caldera and across the earth's surface during a volcanic eruption. As the lava cools due to its exposure to air, it solidifies and transforms into solid rock, creating new land mass.
To simulate this process, the sample layers multiple Beam objects on top of each other with seamless textures and property configurations that emulate the behavioral characteristics of lava cooling as it travels further away from the caldera:
- The bottom layer renders a flat color that transforms from a warm to a cool color to communicate that the lava is beginning to drop in temperature, such as bright red to a dark maroon.
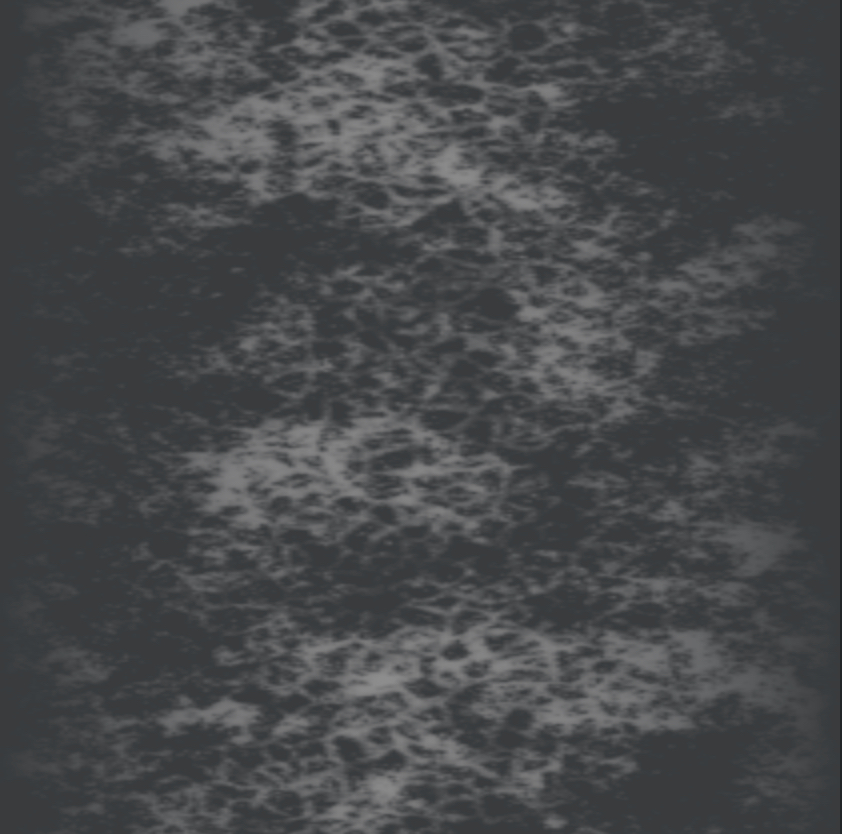
- The middle layer renders a black texture that looks like dark crust with holes that reveal the glowing lava underneath.
- The top layer renders the same texture as the middle layer at a slower rate, flipped attachments, and opposite property configurations. This ensures that the textures never have the opportunity to fully line up with each other while rendering in the same direction, which would allow players to easily detect the unrealistic texture repetition.
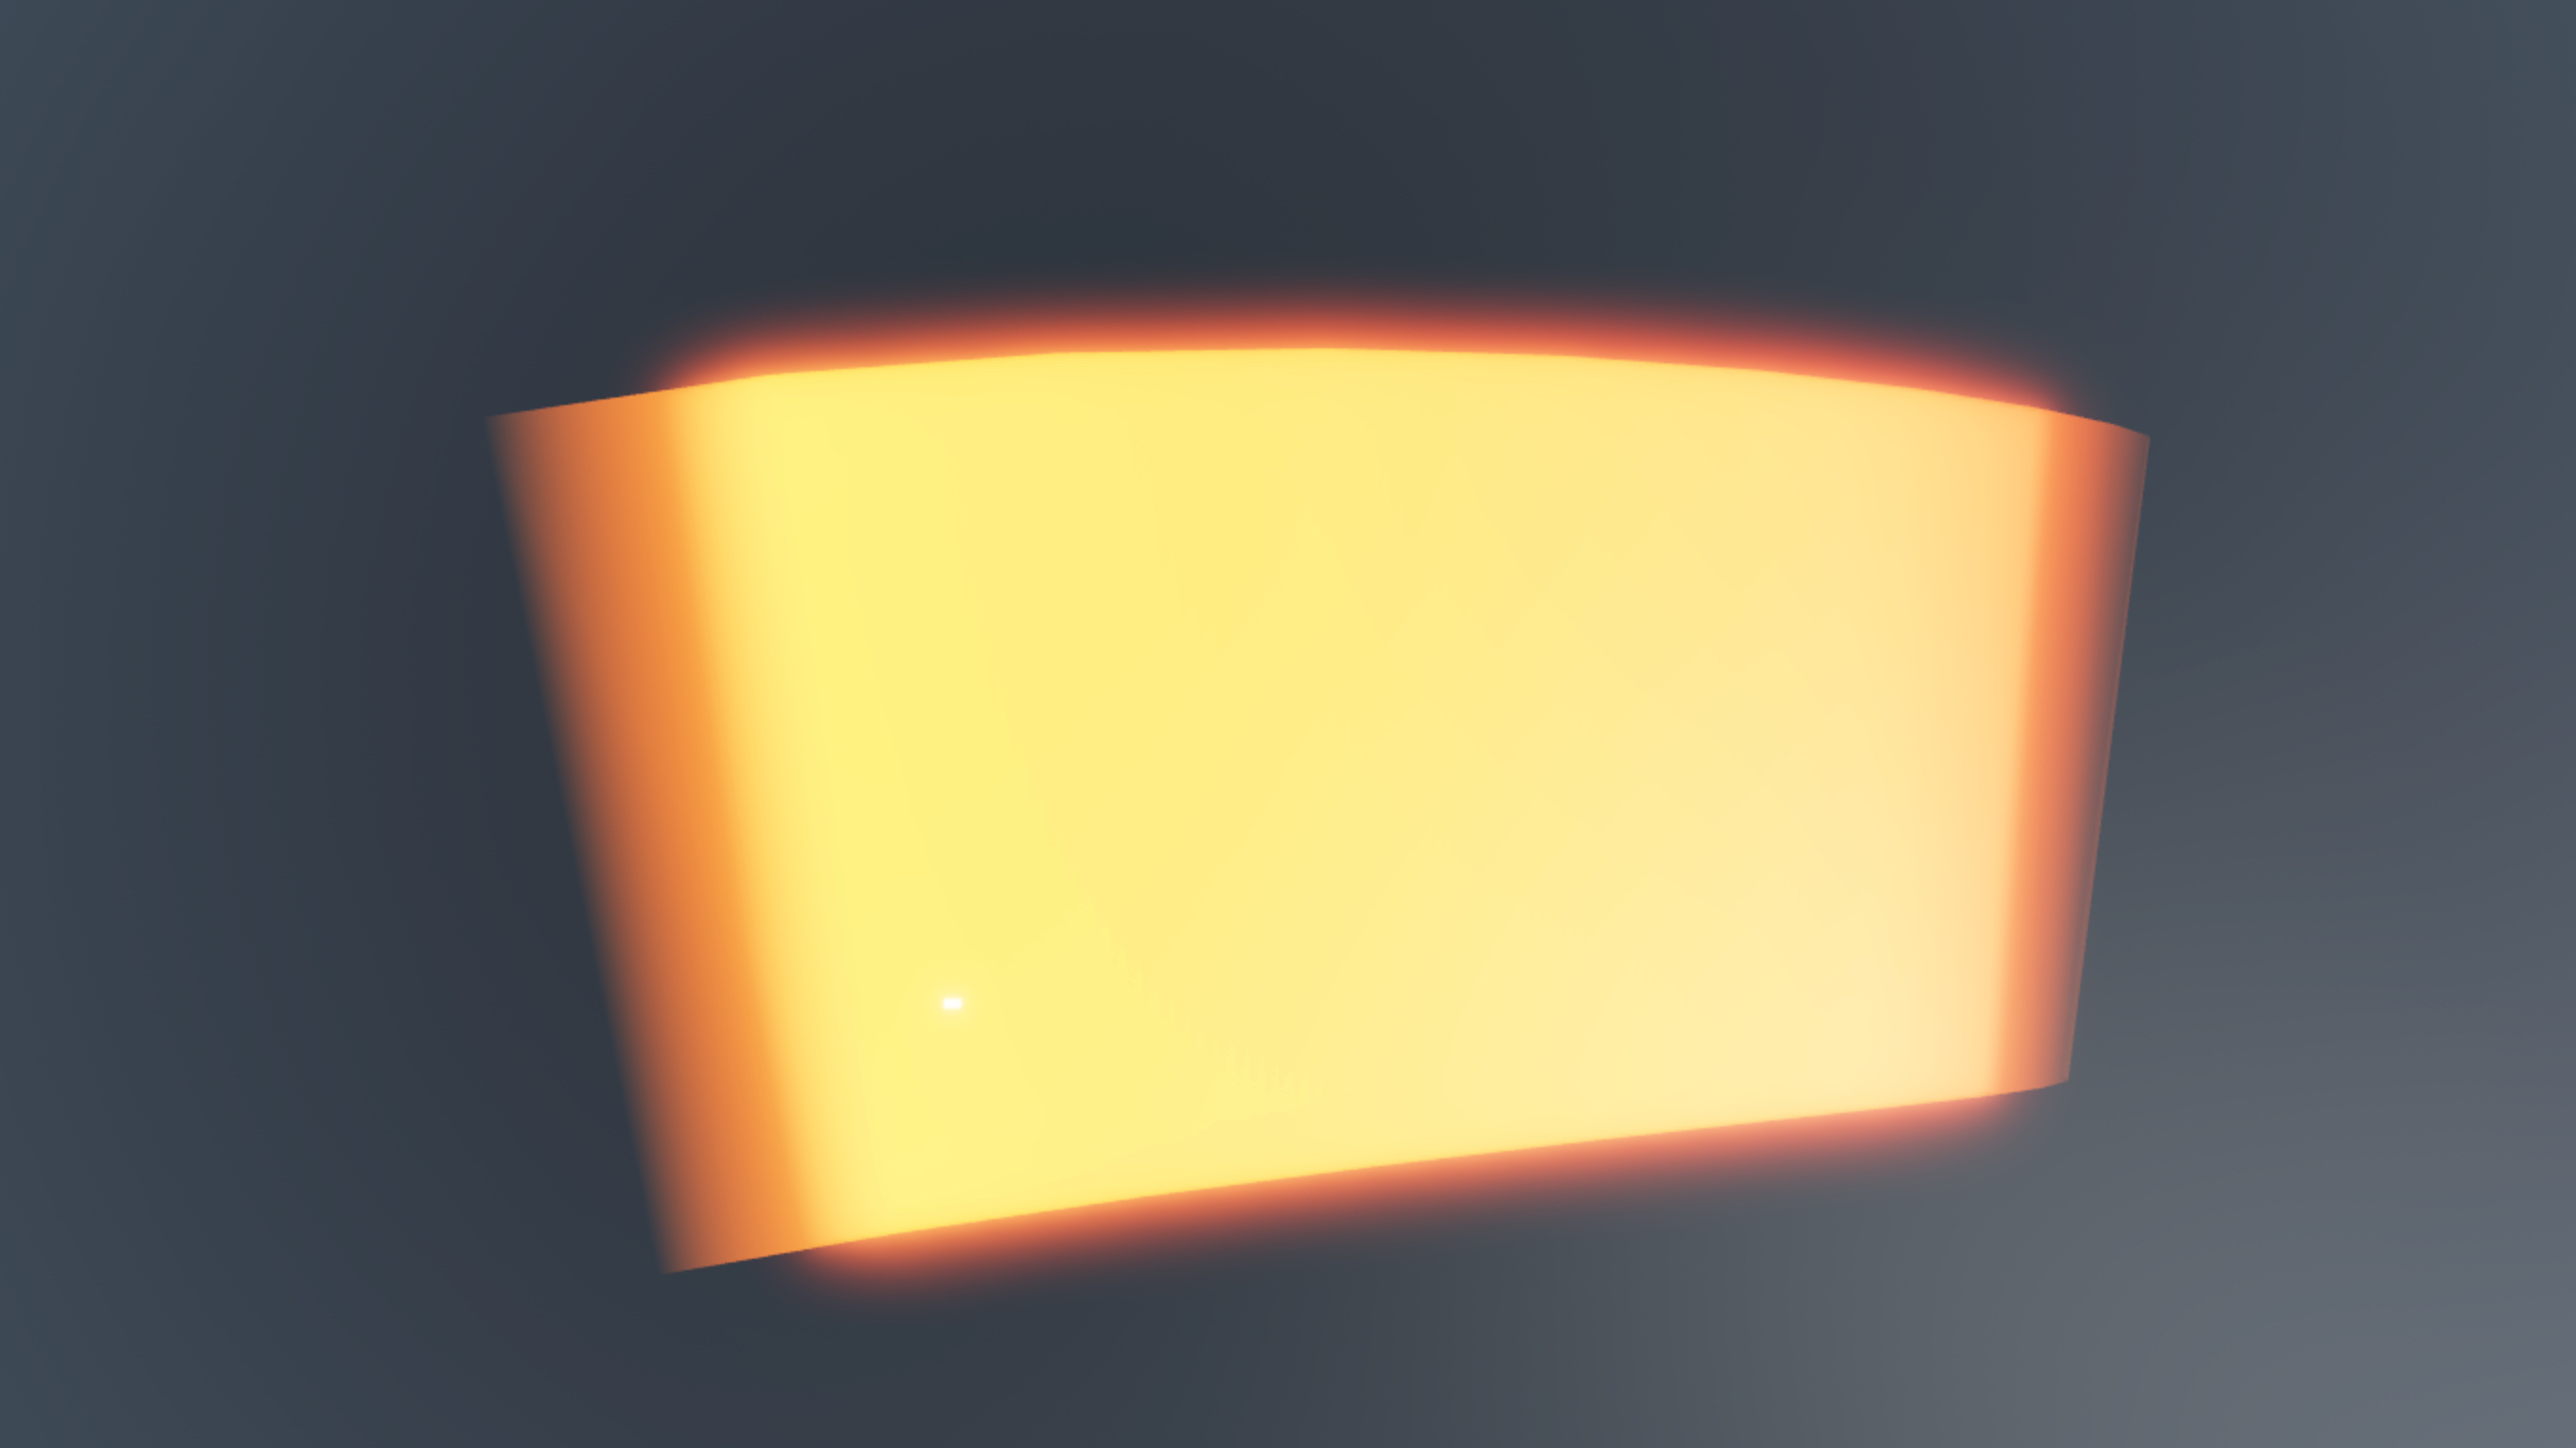
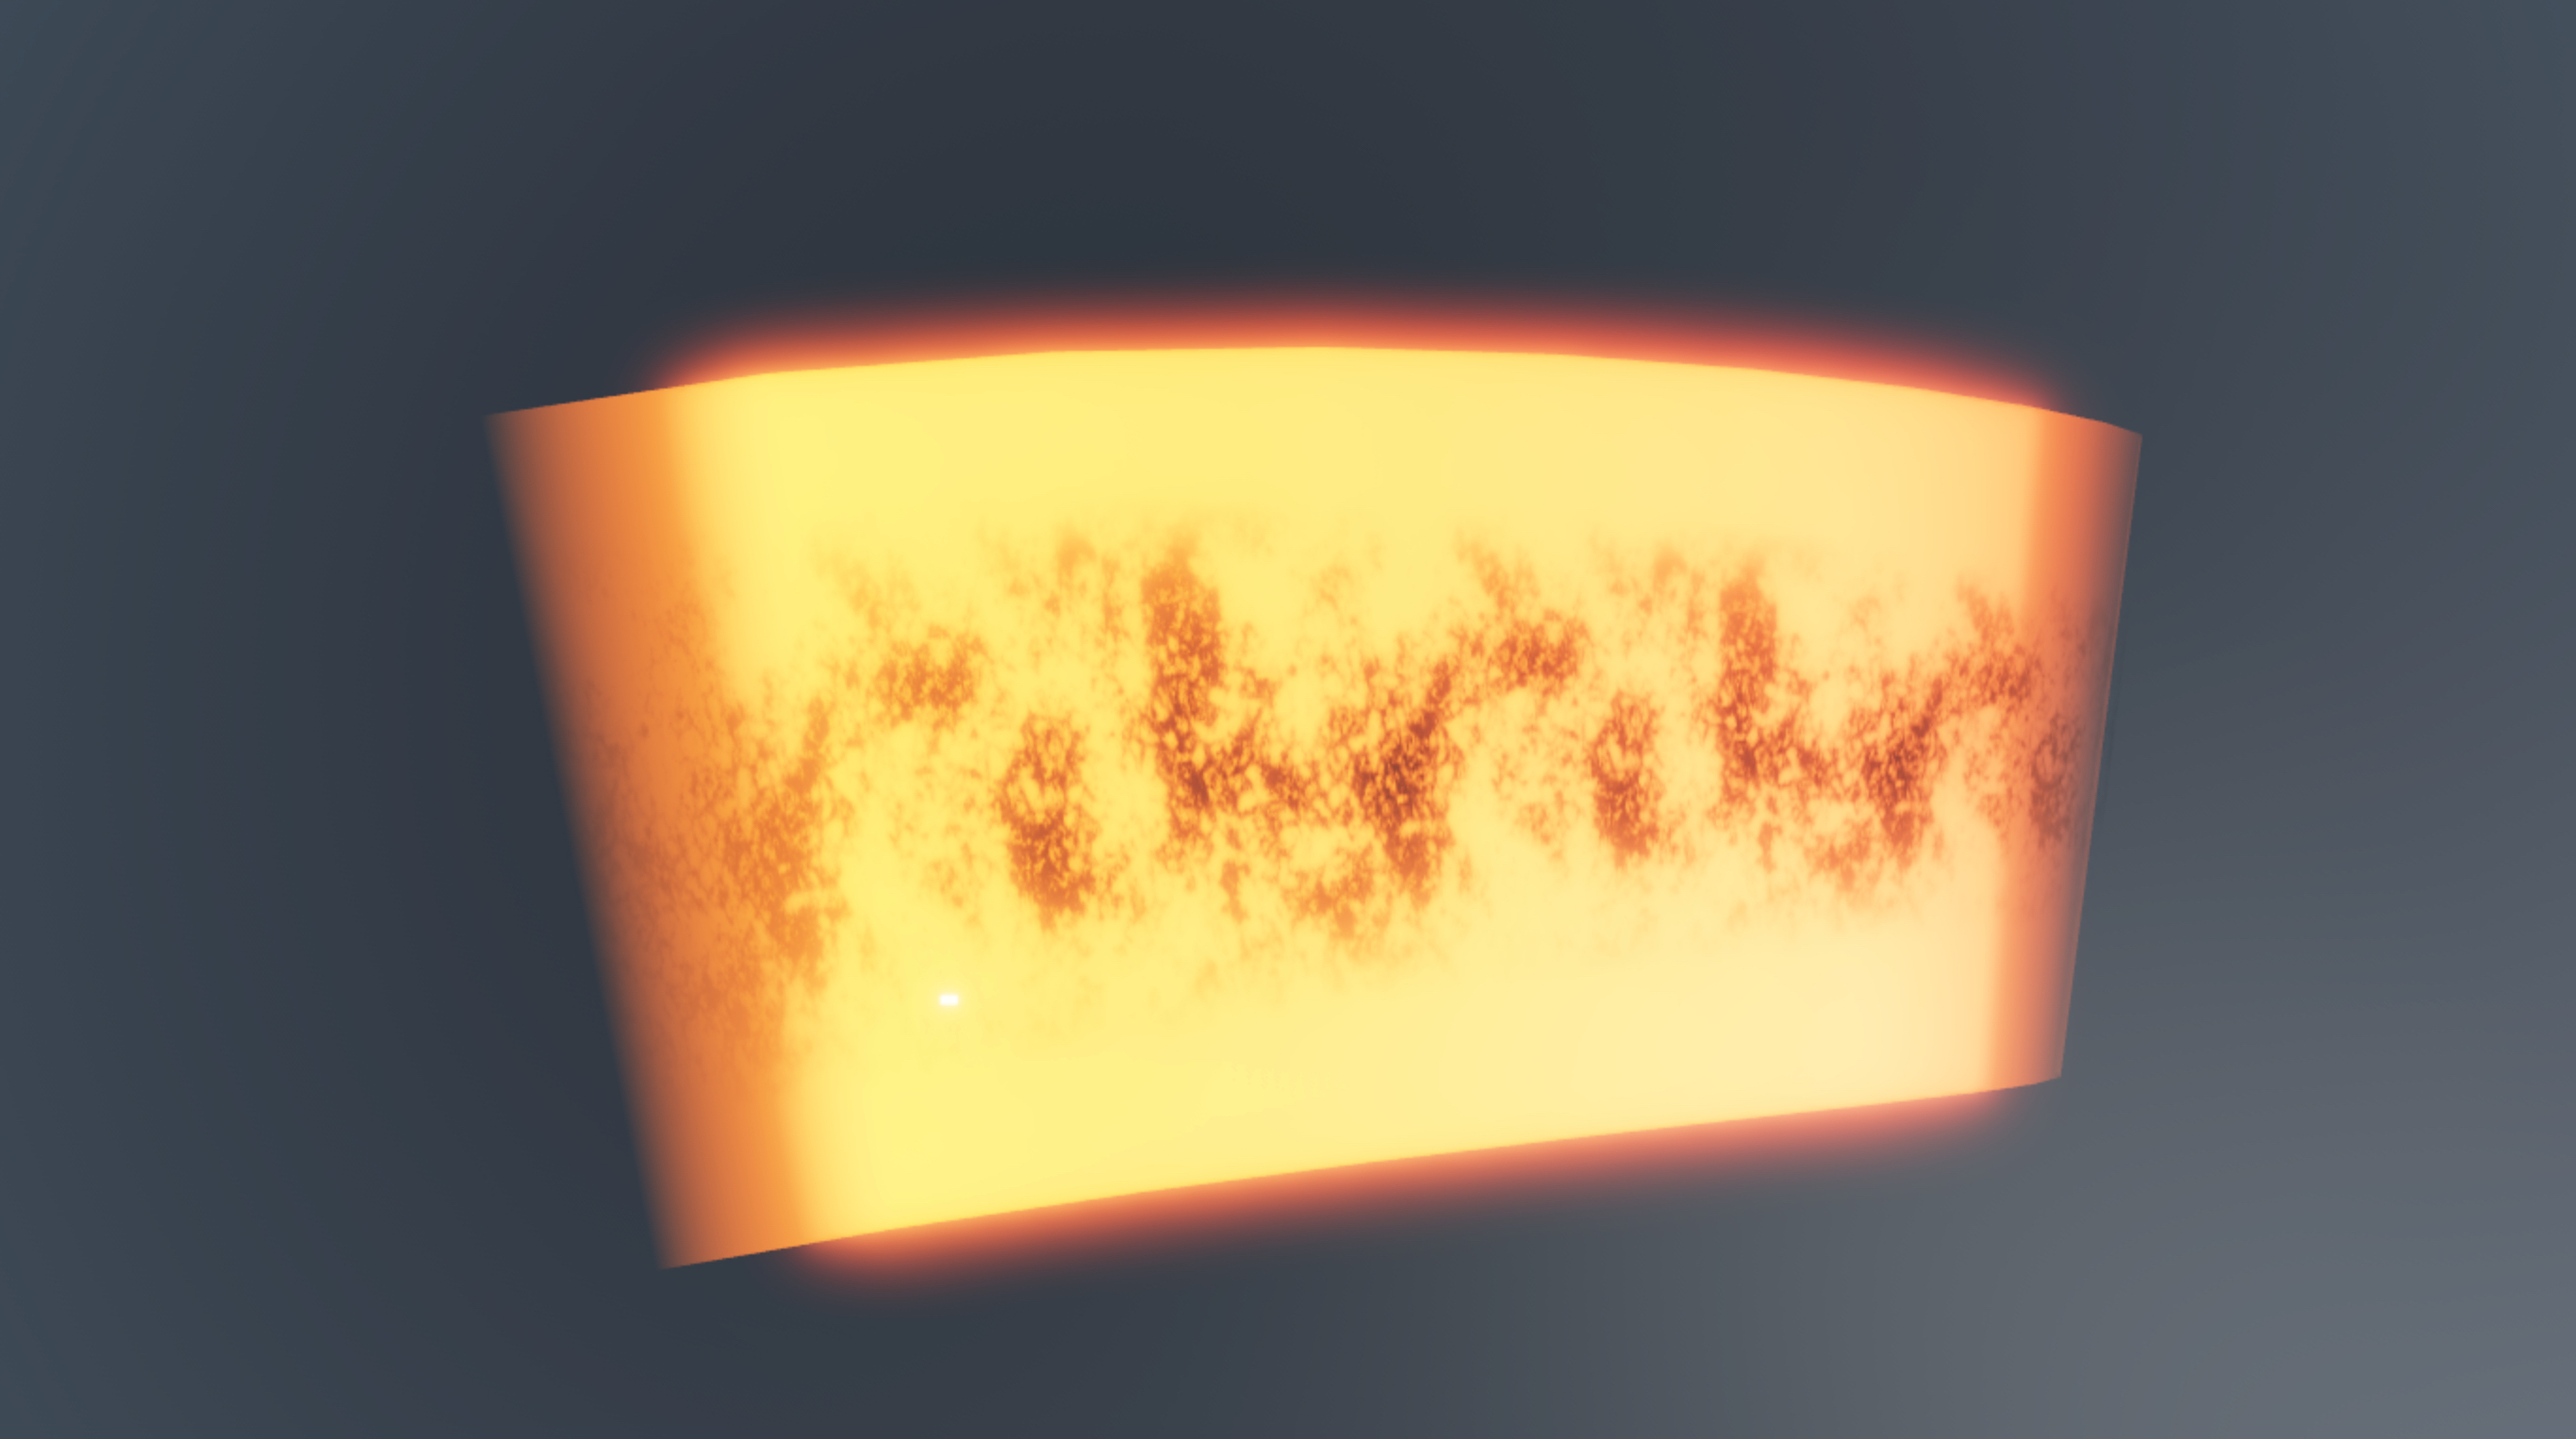
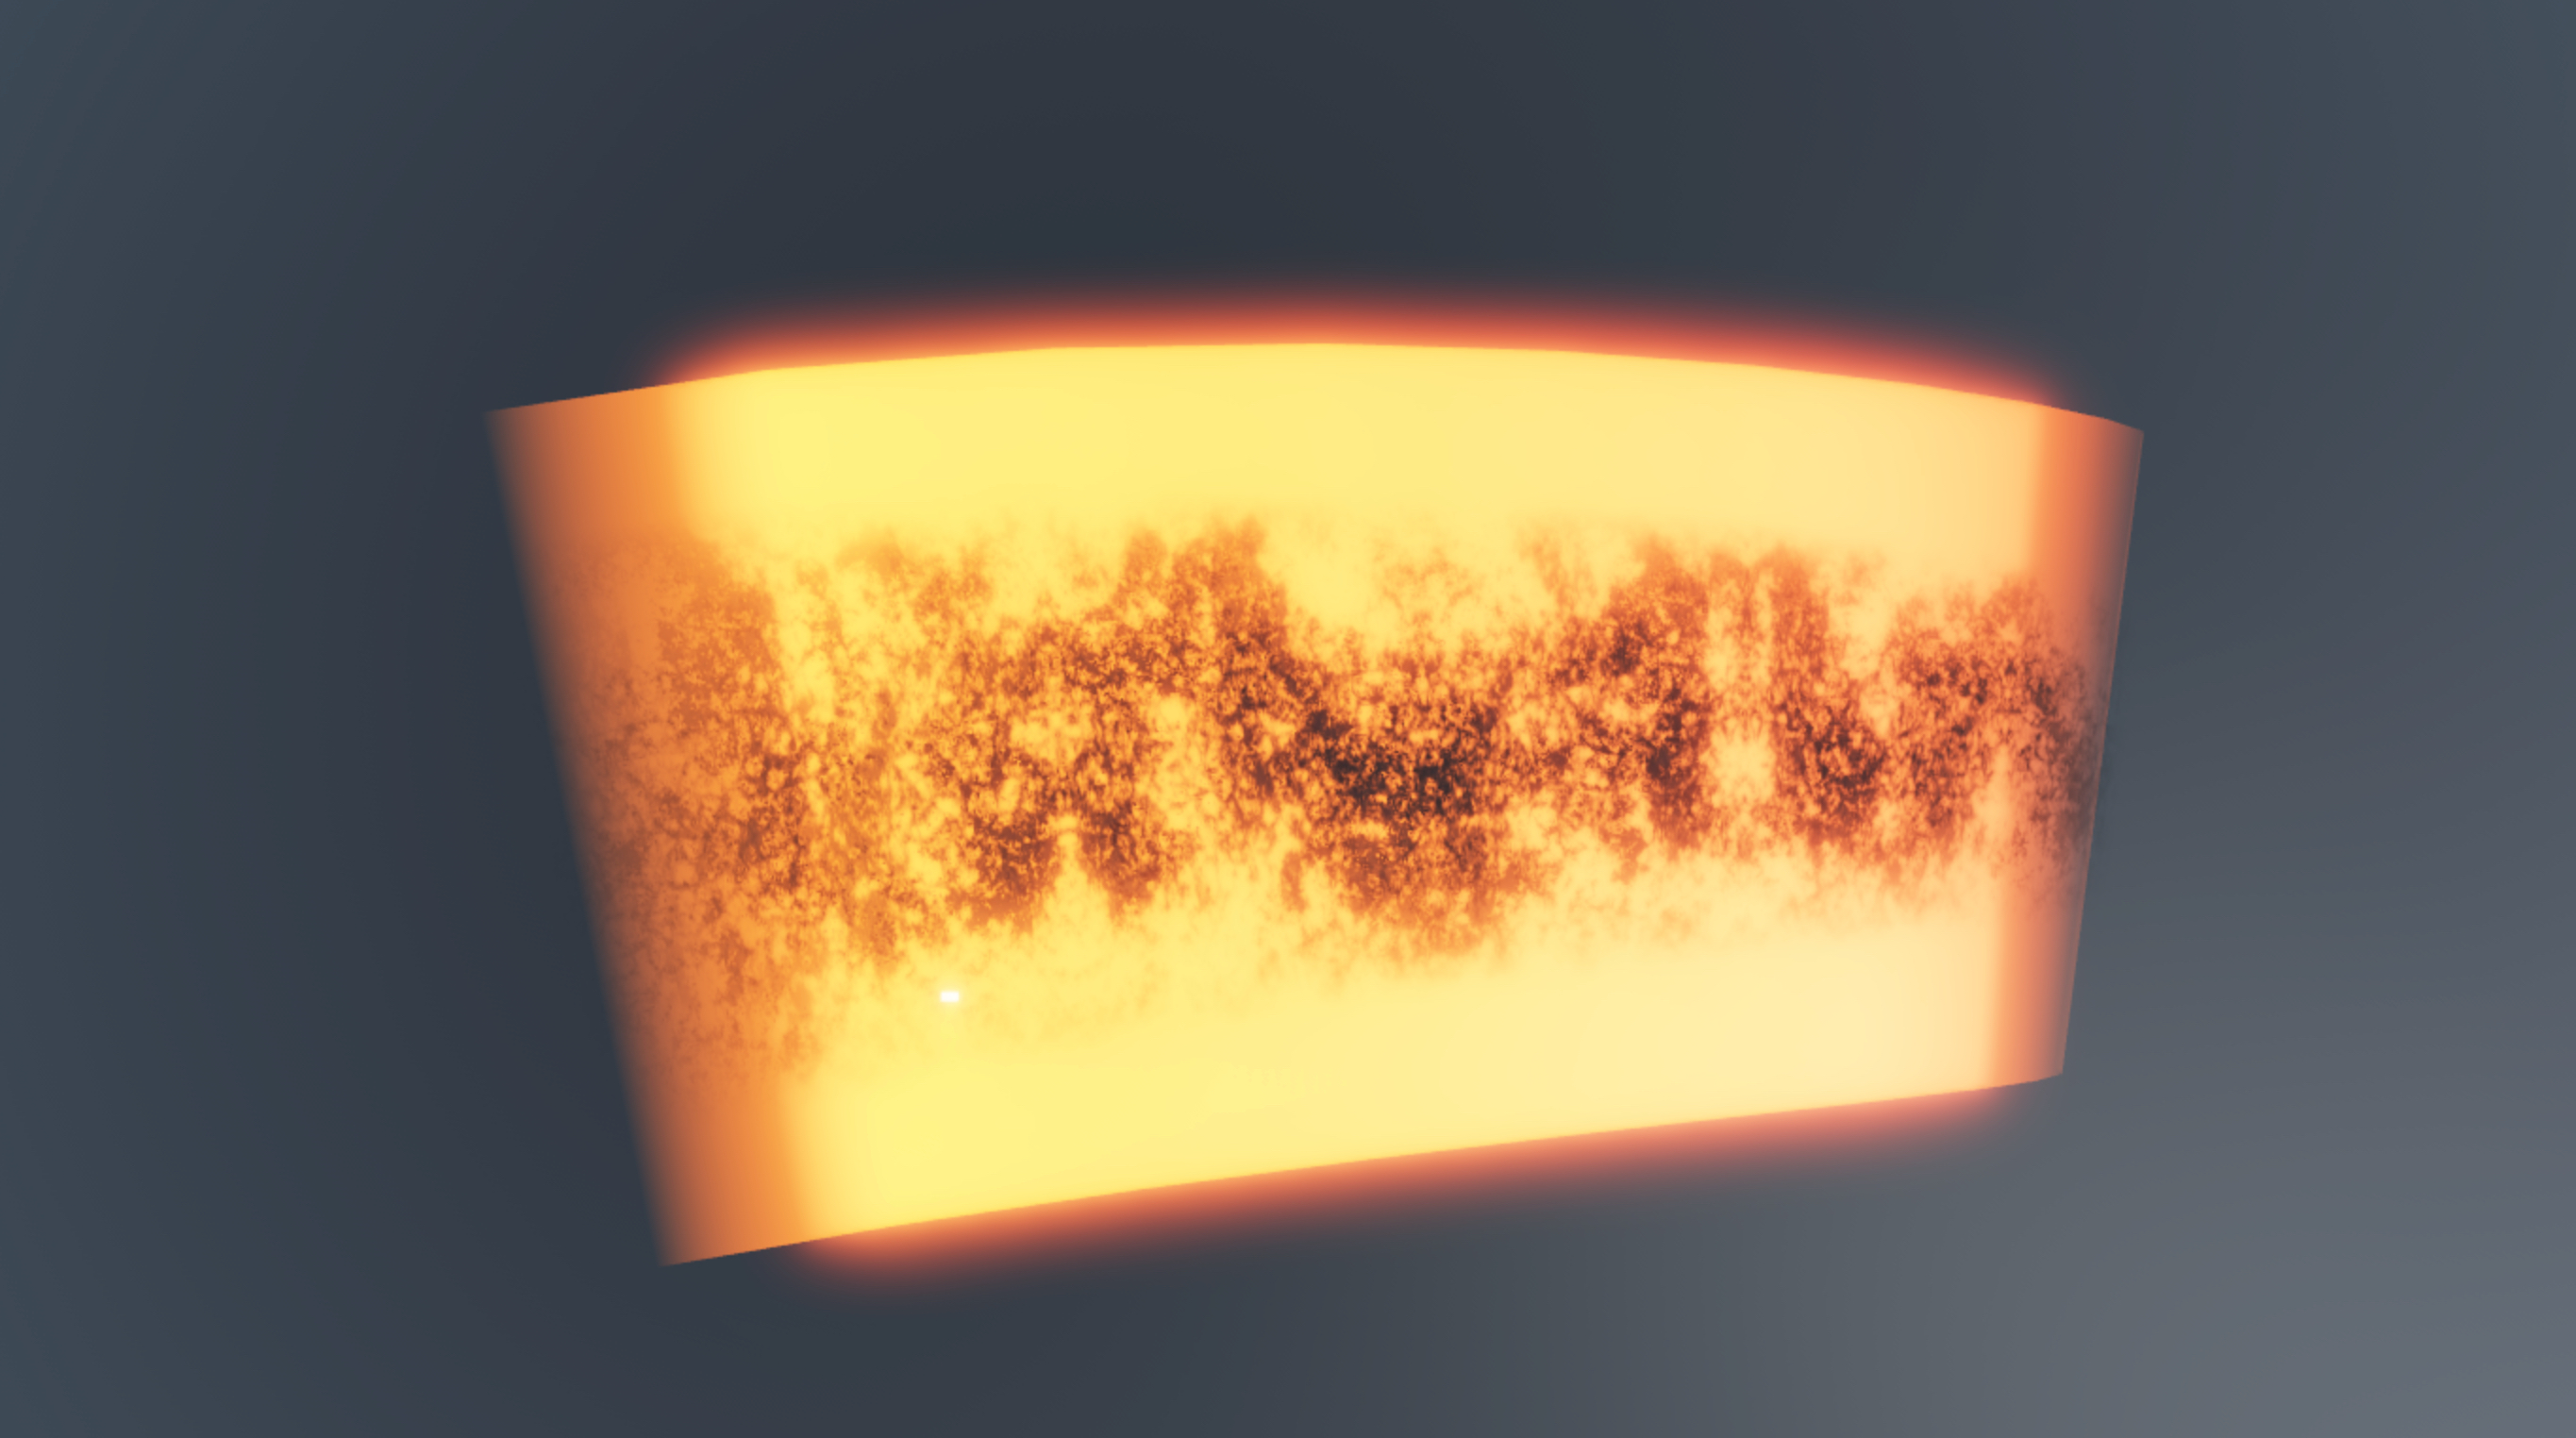
Layering three Beam objects creates an illusion of parallax to make the lava seem like it has a sense of depth and volume where the lava is flowing at different rates, even though they are only three 2D images. This lets players know that there is a sense of turbulence within the canyon, both on and below the lava's surface.
To recreate the flowing magma from the caldera in the sample Volcano Island - Complete place file:
In the Explorer window, create a Folder in the Workspace to contain all flowing magma objects, then rename the folder FlowingMagma.
Insert a block part into the FlowingMagma folder, then rename it MagmaRiverBeam.
Move MagmaRiverBeam to slightly under the edge of the caldera.

Configure attachments for all flowing magma beams from the caldera to use to render their textures.
- Insert an attachment into MagmaRiverBeam, then rotate the attachment until the yellow visual aid points toward the caldera.
- Insert another attachment into MagmaRiverBeam, position it toward the fork in the crevice, then rotate the attachment until the yellow visual aid points down into the ground.

Insert a Beam into MagmaRiverBeam, then rename it Magma.
Assign the part's attachments to Magma.
- In the Explorer window, select Magma.
- In the Properties window,
- Set Attachment0 to the attachment at the edge of the caldera.
- Set Attachment1 to the attachment at the fork in the crevice. The beam renders its default texture between the two attachments.

Customize the beam's visual appearance so it looks like flowing magma.
In the Explorer window, verify Magma is still selected.
In the Properties window,
- Set Width0 to 50 to widen the texture from the axis that it starts to render.
- Set Width1 to 50 to widen the texture as it meets the fork in the crevice.
- Set CurveSize0 to -50 to curve the texture away from the crevice's floor.
- Set CurveSize1 to 5 to curve the texture into the fork in the crevice.
- Set Color to a color sequence that starts bright red and becomes dark red over the beam's lifetime to simulate the magma cooling.
- Time = 0, RGB Value = 255, 51, 0
- Time = 0.5, RGB Value = 211, 39, 0
- Time = 1, RGB Value = 118, 24, 0

- Set Transparency to a number sequence that allows the magma to be more vibrant between the attachment points.
- Time = 0, Value = 1
- Time = 0.0916, Value = 0
- Time = 0.867, Value = 0
- Time = 0.941, Value = 0.725
- Time = 1, Value = 1

- Set LightEmission to 1 to significantly brighten the beam.
- Set LightInfluence to 0 to prevent the environmental light from affecting the color of the beam.
- Set Brightness to 8 to scale the light emitted from the beam.
Insert another Beam into MagmaRiverBeam, rename it Crust1, then attach the part's attachments to Crust1 using the same process in step 6.
Customize the beam's visual appearance so it looks like crust on top of the magma.
In the Explorer window, verify Crust1 is still selected.
In the Properties window,
- Set Texture to rbxassetid://17023930265 to render a new texture that looks like flowing crust.
- Set Width0 to 35 to widen the texture from the axis that it starts to render.
- Set Width1 to 25 to widen the texture as it meets the fork in the crevice.
- Set TextureSpeed to 0.01 to significantly slow down the flow of the texture.
- Set TextureLength to 3 to slightly stretch the texture's length.
- Set CurveSize0 to -50 to curve the texture away from the crevice's floor.
- Set CurveSize1 to 5 to curve the texture into the fork in the crevice.
- Set Color to 83, 83, 83 to tint the beam gray.
- Set Transparency to a number sequence that allows the crust to be more vibrant between the attachment points.
- Time = 0, Value = 1
- Time = 0.22, Value = 0
- Time = 0.85, Value = 0
- Time = 1, Value = 1

- Set ZOffset to 1 to offset the texture to be slightly away from the caldera.
Duplicate Crust1, rename it Crust2, then in the Properties window,
- Set Attachment0 to the attachment at the fork in the crevice.
- Set Attachment1 to the attachment at the edge of the caldera.
- Set Width0 to 25 to widen the texture from the axis that it starts to render.
- Set Width1 to 35 to widen the texture as it meets the fork in the crevice.
- Set TextureSpeed to -0.008 to significantly slow down the flow of the texture.
- Set TextureLength to 2 to slightly unstretch the texture's length.
- Set CurveSize0 to -5 to curve the texture away from the crevice's floor.
- Set CurveSize1 to 50 to curve the texture into the fork in the crevice.
- Set ZOffset to 2 to offset the texture from the other crust.
(Optional) Using this same process, create more beams around the fork in the crevice to offshoot the magma. Be sure to adjust the properties to slow the textures and simulate magma that's darker in color as it cools in temperature.
Smoke plume
A smoke plume from the caldera emits warm pressurized gas, steam, and volcanic ash into the atmosphere. This mixture of volcanic emission can be seen for miles in the real world, so volcano designs often incorporate large smoke plumes to be a significant point of interest in the 3D space.
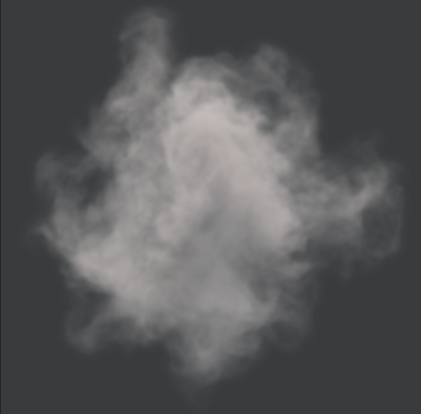
Rather than emitting thick, pyroclastic smoke that one would see immediately following an explosive eruption, the sample uses a ParticleEmitter object to emit particles that look like thin smoke vapors that change color as they rise upwards. This technique accomplishes two goals:
- It breaks up the silhouette of the background crater, creating more visual interest around the volcanic eruption.
- It allows the smoke to look like it accepts light from the environment while still emitting a dark presence as though the smoke is burning impurities into the air before turning gray like the night sky.
To recreate the smoke plume from the caldera in the sample Volcano Island - Complete place file:
Insert a block part into the Caldera folder, then rename it SmokePlume.
Position SmokePlume underneath the caldera, then scale it to roughly the size of the caldera's surface area.

Insert a ParticleEmitter into SmokePlume, then rename the emitter Smoke.
Select Smoke, then in the Properties window,
- Set Texture to rbxassetid://16830673704 to render particles that look like thick smoke.
- Set Color to a color sequence in which particles simulate lighting in the environment from the caldera to the sky by starting black, becoming a light peach, then gray.
- Time = 0, RGB Value = 0, 0, 0
- Time = 0.374, RGB Value = 195, 104, 76
- Time = 0.469, RGB Value = 225, 121, 86
- Time = 0.709, RGB Value = 111, 111, 111
- Time = 1, RGB Value = 113, 113, 113

- Set Transparency to a number sequence in which particles start as transparent, become fully opaque early into their lifetime, then become transparent again near the end of their lifetime.
- Time = 0, Value = 1
- Time = 0.0622, Value = 0
- Time = 0.845, Value = 0
- Time = 0, Value = 1

- Set ZOffset to -10 to offset the texture to be closer to the top of the caldera.
- Set Lifetime to 50, 60 to randomly set each particle's lifetime between 50 and 60 seconds.
- Set Rate to 0.3 to emit a particle about every 3 seconds.
- Set Rotation to -360, 360 to randomly orient each particle in a circle.
- Set RotSpeed to -5, 5 to randomly emit each particle between -5 and 5 degrees per second.
- Set SpreadAngle to 5, 5 to emit particles in a small angle along the X and Z axis.
- Set Acceleration to 0, 7, 0 to simulate upward force and pull particles to the sky.
- Set Drag to 1 to have particles lose their speed with exponential decay.
- Enable WindAffectsDrag to have the wind in the environment push the smoke around.
- Set LightEmission to 0.1 to slightly brighten the particles.
- Set LightInfluence to 0.06 to significantly reduce how much the environmental light affects the color of particles.
In the Command Bar, input the following string to increase each particle's size from 40 to 100 studs across their lifetime with a small window of variation:
workspace.Caldera.SmokePlume.Smoke.Size = NumberSequence.new{NumberSequenceKeypoint.new(0,40,5), NumberSequenceKeypoint.new(1,100,15)}