To import custom makeup textures, use Blender or Maya to reassign the existing textures on the reference template head to your custom texture images. After replacing the textures, export the entire head model, then import it into Studio.
Blender
To reassign textures in Blender:
Unzip and open the Blender reference head file.
Switch to the Shading tab.
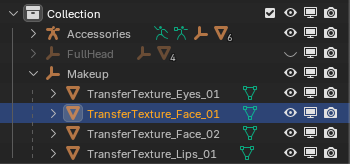
In the Outliner, expand the Makeup collection and select the face region you intend to replace textures for.
In the node graph, select the texture image you intend to update, such as Neutral_FaceDecal_ALB.png
Click the X to remove the existing image assignment.

Click the folder icon to browse for a new image.

Repeat for all PBR textures that you intend to replace.
Delete any texture nodes you are not using.
Verify your final node graph looks similar to the original reference with nothing unintentionally missing.


Maya
To reassign textures in Blender:
Unzip and open the Maya reference head file.
In the Status Line near the top of the default layout, click on the Hypershade icon.

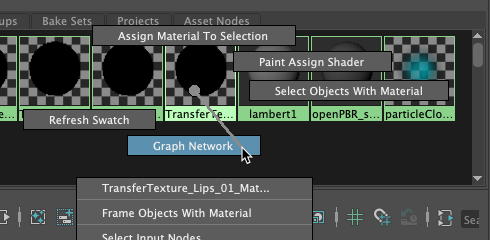
Move your mouse over the material's texture you intend to replace.
Click and hold right mouse-click and drag the selector to Graph Network.
In the newly displayed node graph, click on the Texture Node you intend to replace, such as Neutral_Eyes_ALB.png.
In the right Property Editor, navigate to Image Name and click the folder icon. A file browser displays.


- Select the texture image file you want to use as a replacement.
- Repeat for all PBR textures that you intend to replace.
- Delete any texture nodes you are not using.
- Verify your final node graph looks similar to the original reference with nothing unintentionally missing.

