This guide covers the process to assign texture images in Blender or Maya to your 3D model so that they import seamlessly into Studio. The import process supports both basic textures and realistic PBR textures, as long as they meet Roblox's texture specifications.
Blender
To assign Roblox-supported textures to your 3D model in Blender:
In the Outliner, select your mesh object.
In the Properties panel, navigate to the Materials tab.
Verify that your object has a Material assigned with the Surface set to Principled BSDF.
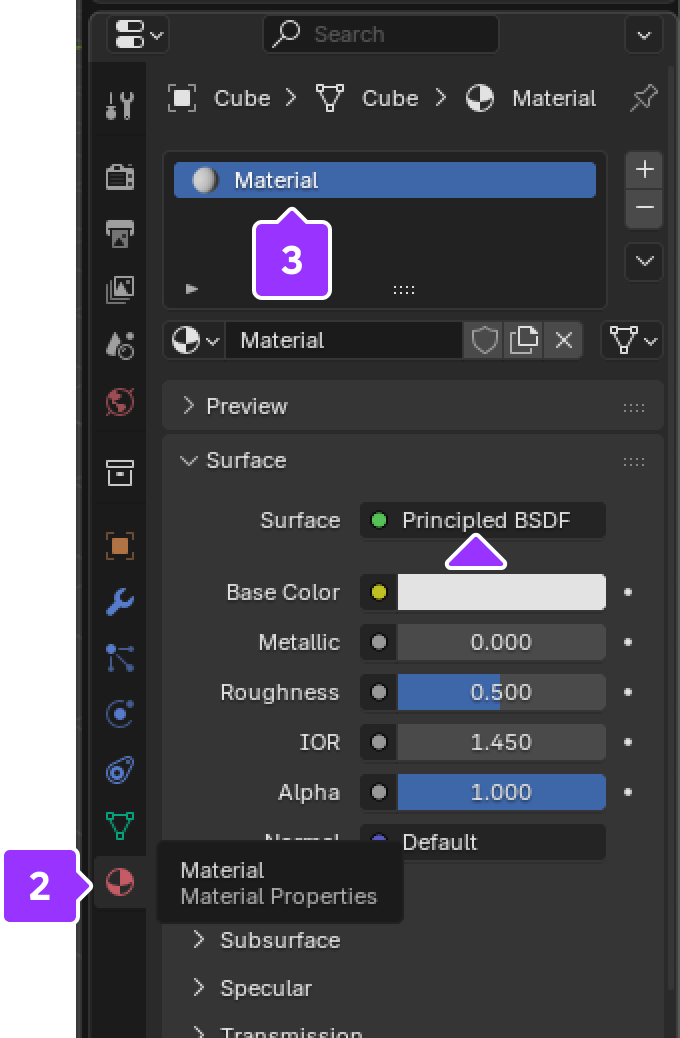
If no material is assigned, click the + symbol to add a material.
Click the New button. A new Principled BSDF material populates.

Navigate to the Shading tab.
With your mesh object selected, check the node graph. There may already be texture image nodes connected to the Principled BSDF node.
In the node graph area, add a texture image node with right-click ⟩ Add ⟩ Texture ⟩ Image Texture.

In the new Image Texture node, click Open to open a file browser and insert your custom texture.

After adding image texture nodes and assigning the appropriate files, drag the Image Texture sockets to the appropriate sockets in the Principled BSDF node:

- Basic texture or PBR color/albedo: connect Color to Base Color.
- Metallic texture: connect Color to Metallic.
- Roughness texture: connect Color to Roughness.
- Normal texture images need to be added to a NormalMap node:
- Right-click in the graph-editor area and select Add ⟩ Vector ⟩ Normal Map.
- Connect Image Texture Color to NormalMap's Color.
- Connect NormalMap's Normal to PrincipledBSDF's Normal socket.


Maya
To assign Roblox-supported textures to your 3D model in Maya:
In the Status Line near the top of the default layout, click on the Hypershade icon.

In the Create Window panel on the Hypershade popup, navigate to Maya ⟩ Surface and click Standard Surface. A surface node appears in the node editor.

If adding a normal map, navigate to Maya ⟩ Utilities and click Bump 2d. A node required for normal maps appears in the node editor.

Drag and drop your PBR textures to the graph network.
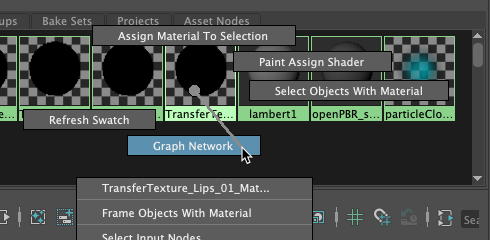
If adding a normal map, select the Bump 2d node, and change to Tangent Space Normals.

Select your model and navigate to your material you intend to assign. Right-click and hold over the material and select Assign Material to Selection.


