Studio's Importer lets you import 3D assets into your projects, such as avatar clothing, accessories, and Roblox's template heads for makeup. The following instructions detail how to import a .fbx or .gltf template file from the best practice creation process into Studio as a Model object that you can use in your games, upload to the Marketplace, or share with other creators.
To import your asset as a makeup model:
Before you begin, it's important to ensure that your template file includes the following objects that are correctly configured to meet Roblox's makeup specifications, otherwise you can encounter errors in later steps:
- Target head mesh
- Target head cage mesh
- If modified, Lips mesh and associated textures.
- If modified, Face mesh and associated textures.
- If modified, Eyes mesh and associated textures.
In Studio, open up the Makeup test place.
In the Home tab, click the Import button to open the Importer. A file browser opens.
Select your makeup's .fbx or .gltf file. The Importer loads a preview of your makeup.
Verify there are no errors with the imported components, then click Import to add the file into Studio. A new Model populates in the workspace.
In the Explorer window, expand the new Model and verify that Decal child objects have populated, each with their own WrapTextureTransfer child object.
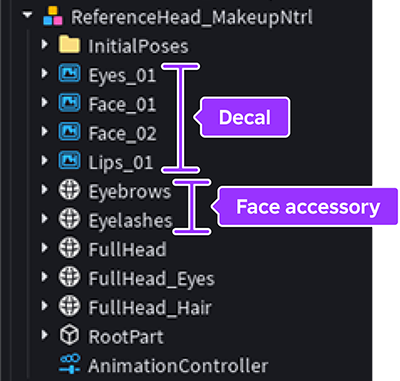
On import, makeup decals appear within the Model. 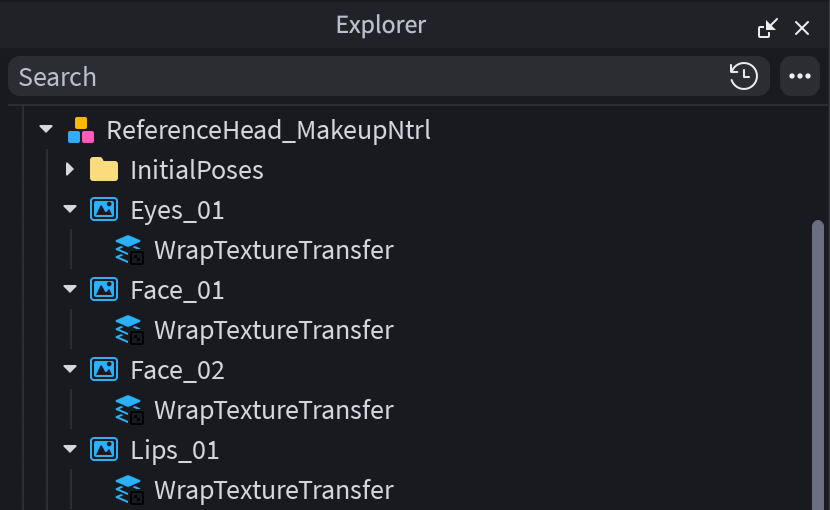
Each decal parents a WrapTextureTransfer object Copy your new Decal objects into a character model's Makeup folder.
- OPTIONALIf you want to apply eyebrows or eyelashes, move those MeshPart objects into the character's Accessories folder. For this place file, you do not need to convert eyelashes and eyebrows into Accessories first.
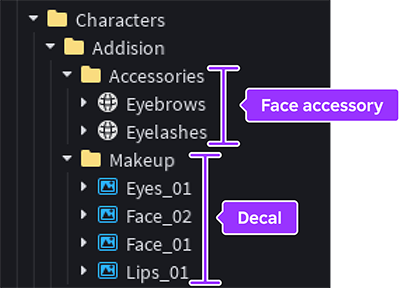
Press Play to playtest and verify that the character has the new makeup applied.


Test with Avatar Setup
You can also use the Avatar Setup tool to preview makeup assets without playtesting.
- Open the Avatar Setup tool by navigating to Avatar > Setup.
- Select the model you would like to preview your assets on.
- For makeup decals, such as eyes, face, and lips:
- In the Explorer window, select any makeup decal assets you want to add into the Avatar Setup preview. The preview only supports valid makeup decals with a child WrapTextureTransfer.
- In the Avatar Setup panel, click the + symbol to add the assets to the Avatar Setup tool.
- In the new prompt, specify the makeup asset type (eyes, face, lips), for each decal selected.
- For makeup meshes, such as eyebrows and eyelashes:
- In the Explorer window, move the MeshPart objects as children within the avatar model.
- In the Avatar Setup panel, click the + symbol to add the assets to the Avatar Setup tool.
- In the Avatar Setup panel, navigate to the Face > Makeup tab, then validate that your assets were properly imported into the tool.
- Click on assets to equip them in your preview.
- Change the order of the assets by dragging their icons on the right side of the preview box.
- Click X to remove them from your avatar preview.
- To see how makeup animates, navigate to the Animations tab, then test various sequences to see what your avatar looks like with the makeup applied.
For the best results, use the avatars provided from Roblox in the test place. You may also bring in any other avatar, but the quality of the makeup fit depends on the head's underlying cage, which may result in varied appearance if not properly aligned.