A cage mesh allows you to define an invisible surface for a visible render mesh. In Studio, you can combine cage meshes to wrap, stretch, shrink, or otherwise deform a mesh over a target mesh.
You must create these types of deformable meshes using a third-party modeling tool, such as Blender or Maya, and import them into Studio. This tutorial uses Blender and provides a Blender project file as reference.

At a minimum, cage meshes require a WrapTarget and a WrapLayer to interact. For a breakdown on the two types of cage meshes, see Cage types.
Cage types
When working with caged meshes, there are two types of meshes: a target mesh and a layered mesh.


| Caged mesh type | Configuration in Blender | Naming requirement |
|---|---|---|
| Target mesh The base mesh that a layered mesh deforms to. | 
| Name the cage after the render mesh with the _OuterCage suffix, such as Cube_OuterCage. An _OuterCage on its own imports as a WrapTarget. |
| Layered mesh Wraps and fits around a target mesh. | 
| Name each cage after the render mesh with the _InnerCage and _OuterCage suffixes, such as Shirt_InnerCage and Shirt_OuterCage. The two cage meshes together import as a WrapLayer. |
Create a cage
Create your cage meshes after you finalize your render mesh. If you later change the render mesh topology or its UVs, you might need to readjust the cage.
As a reference, download the .blend project to see these exact models and other examples. This project contains three target cage mesh configurations and two layered cage mesh configurations.

Cage a target mesh
The following example creates an outer cage on the standard Blender cube. The cube has 10 loop cuts on each axis, adding extra vertices for sculpting later.
To create the outer cage:
Duplicate your render mesh to use as the starting point for the cage. In this example, the cube is duplicated.
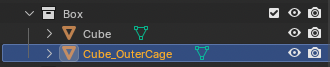
Rename the duplicate with the _OuterCage suffix, such as Cube_OuterCage.
(Optional) Depending on the complexity of your rendered model, simplify the duplicate mesh to a low vertex count, since a cage should be a coarse shell rather than a detailed copy. For example, a detailed avatar head is caged with a far simpler mesh:
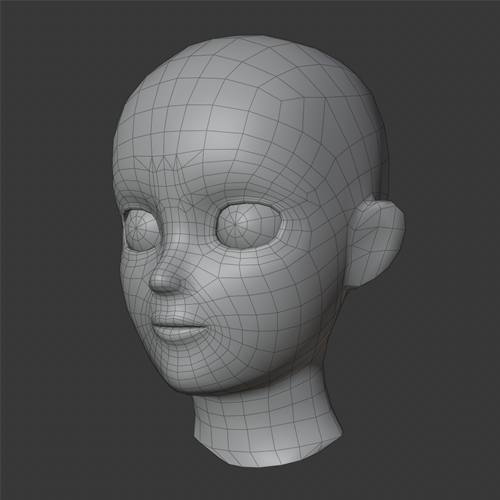
An avatar character head mesh can include up to 12,000 vertices. 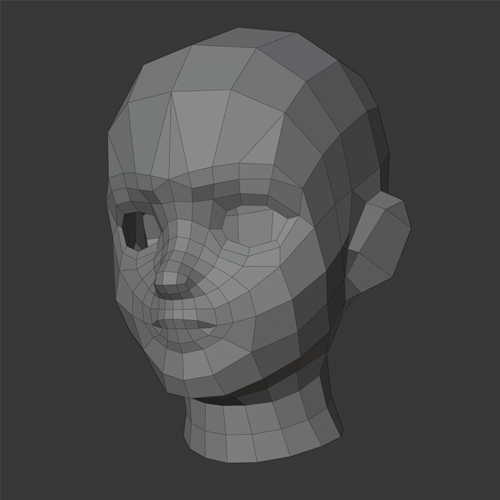
An avatar character head cage only contains 335 vertices. Adjust the cage so it sits just outside the render surface and fully encloses it, staying as close to the surface as possible for accurate layering. Switching to Wireframe viewport shading helps you see the render mesh underneath.

In the UV Editing tab, confirm the cage mesh has UV coordinates — you will need to ensure that any future layered mesh cages share the same UV mapping.

Outer cage UVs must match the UVs of any layered mesh cages that will deform onto it. Confirm your Outliner shows the render mesh with a single _OuterCage beneath it, matching the following configuration.


You can also cage a target with completely different geometry. As long as the cage mesh shares the same UV map, a layered mesh can deform onto it — this is what lets a single layered mesh fit many differently-shaped targets. The following twisted mesh, for example, uses the same UV layout as the cube, so the same layered mesh can deform onto both targets.

Cage a layered mesh
The layered mesh is the mesh you expect to deform to the shape of the target. A layered mesh requires both an inner and an outer cage: the inner cage defines the surface that conforms to the target, and the outer cage defines the surface that additional layers wrap over.
To create the inner and outer cages:
Duplicate your render mesh to use as the starting point for the inner cage.
- If you've already created your target cage mesh, make sure your layered cage's UVs match it.
Rename the duplicate with the _InnerCage suffix, such as Layered-Mesh_InnerCage.
Adjust the inner cage so it sits just inside the render surface.
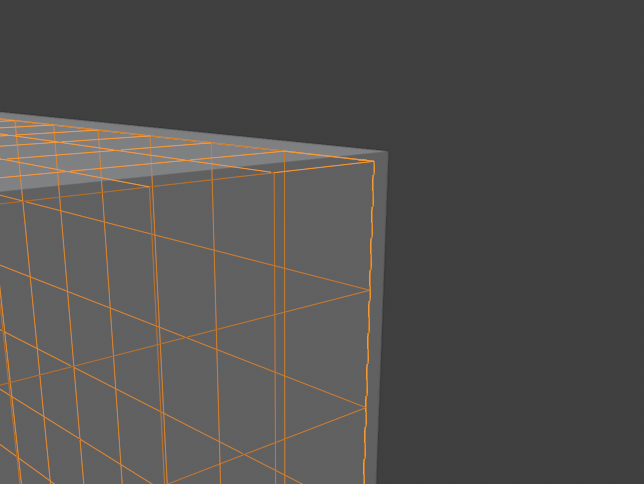
Duplicate the _InnerCage and rename the copy with the _OuterCage suffix, such as Layered-Mesh_OuterCage.
Adjust the outer cage so it sits just outside the render surface and fully encloses it. The outer cage is the surface that additional layers wrap over.

Confirm both cages share the same UV layout as the target mesh, since Roblox pairs the layered mesh with the target by UV.
Confirm your Outliner shows the render mesh with both an _InnerCage and an _OuterCage beneath it, matching the following configuration.


Layered accessories for avatars
Roblox avatar items, such as character bodies (target meshes) and Marketplace clothing (layered meshes), must all share a common cage to ensure universal compatibility with accessories and clothing. If you are creating avatars or layered accessories, do not create your own cage meshes — Roblox provides downloadable cage templates you can modify. Alternatively, you can use Roblox's Avatar Setup tool to automatically generate a Roblox-supported cage for your accessories.
For more information on creating layered accessories, see the following resources:
Export and import
Before you export, apply the correct export settings for Studio. When exporting .fbx, set Apply Scalings to FBX Unit Scale so your model keeps the same scale in Studio. For more information, see Adjust scale (FBX).
Export the render mesh and its cages together as a single .fbx or .gltf file. Studio imports cages from both formats equally, so use whichever your modeling application exports most reliably.
Import the file with the 3D Importer and make sure Uses Cages is enabled.
- If Uses Cages is not enabled by default, the 3D Importer may not be detecting your cage meshes. Double check the naming requirements and re-export.

After importing, confirm that Studio created the expected objects: a WrapTarget for an outer-cage-only mesh, or a WrapLayer for a mesh with both cages.
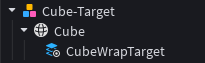
An outer-cage-only mesh imports with a WrapTarget. 
A mesh with both cages imports with a WrapLayer. Once you have both a target (WrapTarget) and a deforming mesh (WrapLayer), see Apply deformation to reshape the mesh onto the target.


