Once a target caged mesh and a layered caged mesh are imported into your experience, you can apply a deformation by parenting both MeshParts within a Model and adding a WeldConstraint.

Deform a mesh
Download the reference files to follow along. The Blender project contains every shape, and each .fbx imports as a ready-made target or layered mesh with its cages.
| File | Description |
|---|---|
| Cage-Mesh-Examples.blend | A Blender project containing every target and layered mesh in this guide, with their cages. |
| Cube_Target.fbx | A cube target, ready to import as a MeshPart with a WrapTarget. |
| Sphere_Target.fbx | A sphere target, ready to import as a MeshPart with a WrapTarget. |
| Cube-Flattened_Target.fbx | A flattened cube target, ready to import as a MeshPart with a WrapTarget. |
| Layered-Mesh1.fbx | A layered mesh with inner and outer cages, ready to import as a MeshPart with a WrapLayer. |
| Layered-Mesh2.fbx | A second layered mesh, ready to import as a MeshPart with a WrapLayer. |
Ensure that your workspace includes two 3D objects: a target MeshPart and a layered MeshPart.
Confirm the target has a WrapTarget and the deforming mesh has a WrapLayer.

Target: a WrapTarget 
Deforming mesh: a WrapLayer (Optional) If testing or applying multiple deformations, make a copy of your layered mesh to ensure you have an original copy later.
Add a WeldConstraint to the layered MeshPart, then:
- Set Part0 to the layered mesh.
- Set Part1 to the target mesh.

In the Properties window, change WrapLayer.Order from the default value to another number, such as 2 or 5.
- Changing this property triggers the deformation in the 3D workspace so the layered mesh reshapes to match the shape of the target.
- If the order is incorrect with other layers, such as a T-shirt wrapping over a sweater, you can change this property at any time.

(Optional) The deformation is retained after it computes, so you can delete the duplicated layered mesh and the WeldConstraint and reset WrapLayer.Order, leaving a single deformed mesh. This is useful to simplify your workspace when applying multiple deformations.

Experiment further. Try deforming the reference layered meshes onto the other target shapes, or deform multiple meshes onto a single target.


Deform multiple meshes to a single target
You can continue to add layered meshes to a target by repeating the process of adding a layered mesh and a weld. Every time a layered mesh is added to a target, Roblox recalculates the surface of the mesh, allowing you to continually add to your target mesh.
Add a WeldConstraint to the new layered MeshPart, then:
- Set Part0 to the original layered mesh.
- Set Part1 to the new layered mesh.

Change WrapLayer.Order in the Properties window. Changing this property triggers the deformation, and the mesh reshapes to match the target. Each layer's WrapLayer.Order determines which one renders on top.
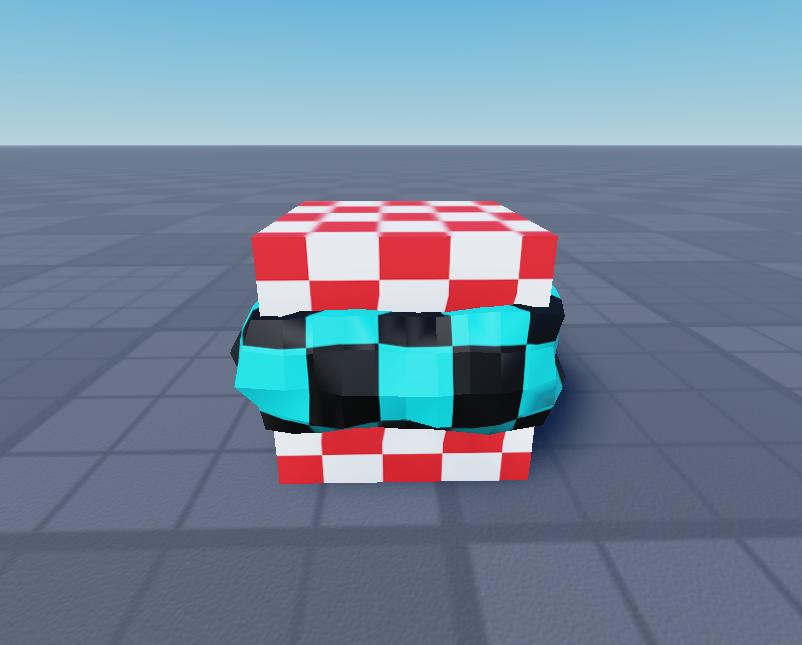
The first layer's WrapLayer.Order is 1 and the second layer's is 2, so the second layer renders on top. 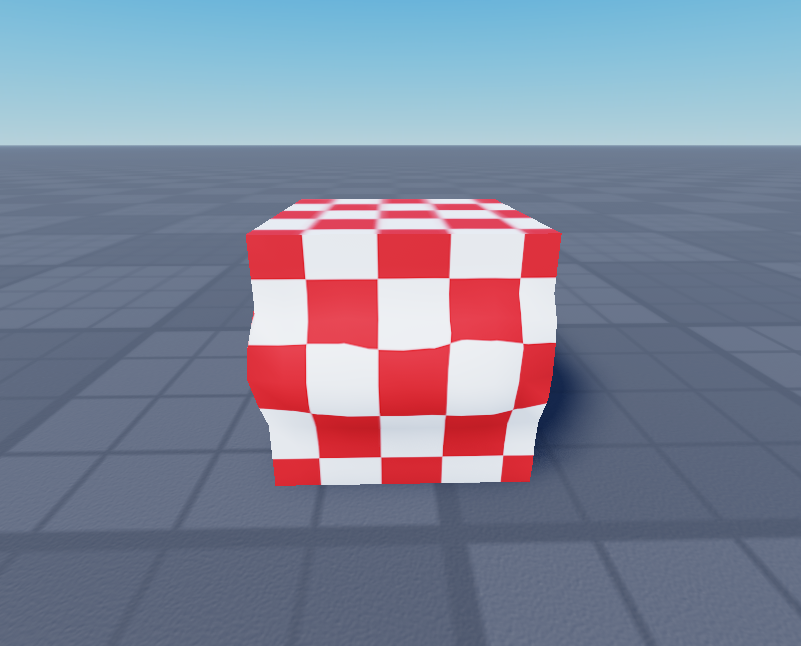
Updating the first layer's WrapLayer.Order to 2, and setting the second layer to 1, brings the first layer on top.


Deform an accessory on an avatar
All Roblox avatars share the same standard body cage. Because cages pair by UV, an accessory caged to that shared layout fits every avatar body. Note that the example meshes in this guide use their own cages, so they aren't compatible with Roblox's standard body cage.


When creating avatar characters and avatar accessories, a similar process of layering applies to a Humanoid character's body cages, and the layered accessory pipeline composes the layered mesh automatically. This allows fitting across body types and transferring skinning data through WrapLayer.AutoSkin.
For an overview of creating your first layered accessory, see the following video:
For the full avatar workflow, see Layered accessories, the Accessory Fitting Tool, and Automatic Skinning Transfer.