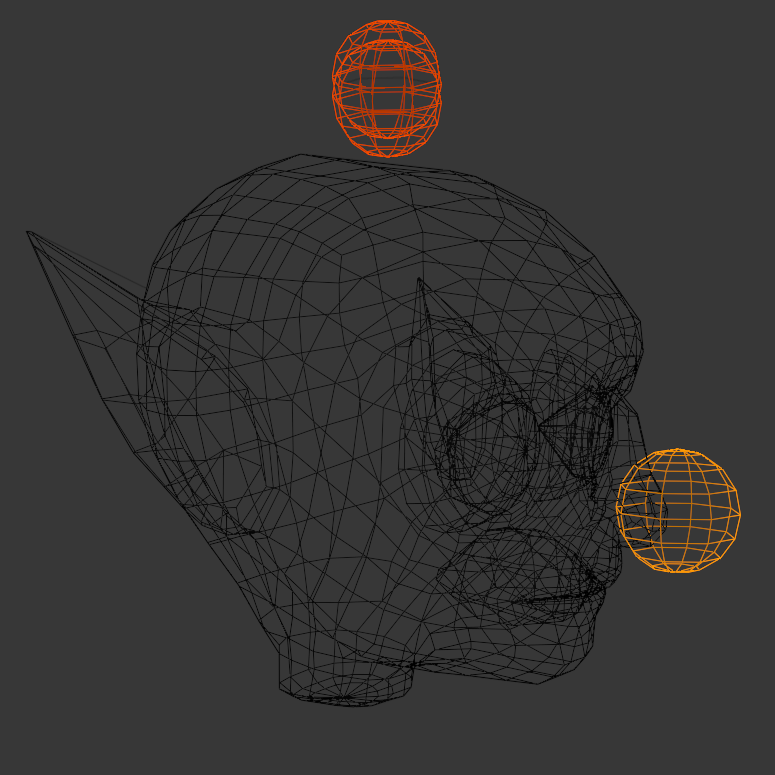
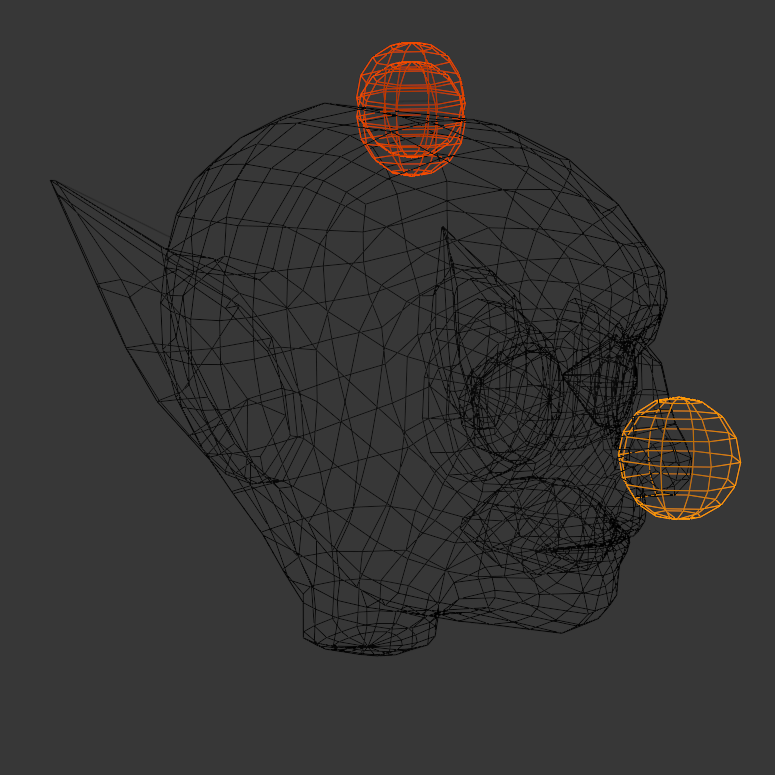
Attachment points are non-rendered objects of your avatar where rigid accessories attach to. Each template includes the required attachments at their expected locations ending with _Att. Before exporting, it's important to verify the attachment position and, if necessary, adjust the location if you made any changes to the shape of your model.


Center attachment points at their respective locations. Each attachment should overlap approximately halfway with the character's mesh.
This tutorial only changes the head of your model, so you only need to adjust the Hat, Hair and FaceFront attachments. To enable visibility and verify your head attachment point:
- If you haven't already, enable disabled objects in your Outliner.
- In the Outliner, find the Joints parent object.
- Hold Shift and click the Hide icon for the Joints object to hide everything.
- Expand the Joints object and un-hide the Head_Geo and Hat_Att and Hair_Att.
- If required, disable Disable In Viewport

- Toggle Visibility for the Hat_Att, Hair_Att, and FaceFront_Att.
- Verify the placement of the attachments. The goblin's head is shorter than the starting template, so the attachments require minor vertical adjustment.
- Select the attachments
- Switch to Edit Mode.
- Using the Grab tool, position the attachments vertically along the y-axis until they are about halfway embedded in the head.