Experience notifications are a way for opted-in users age 13+ to keep up with their favorite games through timely, personalized notifications. As the developer, you can determine what kinds of in-game activities are most important to notify your users about, as well as define the notification content.


The experience notification system features the following:
Customizable notifications with parameters — Full flexibility to customize the notification message with parameters, for example:
Your gold goose egg has hatched!Allie @LaterSk8er1 just beat your record on the Tokyo Tour track!Launch Data — Include optional launch data that can be read through Player:GetJoinData() when the notification recipient joins. This could involve routing a user to a coordinate location or personalizing their joining experience.
Analytics Support — Track your reachable audience and the performance of your notifications in the Creator Dashboard.
Eligibility requirements
In order to use the APIs to send notifications, the game must meet the following base criteria:
- Minimum 100 visits since launch.
- The game must not be under moderation.
- You as the developer must have permission to manage the game.
Usage guidelines
Notifications should be personalized to the receiver and should be based on in-game activity that's specifically relevant to the user. Inversely, notifications should not be of a generic, advertising nature.
Ideally, notifications should also alert users of something they can take immediate action on. Avoid purely informational notifications that do not prompt a direct response or action.
All notification content and behaviors are subject to Roblox's Community Standards and platform‑wide text filtering, regardless of your game's age guidelines. This means that if your game is a 17+ game, your notifications are still subject to the platform‑wide standards, not the 17+ Policy Standards.
Notification content is not permitted to incorporate dark patterns or other tactics that manipulate or deceive users into making choices they don't intend, or which may be counter to their best interests. This could include the following:
Disguised Ads — Notifications that are intentionally disguised as organic content, but are actually advertising. For example, assume that clicking the following notification leads to Petz World but no "important information" is displayed.
Time Pressured Actions — Notifications that pressure users into clicking, subscribing, consenting, or purchasing through applying false time pressure.
Bait-and-Switch with Free Items or Other Rewards — Notifications that falsely tell users that they'll receive something for free when it's not. For example, upon clicking the following notification, it becomes clear that something further is required to get the gift.
Tricking Users Into Purchasing — Notifications that trick users into making unintended purchases. For example, assume that clicking the following notification leads directly to a purchase system pre‑loaded with items that the user didn't choose to buy.
Games should not require users to turn on notifications in order to participate or advance in gameplay.
Implementation
Implementing experience notifications begins with creating a notification string and including the package in your project. Once these are set up, you can send notifications with optional custom parameters.
Alternatively, you can use the Open Cloud API to trigger notifications through freeform API requests.
Create a notification string
As with Player Invite Prompts, you must create and edit your notification strings in the Creator Dashboard. There is no default game notification string, so this step is required.
Navigate to the Creator Dashboard.
Similar to badges, notification strings are tied to a specific game. Locate that game's thumbnail and click on it.
In the left column, under Engagement, click Notifications.
In the center region, click the Create a Notification String button.
Fill in an identifier name (only visible to you) and the custom notification string; this is limited to 99 characters and can include unlimited custom parameters. Notifications will automatically use the title of your game as the notification title, but you can additionally use {experienceName} to reference your game in the notification body text.
Example notification strings:
You're {numQuests} quests away from completing the weekly challenge!Your {eggName} hatched! Come meet your new pet.You won {numRaces} races this week and unlocked the {racetrackName} track!{userId-friend} just beat your record on the Tokyo Tour track! Time for revenge?When ready, click the Create Notification String button.
On the notifications page, in the table of notifications, click the ⋯ button in the Actions column and select Copy Asset ID.
Use the copied ID for the messageId key value in the payload table as demonstrated in the example script.
Include the package
To implement experience notifications, you must obtain the Luau package from the Creator Store.
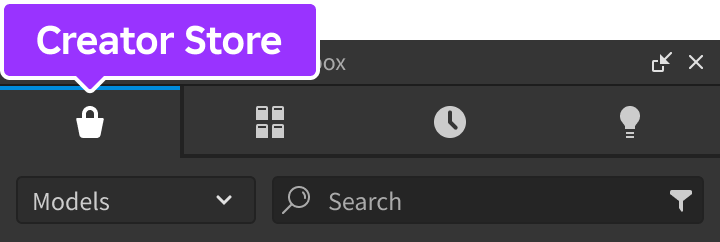
From Studio's Window menu or Home tab toolbar, open the Toolbox and select the Creator Store tab.
Make sure the Models sorting is selected, then click the See All button for Categories.

Locate and click the Packages tile.
Locate the Open Cloud module and click it, or drag‑and‑drop it into the 3D view.

In the Explorer window, move the entire OpenCloud model into ServerScriptService.


Send an experience notification
Once you've created a notification string and included the package in your project, you can send notifications from server‑side scripts. Notifications will be delivered to opted-in users age 13+ through their Roblox notification stream, at which point they can join the experience directly via the Join button on the notification and spawn according to your launch data.

To send a basic notification to a specific user, include the notification string asset ID in the payload's messageId field, then call the createUserNotification function with the recipient's Player.UserId and the request data.
Send an experience notification
Customize notifications using parameters
To customize the notification for each recipient, you can include parameters in the notification string, then customize the parameters when calling the API. For example, you can define the notification string as:
Then, set the userId-friend and points parameters in the script:
Customize Notification Using Parameters
Prompt users to enable notifications
To encourage users to enable notifications for your experience, you can display an in‑experience permission prompt to users age 13+ using the ExperienceNotificationService:PromptOptIn() method.

You can trigger the prompt in any suitable context within your experience that warrants a future notification. The prompt's text is not customizable and is standardized across all experiences.
The modal will not appear if the user:
- Is under the age of 13.
- Has already enabled notifications for your experience.
- Has already seen the permission prompt for your experience in the past 30 days.
To prompt users to enable notifications, you should first determine whether the user is eligible. Once confirmed, you can display the permission prompt to the user.
- Call ExperienceNotificationService:CanPromptOptInAsync(), wrapped in a pcall() since it's an asynchronous network call that may occasionally fail.
- If the user can be prompted, call ExperienceNotificationService:PromptOptIn().
LocalScript - Notification Permission Prompt Implementation
local ExperienceNotificationService = game:GetService("ExperienceNotificationService")
-- Function to check whether the player can be prompted to enable notifications
local function canPromptOptIn()
local success, canPrompt = pcall(function()
return ExperienceNotificationService:CanPromptOptInAsync()
end)
return success and canPrompt
end
local canPrompt = canPromptOptIn()
if canPrompt then
local success, errorMessage = pcall(function()
ExperienceNotificationService:PromptOptIn()
end)
end
-- Listen to opt-in prompt closed event
ExperienceNotificationService.OptInPromptClosed:Connect(function()
print("Opt-in prompt closed")
end)
Include launch and analytics data
To further improve user experience, you can include launch data in the notification, useful for scenarios such as routing users to a coordinate location or personalizing the joining experience. Additionally, you can include analytics data to segment the performance of different categories of notifications. Please also refer to the Player invite prompts example on how launch data can be set and used.
Include Launch Data and Analytics Data
Delivery system
A spam prevention system exists to ensure the quality of notifications for users and protect the shared notification channel for all developers. Because of this, delivery of notifications is not guaranteed. This spam prevention system is directly informed by user engagement: the more users engage with your notifications, the more reach they'll receive. You can transparently track engagement metrics in the analytics dashboard, as explained below.
Experience notifications have a static throttle limit; each user can receive one notification per day from a given experience, and you receive transparent feedback when a user's throttle limit is reached.
Additionally, the following list outlines some of the special cases which may result in non‑delivery of a notification:
- Experience eligibility requirements are not met.
- Recipient is not opted in to notifications from your experience.
- Recipient's throttle limit for your experience has been reached.
- Recipient's aggregate daily throttle limit has been reached.
- Missing or invalid request parameters.
- Notification string was moderated.
- For notifications with user mentions, non-delivery occurs if either of these conditions are met:
- The receiver and mentioned user are not friends.
- The mentioned user has No selected for "Update friends about my activity?" under Privacy → Other Settings in their Roblox account settings.
Analytics
Performance of your notifications and notifiable audience are displayed in the Analytics tab of the Notifications page where you configure notification strings (simply tab from Creations to Analytics).
- Navigate to the Creator Dashboard.
- Similar to badges, notification strings are tied to a specific game. Locate that game's thumbnail and click on it.
- In the left column, under Engagement, click Notifications.
- On the target page, click the Analytics tab to switch to the analytics dashboard.
Notifications summary
The summary section serves as a snapshot of the aggregate performance of your notifications. A minimum of 100 aggregate impressions is required to display the performance statistics.

| Statistic | Description |
|---|---|
| Opted-in Users | The total number of users that have turned on notifications for your game. Please note that this does include users under the age of 13 who are only able to receive notification of experience updates, not personalized experience notifications. |
| Impressions | The total number of user impressions all of your notifications have received in aggregate. |
| Clicks | The total number of clicks all of your notifications have received in aggregate. |
| CTR | The rate at which users are clicking on your notifications, calculated as the ratio of clicks to impressions. |
| Turn Off | The rate at which users are turning off notifications for your game directly from your notifications, calculated as the ratio of turn off actions to impressions. |
| Dismiss | The rate at which users are dismissing your notifications, calculated as the ratio of dismiss actions to impressions. |
Itemized stats
The Experience Notifications table displays detailed performance statistics for each notification with at least 100 impressions, ordered by the date of first impression for that notification.

The Name column is the key identifier for the notification. By default, the name matches the identifier name you specified when creating the notification string, but you can override it through the category field in your API calls, in which case category overrides the name. Changing the string name in the Creator Dashboard or changing the string your message ID references in the API call will generate a new row in the table.
If you'd like to A/B test the performance of different strings, it's recommended that you create an entirely new notification string with a similar name, for example:
- EggHatchA — "Your gold egg has hatched! Come meet your new pet."
- EggHatchB — "It's hatching time! Come meet your new pet."
API reference
Functions
createUserNotification
createUserNotification (userId : number, userNotification : UserNotification) : UserNotificationResultSends a notification from a server‑side script. Requires the recipient's Player.UserId and a UserNotification. Returns a UserNotificationResult.
Send an experience notification
Types
UserNotification
Table containing details on the notification to be sent to the user. Must contain a payload table with required messageId and type strings, and optional parameters, joinExperience, and analyticsData tables.
| Key | Type | Description |
|---|---|---|
| messageId | string | An ID that represents a customizable notification message template that you create in the Creator Dashboard. |
| type | string | The type of notification. Only "MOMENT" is currently supported. |
| parameters | table | A table of parameters used to render a notification message template. See Customize notifications using parameters for example usage. |
| joinExperience | table | A call-to-action that represents joining an experience. Currently supports a launchData key‑value pair which represents arbitrary data available to an experience when a user joins the experience from the notification; this value is limited to a maximum of 200 bytes. See Include launch and analytics data for example usage. |
| analyticsData | table | Data for how analytics are reported. Currently supports a category key‑value pair which represents the notification category, used to group analytics data. See Include launch and analytics data for example usage. |
UserNotificationResult
A wrapper object that holds the response from a sent notification. Contains the following key‑value pairs:
| Key | Type | Description |
|---|---|---|
| statusCode | number | The HTTP status code for the request. |
| error | table | Table containing code and message keys describing the GRPC error code and the error message, respectively. |
| response | table | Table containing id and path keys describing a unique UUID and the resource path of the user notification, respectively. |